Table of Contents

Related Manuals for ProForm crosswalk sport


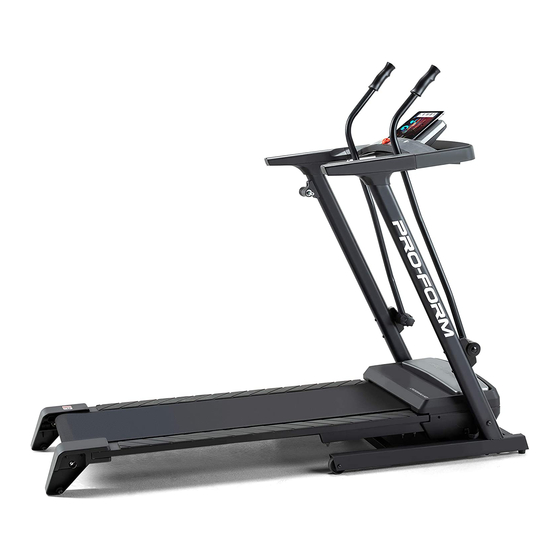
Summary of Contents for ProForm crosswalk sport
- Page 1 ModelNo.831.24813.0 TR A Serial No. Manual User's Write the serial number in the space above for future reference. Serial Numl Decal • Assembly • Operation • Maintenance • Part List and Drawing Sears, Roebuck and Co. Hoffman Estates, IL 60179...
- Page 2 TABLE OF CONTENTS WARNING DECAL PLACEMENT .............. IMPORTANT PRECAUTIONS ..............BEFORE YOU BEGIN ..............ASSEMBLY ................OPERATION AND ADJUSTMENT ............HOW TO FOLD AND MOVE THE TREADMILL ..........TROUBLESHOOTING ..............EXERCISE GUIDELINES ..............PART LIST ................EXPLODED DRAWING ..............ORDERING REPLACEMENT PARTS ..........
- Page 3 iMPORTANT PRECAUTIONS WARNING: To reduce the .skofse.ous niury, read a ,important precautions structions in this manual and all warnings on your treadmill before using your treadmill. Sears as= sumes no responsibility for personal injury or property damage sustained by or through the use of this product.
- Page 4 20. Never leave the treadmill unattended while it inspect and properly tighten all parts of the is running. Always remove the key, unplug treadmill regularly. the power cord, and switch the reset/off cir- DANG ER: A ways unplug the power cuit breaker to the off position when the treadmill is not in use.
- Page 5 BEFORE YOU BEGIN Thank you for selecting the revolutionary PROFORM ® ing this manual, please see the back cover of this man- CROSSWALK SPORT treadmill. The CROSSWALK ual. To help us assist you, note the product model num- SPORT treadmill offers an impressive array of features ber and serial number before contacting us.
-
Page 6: Assembly
ASSEMBLY Assembly requires two persons. Set the treadmill in a cleared area and remove all packing materials, Do not dispose of the packing materials until assembly is completed. Note: The underside of the treadmill walking belt is coated with high-performance lubricant. - Page 7 Remove theM10Nut(33),theM10x 50mmBolt (27),andtheshipping bracket ( C)fromtheBase (85).Attach a Wheel ( 86)withtheBoltandthe Nutthatyoujustremoved. Donot overtighten the Nut;the Wheelmustturn freely.Discard theshipping bracket. Press a BaseCap(82)intothe Base(85). Identify the Right Upright (78) and the Right Upright Spacer (80), which are marked with "Right"...
- Page 8 Withthe helpofa second person, c arefully tip thetreadmill ontoitsrightside.Partially foldthe Frame (48)sothetreadmill is morestable; d o not fully fold the Frame yet. Remove anddiscard thetwoindicated b olts(A) andtheshipping bracket ( B). Attach a BaseFoot(81)totheBase(85)inthelo- cation shown witha BaseFoot S pacer ( 104) a nd anM4.2 x 25mm TekScrew (2).Then, a ttach an- otherBaseFoot(81)withonlya Screw (2).
- Page 9 Have a second person hold the console assem- bly near the Right Upright (78). Cut the plastic ties from the brackets on the Right Handrail (90) Console Assembly\ and Left Handrail (not shown). Press the Cage Nuts (38) back into place if necessary. Connect the Upright Wire (77) to the console wire.
- Page 10 10. Press the Latch Insert (70) into the Left Upright (73). It may be necessary to tap on the Latch Insert with a rubber mallet. Locate the Latch Pin Assembly (72). Remove Knob the knob from the pin. Make sure that the collar and the spring are on the pin.
- Page 11 OPERATION AND ADJUSTMENT THE PRE-LUBRICATED WALKING BELT tric shock. This product is equipped with a cord having an equipment-grounding conductor and a grounding Your treadmill features a walking belt coated with high- plug. Plug the power cord into a surge suppressor, performance lubricant.
- Page 12 CONSOLEDIAGRAM PLATEAU "_ ROLLING HILLS ROLLING PLATEAU PARK TRAIL _._'t CUST0 M-F'T RKOUTS SELECT WORKOUT TIME ÷ STOP INCLINE FEATURES OFTHECONSOLE To turn on the power, see page 13. To use the man- ual mode, see page 13. To use a preset workout, The treadmill console offers an impressive array of see page 15.
-
Page 13: To Turn On The Power
HOW TO TURN ON THE POWER HOW TO USE THE MANUAL MODE iMPORTANT: if the treadmill has been exposed to Insert the key into the console. cold temperatures, allow it to warm to room tem- See HOW TO TURN ON THE POWER at the left. perature before turning on the power, if you do not... - Page 14 Follow your progress with the displays. Measure your heart rate if desired. The lower left display-- Before using the As you exercise, the handgrip pulse lower left display can sensor, remove the sheets of show the elapsed time and the distance that you clear plastic from have walked or run.
- Page 15 HOW TO USE A PRESET WORKOUT Tones will sound at the end of each segment. Three seconds before the speed and/or incline of Insert the key into the console. the treadmill is about to change, the speed and/or incline will flash in the display and a series of tones See HOW TO TURN ON THE POWER on page 13.
- Page 16 THE iNFORMATiON MODE HOW TO USE THE CROSSWALK ARMS The console features an information mode that keeps As you walk on the treadmill, you can hold the track of the total distance that the walking belt has handrails or use the crosswalk arms. To exercise your moved and the total number of hours that the treadmill arms, shoulders, and back for a total body workout, has been used.
-
Page 17: To Fold For Storage
HOW TO FOLD AND MOVE THE TREADMILL HOW TO FOLD THE TREADMILL FOR STORAGE Before folding the treadmill, adjust the incline to the lowest position, if you do not do this, you may damage the treadmill when you fold it. Remove the key and unplug the power cord. -
Page 18: Troubleshooting
TROUBLESHOOTING Most treadmill problems can be solved by following the steps below. Find the symptom that applies, and follow the steps listed. If further assistance is needed, please see the back cover of this manual. PROBLEM: The power does not turn on SOLUTION: a. - Page 19 Locate the Reed Switch (54) and the Magnet (42) on the left side of the Pulley (44). Turn the Pulley until the Magnet is aligned with the Reed Switch. 1/8 in.- Make sure that the gap between the Magnet and the Reed Switch is about 1/8 in.
- Page 20 PROBLEM: The walking belt is off-center or slips when walked on SOLUTION: a. If the walking belt is off-center, first remove the key and UNPLUG THE POWER CORD. If the walking belt has shifted to the left, use the hex key to turn the left idler roller bolt clockwise 1/2 of a turn;...
- Page 21 EXERCISE GUiDELiNES Burning Fat--To burn fat effectively, you must exer- , WARNING: Before beginning this cise at a low intensity level for a sustained period of time. During the first few minutes of exercise, your or any exercise program, consult your physi- body uses carbohydrate calories for energy.
- Page 22 PART LISTmModel No. 831.24813.0 R0809A To locate the parts listed below, see the EXPLODED DRAWING near the end of this manual. Key No. Qty. Description Key No. Qty. Description M4.2 x 19mm Screw Left Foot M4.2 x 25mm Tek Screw Right Foot Motor Hood M4.2 x 13mm Hypot Screw...
- Page 23 Key No. Qty. Description Key No. Qty. Description Hex Key Incline Stop Bracket Lift Frame/Base Ground Wire 8" Blue Wire, 2F Frame Cap 6" Blue Wire, M/F Base Foot Spacer 6" Red Wire, M/F 4 mm Hex Key 6" Black Wire, M/F M8 Locknut 8"...
- Page 24 EXPLODED DRAWING AmModel No. 831.24813.0 R0809A...
- Page 25 EXPLODED DRAWING BmModel No. 831.24813.0 ROSOgA g2-37...
- Page 26 EXPLODED DRAWING CmModel No. 831.24813.0 ROSOgA...
- Page 27 EXPLODED DRAWING D--Model No. 831.24813.0 RosogA...
- Page 28 Your Home For repair--in your home--of all major brand appliances, lawn and garden equipment, iiiiiiiiiiiiiiii or heating and cooling systems, no matter made it, no matter who sold iiiiiiiiiiiiiiiiiii iiiiiiiiiiiiiiii iiiiiiiiiiiiiiiiiii For the replacement parts, accessories, and user's manuals that you need to do-it-yourself. iiiiiiiiiiiiiiiiiii iiiiiiiiiiiiiiii iiiiiiiiiiiiiiiiiii...
Need help?
Do you have a question about the crosswalk sport and is the answer not in the manual?
Questions and answers
The motor runs but the walking belt doesn't move...any way to fix??
To fix the walking belt on a ProForm Crosswalk Sport if the motor runs but the belt doesn't move, follow these steps:
1. Check the Belt Tension – Lift each side of the walking belt. It should lift 2 to 3 inches (5 to 7 cm) off the walking platform. If it's too loose, tighten it.
2. Center the Belt – Ensure the walking belt is centered on the platform.
3. Adjust the Tension – Turn the adjustment bolts at the back of the treadmill to tighten the belt gradually.
4. Test the Belt – Plug in the power cord, insert the key, and walk on the treadmill for a few minutes. If the belt still doesn’t move, repeat the adjustment process.
If the issue persists, further troubleshooting may be required.
This answer is automatically generated
The machine come on put shuts off within 5 seconds
The ProForm Crosswalk Sport machine could turn on and then shut off within 5 seconds if the reset/off circuit breaker has tripped. To fix this, wait five minutes and then press the circuit breaker switch back in. Also, ensure the power cord is properly plugged in and not connected to a GFCI-equipped outlet, as the treadmill is not compatible with those.
This answer is automatically generated
does the walking belt need to be lubricated
No, the ProForm Crosswalk Sport walking belt does not need lubrication. It is already coated with a high-performance lubricant, and applying silicone spray or other substances can damage the belt and cause excessive wear.
This answer is automatically generated