Table of Contents
Advertisement
Available languages
Available languages
Owner's Manual
IC..FTSMnWl
ROTARY LAWN MOWER
6.5 Horsepower
Power-Propelled
21" Rear Discharge
Model No.
917.378381
• EspaSol, p. 19
CAUTION:
Read and follow all
Safety Rules and Instructions
before operating this equipment
Sears, Roebuck and Co., Hoffman Estates, IL 60179
U.S.A.
Visit our Craftsman website: www.sears.com/craftsman
Advertisement
Table of Contents

Related Manuals for Craftsman 917.378381


Summary of Contents for Craftsman 917.378381
- Page 1 6.5 Horsepower Power-Propelled 21" Rear Discharge Model No. 917.378381 • EspaSol, p. 19 CAUTION: Read and follow all Safety Rules and Instructions before operating this equipment Sears, Roebuck and Co., Hoffman Estates, IL 60179 U.S.A. Visit our Craftsman website: www.sears.com/craftsman...
- Page 2 Warranty service is available by returning the Craftsman power mower to the nearest Sears Parts & Repair Center in the United States. This warranty applies only while this product is used in the United States.
- Page 3 I. GENERAL OPERATION II. SLOPE OPERATION • Read, understand, and follow all Slopes are a major factor related to slip instructions on the machine and in the and fall accidents which can result in manual(s) before starting. Be thoroughly severe injury. All slopes require extra cau- familiar with the controls and the proper tion.
- Page 4 Record both serial number and date of purchase in space provided above. Repair Protection Agreements Congratulations on making a smart pur- Fast help by phone - phone support chase. Your new Craftsman® product is from a Sears technician on products designed and manufactured for years of requiring in-home repair, plus conve- dependable operation.
- Page 5 These accessories were available when this lawn mower was produced. They are not shipped with your mower. They are also available at most Sears retail outlets and service centers. Some of these accessories may not apply to your lawn mower. LAWN MOWER PERFORMANCE CLIPPING...
- Page 6 TO REMOVE LAWN MOWER FROM Catcher CARTON frame 1. Remove loose parts included with handle mower. 2. Cut down two end corners of carton and lay end panel down flat. 3. Remove all packing materials except padding between upper and lower handle and padding holding operator presence control bar to upper handle.
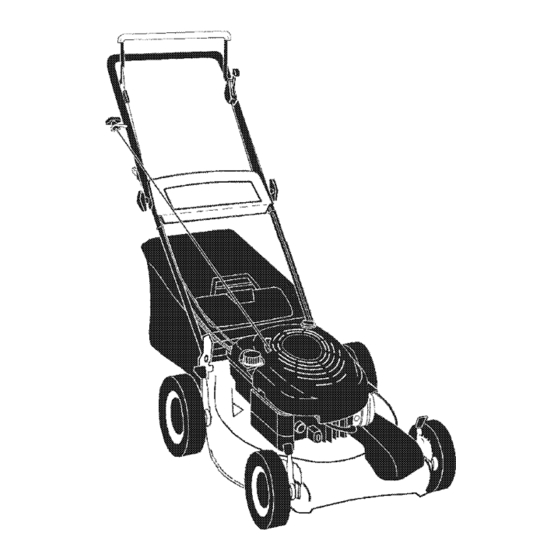
- Page 7 KNOW YOUR LAWN MOWER READ THIS OWNER'S MANUAL AND ALL SAFETY RULES BEFORE OPERATING YOUR LAWN MOWER. Compare the illustrations with your lawn mower to familiarize yourself with the location of various controls and adjustments. Save this manual for future reference. These symbols may appear on your lawn mower or in literature supplied with the product.
- Page 8 TO ADJUST CUTTING HEIGHT The operationof any lawn Raise wheels for low cut and lower wheels mowercan result in foreign objectsthrown into the for high cut, adjust cutting height to suit eyes, which can result in your requirements. Medium position is best for most lawns.
- Page 9 days or longer. Empty the gas tank, start the engine and let it run until the fuel lines and carburetor are empty. Use fresh fuel next season. See Storage Instructions for additional information. Never use engine Grass or carburetor cleaner products in the fuel catcher tank or permanent damage may occur.
- Page 10 MULCHING MOWING TIPS MOWING TIPS IMPORTANT: For best performance, • Under certain conditions, such as very keep mower housing free of built-up tall grass, it may be necessary to raise grass and trash. See "CLEANING" in the the height of cut to reduce pushing Maintenance section of this manual.
- Page 11 MAINTENANCE SCHEDULE /_:;,_°_o_y REGO RSERV,CE AS YOU COMPLETE Lubrication It#' CheckTires Check DriveWheels (Power-Propelled Mowers) Check for Loose Fasteners Clean/Inspect Grass Catcher (If Equipped) Clean Lawn Mower RE Clean Under Drive Cover (Power-Propelled Mowers) Check drive belt/pulleys (Power-Propelled Mowers) Check/Sharpen/Replace Blade Clean Battery/Recharge IElectdc Start MowersI Check Engine Oil Level...
- Page 12 TO REPLACE BLADE LAWN MOWER Always observe safety rules when per- 1. Position the blade adapter on the en- forming any maintenance. gine crankshaft. Be sure key in adapter and crankshaft keyway are aligned. TIRES 2. Position blade on the blade adapter aligning the two (2) holes in the blade •...
- Page 13 TO CHANGE ENGINE OIL GRASS CATCHER • The grass catcher may be hosed with NOTE: Before tipping lawn mower to water, but must be dry when used. drain oil, empty fuel tank by running en- • Check your grass catcher often for damage gine until fuel tank is empty.
- Page 14 AIR FILTER SPARK PLUG Your engine will not run properly and may Replace spark plug at the beginning of be damaged by using a dirty air filter. each mowing season or after every 100 Replace the air filter cartridge every 100 hours of operation, whichever occurs hours of operation or every season, which- first.
- Page 15 TO REMOVE DRIVE BELT 1. Remove drive cover. Remove belt from gearcase pulley by pushing down on pulley and rolling belt off it. 2. Turn lawn mower on its side with air filter and carburetor up. 3. Remove blade. 4. Remove debris shield. 5.
- Page 16 Immediately prepare your lawn mower for Operator presence control bar storage at the end of the season or if the unit will not be used for 30 days or more. LAWN MOWER When lawn mower is to be stored for a pe- Lower riod of time, clean it thoroughly, remove all dirt, grease, leaves, etc.
- Page 17 CYLINDER • Replace your gasoline can if your can starts to rust. Rust and/or dirt in your 1. Remove spark plug. gasoline will cause problems. 2. Pour one ounce (29 ml) of oil through • If possible, store your unit indoors and spark plug hole into cylinder.
- Page 18 TROUBLESHOOTING - See appropriate section in manual unless directed to a Sears Service Center. PROBLEM CAUSE CORRECTION Loss of power 1. Rear of mower housing or 1. Raise cutting height. blade dragging in grass. 2. Cutting too much grass. 2. Raise cutting height. 3.
- Page 19 Contratapa GARANTfA LIMITADA DE DOS AI_IOS PARA LA SEGADORA A MOTOR CRAFTSMAN Per dos (2) ai_os, a partir de la fecha de compra, cuando esta Segadora Craftsman se mantenga, lubrique y afine segt]n las instrucciones para la operaci6n y el mantenimiento en el manual del dueiSo, Sears repararA gratis todo defecto en el material y la mano de obra.
- Page 20 HACER: I. OPERAClON • Antes de empezar, debe familiarizarse comple- • Puede recortar a trav6s de la superficie de tamente con los controles y el uso correcto de la cuesta, nunca hacia ardba y hacia abajo. la maquina. Para esto, debe leer y comprender Proceda con extrema precauci6n cuando todas las instrucciones que aparecen en la ma- cambie de direcci6n en las cuestas.
- Page 21 • Nunca manipule deforma indebida los • Loscomponentes delreceptor d ela hierba dispositivos d eseguddad. Controle regular- vansujetos a desgaste, daSos y deterioro, mentesufuncionamiento correcto. quepueden exponer l aspartesenmov- • Mantenga lamAquina libredehierba, h ojas imiento o permitir q ueobjetos seandispara- u otrasacumulaciones dedesperdicio.
- Page 22 Estos accesorios estaban disponibles cuando se produjo la segadora. No son facilitados junto al ¢ortacesped. Tambi6n estAn disponibles en la mayorfa de las tiendas de Sears yen los centros de servicio. Algunos de estos accesorios tat vez no se apliquen a su segadora. RENDIMIENTO DE LA SEGADORA DESVIADOR...
- Page 23 PARA REMOVER LA SEGADORA LA CAJA DE CARTON Mango del Remueva las partes sueltas que se incluyen bastidor del con la segadora. recogedor Corte las dos esquinas de los extremos de la caja de cart6n y tienda el panel del extremo piano.
- Page 24 FAMILIARICESE CON SU SEGADORA LEA ESTE MANUAL DEL DUENO Y LAS REGLAS DE SEGURIDAD ANTES DE OPARAR SU SEGADORA. Compare las ilustraciones con su segadora para familiarizarse con la ubicaci6n de los diversos controles y ajustes. Guarde este manual para referencia en el futuro. Estos simbolos pueden apareser sobre su segadora o en la literatura proporcionada con el producto.
- Page 25 PARA AJUSTAR LA ALTURA DE CORTE Laoperaci6n d ecualquier Levante las ruedas para el corte bajo y baje las segadora puedehacerque ruedas para el corte alto., ajuste la attura de satten objetos extrafios dentrode corte para que se acomode a sus requisitos. La susojos,Ioquepuedeproducir dafiosgraves en_stos.
- Page 26 PARA VAClAR EL RECOGEDOR DE ClaSPED _PRECAUCI(_N: Limpie el aceite o el Levante el recogedor de c_sped usando el combustible derramado. No almacene, derrame mango del bastidor. o use gasolina cerca de una llama expuesta. Remueva el recogedor de c_sped, con los _kPREOAUCION: Los combustibles recortes, de debajo del mango de la segadora.
- Page 27 • Para comenzar el motor sandio el arrancador CONSEJOS PARA SEGAR Y ACOLCHAR de soga, siga los pasos de arriba. Cambie el IMPORTANTE: Para obtener el mejor uso del Ilave de arranque con el arrancador rendimiento mantenga la caja de la segadora de soga.
- Page 28 PROQRAMA DE MANTENIMIENTO _-_'_ Lubricaci6n Controlar losneum_.ticos Controlar lasruedas motrices Revisar s ihaysujetadores sueltos (segadoras con poder propulsor) Limpiar/inspecoionar el recogedor de c_sped (siviene equipado) Limpiar l asegadora delacubierta d e latrans- misidn (segadoras conpoder p ropulsor) Limpiar debajo (segadoras sadas con poder propulsor) Revisar l ascorreas y laspoleas impul-...
- Page 29 SEGADORA Ponga la cuchilla en el adaptador de 6sta alineando los dos (2) agujeros en la cuchilla Siempre observe las reglas de seguridad cu- con las satientes elevadas en el adaptador. ando haga el mantenimiento. Asegt_rese de que el borde de satida de LLANTAS la cuchilla (opuesto al borde afilado) est6 •...
- Page 30 CAJADEENGRANAJES • Paramantener el sistema deimpulsi6n funcionando e nformaadecuada, lacaja deengranajes y el Areaalrededor d ela impulsi6n t ienenquemantenerse l impias y sinacumulaci6n de basura. U mpie debajo delacubierta dela impulsi6n d osvecespor temporada. • Lacajadeengranajes s e llenaconlubricante hastael nivel a decuado enlafabric&La Qnica vezqueel lubdcante necesita atenci6n escuando se le haprestado servicio a la cajadeengranajes.
- Page 31 SILENClADOR • Haga descansar la segadora en su lado. Inspeccione y cambie el silenciador si est#, Asegt_rese que et filtro de aire y que el carbu- corrofdo puede producir un peligro de incendio rador queden mirando hacia arriba. Limpie la y/o daiSo.
- Page 32 PARA AJUSTAR EL MANGO El mango puede ser montado a una posici6n atta o baja. Los agujeros de montaje en el mango inferior est&n fuera del centre para levantar y bajar el mango. Remueva el mango superior y todas las partes atadas al mango inferior.
- Page 33 MANGO • Vaciar el dep6sito del carburante poniendo Puede doblar el mango de su segadora para el en marcha el motor y dej&ndolo funcionar atmacenamiento. hasta que el carburante termine y el carburador est6 vacfo. Apriete los extremos inferiores del mango inferior entre sf hasta que el mango inferior •...
- Page 34 SOLUCION DE PROBLEMAS - Vea la secci6n apropiada en el manual amenos estd dirigido a un centro de servico Sears. PROBLEMA CAUSA CORRECCION No arranca Filtro de aire sucio. Limpie/cambie el filtro de aire. Sin combustible. Ltene el estanque de combustible. Combustible rancio.
- Page 35 SOLUCION DE PROBLEMAS - Vea la secci6n apropiada en el manual amenos que estd dirigido a un centro de servico Sears. CORRECCI()N PROBLEMA CAUSA Falta de Cuchilla desgastada, doblada 1. Ajuste a la posici6n de fuerza o suelta. "Corte m_s alto" Altura de las ruedas dispareja.
- Page 36 CRAFTSMAN ROTARY LAWN MOWER - - MODEL NUMBER 917.378381 86 54...
- Page 37 CRAFTSMAN ROTARY LAWN MOWER - - MODEL NUMBER 917.378381 PART PART DESCRIPTION DESCRIPTION 183230X479 Washer, Step Upper Handle 176185 175245X479 Lower Handle 186153 Trimplate Assembly Control Bar 141841 Screw 186112 131959 Handle Bolt 175551 Bolt, Shoulder 181254 Handle Knob 175083...
- Page 38 CRAFTSMAN ROTARY LAWN MOWER - - MODEL NUMBER 917.378381...
- Page 39 CRAFTSMAN ROTARY LAWN MOWER - - MODEL NUMBER 917.378381 PART PART DESCRIPTION DESCRIPTION 184586 Drive Cover Control Cable Assembly 178843 167387 Bearing, Wheel Adjuster 132010 Hex Flange Nut 751152 Locknut #10-24 137052 Drive Pulley 158755 Hex Washer Head Screw 1/4-20 x 2.12...
- Page 40 CRAFTSMAN ROTARY LAWN MOWER - - MODEL NUMBER 917.378381 GEAR CASE ASSEMBLY - - PART NUMBER 180184 15 12 PART DESCRIPTION 183497 Case, Lower 183498 Case, Upper 183499 Gear, 27 Teeth 183500 Lever, Clutch 183501 Spring, Return 183502 Shaft, Input...
- Page 41 BRIGGS & STRATTON 4-CYCLE ENGINE MODEL NUMBER 123K05-0275-E1 I 1019 LABEL KII_ 523 I._ 718_ 307_...
- Page 42 BRIGGS & STRATTON 4-CYCLE ENGINE MODEL NUMBER 123K05-0275-E1 443_ 163_ 977 CARBURETOR 633 @ GASKET SET 365_ 6330 276_ 276_ 127_ 121 CARBURETOR OVERHAUL KI' 6330 276_ 276_ 127_...
- Page 43 BRIGGS & STRATTON 4-CYCLE ENGINE MODEL NUMBER 123K05-0275-E1 969 _ 1036 EMISSIONS LABEL 592_ 1211 597_ 358 ENGINE GASKET 642_ s24_ 334_ 2o2_...
- Page 44 BRIGGS & STRATTON 4-CYCLE ENGINE MODEL NUMBER 123K05-0275-E1 188 _ 745 _' 1116o+ 783 Q 784_ 785_ 513_ 783A_ _" 668 69" 803 _ 3101 970_ 8s3% 802 12_ J 633 @ 977 CARBURETOR GASKET 163_ 6330_ 276 _'_ 276_ 121 CARBURETOR OVERHAUL 6330...
- Page 45 BRIGGS & STRATTON 4-CYCLE ENGINE MODEL NUMBER 123K05-0275-E1 PART PART DESCRIPTION DESCRIPTION 691997 Slinger-Governor/Oil 692342 Cover-Breather Passage 690548 Tappet-Valve 691879 ° Gasket-Breather Passage 691449 Camshaft 690800 Nut (Rewind Starter) 498829 Short Block (Replacement 691696 Screw (Pawl Friction Plate) Engine 125K02-0253) 95162 Clamp-Hose 497465...
- Page 46 SERVICE NOTES...
- Page 47 SERVICE NOTES...
- Page 48 Get it fixed, at your home or ours! Your Home For repair - in your home - of all major brand appliances, lawn and garden equipment, or heating and cooling systems, no matter who made it, no matter who sold it! For the replacement parts, accessories owner's manuals that you need to do-it-yourself.
Need help?
Do you have a question about the 917.378381 and is the answer not in the manual?
Questions and answers