
Related Manuals for Universal Audio 710


Summary of Contents for Universal Audio 710
- Page 1 Model 710 Twin-Finity Mic/Line/Hi-Z Preamplifier Universal Audio Part Number 65-0029 Revision 1.0 Universal Audio, Inc. Customer Service & Tech Support: 1-877-MY-AUDIO Business, Sales & Marketing: 1-866-UAD-1176 www.uaudio.com...
- Page 2 710, Twin-Finity, 4110, 8110, SOLO/110, SOLO/610, 2-610, LA-610, LA-2A, 2-LA2, LA-3A, 6176, 1176LN, 2-1176, 2192, DCS Remote Preamp, UAD and the Universal Audio, Inc. logo are trademarks of Universal Audio, Inc. Other company and product names mentioned herein are trademarks of their...
-
Page 3: A Letter From Bill Putnam, Jr
Most of us at Universal Audio are musicians and/or recording engineers. We love the recording process, and we really get inspired when tracks are beautifully recorded. Our design goal for the 710 was to build a mic preamp that we would be delighted to use ourselves—one that would induce that “a-ha”... -
Page 4: Important Safety Instructions
Important Safety Instructions ___________________________________________________________ Before using this unit, be sure to carefully read the applicable items of these operating instructions and the safety suggestions. Afterwards, keep them handy for future reference. Take special care to follow the warnings indicated on the unit, as well as in the operating instructions. 1. -
Page 5: Table Of Contents
Table of Contents __________________________________________________________ A Letter From Bill Putnam, Jr......................... Important Safety Instructions ........................ Two Page, Two Minute Guide To Getting Started ..................Front Panel ............................Rear Panel ............................Interconnections ..........................Insider’s Secrets ..........................The Technical Stuff ..........................History of the 710 ......................... 710 Overview ........................ -
Page 6: Two Page, Two Minute Guide To Getting Started
It will tell you everything you need to know to get your Universal Audio 710 up and running, without bogging you down with details. Of course, even the most expert of us has to crack a manual every once in awhile. As the saying goes, “as a last resort, read the instructions.”... - Page 7 The Two Page, Two Minute Guide To Getting Started __________________________________________________________ Step 8: Set the Gain control to “0” and the Level control to approximately “5”. Step 9: Set the Blend knob to its twelve o’clock position. This ensures an equal blend of both of the 710 preamplifiers (solid-state and vacuum tube).
-
Page 8: Front Panel
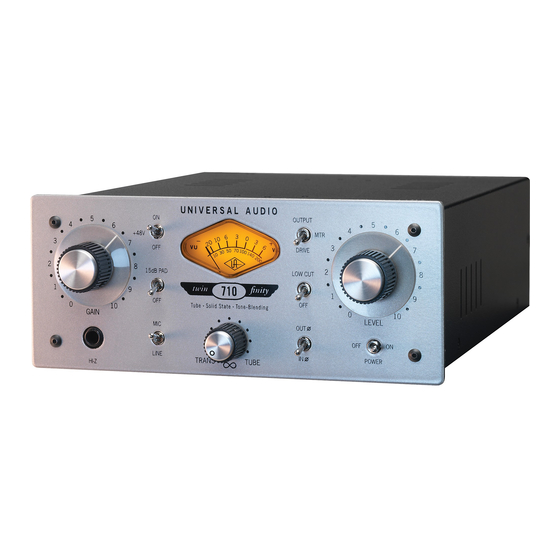
Front Panel __________________________________________________________ (1) Gain - Adjusts the gain of the input stage. Turning this knob clockwise raises the amount of gain applied to the input signal. (2) Level - This is the 710’s master volume control. It determines the amount of signal sent from the rear panel LINE OUTPUT. - Page 9 Front Panel __________________________________________________________ (3) Hi-Z Input Connect high impedance signal from an instrument such as electric guitar or bass to this standard unbalanced 1/4" jack connector. The 710’s jack detection circuitry automatically switches from the selected rear panel MIC or LINE input to the front panel Hi-Z input whenever a plug is inserted into this jack.
-
Page 10: Front Panel
Front Panel __________________________________________________________ meter reading of 0 VU corresponds to a level of +4 dBm at the rear panel LINE OUTPUT jack. ( #2 on page 7) (10) Low Cut - When enabled (placed in the up position), the input signal passes through a 75Hz low cut filter. -
Page 11: Rear Panel
Rear Panel __________________________________________________________ 710 Twin-Finity UNIVERSAL AUDIO, INC • SCOTTS VALLEY, CALIF. USA POWER 100-240VAC 0.60A 50/60Hz (1) AC Power Connector Connect a standard, detachable IEC power cable (supplied) here. (2) LINE OUTPUT A balanced XLR connector that carries the line-level output signal of the 710. Note that Pin 2 is positive when the front panel Polarity switch is off (INø). -
Page 12: Interconnections
Interconnections __________________________________________________________ For most applications, we recommend setting the 710 Gain and Level controls at approximately “5” (their twelve o’clock position). Adjustments can then be made to the Gain, Level, and Blend controls to achieve the optimum sound for your signal source. - 8 -... -
Page 13: Insider's Secrets
Insider’s Secrets __________________________________________________________ The Best of Both Worlds There’s a reason why tube preamplifiers have long been favored by audio engineers (especially in this age of digital recording): they impart a warmth and richness that makes most sounds larger than life. However, there is no denying that tube preamps also tend to color the incoming signal somewhat, albeit in a way which most listeners find pleasant and desirable. - Page 14 The Technical Stuff __________________________________________________________ from a slight bark to total grunge. Set the Blend control all the way to TRANS for that overloaded console effect, or all the way to TUBE to emulate the grittiness and bite of an overdriven guitar amp... or anywhere in-between for a custom guitar sound perfectly crafted to the context of the song.
-
Page 15: The Technical Stuff
For these reasons, audio circuit designers such as Bill Putnam began creating preamplifiers using transistors instead of tubes. One of the first of these was the Universal Audio 1108. This was an exquisitely designed, widely used single-stage modular preamp made for modular... - Page 16 The key is knowing which tools to reach for... and, in the case of preamplifiers, whether to opt for the “warmth” of tubes or the precision of solid-state. The Universal Audio 710 Twin-Finity allows the recordist to literally enjoy the best of both worlds. Not only does it combine two preamplifiers—one vaccum tube and one solid-state—in a single box, its unique Blend control allows the engineer to dial...
-
Page 17: 710 Overview
For many users, the useful characteristics of these devices are preferred at the mix stage—and are commonly implemented using DSP processors and plug-ins with excellent (and reversible) results, such as those found on Universal Audio’s UAD plug-in platform. -
Page 18: About Class A
The Technical Stuff __________________________________________________________ About “Class A” Most electronic devices can be designed in such a way as to minimize a particularly unpleasant form of distortion called crossover distortion. However, the active components in “Class A” electronic devices such as the 710 draw current and work throughout the full signal cycle, thus eliminating crossover distortion altogether. -
Page 19: Low Cut Filtering
The Technical Stuff __________________________________________________________ Other double-mic applications often requiring phase inversion include piano soundboards, drum heads (one mic on top of the drum and the other below it), and acoustic guitar miking, where one mic is placed close to the soundhole and another further away or behind the guitar. Low Cut Filtering A common method for optimizing mixes is to apply low-cut filtering whenever possible. - Page 20 The Technical Stuff __________________________________________________________ - 16 -...
-
Page 21: Maintenance Information
The Technical Stuff __________________________________________________________ Maintenance Information The 710 contains no user-serviceable parts. Repair should be performed only by qualified service personnel. Fuse There is no user accessible fuse for the 710. It contains an internal power supply circuit board with its own fuse. -
Page 22: Block Diagram
The Technical Stuff __________________________________________________________ Block Diagram - 18 -... -
Page 23: Glossary Of Terms
Glossary of Terms __________________________________________________________ Balanced - Audio cabling that uses two twisted conductors enclosed in a single shield, thus allowing relatively long cable runs with minimal signal loss and reduced induced noise such as hum. Class A - A design technique used in electronic devices such that their active components are drawing current and working throughout the full signal cycle, thus yielding a more linear response. - Page 24 Glossary of Terms _______________________________________________________________________ translates to 1.23 volts), while consumer and semiprofessional audio equipment typically utilize line level signals of -10 dBV (which translates to 0.316 volts). Low cut filter - An equalizer circuit that cuts signal below a particular frequency. Mic level - Refers to the very low level signal output from microphones, typically around 2 millivolts (2 thousandths of a volt).
-
Page 25: Recall Sheet
Recall Sheet __________________________________________________________ - 21 -... -
Page 26: Specifications
Specifications _______________________________________________________________________ Microphone Input Impedance Balanced Line Input Impedance Hi-Z Input Impedance 2.2M Internal Output Impedance Overall Gain Range -Infinity to 70dBu Gain Pot Range +10 ~ +60 dBu Line - 10 ~ +40 dBu Hi-Z +10 ~ +40 dBu Maximum Mic Input Level Gain @min SS 1% THD +18 dBu... -
Page 27: Additional Resources/Product Registration/Warranty/Service & Support
Product Registration Please take a moment to register your new Universal Audio product by following the instructions on the included registration card. This card contains your unique registration I.D. number.
Need help?
Do you have a question about the 710 and is the answer not in the manual?
Questions and answers