Table of Contents
Advertisement
PERATOR'S
T$
MAN
5-1/2 in., 19.2 VOLT
CORDLESS
LASER TRiM
Model No.
315.115780
AL
®
SAW
BATTERIES
AND CHARGERS
SOLD SEPARATELY
_1_ WARNING:
To reduce the risk of injury,
the user must read and understand the
operator's manual before using this
product.
Customer
Help Line: 1-800-932-3188
Sears, Roebuck
and Co., 3333 Beverly Rd., Hoffman
Estates,
IL 60179 USA
Visit the Craftsman web page: www.sears.com/craftsman
983000-877
02-29-08 (REV:01)
Save this manual
for future
reference
C
Advertisement
Table of Contents

Related Manuals for Craftsman 315.115780


Summary of Contents for Craftsman 315.115780
- Page 1 Customer Help Line: 1-800-932-3188 Sears, Roebuck and Co., 3333 Beverly Rd., Hoffman Estates, IL 60179 USA Visit the Craftsman web page: www.sears.com/craftsman Save this manual for future reference 983000-877 02-29-08 (REV:01)
-
Page 2: One-Year Full Warranty
If this Craftsman tool fails to give complete satisfaction within one year from date of purchase, RETURN iT TO ANY SEARS STORE OR OTHER CRAFTSMAN OUTLET iN THE UNITED STATES FOR FREE REPLACEMENT. If this Craftsman tool is used for commercial or rental purposes, this warranty applies for only 90 days from the date of purchase. -
Page 3: Work Area
[] Use safety equipment. Always wear eye protection. WARNING! READ AND UNDERSTAND ALL IN- Dust mask, non-skid safety shoes, hard hat, or hearing STRUCTIONS. Failure to follow all instructions listed protection must be used for appropriate conditions. below, may result in electric shock, fire and/or seri- [] Do not wear loose clothing or jewelry. - Page 4 SERVICE [] When servicing a tool, use only identical replace- [] Tool service must be performed only by qualified ment parts. Follow instructions in the Maintenance repair personnel. Service or maintenance performed section of this manual. Use of unauthorized parts or by unqualified personnel may result in a risk of injury, failure to follow Maintenance Instructions may create a risk of shock or injury.
- Page 5 Laser Guide Warnings: Everyday glasses have only impact resistant lenses. The laser guide radiation used in the Craftsman trim saw is They are NOT safety glasses. Following this rule will Class Ilia with maximum <5 mW and 650nm wavelengths or reduce the risk of eye injury.
-
Page 6: Symbols
Someofthe following symbols maybeusedonthisproduct. P lease studythemandlearn theirmeaning. Proper i nter- pretation ofthesesymbols willallowyouto operate the productbetter andsafer. SYMBOL NAME DESIGNATION/EXPLANATION Volts Voltage Current Amperes Hertz Frequency (cycles per second) Watt Power Minutes Time Alternating Current Type of current Direct Current Type or a characteristic of current No Load Speed... - Page 7 If you do not understand the warnings and to your nearest SEARS PARTS AND REPAIR SERVICE instructions in the operator's manual, do not use this CENTER for repair. When servicing, use only identical product. Call the Craftsman Consumer Helpline at replacement parts. 1-800-932-3188 for assistance. WARNING: The operation of any power tool can result in foreign objects being thrown into your eyes, which can result in severe eye damage.
-
Page 8: Product Specifications
PRODUCT SPECiFiCATiONS Motor ..................................19.2 V DC Blade Diameter ................................5-1/2 in. Blade Arbor ..............................10 mm (3/8 in.) Cutting Depth at 0°..............................1-9/16 in. Cutting Depth at 45 °..............................1-1/8 in. No Load Speed ............................4,500 r/min. (RPM) Laser Guide ................. Class Ilia, <5 mW max, 650nm or Class II, <1 mW max, 650nm SPINDLELOCK LOCK-OFF... -
Page 9: Features
KNOW YOUR LASER TRIM SAW DEPTH CUT See Figure 1, Adjusts the depth of cut from 0 in. to 1-9/16 in. The safe use of this product requires an understanding SPINDLE LOCK the information on the tool and in this operator's manual The spindle lock allows you to secure the blade when as well as a knowledge of the project you are attempt- turning the blade screw. -
Page 10: Spindle Lockbutton
ATTACHING BLADE [] Depress spindle lock button, then replace blade screw. See Figure 2. Tighten blade screw securely. NOTE: Turn blade screw counterclockwise to tighten. WARNING: A 5-1/2 in. blade is the maximum blade [] Return blade wrench to storage area. capacity of the saw. -
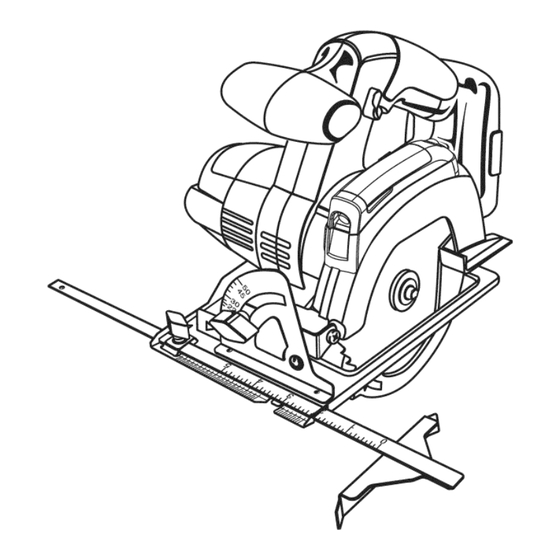
Page 11: Edge Guide
REMOVING BLADE SPINDLELOCK See Figure 3, [] Remove battery pack from saw. [] Remove blade wrench from storage area. [] Position saw as shown in figure 3, depress spindle lock button, and remove blade screw. NOTE: Turn blade screw clockwise to remove. SPINDLELOCK [] Remove outer blade washer. -
Page 12: Operation
WARNING: Do not allow familiarity with tools to make you careless. Remember that a careless fraction of a second is sufficient to inflict serious injury. WARNING: Always wear safety goggles or safety glasses with side shields when operating tools. Failure to do so could result in objects being thrown LATCHES into your eyes, resulting in possible serious injury. - Page 13 KICKBACK See Figures 7- 10. Kickback occurs when the blade stalls rapidly and the saw is driven back toward you. Blade stalling is caused by any action which pinches the blade in the wood. DANGER: Release switch immediately if blade binds or saw stalls.
- Page 14 SAWBLADES STARTING/STOPPING THE SAW Thebestofsawblades will notcutefficiently i ftheyare See Figure 12. not keptclean, s harp, a ndproperly set.Usinga dullblade To start the saw: Depress the switch trigger. willplacea heavy loadonthesawandincrease t he dan- Always let the blade reach full speed, then guide the saw gerof kickback.
-
Page 15: Adjustments
WARNING: Always remove battery pack from the TO RAISE tool when changing operation settings or when the tool is not in use. Failure to remove the battery pack may result in accidental starting and serious per- sonal injury. ADJUSTING BLADE DEPTH See Figure 13. -
Page 16: Operating The Saw
OPERATING THE SAW See Figures 15- 17. It is important to understand the correct method for oper- ating the saw. Refer to the figures in this section to learn the correct and incorrect ways for handling the saw. DANGER: When lifting the saw from the workpiece, the blade is exposed on the underside of the saw until the lower blade guard closes. - Page 17 CROSSCUTTING/RIPCUTTING WORKPIECE See Figure 18. NOTE: Refer to "Using the Laser Guide" on page 19 for the following aplications When making a cross cut or rip cut, align the line of cut with the outer blade guide notch on the base as shown in the figure.
-
Page 18: Bevel Cutting
BEVELCUTTING BEVEL See Figures 21 - 23. SCALE NOTE: Refer to "Using the Laser Guide" on page 19 for the following aplications BEVEL To make the best possible cut, follow these helpful hints: ADJUSTMENT KNOB [] Align the line of cut with the inner blade guide notch on the base when making 45 °... - Page 19 POSiTiVE0° BEVELSTOP ADJUSTMENT SCREW See Figure 24. BEVEL ADJUSTMENT The saw has a positive 0 ° bevel stop that has been factory KNOB adjusted to assure 0 ° angle of the saw blade when making 90 ° cuts. TO CHECK POSiTiVE 0° BEVEL STOP [] Remove battery pack from the trim saw.
- Page 20 POCKETCUTTING [] Release the trigger and allow the blade to come to a complete stop. See Figure 25. [] Lift the saw from the workpiece. WARNING: Always adjust bevel setting to zero [] Clear corners out with a hand saw or sabre saw. before making a pocket cut.
-
Page 21: General Maintenance
WARNING: When servicing use only identical Avoid direct Laser radiation- eyeexposure Craftsman replacement parts. Use of any other parts may create a hazard or cause product damage. WARNING: Always wear safety goggles or safety glasses with side shields during power tool opera- tion or when blowing dust. -
Page 22: Accessories
BATTERY PACK REMOVAL BATTERIES PREPARATION FOR RECYCLING The battery pack for this tool is equipped with nickel-cad- mium rechargeable batteries. Length of service from each To preserve natural resources, please charging will depend on the type of work you are doing. recycle or dispose of batteries properly. - Page 23 CRAFTSMAN 19.2 VOLT CORDLESS TRiM - MODEL NUMBER 315.115780 21 22...
-
Page 24: Parts List
CRAFTSMAN 19.2 VOLT CORDLESS TRiM SAW - MODEL NUMBER 315.115780 SEE BACK PAGE FOR PARTS ORDERING iNSTRUCTiONS PARTS LiST PART PART NUMBER DESCRiPTiON QTY. NUMBER DESCRiPTiON QTY. 6614301 * Carriage Bolt (M6 X 100 mm) ...... 1 6112004 Inner Blade Washer ........
Need help?
Do you have a question about the 315.115780 and is the answer not in the manual?
Questions and answers