Table of Contents
Advertisement
Available languages
Available languages
Quick Links
Advertisement
Table of Contents

Subscribe to Our Youtube Channel
Related Manuals for Broan beot P195


Summary of Contents for Broan beot P195
- Page 1 !® byBR_N...
- Page 2 ,_, iNTENDED FOR DOMESTIC COOKING ONLY ,_ ,_ ,t_ WARNING TO REDUCE THE RISK OF FIRE, ELECTRIC SHOCK, OR INJURY TO PERSONS, OBSERVE THE FOLLOWING: 1. Use this unit only in the manner intended by the manufacturer, if you have questions, contact the manufacturer at the address or telephone number listed in the warranty.
- Page 3 _, CAUTION To reduce risk of fire and to properly exhaust air, be sure to duct air outside. Do not vent exhaust air into spaces within walls or ceilings or into attics, crawl spaces, or garages. Take care when using cleaning agents or detergents. Avoid using food products that produce flames under the Range Hood.
- Page 4 PREPARE THE HOOD Unpack hood and check contents. You should receive: 1 - Hood 1 - Parts Bag (B080810286)containing: 6 - Mounting Screws (3,2 x 16mm Pan Head) 4 - Mounting Screws (3,9 x 9,5mm Pan Head) 1 - Duct Connector (+ Non Return Flap) 1 - Installation Instructions DUCT CONNECTOR...
-
Page 5: Duct Connector
INSTALL THE DUCTWORK DUCTED CONFmGURATmON NOTE: To reduce the risk of fire, use only metal ductwork. (8" motors) 1. Decide where the ductwork will run between the hood and the outside. 2. A straight, short duct run will allow the hood to perform most efficiently. -
Page 6: Install The Hood
INSTALL THE HOOD CUT A HOLE IN THE BOTTOM THE CABINET 1. Cut a hole in the bottom of the cabinet in order to settle the hood. 2. To install the hood, adjust the position of the clasping side spring by means of the proper screws, according to the thickness of the bored panel to which... -
Page 7: Maintenance
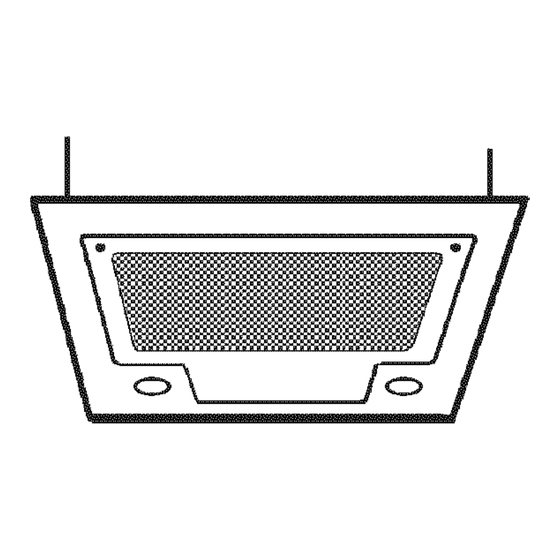
MAINTENANCE KNOBS Grease Filters The grease filters should be cleaned fre- quently. Use a warm detergent solution. Grease filters are dishwasher safe. To take off the grease filters first open the grille making the two knobs rotate towards outside; take off stop and make the filters slip toward the GRILLE right while they get off the guides. -
Page 8: Operation
OPERATION Controls PILOT LAMP The light switch turns the halogen lights on and off. BLOWER HIGH SPEED The blower on/off switch turns the blower on to its lowest running speed. The blower must be turned on using this switch. Turn the blower BLOWER MEDIUM SPEED O... -
Page 9: Warranty
This warranty gives you specific legal rights, and you may also have other rights, which vary from state to state. This warranty supersedes all prior warranties. To qualify for warranty service, you must (a) notify Broan at one of the addresses or phone numbers stated below, (b) give the model number... - Page 10 POUR USAGE DOIVIESTIQUE SEULEIVIENT _ AVERTISSEMENT AFIN DE REDUIRE LES RISQUES D'INCENDIE, D'ELECTROCUTION OU DE BLESSURES CORPORELLES, SUIVEZ LES INSTRUCTIONS SUIVANTES 1. N'utilisez cet appareil que de la fagon prevue par le fabricant. Pour d'autres renseignements, contactez le fabricant & Fadresse ou au num@o de telephone indiques dans la garantie.
- Page 11 _, _, AVERTISSEIVIENT AFIN D'EVITER TOllS RISQUES DE BLESSURE L ORS D'UN FEUDE CUISINIE=RE, OBSERVEZ LES INSTRUCTIONS SUIVANTES* : 1. ¢:TOUFFEZ LES FLAMMES & I'aide d'un couvercle hermetique, une plaque & biscuits ou un plateau en metal, puis eteignez le brQteur. ATTENTION DE NE PAS VOUS BRULER.
- Page 12 PRC:PARATION DE LA HOTTE Retirer la hotte de I'embailage, puis verifier le contenu. Les etements suivants doivent 6tre inclus : 1 - Hotte 1 - Sac de pieces (B080810286) comprenant 6 - Vis de montage (3,2 mm x 16 mm & t_te ronde) 4 - Vis de montage (3,9 mm x 9,5 mm &...
- Page 13 POSE DU CONDUIT HOTTE P, EVACUATION ATTENTION : Pour r_duire le risque d'incendie, n'utiliser que des conduits moteurs) en rn_tal. 1. Planifier pose conduit determinant son trace entre la hotte et I'exterieur la maison. 2. Un trace droit et court permet ,_ la hotte d'6tre plus efficace.
-
Page 14: Installation
INSTALLATION DE LA HOTTE DECOUPER UN TROU DANS LA BASE DE L'ARMOIRE 1. Decouper un trou dans la base I'armoire pour y inserer la hotte. 2. Pour installer la hotte, regler la position du ressort de fixation lateral ,_ I'aide des vis appropriees en fonction de I'epaisseur du panneau troue sur lequet il sera ancre. -
Page 15: Entretien
ENTRETIEN BOUTONS Filtres a graisses Les filtres a graisses doivent _tre nettoyes frequemment. Utiliser une solution d'eau chaude additionnee de detergent. Les filtres & graisses peuvent 6tre laves au lave-vaissetle. Pour retirer les filtres & graisses, ouvrir la grille en tournant les deux boutons vers... - Page 16 FONCTIONNEIVlENT TI_MOIN LUMINEUX Commandes La commande d'eclairage allume et eteint les larnpes halogenes. VITESSE DU VENTILATEUR ELEVEE La commande Marche/Arr_t du ventilateur active le ventilateur & ta vitesse la plus basse. Le ventilateur doit 6tre rnis en rnarche par VITESSE MOYENNE DU VENTILATEUR cette cornrnande.
- Page 17 La presente garantie remplace toutes les autres garanties precedentes. Pour le service sous garantie, vous devez (a) aviser Broan a I'une des adresses ou numeros de telephone mentionnes ci-dessous, (b) indiquer le numero de modele et d'identification de la piece et (c) decrire la defectuosite du produit ou de la piece.
- Page 18 INDICADO PARA EL USO EN COClNAS DOMESTICAS _, _ ADVERTENCIA PARA EVlTAR EL RIESGO DE INCENDIO, CORTOCIRCUITO 0 DAI_IO PARA PERSONAS, OBSERVE A TENTAMENTE LA S SlGUIENTES NORMAS: 1. Use esta unidad solamente de la manera indicada por el fabricante; si tiene dudas, p6ngase en contacto con @ste a la direcci6n...
- Page 19 ADVERTENCIA 1. Para reducir el riesgo de incendios y para evacuar correctamente los humos, asegurarse de haber realizado una conducci6n del aire hasta el exterior. No expulsar los humos en espacios cerrados por paredes o techos, _.ticos, espacios angostos o garajes. 2.
- Page 20 PREPARE LA CAIVIPANA Sacar la campana de I'embalaje y controtar et contenido. Recivireis: 1 - Campana 1 - Botsita (B080810286) con: 6 - Tornillos de montaje (3,2 x 16mm cabeza redonda) 4 - Torniltos de montaje (3,9 x 9,5mm cabeza redonda) 1 - Casquillo (+ Valvula de no ritomo) 1 - Instrucciones para instalaciOn...
- Page 21 INSTALACION DEL TUBO VERSION ASPIRANTE EXTRACCION DIAMETRO (8" NOTA: para evitar el riesgo de incendio, use solamente material de metal. 1. Decida donde va a colocar el tubo de extracci6n entre la campana y la parte exterior. 2. Un recorrido de tubo corto y recto permitira CAMPANA a la campana funcionar de manera m,_s...
- Page 22 INSTALACION DE LA CAMPANA HACER LA ABERTURA EN LA BASE DEL ARMARIO 1. Hacer en la base det armario la abertura necesaria para acoger el aparato. 2. Para instalar la campana, regular la posiciOn det enganche laterale por medio de los tornillos destinados a este propOsito, consi- derando et espesor...
- Page 23 MANTENllViiENTO ASAS Filtros anti-grasa Los filtros anti-grasa deben limpiarse rnenudo. Use un detergente que no sea fuerte. Los filtros antigrasa se pueden meter en et lavavajillas. Para extraer los filtros anti-grasa abrir primero la rejilla girando las dos asas hacia et exterior; quite el seguro y desptace hacia la derecha et REJmLLA filtro extrayendolo de las guiaderas.
- Page 24 FUNCIONAIVllENTO PILOTO Mandos El interruptor luminoso enciende y apaga las lamparas hal6genas. MANDO DE VELOCIDAD M,_O(IMA °° El mando de encendido, apagado aspirador pone el aspirador a una velocidad minima. Et aspirador se enciende usando este MANDO DEMEDIAVELOCIDADO mando. Si quiere apagar el aspirador, tiene que accionar este mando otra vez.
- Page 25 GARANTIAS IMPLICITAS CAPACIDAD COMERCIAL CONVENIENCIA PARA UN PROPOSITO ESPECIFICO. Durante el periodo de un a_o, Broan, si Io estima conveniente, reparara o reemplazara sin gastos para el usuario cualquier producto o parte de este que sea defectuosos habiendose usado correctamente.
-
Page 26: Service Parts
SERVICE PARTS MODEL P195 (1 motor) - Parts for stainless steel models shown. For service parts for black or white models, call Broan Customer Service. KEY NO. PART NO. DESCRIPTION B08092167 Grille (52Cm - 201/2") B08092165 Grille (70Cm - 279/16") - Page 27 SERVICE PARTS MODEL P195 (2 motors) - Parts for stainless steel models shown. For service parts for black or white models, call Broan Customer Service. KEY NO. PART NO. DESCRIPTION Grille B08092165 B02011013 Filter Spring Grease Filter B08087233 B02300233 Motor Capacitor...
- Page 28 LISTE DES PI#CES DE RECHANGE MODELE P195 (1 moteur) - Voici laliste des pieces de rechange pour les hottes en acier inoxydable. P ourlespiecesde rechangedesmodelesde couleursnoirou blanc,communiqueravecle Servicea. l aclienteledeBroan. N°REP#RE N° DE PI#CE DESCRiPTiON B08092167 Grille (52 cm - 20 1/2po) B08092165 Grille (70 cm - 27 9/16 po)
- Page 29 LISTE DES PI#CES DE RECHANGE MODE-LE P195 (2 moteurs) -Voici la listedes pieces de rechange pour les hottes en acier inoxydable. P ourlespiecesde rechangedesmodelesde couleursnoirou blanc,communiquer a vecle Service &laclientele de Broan. N° REP#RE N° DE PI#CE DESCRiPTiON B08092165 Grille...
- Page 30 MODELO P195 (1 motor) - Aqui aparecen solamente las piezas de recambio para campanas de acero inoxidable, si desean las piezas de recambio de los modetos en blanco O negro, ponganse en contacto con et servicio al cliente de Broan. COD. N.
-
Page 31: Lista De Piezas
- Aqui aparecen solamente las piezas de recambio para campanas de acero inoxidable, si desean las piezas de recambio de los modelos en blanco O negro, ponganse en contacto con et servicio al cliente de Broan. COD. N. PIEZA N. DESCRIPCI6N... - Page 32 SERVICE PARTS- LISTE DE PIECES DE RECHANGE LISTA DE PIEZAS DE RECAIVIBIO MODEL P195 (1 motor) 116(BE3334252) 116(BE3242502) _[1_ _[_/(B 0_3294781)i_5 (B03295008)165 - 33 -...
- Page 33 SERVICE PARTS- LISTE PIECES DE RECHANGE LISTA DE PIEZAS DE RECAIVIBIO MODEL P195 (2 motors) (BE3334252)116 .(BE3242502)116 /[_(Bo31_294781) 11_ 56 _ (B03295008)165 - 34 -...
- Page 34 04307083/9N...
Need help?
Do you have a question about the beot P195 and is the answer not in the manual?
Questions and answers
How to uninstall the broan p195? I assume you loosen the 6 screws but how to remove it re the spring?
To uninstall the Broan P195 and remove the spring after loosening the screws:
1. Remove the 6 mounting screws (3.2x16mm) that fix the hood casing.
2. Unlock the hood by releasing the side spring that was used to lock it in place.
3. Carefully slide the hood out of the cabinet after detaching it from the anchoring points.
Note: Always switch off the electricity supply before starting.
This answer is automatically generated