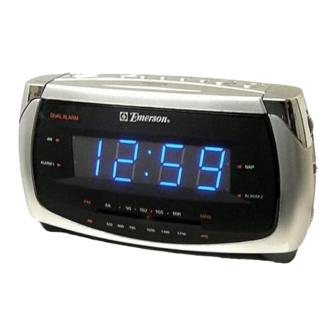
Summary of Contents for Emerson CK5052
- Page 1 SPACE SAVING AM / FM CLOCK RADIO with DUAL ALARMS and NAP TIMER OWNER'S MANUAL CK5052 Visit our web site at www.emersonradio.com CK5052_ib041503.p65 15/4/2003, 10:30...
-
Page 2: Important Safety Nstructions
TO PREVENT FIRE OR SHOCK HAZARD, DO NOT USE THIS PLUG WITH AN EXTENSION CORD, RECEPTACLE OR OTHER OUTLET UNLESS THE BLADES CAN BE FULLY INSERTED TO PREVENT BLADE EXPOSURE. TO PREVENT FIRE OR SHOCK HAZARD, DO NOT EXPOSE THIS APPLIANCE TO RAIN OR MOISTURE. The lightning flash with arrow- WARNING: TO REDUCE THE head symbol, within an equi-... - Page 3 Once again, from all of us at Emerson Radio Corp., thanks for your purchase. For future reference, record the serial number in the space provided.
-
Page 4: Important Notes
IMPORTANT NOTES • Avoid installing this unit in places exposed to direct sunlight or close to heat radiating appliances such as electric heaters, on top of other stereo equipment that radiates too much heat, places lacking ventilation or dusty areas, places subject to constant vibration and/or humid or moist areas. -
Page 5: Preparation For Use
PREPARATION FOR USE UNPACKING AND SET UP • Remove the radio from the carton and remove all packing material from the radio. We suggest that you save the packing material, if possible, in the unlikely event that your radio ever needs to be returned for service. The original carton and packing material is the only safe way to pack your radio to protect it from damage in transit. -
Page 6: To Install The Battery
TO INSTALL THE BATTERY • Open the battery compartment cover on the bottom of the radio by pressing the tab in the direction of the arrow. • Connect the 9-volt battery to the battery terminal. It can only be connected one way. •... -
Page 7: Location Of Controls And Indicators
LOCATION OF CONTROLS AND INDICATORS 1.) Lighted Dial Pointer. 2.) Display DIMMER switch (HI/LO). 3.) ALARM 1 ‘ On’ Indicator. 4.) ALM 2 (Alarm) Selector Switch. (RADIO/BUZZER/OFF) 5.) AM indicator. 6.) ALM (Alarm) 1 Selector Switch. (RADIO/BUZZER/OFF) 7.) Time Display. 8.) VOL (Volume) Control. -
Page 8: Setting The Clock
OPERATING INSTRUCTIONS SETTING THE CLOCK When you connect the radio to your AC outlet for the first time, the display will begin flashing “12:00” PM (Noon). The flashing will stop when you set the time. 1.) Press and release the TIME button. The display will stop flashing and you can now proceed to set the clock. - Page 9 SETTING THE WAKE UP TIMES This clock radio has two separate alarms that can be set and used independently. You may use the alarms to wake two people at different times, or you may use one alarm for weekdays and the other for weekend wake up times. The procedure for adjusting the wake up time is the same for both Alarm 1 and Alarm 2.
-
Page 10: Listening To The Radio
LISTENING TO THE RADIO Note: Set the clock before pressing the RADIO ON/OFF button to turn the r ad i o ‘ O n ’ fo r t h e first t im e . 1.) Set the Band selector to the desired band, AM or FM. 2.) Set the VOL (Volume) control to a low setting. -
Page 11: Wake To Radio
WAKE TO RADIO 1.) Turn the radio ‘ On’ and select the band, station, and volume level that you wish to hear when the alarm comes on, then turn the radio ‘ Off’ again. 2.) Reconfirm the wake up time settings for the alarm you are using, Alarm 1, Alarm 2, or both alarms. -
Page 12: Snooze Alarm
RADIO AND BUZZER OPERATION You may also set one alarm for wake to radio and the other for wake to buzzer. Just set the ALM 1 and ALM 2 selector switches to the desired positions. SNOOZE ALARM After the radio or buzzer alarm sounds in the morning you may press the SNOOZE Bar for a few more minutes sleep. -
Page 13: Nap Timer
NAP TIMER This radio includes a programmable Nap Timer alarm. Use the Nap Timer to wake up after a nap without disturbing your regular alarm settings. The Nap Timer can be used for naps of up to 99 minutes. To set the Nap Timer: 1.) Depress the NAP button. -
Page 14: Dimmer Control
SLEEP TO MUSIC TIMER You can program the Sleep Timer to play the radio for up to 99 minutes and then shut off automatically. 1.) Depress the SLEEP button. The display will show “L 30”, the radio will turn on, play for 30 minutes and then turn off automatically. -
Page 15: Care And Maintenance
TO FIND THE LOCATION AND PHONE NUMBER OF Y OUR NEA RES T SERVI CE CE NT ER PERMITTED TO PERFORM WARRANTY... CALL TOLL FREE: 1-800-695-0098 PLEASE CALL: 1-800-898-9020 Emerson Radio Corp. Consumer Affairs Dept. 1901 Diplomat Drive, 15/4/2003, 10:30... -
Page 16: Limited Warranty
For repair or replacement, pack your unit in a padded box, enclose your check or money order payable to Emerson Radio Corp. in the amount of $5.00 (not required by California residents) to cover shipping and handling costs, and enclose a copy of your proof of purchase. - Page 17 EMERSON RADIO CORP. EMERSON Part No. : 16-2898 304-02 Printed in China CK5052_ib041503.p65 15/4/2003, 10:30...


Need help?
Do you have a question about the CK5052 and is the answer not in the manual?
Questions and answers