
Related Manuals for Hanna Instruments HI 96771C


Summary of Contents for Hanna Instruments HI 96771C
-
Page 1: Instruction Manual
Instruction Manual HI 96771C Chlorine Ultra High Range This Instrument is in w w w . h a n n a i n s t . c o m Compliance with the CE Directives... -
Page 3: Table Of Contents
BATTERY MANAGEMENT ....................23 BATTERY REPLACEMENT ....................24 ACCESSORIES .........................24 WARRANTY .........................25 All rights are reserved. Reproduction in whole or in part is prohibited without the written consent of the copyright owner, Hanna Instruments Inc., Woonsocket, Rhode Island, 02895 , USA. -
Page 4: Preliminary Examination
PRELIMINARY EXAMINATION Please examine this product carefully. Make sure that the instrument is not damaged. If any damage occurred during shipment, please notify your Dealer. Each HI 96771 Ion Selective Meter is supplied complete with: • Two Sample Cuvets and Caps •... -
Page 5: General Description
GENERAL DESCRIPTION The HI 96771 is an auto diagnostic portable microprocessor meter that benefits from Hanna’s years of experience as a manufacturer of analytical instruments. It has the advanced optical system based on a special tungsten lamp and a narrow band interference filter that allows most accurate and repeatable readings. -
Page 6: Specifications
SPECIFICATIONS for Chlorine LOW RANGE Range 0.00 to 5.00 mg/L Resolution 0.01 mg/L from 0.00 to 3.50 mg/L; 0.10 mg/L above 3.50 mg/L Precision ±0.02 mg/L @ 1.00 mg/L Typical EMC Deviation ±0.01 mg/L for Chlorine ULTRA HIGH RANGE Range 0 to 500 mg/L Resolution 1 mg/L from 0 to 200 mg/L;... -
Page 7: Precision And Accuracy
PRECISION AND ACCURACY Precision is how closely repeated measurements agree with each other. Precision is usually expressed as standard deviation (SD). Accuracy is defined as the nearness of a test result to the true value. Although good precision suggests good accuracy, precise results can be inaccurate. - Page 8 Photometric chemical analysis is based on the possibility to develop an absorbing compound from a specific chemical reaction between sample and reagents. Given that the absorption of a compound strictly depends on the wavelength of the incident light beam, a narrow spectral bandwidth should be selected as well as a proper central wavelength to optimize measurements.
-
Page 9: Functional Description
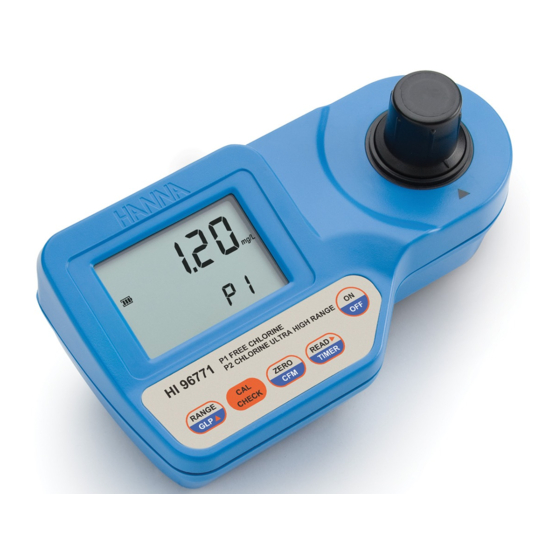
FUNCTIONAL DESCRIPTION INSTRUMENT DESCRIPTION 1) RANGE/GLP/ key 2) CAL CHECK key 3) ZERO/CFM key 4) READ/ /TIMER key 5) ON/OFF key 6) Liquid Cristal Display (LCD) 7) Cuvet alignment indicator 8) Cuvet holder KEYPAD DESCRIPTION • ON/OFF: to turn the meter on and off. •... -
Page 10: Errors And Warnings
DISPLAY ELEMENTS DESCRIPTION 1) The measuring scheme (lamp, cuvet, detector), appears during different phases of zero or reading measurement 2) Error messages and warnings 3) The battery icon shows the charging level of the battery 4) The hourglass appears when an internal checking is in progress 5) Status messages 6) The chronometer appears when the reaction timer is running 7) The month, day and date icons appear when a date is displayed... - Page 11 No Light:The instrument cannot adjust the light level. Please check that the samples does not contain any debris. b) on sample reading Inverted cuvets: The sample and the zero cuvet are inverted. Zero: A zero reading was not taken. Follow the instructions of the measurement procedure for zeroing the meter.
-
Page 12: General Tips For An Accurate Measurement
d) other errors and warnings Cap error: Appears when external light enters in the analysis cell. Assure that the cuvet cap is present. Cooling lamp: The instrument waits for the lamp to cool down. Battery low: The battery must be replaced soon. Dead battery: This indicates that the battery is dead and must be replaced. - Page 13 • Proper use of the powder reagent packet: (a) use scissors to open the powder packet; (b) push the edges of the packet to form a spout; (c) pour out the content of the packet. • Each time the cuvet is used, the cap must be tightened to the same degree.
-
Page 14: Startup
STARTUP Prepare the instrument for measurement as follows: • Unpack the instrument by removing the dust protection sleeve from the instrument cuvet holder. • Place the battery in the instrument as described in the “BATTERY REPLACEMENT” chapter. • Place the instrument on a flat table. •... -
Page 15: Measurement Procedure
MEASUREMENT PROCEDURE To compensate the meter for the sample turbidity or color, the measurement takes place in two phases. First, the meter is zeroed using the unreacted sample. After the reagents are added the reacted sample is measured. Important note: Chlorine ULTRA HIGH RANGE and chlorine LOW RANGE have to be measured separately with fresh unreacted samples if both values are requested. - Page 16 • After a few seconds, the display will show “-0.0-”. The meter is now zeroed and ready for measurement. • Remove the cuvet from the instrument. Remove the cap. • Add the content of the one packet of HI 93701-0 Free Chlorine reagent. Replace the cap and shake gently for 20 seconds.
- Page 17 INTERFERENCES Bromine (positive error) Oxidized Manganese and Chromium (positive error) Chlorine dioxide (positive error) Ozone (positive error) Iodine (positive error) Alkalinity above 250 mg/L CaCO or acidity above 150 mg/L CaCO will not reliably develop the full amount of color or it may rapidly fade. To resolve this, neutralize the sample with diluted HCl or NaOH.
- Page 18 • After a few seconds, the display will show “-0.0-”. The meter is now zeroed and ready for measurement. • Remove the cuvet from the instrument. Remove the cap. • Add the content of the one packet of HI 95771A-0 Chlorine Ultra HR reagent A. •...
-
Page 19: Validation Procedure
INTERFERENCES Bromine (positive error) Oxidized Manganese and Chromium (positive error) Chlorine dioxide (positive error) Ozone (positive error) Iodine (positive error) VALIDATION PROCEDURE Use the validation procedure to ensure that the instrument is properly calibrated. Warning: Do not validate the instrument with any standard solutions other than the HANNA CAL CHECK Standards, otherwise erroneous results will be obtained. -
Page 20: Calibration Procedure
• Remove the cuvet. • Place the CAL CHECK Standard HI 95771-11Cuvet B into the cuvet holder and ensure that the notch on the cap is positioned securely into the groove. • Press CAL CHECK and the lamp, cuvet and detector icons together with “CAL CHECK”... - Page 21 • Press and hold CAL CHECK for three seconds to enter calibration mode. The display will show “CAL” during calibration procedure. The blinking “ZERO” asks for instrument zeroing. • Place the CAL CHECK Standard HI 95771-11 Cuvet A into the cuvet holder and ensure that the notch on the cap is positioned securely into the groove.
- Page 22 Note: If the display shows “STD HIGH”, the standard value was too high. If the display shows “STD LOW”, the standard value was too low. Verify that both CAL CHECK Standards HI 95771-11 Cuvets, A and B are free from fingerprints or dirt and that they are inserted correctly.
-
Page 23: Glp
• Press ZERO/CFM to save the calibration date. • The instrument displays “Stor” for one second and the calibration is saved. • The instrument will return automatically to the measurement mode by displaying dashes on the LCD. In the GLP mode, the last user calibration date can be consulted and the factory calibration can be restored. -
Page 24: Battery Management
• Press READ/ /TIMER to enter in the factory calibration restore screen. The instrument asks for confirmation of user calibration delete. • Press ZERO/CFM to restore the factory calibration or press RANGE/GLP/ again to abort factory calibration restore. • The instrument briefly notifies “done” when restores factory calibration and returns to measurement mode. -
Page 25: Battery Replacement
BATTERY REPLACEMENT To replace the instrument’s battery, follow the steps: • Turn the instrument off by pressing ON/OFF. • Turn the instrument upside down and remove the battery cover by turning it counterclockwise. • Extract the battery from its location and replace it with a fresh one. •... -
Page 26: Warranty
If the repair is not covered by the warranty, you will be notified of the charges incurred. If the instrument is to be returned to Hanna Instruments, first obtain a Returned Goods Authorization Number from the Customer Service Department and then send it with shipment costs prepaid.
Need help?
Do you have a question about the HI 96771C and is the answer not in the manual?
Questions and answers