Table of Contents
Advertisement
Advertisement
Table of Contents

Related Manuals for Baumatic BT2710SS


Summary of Contents for Baumatic BT2710SS
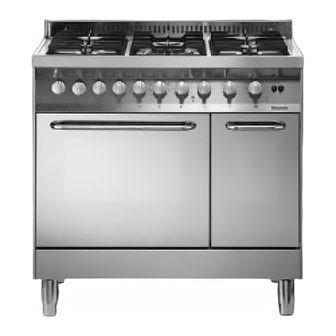
- Page 1 BT2710SS 90cm Multi- function twin cavity cooking theatre...
- Page 2 User Manual for your Baumatic BT2710SS 90 cm Multi-function twin cavity cooking theatre NOTE : This User Instruction Manual contains important information, including safety & installation points, which will enable you to get the most out of your appliance. Please keep it in a safe place so that it is easily available for future reference;...
-
Page 3: Table Of Contents
Contents Environmental note Important safety information 5 – 9 Specifications 9 – 10 Control panel Thermostat control knob (main oven) Oven function selector knob (main oven) Oven function and thermostat control knob (secondary oven) Minute minder Selecting manual operation mode Before first use Selecting a main oven function Main oven cooking functions... -
Page 4: Environmental Note
Environmental note o The packaging materials that Baumatic uses are environmentally friendly and can be recycled. o Please discard all packaging material with due regard for the environment. -
Page 5: Important Safety Information
Your new appliance is guaranteed against electrical or mechanical defects, subject to certain exclusions that are noted in Baumatic’s Conditions Of Guarantee. The foregoing does not affect your statutory rights. o Repairs may only be carried out by Baumatic Service Engineers or their authorised service agent. - Page 6 Warning and safety instructions o This appliance complies with all current European safety legislation. Baumatic do wish to emphasise that this compliance does not remove the fact that the appliance surfaces will become hot during use and retain heat after operation.
- Page 7 o Do not place heavy objects on the oven door or lean on the oven door when it is open, as this can cause damage to the oven door hinges. Nobody should be allowed to sit or stand on any part of the cooker.
- Page 8 Please see the specific section of this booklet that refers to installation. o Baumatic Ltd. declines any responsibility for injury or damage, to person or property, as a result of improper use or installation of this appliance.
-
Page 9: Specifications
o The manufacturer declares that the oven is built using certified materials and requires the appliance to be installed in accordance with the standards currently in force. This appliance must be used by a trained person for domestic purposes only. Specifications Product dimensions: Height:... - Page 10 o Thermostatically controlled grills o Double glazed removable doors o Adjustable feet Standard accessories: o Wok stand o Removable side racks o 3 x Safety shelves o 2 x Enamelled drip trays o 2 x Trivets o LPG conversion jets Optional extras: o BPS1 Pizza stone o BTGRID Double-sided griddle plate...
-
Page 11: Control Panel
Control Panel 1. Hob control knobs 2. Main oven function selector knob 3. Main oven thermostat control knob 4. Main oven operating light 5. Minute minder 6. Power indicator light 7. Secondary oven function selector and thermostat control knob 8. Secondary oven light ON/OFF button Thermostat control knob (main oven) o Use this control knob to set the temperature in the main oven. -
Page 12: Selecting Manual Operation Mode
Minute minder o Use this control knob to set the minute minder and put the oven in manual operation mode. Selecting manual operation mode o IMPORTANT: Before you can use a main oven function, then you must ensure that the appliance is set to manual operation mode. -
Page 13: Selecting A Main Oven Function
Selecting a main oven function The main oven function selector knob should be turned clockwise and used to select the particular mode of cooking that you require. The appliance will utilise different elements within the oven cavity, depending on the oven function that you select. -
Page 14: Thermostat Control Knob (Main Oven)
CONVECTION OVEN AND FAN: T his method of cooking provides traditional cooking with heat from the top and lower element, plus the use of the circulation fan to ensure a fast and even distribution of the heat. This function is suitable for light nd delicate baking, such as pastries. -
Page 15: Oven Operating Light
GRILL ELEMENT ONLY: This method of cooking utilises the element, which directs heat downwards onto the food. This function is suitable for grilling small portions of b acon, toast and meat etc. Oven operating light This ligh ill come on to indicate that the main oven’s heating eleme nts are in operation. -
Page 16: Warnings
arnings o Keep the oven door closed when using any of the grill or oven functions. o Do not use aluminium foil to cover the grill pan or heat items wrapped in aluminium foil under the grill. The high reflectivity of the foil could potentially damage the grill element. -
Page 17: Minute Minder
inute minder The minute minder can be used independently of an oven cooking function for a time period of up to 120 minutes. To set the timer, turn the minute minder control knob clockwise to the requir d countdown time. o DO NOT turn the minute minder control knob past the 120 minute marking. -
Page 18: Using The Hob Top
Using the hob top e f llowing symbols will appear on the control panel, next to each con o tr l knob: Black circle: gas off Large flame: maximum setting Small fl ame: minimum setting he minimum setting is at the end of the anti-clockwise rotation of the control knob. -
Page 19: Energy Saving Tips
nergy saving tips o The diametre of the bottom of the pan should correspond to that of the burner. The burner flam e must never extend beyond the diametre of the pan. o Use flat bottomed pans only o When possible, keep a lid on the pan whilst cooking. o Cook vegetables with as little water as possible, to reduce cooking times. -
Page 20: Cleaning And Maintenance
Any damage that is caused to the appliance by a cleaning product will not be fixed by Baumatic free of charge, even if the appliance is within the guarantee period. -
Page 21: Removing The Side Racks
moving the side racks o prope rly clean the oven cavity, it is necessary to remove all of t ven furniture, including the side racks. To remove the side racks you hould do the following:- o Unscrew the four nuts (C) and then unclip the side racks from the holes in the oven cavity that they sit in. -
Page 22: Cleaning The Hob Burners
leaning the hob burners he hob burners should be cleaned once a week or more frequently if ey get soiled. o Remove the hob burners by pulling them upwards and away from the hob top. o Soak them for about ten minutes in hot water and a little detergent. -
Page 23: Removing The Oven Door For Cleaning
moving the oven door for cleaning It is possible to remove the oven doors to clean them and for ease of access into the oven cavity. To remove the oven doors you should do the following:- o Open the oven door fully. o The hinges both have a locking device (A) on them;... -
Page 24: Installation
Installation The installation must be carried out by a suit ably qualified person, in accordance with the current version of the following. UK Regulations and Safety S tandards or their European Norm Replacements. Building Regulations (issued by the Department of the Environme nt). - Page 25 Any overhanging surface or cooker hood should be at least 700 mm above the highest point of the hob top (including the burners). o Baumatic do not recommend that the cooker is positioned below wall cupboards, as the heat and steam from the appliance a what is being cooked, may damage the cupboard and its contents.
-
Page 26: Gas Connection
Conversion for use on LPG and other gases must only be undertaken by a qualified person. For information on the use of other gases, please contact the Baumatic Technical Department. The cooker must be installed by a qualified pers on, in... -
Page 27: Ventilation Requirements
nt lation requirements The room containing the co oker should have an air supply in accordance with the current edition of BS 5440: Part 2: The room must have opening windows or equivalent; some rooms may also require a permanent vent. o If the room has a volume between 5 and 10m³, it will require an air vent of 50cm²... -
Page 28: Gas Safety (Installation And Use) Regulations
s Safety (Installation and Use) Regulations It is the law that all gas ap pliances are installed by competent persons in accordance with the current edition of the Gas Safety Installation and Use Regulations. It is in your interest and that of safety to ensure complia nce with the law. -
Page 29: Gas Connection
as connection ALL INSTALLATION AND SERVICE WORK MUST BE CARRIED OUT BY A CORGI REGISTERED ENGINEER. o Prior to installation, ensure that the gas supply conditions (nature of the gas and gas pressure) and the adjustment conditions are compatible. The adjustment conditions for this appliance are stated on the rating plate which can be found on the back cover. -
Page 30: Gas Adjustment
Gas a djustment (Convers ion to LPG and flow adjustment). All work must be carried out by a CORGI registere engineer. IM O P RTANT: Always isolate the cooker from the electricity supp ly before changing the injectors. o Remove the pan-stands, burners and flame spreaders (A). -
Page 31: Minimum Flow Adjustment For Hob Gas Taps
inimum flow adjustment for hob gas taps. All work must be carried out by a CORGI registered engineer. o Light the burner and set the knob at the minimum position. o Remove the knob from the tap and place a small bladed screwdriver in the centre of the tap shaft. -
Page 32: Fitting A Stability Chain
Fittin g a stability chain IMPORTANT: It is a legal requirement for your CORGI registered installer to fit a stability chain. The stability hook should be securely fixed to the fabric of the building, in an adjacent position to the safety chain at the rear of the appliance. The chain should be kept as short as is practical. -
Page 33: Electrical Connection
Electrical connection This appliance must be installed by a qualified person in accordance with the latest edition of the I.E.E. Regulations and in compliance with Baumatic’s instructions. Before connecting the appliance, make sure that the supply voltage marked on the rating plate corresponds with your mains supply voltage. -
Page 34: Replacing The Mains Supply Cable
Replacing the mains supply cable If the mai ns supply cable is damaged, then it must be replaced with a uitable replacement cable. he mains supply cable should be replaced in accordance with the lowing instructions: Switch the appliance off at the control switch. Open the box o f the supply board. - Page 35 IMPORTANT: If your appliance appears not to be operating correctly, then you should disconnect it from your mains supply and then contact the Baumatic Service Department on telephone number (0118) 933 6911. DO NOT ATTEMPT TO REP AIR THE APPLIANCE...
- Page 36 O r any installation other n the one specified by Baumatic Ltd. has been completed. as refer to the conditions of guarantee that appear on the arra nty card t hat you receive with the appliance.
-
Page 37: Contact Details
Czech Republic Baumatic CR spol s.r.o. Amperova 495 46215, Librec Czech Republic +420 800 185 263 United Kingdom www.baumatic.cz aumatic Ltd., Baumatic Buildings, Slovak Republic 6 Bennet Road, Baumatic Slov akia, s.r.o. eading, Berkshire Skultetyho 1 G2 0QX 831 04 Bratislava 3...
Need help?
Do you have a question about the BT2710SS and is the answer not in the manual?
Questions and answers