
Related Manuals for Fire-Lite CHG-75

Summary of Contents for Fire-Lite CHG-75
-
Page 1: Battery Charger
PN: 51315:A ECN 01-437 Battery Charger CHG-75 Document #51315 08/01/01 Revision:... -
Page 2: Fire Alarm System Limitations
While a fire alarm system may lower insurance Fire Alarm System Limitations rates, it is not a substitute for fire insurance! An automatic fire alarm system–typically made up of smoke Heat detectors do not sense particles of combustion and detectors, heat detectors, manual pull stations, audible warn- alarm only when heat on their sensors increases at a prede- ing devices, and a fire alarm control with remote notification termined rate or reaches a predetermined level. -
Page 3: Installation Precautions
Installation Precautions Adherence to the following will aid in problem-free installation with long-term reliability: WARNING - Several different sources of power can be con- Like all solid state electronic devices, this system may nected to the fire alarm control panel. Disconnect all sources operate erratically or can be damaged when subjected to light- of power before servicing. - Page 4 Notes CHG-75 PN 51315:A 08/01/01...
-
Page 5: Table Of Contents
Table of Contents SECTION 1: Product Description ........................7 1.1: Features ...............................7 1.2: Specifications ..............................8 1.3: LED Indicators ............................9 1.4: Charger Maintenance ..........................9 SECTION 2: Installation and Configuration .......................10 2.1: Precautions ..............................10 2.2: Charger Connections, Jumpers and Switches....................10 2.3: Charger Configuration..........................11 2.3.1: SW2 &... - Page 6 It is imperative that the installer understand the requirements of the Authority Having Jurisdiction (AHJ) and be familiar with the standards set forth by the following regulatory agencies: • Underwriters Laboratories Standards • NFPA 72 National Fire Alarm Code Before proceeding, the installer should be familiar with the following documents. NFPA Standards NFPA 72 National Fire Alarm Code UL 864 Standard for Control Units for Fire Protective Signaling Systems...
-
Page 7: Section 1: Product Description
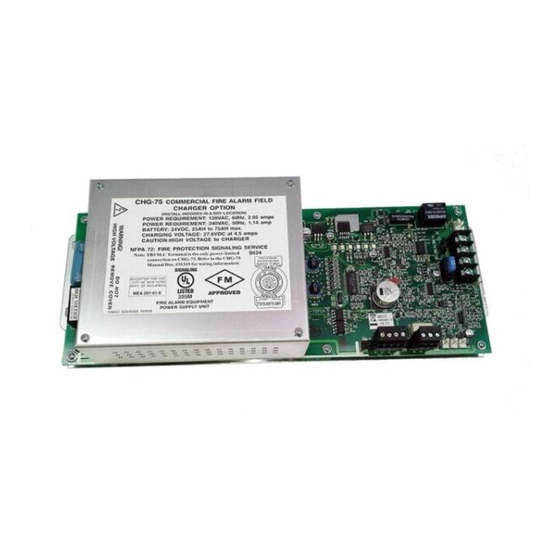
Features Product Description Product Description SECTION 1 The CHG-75 battery charger is designed to charge lead-acid batteries that provide emergency standby power for an FACP (Fire Alarm Control Panel) and related equipment. Two 12 volt batteries are used in series to supply a nominal 24VDC. The battery charger is compatible with any FACP that uses lead-acid batteries with a rating of 25 AH (Amp Hours) to 75 AH. -
Page 8: Specifications
Product Description Specifications 1.2 Specifications Primary (AC) Power - TB1, Terminals 1 (Hot), 2 (Neutral) & 3 (Earth) 120 VAC, 60 Hz, 2.05 amps maximum 220/240 VAC, 50 Hz, 1.14 amp maximum (JP1 cut) Fuse F1 - 6.25 amp (slow blow 3AG) Wire size: minimum 14 AWG with 600 volt insulation Secondary Power (Battery) Charging Circuit - TB2, Terminals 1 (+) &... -
Page 9: Led Indicators
LED Indicators Product Description 1.3 LED Indicators LEDs are provided on the battery charger circuit board to monitor various conditions: • AC LED - green LED indicates AC power is present • Trouble LED - yellow LED turns on for charger troubles or trouble indication from the Master Trouble Input •... -
Page 10: Section 2: Installation And Configuration
Installation and Configuration Precautions Installation and Configuration SECTION 2 2.1 Precautions Battery and Charger Precautions When installing the CHG-75 battery charger, observe the following precautions: ❒ Do not cut any jumpers when power is applied to the charger ❒ Observe polarity when making connections ❒... -
Page 11: Charger Configuration
Charger Configuration Installation and Configuration 2.3 Charger Configuration 2.3.1 SW2 & SW3 SLC Addressing Switches An addressable monitor module has been incorporated into the circuitry of the CHG-75 to allow a host FACP (Fire Alarm Control Panel) to monitor the charger condition via its SLC. -
Page 12: 4: Ground Fault Detection Disable
Installation and Configuration Mounting the Charger 2.3.4 Ground Fault Detection Disable Cut jumper JP2 to disable reporting of a local ground fault condition. The charger’s ground fault detection circuit might be disabled when the charger is connected to equipment with its own ground fault detection circuit to prevent competition between the two circuits. -
Page 13: 2: Mounting The Charger In A Bb-55F Battery Box
Mounting the Charger Installation and Configuration 2.4.2 Mounting the Charger in a BB-55F Battery Box The CHG-75 can mount in a BB-55F Battery Box at the location indicated in Figure 2.4. Use the supplied self-tapping screws to secure the charger to the backbox. Note: left and right side of backbox have same layout. -
Page 14: Ul Power-Limited Wiring Requirements
Installation and Configuration UL Power-limited Wiring Requirements 2.5 UL Power-limited Wiring Requirements Power-limited and nonpower-limited wiring must remain separated in the cabinet. All power-limited circuit wiring must remain at least 0.25” away from any nonpower- limited circuit wiring. Furthermore, all power-limited circuit wiring and nonpower- limited circuit wiring must enter and exit the cabinet through different conduits. -
Page 15: Optional Voltmeter/Ammeter Installation
Optional Voltmeter/Ammeter Installation Installation and Configuration 2.6 Optional Voltmeter/Ammeter Installation An ammeter (AM-1) or voltmeter (VM-1) can be installed for use with the CHG-75 charger. If installing an AM-1 or VM-1, mount the meter to a BB-26 or BB-55F battery box as illustrated below. -
Page 16: Connecting Ac Power To The Charger
Installation and Configuration Connecting AC Power to the Charger 2.7 Connecting AC Power to the Charger CAUTION! Disconnect all sources of power before making any connections, cutting any jumpers or servicing the charger. AC power connections are made to TB1 of the CHG-75 battery charger. Primary power source for the CHG-75 is 120 VAC, 60 HZ, 2.05 amps or, if JP1 is cut, 220/240 VAC, 50 Hz, 1.14 amps. -
Page 17: Connecting Batteries To The Charger
Connecting Batteries to the Charger Installation and Configuration 2.8 Connecting Batteries to the Charger Batteries ranging from 25 AH to 75 AH can be connected to the charger. This section provides illustrations and instructions for connecting two or four batteries. 2.8.1 Connecting Two Batteries The following steps must be followed when connecting two batteries to the charger: 1. -
Page 18: 2: Connecting Four Batteries
Installation and Configuration Connecting Batteries to the Charger 2.8.2 Connecting Four Batteries The following steps must be followed when connecting four batteries to the charger: 1. Remove all power sources to the charger 2. Connect the batteries in pairs by connecting the battery negative terminals and the battery positive terminals as illustrated in Figure 2.11 3. -
Page 19: Connecting The Charger To A Load
Connecting the Charger to a Load Installation and Configuration 2.9 Connecting the Charger to a Load This section provides three applications for connecting a charger to a load. While connecting a charger to a load, observe the following precautions: • Make sure all power has been removed from the charger and the load •... -
Page 20: 2: Connecting The Charger To An Ms-9200
Installation and Configuration Connecting the Charger to a Load 2.9.2 Connecting the Charger to an MS-9200 The charger can be connected to an FACP power supply, such as an MS-9200, by disabling the local charger. The MS-9200 charger is disabled by cutting jumper JP1. WARNING! Do not attempt to connect the CHG-75 to older versions of the MS-9200 FACP main circuit board, which does not allow disabling of the FACP battery charger (no JP1 jumper). -
Page 21: 3: Connecting The Charger To An Ms-9600
Connecting the Charger to a Load Installation and Configuration 2.9.3 Connecting the Charger to an MS-9600 The charger can be connected to an FACP power supply, such as an MS-9600, by disabling the local charger. The MS-9600 charger is disabled by cutting jumper JP3. To connect a charger to the MS-9600: 1. -
Page 22: 4: Connecting The Charger To Multiple Loads
Installation and Configuration Connecting the Charger to a Load 2.9.4 Connecting the Charger to Multiple Loads The CHG-75 charger can be connected to multiple loads, such as a main power supply, auxiliary power supply, auxiliary devices, etc., as illustrated in Figure 2.15. To connect the charger to multiple loads: 1. -
Page 23: Trouble Monitoring
Trouble Monitoring Installation and Configuration 2.10 Trouble Monitoring The CHG-75 charger has three connectors (J1, J2 & J3), a Form-C trouble relay (TB4) and an SLC (Signal Line Circuit - TB3) which can be used for trouble monitoring by an FACP. - Page 24 Installation and Configuration Trouble Monitoring Trouble Monitoring Connections The following figure illustrates the various connections which can be made to allow trouble monitoring of the CHG-75. Any one or more of these connections can be made, depending on the capabilities of the host FACP. CHG-75 J P 1 A M -1 E N A B LE...
-
Page 25: Section 3: Operation
Powering the Charger Operation Operation SECTION 3 3.1 Powering the Charger WARNING! Prior to applying power to the charger, perform the following check list: ❒ Follow the installation instructions described in the section titled "Installation and Configuration" on page 10 ❒... -
Page 26: Normal Operation
Operation Normal Operation 3.3 Normal Operation While charging the batteries, the CHGING (charging) LED will turn on. When batteries are fully charged, the charger maintains a float charge of 27.6 VDC. The SLC LED and AC LED are the only other LEDs that should be on during normal operation if SLC communication is programmed at the FACP and the SLC enable switch SW1 is (if programmed and enabled) AC Power On... - Page 27 Index connection to load 19 connection to MS-9200 20 LED 9 connection to MS-9600 21 AC loss connection to multiple loads 22 reporting delay 7 connection to single load 19 AC loss reporting delay 11 charging jumper selection 10 LED 9 time selection 11 communication enable AC power...
- Page 28 AC 9 wire size 8 AC power 25 primary voltage 7 charging 9, 25 selection jumper 8 ground fault 9, 25 protection low battery 9, 25 see also fuse 9 normal operation 26 see also indicators 9 relay 10 SLC communication 9, 25 contact rating 7 status indicators 25, 26 trouble 7...
- Page 29 UL power-limited wiring requirements 14 VM-1 voltmeter see also voltmeter installation 15 voltmeter 7 voltmeter installation 15 CHG-75 PN 51315:A 08/01/01...
- Page 30 Notes CHG-75 PN 51315:A 08/01/01...
-
Page 31: Limited Warranty
Limited Warranty The manufacturer warrants its products to be free from defects in materials and workmanship for eighteen (18) months from the date of manufacture, under normal use and service. Products are date-stamped at time of manufacture. The sole and exclusive obligation of the manufacturer is to repair or replace, at its option, free of charge for parts and labor, any part which is defective in materials or workmanship under normal use and service. - Page 32 World Headquarters One Fire-Lite Place, Northford, CT 06472-1653 USA 203-484-7161 • Fax 203-484-7118 www.firelite.com...
Need help?
Do you have a question about the CHG-75 and is the answer not in the manual?
Questions and answers