Table of Contents
Advertisement
Advertisement
Table of Contents
Troubleshooting

Related Manuals for RME Audio Hammerfall HDSPe RayDAT


Summary of Contents for RME Audio Hammerfall HDSPe RayDAT
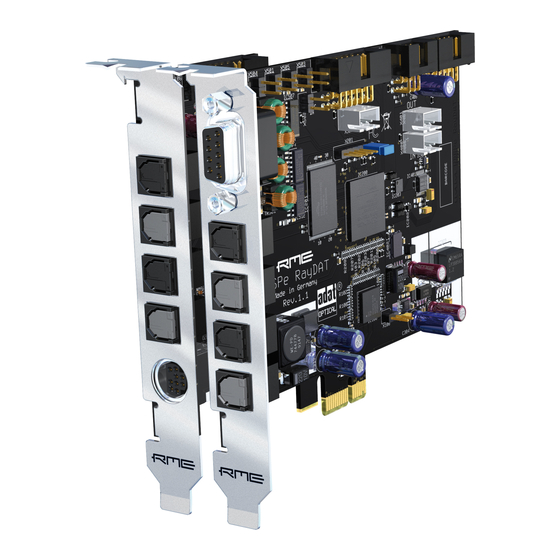
- Page 1 User's Guide Hammerfall DSP System ® HDSPe RayDAT ™ TotalMix 24 Bit / 192 kHz ® ® ® SyncAlign SyncCheck ™ SteadyClock PCI Express Digital I/O Card 2 + 2 + 32 Channels AES / SPDIF / ADAT Interface 24 Bit / 192 kHz Digital Audio 72 x 36 Matrix Router 2 x MIDI I/O Quick Boot...
-
Page 2: Table Of Contents
13.1 General ..............24 13.2 Channel Count under ASIO .........24 13.3 Known Problems ..........25 Operation under GSIF..........25 Using more than one HDSPe RayDAT ....26 DIGICheck ..............26 Hotline – Troubleshooting 17.1 General ..............27 17.2 Installation ............28 User's Guide HDSPe RayDAT © RME... - Page 3 24.7 Quick Access Panel..........51 24.8 Presets..............51 24.9 Monitor Panel............53 24.10 Preferences............53 24.11 Editing the Names ..........54 24.12 Hotkeys ..............55 24.13 Menu Options............56 24.14 Level Meter ............57 User's Guide HDSPe RayDAT © RME...
- Page 4 29.4 MIDI..............72 Technical Background 30.1 Lock and SyncCheck ...........73 30.2 Latency and Monitoring........74 30.3 DS – Double Speed ..........75 30.4 QS – Quad Speed..........75 30.5 AES/EBU – SPDIF ..........76 30.6 SteadyClock ............77 30.7 Terminology ............78 User's Guide HDSPe RayDAT © RME...
-
Page 5: General
User's Guide HDSPe RayDAT General User's Guide HDSPe RayDAT © RME... -
Page 6: Introduction
1. Introduction Thank you for choosing the RME Hammerfall DSP system. This unique audio system is capable of transferring digital audio data directly to a computer from practically any device. The latest Plug and Play technology guarantees a simple installation, even for the inexperienced user. The numerous unique features and well thought-out configuration dialog puts the Hammerfall DSP at the very top of the range of computer-based audio interfaces. -
Page 7: Hardware Installation
The included MIDI breakout cable is connected to the 9-pin Mini-DIN connector, providing two MIDI inputs and outputs. Note: If neither MIDI I/O nor a third and fourth ADAT I/O are required, it is not necessary to in- stall the Expansion Board at all. User's Guide HDSPe RayDAT © RME... -
Page 8: Internal Connectors
WCM / TCO (X403) 10-pin connector to connect the optional 9632 Word Clock Module or the optional Time Code Option (TCO) via flat ribbon cable. X402 14-pin connector to connect the Expansion Board using flat ribbon cable. User's Guide HDSPe RayDAT © RME... -
Page 9: Accessories
Manufacturer: IMM Elektronik GmbH, Leipziger Strasse 32, D-09648 Mittweida Trademarks All trademarks, registered or otherwise, are the property of their respective owners. RME, DIGICheck and Hammerfall are registered trademarks of RME Intelligent Audio Solutions. DIGI96, SyncAlign, ZLM, Sync- Check, Hammerfall DSP, HDSPe RayDAT, SteadyClock, TMS and TotalMix are trademarks of RME Intel- ligent Audio Solutions. - Page 10 RME does not accept responsibility for any misleading or incorrect information within this guide. Lending or copying any part of the guide or the RME Driver CD, or any commercial exploitation of these media without express written permission from RME Intelligent Audio Solutions is prohibited. RME reserves the right to change specifi- cations at any time without notice.
-
Page 11: Driver Installation And Operation - Windows
User's Guide HDSPe RayDAT Driver Installation and Operation - Windows User's Guide HDSPe RayDAT © RME... -
Page 12: Driver And Firmware
Windows will recognize the new hardware component and start its ‘Hardware Wizard’. Insert the RME Driver CD into your CD-ROM drive, and follow fur- ther instructions which appear on your computer screen. The driver files are located in the di- rectory \WDM on the RME Driver CD. -
Page 13: De-Installing The Drivers
Settings dialog, and the registration of the ASIO driver. Those entries can be re- moved from the registry through a software de-installation request. This request can be found (like all de-installation entries) in Control Panel, Software. Click on the entry 'RME Hammerfall DSP (WDM)'. -
Page 14: Configuring The Hdspe Raydat
In / CD In. Here an Expansion Board (AEB4-I, AEB8-I, TEB) can be connected. ADAT2 In switches the input ADAT2 from the optical connector to the internal connector AEB2 In. Here an Expansion Board (AEB4-I, AEB8-I, TEB) can be connected. User's Guide HDSPe RayDAT © RME... - Page 15 The current clock source and sample rate is displayed in the System Clock field. The automatic clock selection checks and changes between the clock sources ADAT1-4, AES, SPDIF, Word/TCO and Sync Internal. User's Guide HDSPe RayDAT © RME...
-
Page 16: Settings Dialog - Dds
Therefore the internal clock can be set to 44.1 kHz or 48 kHz, but not to a value in be- tween. SteadyClock, RME's sensational Low Jitter Clock System, is based on a Direct Digital Synthesizer (DDS). This superior circuitry can generate nearly any frequency with highest pre- cision. -
Page 17: Clock Modes - Synchronization
DAT machine are connected di- rectly to the Hammerfall DSP, AutoSync may cause feedback in the digital carrier, so synchro- nization breaks down. To remedy this, switch the HDSP’s clock mode over to 'Master'. User's Guide HDSPe RayDAT © RME... - Page 18 In this case, 'Pref Sync Ref' should be temporarily set to SPDIF. RME’s exclusive SyncCheck technology enables an easy to use check and display of the cur- rent clock status. The status box labelled Input Status indicates whether no signal (‘No Lock’), a valid signal (‘Lock’) or a valid and synchronous signal (‘Sync’) is present at each of the digital...
-
Page 19: Operation And Usage
Since Vista the audio application can no longer control the sample rate under WDM. Instead the user has to work himself through numerous settings, and to set the sample rate to the exact same value per stereo device. User's Guide HDSPe RayDAT © RME... -
Page 20: Dvd-Playback (Ac-3/Dts)
(tab Sounds, scheme 'No audio'). Note 2: The DVD player will be synced backwards from the HDSPe card. So when using Auto- Sync and/or word clock, the playback speed and pitch follows the incoming clock signal. User's Guide HDSPe RayDAT © RME... -
Page 21: Notes On Wdm
It is nearly impossible to change the number of WDM devices without a reboot of the computer. Therefore whenever the RayDAT changes into Double Speed (88.2/96 kHz) or Quad Speed mode (176.4/192 kHz) all devices stay present, but are partly inactive. User's Guide HDSPe RayDAT © RME... -
Page 22: Multi-Client Operation
Once again the same inputs can be used simultaneously. RME's sophisticated tool DIGICheck is an exception to this rule. It operates like an ASIO host, using a special technique to access playback channels already occupied. Therefore DIGICheck is able to analyse and display playback data from any software, no matter which format the software uses. -
Page 23: Digital Recording
Unlike analog soundcards which produce empty wave files (or noise) when no input signal is present, digital I/O cards always need a valid input signal to start recording. To take this into account, RME included a comprehensive I/O signal status display (showing sample frequency, lock and sync status) in the Settings dialog. -
Page 24: Operation Under Asio
RayDAT AES L / R RayDAT ADAT 17 to 32 RayDAT AES L / R RayDAT SPDIF L / R RayDAT AES L / R RayDAT SPDIF L / R RayDAT SPDIF L / R User's Guide HDSPe RayDAT © RME... -
Page 25: Known Problems
If Gigastudio starts up properly, loads gig files too, but won't play at all even when using the virtual keyboard: Go to Hardware/Routing and select a valid MIDI input port. Note that blank is not valid, but <none> is. User's Guide HDSPe RayDAT © RME... -
Page 26: Using More Than One Hdspe Raydat
• Completely multi-client. Open as many measurement windows as you like, on any chan- nels and inputs or outputs! To install DIGICheck, go to the \DIGICheck directory on the RME Driver CD and run setup.exe. Follow the instructions prompted on the screen. -
Page 27: Hotline - Troubleshooting
17. Hotline – Troubleshooting 17.1 General The newest information can always be found on our website www.rme-audio.de, section FAQ, Latest Additions. The input signal cannot be monitored in real-time • ASIO Direct Monitoring has not been enabled, and/or monitoring has been disabled globally (for example in TotalMix). -
Page 28: Installation
• Check whether the Hammerfall DSP appears in the Device Manager. If the ' Hammerfall DSP’ device has a yellow exclamation mark, then there is an address or interrupt conflict. • Even if there is no yellow exclamation mark, it's still worth checking the ‘Resources’ tab. User's Guide HDSPe RayDAT © RME... -
Page 29: Driver Installation And Operation - Mac Os X
User's Guide HDSPe RayDAT Driver Installation and Operation – Mac OS X User's Guide HDSPe RayDAT © RME... -
Page 30: Driver And Flash Update
First fit the card (see 5. Hardware Installation), then switch on the computer and install the driv- ers from the RME Driver CD. The driver file is located in the folder HDSPe. Installation works automatically by a double-click on the file HDSPe.pkg. -
Page 31: Configuring The Hdspe Raydat
In / CD In. Here an Expansion Board (AEB4-I, AEB8-I, TEB) can be connected. ADAT2 In switches the input ADAT2 from the optical connector to the internal connector AEB 2 In. Here an Expansion Board (AEB4-I, AEB8-I, TEB) can be connected. User's Guide HDSPe RayDAT © RME... -
Page 32: Settings Dialog - Dds
Therefore the internal clock can be set to 44.1 kHz or 48 kHz, but not to a value in between. SteadyClock, RME's sensational Low Jitter Clock System, is based on a Direct Digital Synthesizer (DDS). This superior circuitry can generate nearly any frequency with highest pre- cision. - Page 33 – for unknown reasons. It also prevents a change from Dou- ble Speed (96 kHz) to Single Speed (48 kHz), which would cause configuration and routing problems by the changed amount of MADI channels. User's Guide HDSPe RayDAT © RME...
-
Page 34: Clock Modes - Synchronization
(wrong) clock from the ADAT i.e. out of sync. In this case, 'Pref Sync Ref' should be temporarily set to SPDIF. RME’s exclusive SyncCheck technology enables an easy to use check and display of the cur- rent clock status. The status box labelled Input Status indicates whether no signal (‘No Lock’), a valid signal (‘Lock’) or a valid and synchronous signal (‘Sync’) is present at each of the digital... -
Page 35: Mac Os X Faq
MIDI port. The reason for this is usually visible within the Audio MIDI Setup. It displays no RME MIDI device, or the device is greyed out and therefore inactive. Mostly, removing the greyed out device and searching for MIDI devices again will solve the problem. -
Page 36: Various Information
20.5 Supported Sample Rates RME's Mac OS X driver supports all sampling frequencies provided by the hardware. Besides 192 kHz and 96 kHz this also includes 32 kHz and 64 kHz. But not any software will support all the hardware's sample rates. The hardware's capabilities can easily be verified in the Audio MIDI Setup. -
Page 37: Hotline - Troubleshooting
RayDAT SPDIF L / R RayDAT SPDIF L / R 21. Hotline – Troubleshooting The newest information can always be found on our website www.rme-audio.com, section Sup- port, Macintosh OS. The 8 ADAT channels 25-32 don’t seem to work • The optical output ADAT4 has been switched to 'SPDIF'. The ADAT playback devices are still usable by routing and mixing them in TotalMix to other outputs. - Page 38 User's Guide HDSPe RayDAT © RME...
-
Page 39: Connections And Totalmix
User's Guide HDSPe RayDAT Connections and TotalMix User's Guide HDSPe RayDAT © RME... -
Page 40: Digital Connections
22. Digital Connections 22.1 ADAT The ADAT optical I/Os of the RayDAT are fully compatible to other ADAT devices. RME's un- surpassed Bitclock PLL prevents clicks and drop outs even in extreme varipitch operation, and guarantees a fast and low jitter lock to the digital input signal. A usual TOSLINK cable is suffi- cient for connection. -
Page 41: Spdif
Professional AES/EBU equipment can be connected to the HDSPe RayDAT thanks to the ‘Pro- fessional’ format option with doubled output voltage. The required cable is the same as the one for the input (see above), but with a male XLR plug instead of a female one. User's Guide HDSPe RayDAT © RME... -
Page 42: Word Clock
The MIDI In port is available for both GSIF (GSIF-2 Low Latency) and standard WDM MIDI simultaneously. The third software-only MIDI port, HDSP MIDI In 3 (1), provides MTC, in case the TCO has been connected and receives a valid input signal. User's Guide HDSPe RayDAT © RME... -
Page 43: Word Clock
In this case the network load is often 2 x 75 Ohms, and the user is forced to buy a special word clock distributor. Note that such a device is generally recommended for bigger studios. User's Guide HDSPe RayDAT © RME... -
Page 44: General Operation
In Slave mode, the provided frequency is identical to the one pre- sent at the currently chosen clock input. When the current clock signal fails, the RayDAT switches to Master mode and adjusts itself to the next, best matching frequency (44.1 kHz, 48 kHz etc.). User's Guide HDSPe RayDAT © RME... -
Page 45: Totalmix: Routing And Monitoring
TotalMix provides the means to mix and monitor these on a single stereo output. • Mixing of the input signal to the playback signal (complete ASIO Direct Monitoring). RME not only is the pioneer of ADM, but also offers the most complete implementation of the ADM functions. - Page 46 User's Guide HDSPe RayDAT © RME...
-
Page 47: The User Interface
Bottom row (third row): Hardware outputs. Here, the total level of the output can be adjusted. This may be the level of connected loudspeakers, or the necessity to reduce the level of an overloaded submix. The following chapters explain step by step all functions of the user interface. User's Guide HDSPe RayDAT © RME... -
Page 48: Elements Of A Channel
Click into the area above the fader and drag the green bar in order to set the panorama between left and right. The level meters of the third row display the level changes in real-time. User's Guide HDSPe RayDAT © RME... - Page 49 1+2'. The window disappears, fader and pan jump to their initial values, the signal can now be routed to the output A2 1+2. You can continue like this until all entries have got a checkmark, i. e. you can send the signal to all outputs simultaneously. User's Guide HDSPe RayDAT © RME...
-
Page 50: Submix View
As soon as one Solo button is pressed, the Solo Master button lights up in the Quick Access area. With this all selected Solos can be switched off and on again. You can comforta- bly make solo-groups or activate and deactivate several Solos simultaneously. User's Guide HDSPe RayDAT © RME... -
Page 51: Quick Access Panel
TotalMix stores and reads the changed presets from the files preset11.mix to preset81.mix, located in Windows' hidden directory >Documents and Settings, <Username>, Local Settings, Application Data, RME TotalMix<. On the Mac the location is in the folder >User, <Username>, Library / Preferences / Hammerfall DSP<. The first number indi- cates the current preset, the second number the current unit. - Page 52 Menu File, Save All Presets as and Open All Presets (file suffix .mpr). After the loading the presets can be activated by the preset buttons. In case the presets have been renamed (see chapter 24.11), these names will be stored and loaded too. User's Guide HDSPe RayDAT © RME...
-
Page 53: Monitor Panel
Therefore it is not necessary to select <NONE>, in case one of both shall be deacti- vated. MIDI Controller, Full LC Display Support See chapter 27.3 and 27.4 for details. User's Guide HDSPe RayDAT © RME... -
Page 54: Editing The Names
The preset button names are not stored in the preset files, but globally in the registry, so won't change when loading any file or saving any state as preset. But loading a preset bank (see chapter 24.8) the names will be updated. User's Guide HDSPe RayDAT © RME... -
Page 55: Hotkeys
Further hotkeys are available to control the configuration of the Level Meter (see chapter 24.14): Key 4 or 6: Display range 40 or 60 dB Key E or R: Numerical display showing Peak or RMS Key 0 or 3: RMS display absolute or relative to 0 dBFS User's Guide HDSPe RayDAT © RME... -
Page 56: Menu Options
Lock Mixer: Opens a dialog box for password entry. Changes on the mixer have no effect any- more until the mixer is unlocked in the same way, by entering the password a second time. The password is stored unencrypted in the registry (Windows: Software, RME, hdspmix, Password). User's Guide HDSPe RayDAT © RME... -
Page 57: Level Meter
Thus it can be a valuable tool for sound optimization and error removal in the studio. Measuring SNR (Signal to Noise) is best done with RME’s free software DIGICheck. The function Bit Statistic includes three different RMS meters for exactly this purpose (RMS unweighted, A-weighted and DC). -
Page 58: Totalmix: The Matrix
Matrix view. Hold down the Shift-key while clicking on an already activated field. Mute overwrites the phase display, blue becomes orange. If mute is deactivated the phase inversion is indicated again. User's Guide HDSPe RayDAT © RME... -
Page 59: Advantages Of The Matrix
Example: you have lowered the output level of a submix, or just a specific channel, by some dB. The audio signal passed through via ADM will be attenuated by the value set in the third row. User's Guide HDSPe RayDAT © RME... -
Page 60: Selection And Group Based Operation
The fastest way to delete complex routings: select a channel in the mixer view, click on the menu entry Edit and select Delete. Or simply hit the Del-key. Attention: there is no undo in To- talMix, so be careful with this function! User's Guide HDSPe RayDAT © RME... -
Page 61: Recording A Subgroup (Loopback)
A software monitor- ing on the subgroup record channels is only allowed as long as the monitoring is routed in both software and TotalMix to a different channel than the active subgroup recording one. User's Guide HDSPe RayDAT © RME... -
Page 62: Using External Effects Devices
1 is sent by TotalMix to any output, to the Compressor, back from the Compressor to any input. This input is now selected within the record software. User's Guide HDSPe RayDAT © RME... -
Page 63: Ms Processing
Low Cut, Expander, Compressor or Delay. The most basic application is already available di- rectly in TotalMix: Changing the level of the side channel allows to manipulate the stereo width from mono to stereo up to extended, stepless and in real-time. User's Guide HDSPe RayDAT © RME... -
Page 64: Totalmix Midi Remote Control
1 - 8 select Main Monitor F10 - F12 Monitor Phones 1 - 3 *Tested with Behringer BCF2000 Firmware v1.07 in Mackie Control emulation for Steinberg mode and with Mackie Control under Mac OS X. User's Guide HDSPe RayDAT © RME... -
Page 65: Setup
TotalMix also supports the 9th fader of the Mackie Control. This fader (labelled Master) will con- trol the stereo output faders (lowest row) which are set up as Main Monitor outputs in the Moni- tor panel. Always and only. User's Guide HDSPe RayDAT © RME... -
Page 66: Simple Midi Control
16 Controller numbers are used: 102 up to 117 (= hex 66 up to 75). With these 16 Controllers (= faders) and 4 MIDI channels each per row, up to 64 faders can be controlled per row (as required by the HDSPe MADI). User's Guide HDSPe RayDAT © RME... -
Page 67: Loopback Detection
MIDI output. As soon as it detects this special note at the input, the MIDI functionality is disabled. After fixing the loopback, check Enable MIDI Control under Options to reactivate the TotalMix MIDI. User's Guide HDSPe RayDAT © RME... - Page 68 User's Guide HDSPe RayDAT © RME...
-
Page 69: Technical Reference
User's Guide HDSPe RayDAT Technical Reference User's Guide HDSPe RayDAT © RME... -
Page 70: Tech Info
28. Tech Info Not all information to and around our products fit in a manual. Therefore RME offers a lot more and detailed information in the Tech Infos. The very latest Tech Infos can be found on our web- site, section Support. These are some of the currently available Tech Infos: Synchronization II (DIGI96 series) Digital audio synchronization - technical background and pitfalls. -
Page 71: Technical Specifications
• Level range: 1.0 Vpp – 5.6 Vpp • Lock Range: 28 kHz – 200 kHz • Jitter suppression: > 30 dB (2.4 kHz) • Jitter when synced to input signal: < 3 ns User's Guide HDSPe RayDAT © RME... -
Page 72: Digital Outputs
• 2 x MIDI I/O via 5-pin DIN jacks • PCIe bus based hi-speed operation • Separate 128 byte FIFO for input and output • MIDI state machine in hardware for reduced interrupt request load User's Guide HDSPe RayDAT © RME... -
Page 73: Technical Background
In practice, SyncCheck allows for a quick overview of the correct configuration of all digital de- vices. So one of the most difficult and error-prone topics of the digital studio world finally be- comes easy to handle. User's Guide HDSPe RayDAT © RME... -
Page 74: Latency And Monitoring
30.2 Latency and Monitoring The term Zero Latency Monitoring has been introduced by RME in 1998 for the DIGI96 series of audio cards. It stands for the ability to pass-through the computer's input signal at the inter- face directly to the output. Since then, the idea behind has become one of the most important features of modern hard disk recording. -
Page 75: Ds - Double Speed
This transmission mode is being called Quad Wire in the professional studio world, and is also known as S/MUX4 in connection with the ADAT format. The AES3 specification does not mention Quad Wire. User's Guide HDSPe RayDAT © RME... -
Page 76: Aes/Ebu - Spdif
The table shows that a Professional-coded signal would lead to malfunctions for copy prohibi- tion and emphasis, if being read as Consumer-coded data. Nowadays many devices with SPDIF input can handle Professional subcode. Devices with AES3 input almost always accept Consumer SPDIF (passive cable adapter necessary). User's Guide HDSPe RayDAT © RME... -
Page 77: Steadyclock
Latest circuit designs like hi-speed digital synthesizer, digital PLL, 100 MHz sample rate and analog filtering allow RME to realize a completely newly developed clock technology, right within the FPGA at lowest costs. The clock's performance exceeds even professional expectations. -
Page 78: Terminology
S/MUX4. With MADI S/MUX4 is used as well, to transmit up to 192 kHz although the 48K Frame format is used. Note: All conversions of the described methods are lossless. The existing samples are just spread or re-united between the channels. User's Guide HDSPe RayDAT © RME...
Need help?
Do you have a question about the Hammerfall HDSPe RayDAT and is the answer not in the manual?
Questions and answers