LG LMX28988 Series Owner's Manual
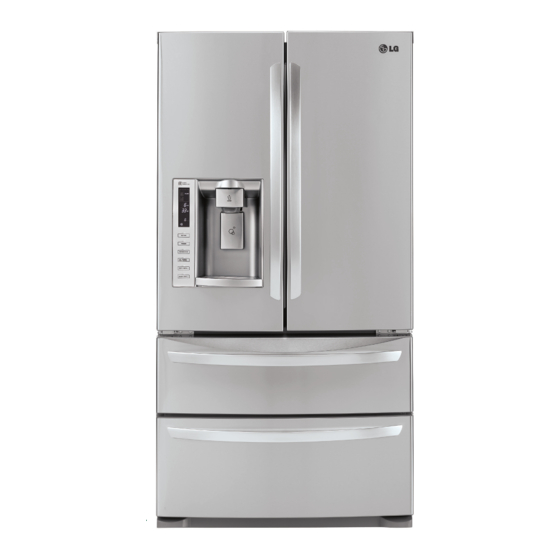
French door refrigerator
Hide thumbs
Also See for LMX28988 Series:
- Service manual (83 pages) ,
- Owner's manual (157 pages) ,
- Manual del propietario (53 pages)

Related Manuals for LG LMX28988 Series


Summary of Contents for LG LMX28988 Series
- Page 1 Life's Good OWNER'S _NUAL FRENCH DOOR REFRIGERATOR Please read this guide thoroughly keep it handy for reference LMX28988_ P/No. : MFL62184506 before operating at ail times. www.lge.com...
-
Page 2: Table Of Contents
Before Calling for Service ... SPECIFICATIONS Key Dimensions and Specifications WARRANTY Product Registration Information ... 49 THANK YOU! Congratulations and welcome Your new LG French Door Refrigerator advanced with simple operation efficiency. and care instructions manual will provide of reliable service. -
Page 3: Basic Safety Precautions
Installer Instructions were taped to the front of the refrigerator. • After your refrigerator is in operation, do not touch the cold surfaces in the freezer compartment when hands are damp or wet. Skin may adhere to the extremely cold surfaces. -
Page 4: Cfc Disposal
Risk of Child Entrapment Discarded or abandoned refrigerators are dangerous, even if they will sit for just a few days. If you are disposing of your old refrigerator, please follow the instructions below to help prevent accidents. Before you throw away your old refrigerator or freezer: •... -
Page 5: How To Connect Electricity
Do not use an adapter plug. NOTE: Some models have LED interior lighting and service should be performed by a qualified technician. When you are finished, reconnect the refrigerator to the electrical source and reset the control (Thermostat, Refrigerator Control, or Freezer Control, depending on the model) to the desired setting. -
Page 6: Special Features
24-hour period to keep the ice dispenser fully supplied. The in-door design creates more shelf space. CRISPERS LG's crispers preserve humidity and help vegetables stay crisp. GLIDE'N'SERVE Provides storage space with a variable temperature control that keeps the compartment colder than refrigerator. -
Page 7: Key Parts And Components
In addition to the special features and components outlined in the Special Features section, there are several other important components that are referenced in this manual. ADJUSTABLE REFRIGERATOR The refrigerator compartment adjustable to allow flexibility for storage needs. GALLON STORAGE BINS Three interchangeable bins can be arranged to suit your storage needs. -
Page 8: Choose The Proper Location
Hazard Two or more people are required when moving and unpacking the appliance. • Store and install the refrigerator where it will not be exposed to temperatures below freezing or exposed to outdoor weather conditions. • Install this appliance in an area where the temperature is between 55°F (13°C) and 110°F... -
Page 9: Flooring
NOTE: It is recommend that the doors be removed when it is necessary to move the refrigerator through a narrow opening. HANDLE REMOVAL NOTE: Handle appearance may vary from illustrations on this page. -
Page 10: Refrigerator Door And Freezer Drawer Removal
You may be injured. Before you begin, remove food and bins from the doors. If your entrance door is too narrow for the refrigerator to pass through, remove the refrigerator door and move the refrigerator sideways through the doorway. - Page 11 REFRIGERATOR DOOR AND FREEZER DRAWER REMOVAL (CONT.) REFRIGERATOR DOOR REMOVAL (CONT.) (3). • Open the door. Remove the top hinge cover screw (1). • Use a flat blade screwdriver to lift the tabs on the front underside of the cover(2). Lift up the cover.
- Page 12 INSIAllAIION REFRIGERATOR DOOR AND FREEZER DRAWER REMOVAL (CONT.) REFRIGERATOR DOOR REINSTALLATION Install the right-side door first. • Lower the door onto the middle hinge pin as shown. • Make sure the plastic sleeve is inserted in the bottom of the door.
- Page 13 REFRIGERATOR DOOR AND FREEZER DRAWER REMOVAL (CONT.) REFRIGERATOR DOOR REINSTALLATION Cover Cover Screw (6)_ • Push the water supply tube (6) into the hole on the top case and pull it through the backplate. &CAUTION Collet Tube Insert Line 1. Insert the tube until you can see only one of the lines printed on the tube.
- Page 14 INSIAllAIION REFRIGERATOR DOOR AND FREEZER DRAWER REMOVAL (CONT.) FREEZER DRAWER REMOVAL &CAUTION • Care should be taken to avoid product or property damage when removing the freezer door. It maybe necessary to have assistance with the following insturctions. TOP DRAWER Fully extend the freezer drawer.
- Page 15 REFRIGERATOR DOOR AND FREEZER DRAWER REMOVAL (CONT.) FREEZER DRAWER REMOVAL (cont.) &CAUTION • Care should be taken to avoid product or property damage when removing the freezer door. It maybe necessary to have assistance with the following insturctions. BOTTOM DRAWER Fully extend the freezer drawer.
- Page 16 INSIAllAIION REFRIGERATOR DOOR AND FREEZER DRAWER REMOVAL (CONT.) FREEZER DRAWER REINSTALLATION &CAUTION • To avoid possible injury or product or property damage, you will need two people to perform the following instructions. It maybe necessary to have assistance with the following instructions.
- Page 17 REFRIGERATOR DOOR AND FREEZER DRAWER REMOVAL (CONT.) FREEZER DRAWER REINSTALLATION &CAUTION • To avoid possible injury or product or property damage, you will need two people to perform the following instructions. It maybe necessary to have assistance with the following instructions.
-
Page 18: Connecting The Water Supply
• 1/4-in. nut driver • 1/4-in. drill bit • Hand drill or electric drill (properly grounded) NOTE: Refrigerator dealers offer a kit with a 1/4-in. system saddle-type shutoff valve, a union, and copper tubing. Before purchasing, make sure a saddle-type valve complies with local plumbing codes. -
Page 19: Connecting The Water Lines
•To determine the length of copper tubing you will need, measure from the connection on the lower left rear of the refrigerator to the water pipe. Add 7 ft. (2.1 m) to allow for moving the refrigerator for cleaning. Use 1/4-in. O.D. -
Page 20: Leveling The Refrigerator Doors
NOTE: The front of the refrigerator should be slightly higher than the back. NOTE: If someone pushes backward against the top of the refrigerator, weight is lifted off of the leveling legs, which makes adjustment easier. Kick Plate Open both doors to make sure they close easily. -
Page 21: Starting
• Adjust the desired temperature for the refrigerator and freezer (see Adjusting the Temperature and Functions). • Let your refrigerator run for at least 2 or 3 hours before putting food in it. Check the flow of cold air in the freezer compartment to ensure proper... -
Page 22: How To Use
FREEZERBu'n'ON Press the FREEZER button to adjust the temperature in the freezer compartment. NOTE: When pressed simultaneously with the REFRIGERATOR button for more than five seconds, the temperature display will change from Fahrenheit to Celsius or vice versa. REFRIGERATOR BuI-rON Press the REFRIGERATOR button to adjust the temperature in the refrigerator compartment. -
Page 23: The Led Display
LOCK. SAVING button is &CAUTION Display mode setting and its cancellation • With the refrigerator door open, keep pressing the REFRIGERATOR SAVING button more than 5 seconds, then it goes to the display mode. -
Page 24: Adjusting The Temperatures And Display
&CAUTION To reduce the risk of door scratches, please make sure that the refrigerator door mullion is always folded If dew gathers on the refrigerator door mullion at any point, deactivate the Energy Saving mode until the issue resolves itself. -
Page 25: Operating The Dispenser
The dispenser is designed to not operate while either refrigerator door is open. &CAUTION • When filling container with a small opening, place the container as close as possible to the opening on the water or ice dispenser. -
Page 26: Setting The Functions
If the water or ice cube taste starts to deteriorates. The diagnostic function automatically detects problems with your refrigerator, and a diagnostic code will appear in the display. NOTE: If a diagnostic code appears in the display during use, note the code and... -
Page 27: Spaceplus Ice System
Keep the ice compartment door closed tightly. If the ice compartment door is not closed tightly, the cold air in the ice bin will freeze food in the refrigerator compartment. This could also cause the icemaker to not produce ice. -
Page 28: Automatic Icemaker
20 pieces) and purge the water line for 2 minutes after installation to eliminate air and odd tastes. • This is also necessary if the refrigerator has not been used for a long time. • Never store beverage cans or other foods in the ice bin for the purpose of rapid cooling. -
Page 29: Storing Foods
NOTE: If you keep the refrigerator in a hot and humid place, frequent opening of the door or storing a lot of vegetables in the refrigerator may cause condensation to form. -
Page 30: Location Of Foods
HOW 10 USE LOCATION OF FOODS REFRIGERATOR COMPARTMENT Store larger food items, platters, and containers on the expansive refrigerator compartment shelves. CRISPERS Store vegetables or fruits with humidity control. DAIRYCORNER Store milk products such as butter and cheese. SHEWES GALLON STORAGE BINS... -
Page 31: Shelf Height Adjustment
IMPORTANT: Do not clean glass shelves with warm water when they are cold. -
Page 32: Removing And Replacing Components
HOW 113 USE REMOVING AND REPLACING COMPONENTS NOTE: when reinstalling components, reverse the order of steps for removal. TO prevent damage, never use excessive force when removing or reinstalling components. Dairy Bin To remove the dairy bin, simply lift it and pull straight out. - Page 33 USE Glide'N'Serve The Glide'N'Serve provides storage space with a variable temperature control that keeps the compartment colder than refrigerator. This drawer can be used for large party trays, deli items, or beverages. (but this drawer can't be used for vegetable.) Selection Button •...
- Page 34 NOTE: Removing the fixed door bin is recommended to reduce the risk of door bin scratches. ,CAUTION • When you close the refrigerator door with GLIDE'N'SERVE DRAWER opened, that the drawer could be broken.
- Page 35 REMOVING AND REPLACING COMPONENTS (CONT.) &CAUTION • Pinch hazard! Keep hands and feet clear of the bottom of the door when opening and closing. Ice Bin Drawer To separate the ice bin, pull out the drawer to full extension. Gently lift and pull out the ice bin. To reinstall, simply set the ice bin in its correct position.
-
Page 36: Care Andcleaning
GENERAL INFORMATION Storage During average-length vacations, you will probably find it best to leave the refrigerator in operation. Place freezable items in the freezer for longer life. When you plan to store the refrigerator, remove all food, disconnect the power cord, clean the interior thoroughly, and block the doors open to prevent mold and mildew. -
Page 37: Replacing The Water Filter
REPLACING THE WATER FILTER It is recommended that you replace the filter approximately every 6 months, when the water filter indicator reaches 0 months, or when the ice and water dispenser noticeably decreases out-put. 1. Remove the old cartridge. Press the push button to open the filter cover. NOTE : Replacing the filter causes a small amount of water (around 1 oz. - Page 38 CARE ANDCLEANING REPLACING THE WATER FILTER (CONT.) 2. Replace with a new cartridge. Take the new cartridge out of its packing and remove the protective cover from the o-rings. With cartridge ears in the horizontal position, push the new filter cartridge into the manifold hole until it stops.
- Page 39 Model: LG ADQ36006101-S The concentration of the indicated substances in water entering the system was reduced to a concentration less than or equal to the permissible limit for water leaving the system as specified in NSF/ANSI Standard 42 and Standard 53.
- Page 40 • The disposable filter cartridge must be replaced every 6 months, at the rated capacity or if a noticeable reduction in flow rate occurs. Manufactured for LG®Electronics by CUNO Incorporated 400 Research Parkway Meriden, CT 06450 U.S.A Worldwide: 203-237-5541 www.cuno.com...
- Page 41 Trademark/Model Designation ADQ36006101-S Manufacturer: Cuno Inc. The water treatment device(s) listed 116830 of the Health and Safety C0de for the tbilowing Microbiological Contaminants Cysts Organic Contaminants B enz erie Carbofuran Lindane p-Dichlorobenzene Toxaphene Rated Service Capacity: 200 gal State of California Department of Public Health Water Treatment Device...
-
Page 42: Before Calling For Service
• It is normal for the refrigerator to work longer under these conditions. • It takes a few hours for the refrigerator to reach cooling temperatures. • Warm food will cause the refrigerator to run longer until the desired temperature •... - Page 43 • Close the door completely. • Wait until the refrigerator or freezer has had a chance to cool food to the set temperature. • It takes a few hours for the refrigerator to reach for a the set temperatures. • Adjust the refrigerator control to a colder setting.
- Page 44 • This sound is made when automatically dropped into the ice storage bin. The volume may vary according to the location of the refrigerator. • This sound is normally made when the icemaker is supplied with water after dropping the automatically made ice.
- Page 45 • Wait 24 hours after ice maker installation for ice production to begin. Wait 72 hours for full ice production. • Connect refrigerator to water supply and turn water shutoff valve fully open. • This can decrease water pressure and a little water comes to icemaker.
- Page 46 At least 6 hours are needed for cooling the tap water again. • Allow 24 hours for water supply to cool completely. • Make sure the refrigerator is connected to a cold water pipe.
- Page 47 • Flush and fill the water system. • If any door is not closed completely, the ice is never dispensed. • Connect refrigerator to water supply and turn water shutoff valve fully open. • The water pressure to the home determines the flow from the dispenser.
-
Page 48: Specifications
SPECIFICAIIONS KEY DIMENSIONS AND SPECIFICATIONS The appearance and specifications listed in this guide may vary due to constant product improvements. -
Page 49: Product Registration Information
Should your LG Refrigerator ("Product") fail due to a defect in materials or workmanship under normal home use, during the warranty period set forth below, LG will at its option repair or replace the product. This limited warranty is valid only to the original retail purchaser of the product and applies only when purchased and used within the United States including U.S. - Page 50 LG Canada will at its option repair or replace the Product upon receipt of proof of original retail purchase. This warranty is valid only to the original retail purchaser of the product and applies only to a Product distributed in Canada by LG Canada or an authorized Canadian distributor thereof.
- Page 51 Life's Good nqures orco'r_ments, vstwwwlgecom 1-800-243-0000 USA, Consu 1-888-865-3026 USA, Commercial 1_888_542-2623 CANADA www.lge.com or ca _r_er User User...