Table of Contents
Advertisement
-
MOTU PCI
424
™
User's Guide for Macintosh
Mark of the Unicorn, Inc.
1280 Massachusetts Avenue
Cambridge, MA 02138
Business voice: (617) 576-2760
Business fax: (617) 576-3609
Tech support phone: (617) 576-3066
Tech support fax: (617) 354-3068
Tech support email: techsupport@motu.com
Web site: http://www.motu.com
Advertisement
Chapters
Table of Contents

Related Manuals for MOTU PCI-424


Summary of Contents for MOTU PCI-424
- Page 1 User’s Guide for Macintosh Mark of the Unicorn, Inc. 1280 Massachusetts Avenue Cambridge, MA 02138 Business voice: (617) 576-2760 Business fax: (617) 576-3609 Tech support phone: (617) 576-3066 Tech support fax: (617) 354-3068 Tech support email: techsupport@motu.com Web site: http://www.motu.com...
- Page 2 7. Power Sources - This MOTU interface should be operated only from the type of power source indicated on the marking label. If you are not sure of the type of power supply to your location, consult your local power company.
- Page 3 (b) rent, lease or grant sublicenses or other rights to the program; (c) permission of MOTU, or if the product serial number has been removed or defaced. provide use of the program in a computer service business, network, time-sharing,...
-
Page 4: Table Of Contents
About the PCI-424 System Packing List and Macintosh System Requirements Installing the PCI-424 Hardware Installing the PCI-424 Macintosh Software 2408mk3 Front Panel Operation MOTU PCI Audio Console Digital Performer AudioDesk Cubase, Nuendo and other ASIO Software Sound Manager Expanding Your PCI-424 System... -
Page 5: Quick Reference: Pci-424 Audio Card
Quick Reference: PCI-424 Audio Card Connect the first (core Connect additional MOTU system) interface to the PCI audio interfaces here. PCI-424 card here using the You can connect up to Audio Wire cable included four I/Os to a PCI-424 with your core system. If... -
Page 13: Quick Reference: Expansion Interfaces
CHAPTER EXPANSION I/O OR CORE SYSTEM? IMPORTANT NOTE Read this chapter if you have purchased a MOTU Always power on your expansion interface when PCI audio interface as an Expansion I/O for a operating your core system. In fact, you should PCI-424 core system. -
Page 15: Quick Reference: Pci Audio Console Window
PCI-424 card in your master clock source for your entire PCI-424 latency you may hear when monitoring live The MOTU PCI Audio Console Window gives computer, use this menu to choose which system. This is an important setting, as... - Page 17 This manual covers the operation of the PCI-424 system under Mac OS 9. Visit www.motu.com for Up to four MOTU PCI audio interfaces can be the latest information about using the PCI-424 connected to a single PCI-424 card for a maximum system with Mac OS X.
-
Page 18: About The Pci-424 System
channels total) at samples rates up to 96 KHz. At Video and SMPTE time code synchronization The entire PCI-424 system, including all connected 176.4 or 192 kHz, this chip can process 48 interfaces, can resolve directly to SMPTE time simultaneous channels of input and output. being received on any analog input in the system. - Page 19 Word Clock kHz analog input and output. Therefore, the BNC Word clock connectors (in and out) are 2408mk3 interface offers a maximum of 16 provided for synchronization with standard word channels of input and output at 96 kHz (2 banks of clock devices.
- Page 20 Stand-alone Format Conversion Level Meters Finally, several additional LEDs, along with The front panel of the 24I/O displays 48 level accompanying set/select buttons, allow you to meters, arranged in three banks of 8 channels. For access the 2408mk3 I/O’s stand-alone format each channel, there is a five-segment meter that conversion features.
- Page 21 32-bit floating point processing, crossfades, independently synchronizing the AES/EBU output support for many third-party audio plug-ins (in of the HD192 to a standard input clock. the MOTU Audio System and Adobe Premiere formats), background processing of file-based Level Meters operations, sample-accurate editing and The front panel of the HD192 I/O displays several placement of audio, and more.
- Page 22 drives will allow more simultaneous tracks and real-time effects than a slower computer with less RAM and slower hard drives. Standard third-party system acceleration products can also help you achieve higher track counts. A B O U T T H E P C I - 4 2 4 S Y S T E M...
-
Page 23: Packing List And Macintosh System Requirements
CHAPTER Requirements PACKING LIST MACINTOSH SYSTEM REQUIREMENTS A MOTU PCI-424 core system ships with the items The PCI-424 system requires the following listed below. If any of these items are not present in Macintosh system: your core system box when you first open it, please A G3/500 or G4 Power Macintosh or faster ■... - Page 24 P A C K I N G L I S T A N D M A C I N T O S H S Y S T E M R E Q U I R E M E N T S...
-
Page 25: Installing The Pci-424 Hardware
Installing the PCI-424 Hardware CHAPTER OVERVIEW TRY THE SETUP WIZARD Try the Setup Wizard ..... . .25 The PCI-424 software installer provides an easy- to-use Setup Wizard. -
Page 26: Install The Pci-424 Audio Card
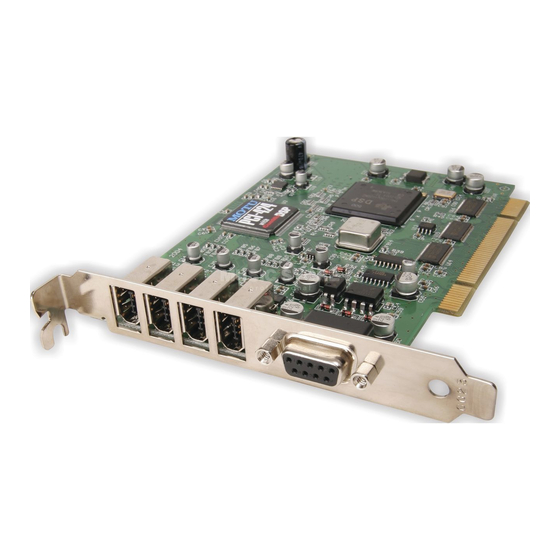
INSTALL THE PCI-424 AUDIO CARD 1 Switch off and unplug your computer. ☛ Failure to do so may result in serious shock or injury. 2 Open your computer. 3 Find an available PCI slot. 4 Remove the slot cover, if necessary. 5 Before removing the PCI-424 card from it’s anti- static bag, touch the power supply inside your 8 Secure the bulkhead of the PCI-424 card to the... -
Page 27: Connect The Audio Interface
CONNECT THE AUDIO INTERFACE 1 Plug one end of the Audio Wire cable (included) into the Audio Wire socket next to the 9-Pin ADAT Sync connector on the PCI-424 card as shown below in Figure 3-1. 2 Plug the other end of the Audio Wire cable into the audio interface as shown below in Figure 3-1. -
Page 28: 2408Mk3 Input & Output Connections
Analog format, the 2408mk3’s analog output bank don’t have to be too concerned about where you will duplicate one of the three banks. The MOTU plug things in, with the exceptions noted below. PCI Audio Console Window has an Interface Options setting that lets you choose which bank. - Page 29 CueMix DSP gives you a great number of choices 2408mk3 interface for mixing and monitoring inputs in your studio. Bank A Bank B Bank C For example, you could connect the analog output of a synth module to a pair of 2408mk3 (or other interface) analog inputs, and then bus that signal Mixer TDIF...
-
Page 30: 24I/O Input And Output Connections
24I/O INPUT AND OUTPUT CONNECTIONS samplers, or other devices with a -10 dB analog Here are a few things to keep in mind when making input signal, you can switch the 24I/O inputs to connections to the 24I/O inputs and outputs. -10 dB in banks of eight inputs. -
Page 31: Hd192 Input And Output Connections
Connect them all, if you like one pair of the 12 virtual ins and outs. For example, All of the HD192’s inputs and outputs can be active in the MOTU PCI Audio Console, you could use simultaneously. channels 1 through 10 for analog input and channels 11-12 for AES/EBU input. - Page 32 Master Master System clock, AES clock & rate convert settings When you are setting up AES/EBU input and output with the HD192, pay careful attention to the following settings in the MOTU PCI Audio Slave Slave Slave Console window: Figure 3-8: With the HD192’s sample rate conversion turned off, you...
- Page 33 AES/EBU input with rate conversion 3. Use word clock to resolve the HD192 system clock and the other AES/EBU device with each Master other. These three AES/EBU input scenarios are AES/EBU OUT HD192 clock source: PCI-424: Internal summarized below. AES/EBU IN AES input Rate Conversion option Scenario 1...
- Page 34 Fixed Frequency, which lets you resolve the AES/EU Figure 3-13: Click the ‘Interface Options’ button in the MOTU PCI Audio Console window to access the AES/EBU output clock options. output rate to the HD192 system clock. In either...
-
Page 35: Make Sync Connections
Device A Source setting to Internal as shown below in Device B Figure 3-15. For details, see chapter 6, “MOTU PCI Audio Console” (page 65). Figure 3-16: When transferring audio, two devices must have phased-locked audio clocks to prevent clicks, pops or other artifacts. -
Page 36: Do You Need A Synchronizer
Machine Control-compatible synchronizer such as PCI-424 system. The following pages give you MOTU’s MIDI Timepiece AV, as discussed in specific information about common sync “Sample-accurate sync” on page 37. If you are scenarios. -
Page 37: Sample-Accurate Sync
SAMPLE-ACCURATE SYNC Transport control from your computer If you have a MIDI Timepiece AV, Digital Your PCI-424 system provides you with the most Timepiece, Alesis BRC, or any ADAT synchronizer advanced, accurate synchronization possible with that also supports MIDI Machine Control (MMC), Alesis and Tascam modular digital tape decks and you can play, stop, rewind and locate all of your hard disk recorders—or any device that supports... -
Page 38: Sample-Accurate Adat Sync
Macintosh computer running AudioDesk, Digital 1. Choose MOTU Audio System>Configure Hardware Driver from the Performer or other sample-accurate software Basics menu in AudioDesk or Digital Performer, or run the MOTU PCI Audio Console application. USB cable (or other bi-directional MIDI connection) bearing MMC transport 2. -
Page 39: Sample-Accurate Adat Sync With No
To set the PCI-424 hardware clock source for sample-accurate sync: 1. Choose MOTU Audio System>Configure Hardware Driver from the Macintosh computer running AudioDesk, Digital Basics menu in AudioDesk or Digital Performer, or run the MOTU PCI Performer or other sample-accurate software Audio Console application. -
Page 40: Sample-Accurate Tascam Sync
Macintosh computer running Tascam: AudioDesk or Digital Performer 1. Choose MOTU Audio System>Configure Hardware Driver from the Basics menu in AudioDesk or Digital Performer, or run the MOTU PCI USB cable (or other bi-directional MIDI Audio Console application. communication) bearing MMC transport commands from 2. -
Page 41: Syncing To Smpte Time Code
Macintosh computer running device slaved to the AudioDesk, Digital Performer or other Launch the MOTU SMPTE Console and specify the SMPTE Source, which is PCI-424 system sample-accurate software. the analog input receiving the SMPTE time code. Also, confirm that the Clock Source is PCI-424: SMPTE/SMPTE. -
Page 42: Syncing To Video
AudioDesk, Digital Performer or other 2408mk3 sample-accurate software. Launch the MOTU SMPTE Console and specify the SMPTE Source, which is the analog input receiving the SMPTE time code. Also, confirm that the Clock Source is PCI-424: SMPTE/SMPTE. For details about the other Figure 3-24: Connections for synchronizing a 2408mk3-based settings, see chapter 14, “MOTU SMPTE Console”... -
Page 43: Syncing To Video And/Or Smpte Time Code Using
Figure 3-25: If your host audio software does not support sample-accurate sync and the PCI-424’s built-in SMPTE sync features, use a universal synchronizer such as the MOTU MIDI Timepiece AV or Digital Timepiece. I N S T A L L I N G T H E P C I - 4 2 4 H A R D W A R E... -
Page 44: Syncing To Adat Or Tascam Devices Using Smpte Time Code
Tascam DA-series digital tape decks or hard disk recorders. software doesn’t support sample-accurate sync, or ✓ A MOTU Digital Timepiece, MIDI Timepiece AV or other if you have an elaborate setup that perhaps involves ADAT synchronizer. multiple Alesis and/or Tascam digital recorders, ✓... -
Page 45: Syncing To A Da-88/98 Time Code Track
Code from the DA-88/98 Macintosh computer running any audio software With this setup, in the MOTU PCI Audio Console window, you can choose any clock source, since the DA-88/98 is slaving to the 2408mk3. The DA-88/98 will slave to the 2408mk3, regardless of what the PCI-424 system is slaving to. -
Page 46: Syncing Adat 'Lightpipe' Devices
MIDI Timepiece AV synchronizer) this category, including digital effects processors, synthesizers, A/D converters, and many more. 2408mk3 Digital mixer With this setup, in the MOTU PCI Audio or other lightpipe ADAT Optical OUT Console window, choose Optical In and device the Bank (A, B or C) to which the light- pipe device is connected. -
Page 47: Syncing Tascam 'Tdif' Devices
Tascam sync (if the TDIF device supports it) ■ 2408mk3 Word Clock Out TDIF With this setup, in the MOTU PCI Audio Console window, choose Internal, or any other clock source setting. The TDIF device slaves to the 2408mk3 via word clock. Word Clock In... -
Page 48: Syncing Spdif Devices
MOTU PCI Audio Console window Clock Source setting 2408mk3 Word Clock Out SPDIF With this setup, in the MOTU PCI Audio Console window, choose Internal, or any Word Clock In SPDIF other clock source setting except SPDIF. The DAT deck (or other SPDIF device) -
Page 49: Syncing Word Clock Devices
For details, see “24I/O interface system could be running at 96 kHz while slaving to options” on page 72. a 48 kHz word clock signal from a MOTU Digital Timepiece. Similarly, the PCI-424 system could For standard word clock sync, you need to choose run at 88.2 kHz and slave to 44.1 kHz word clock. -
Page 50: Sync For 2408Mk3 Stand-Alone Operation
SYNC FOR 2408MK3 STAND-ALONE In most cases, when the 2408mk3 is performing OPERATION stand-alone format conversion, the source of the The 2408mk3 interface goes into stand-alone mode transfer should serve as the clock source. Many of whenever it is not under control of the PCI-424 the synchronization scenarios already discussed in software driver. -
Page 51: Syncing Large Systems
SYNCING LARGE SYSTEMS If you are connecting the PCI-424 to a lot of other digital audio gear, get a Digital Timepiece. It can synchronize a wide variety of devices, and it offers sample accurate synchronization for devices that support it. You will also be able to control everything from the transport controls of your audio software. - Page 52 I N S T A L L I N G T H E P C I - 4 2 4 H A R D W A R E...
-
Page 53: Installing The Pci-424 Macintosh Software
Setup Wizard ......54 Software MOTU Folder ......54 component... - Page 54 SETUP WIZARD Figure 4-1: The MOTU Folder contains the software driver for the PCI-424 card and the ‘MOTU Audio System’ hard disk recording Check out the Setup Wizard. It helps you figure out engine.
- Page 55 ASIO drivers. record, edit, mix, process, bounce and master multi-track digital audio recording projects. The ASIO MOTU PCI driver is only required if you Advanced features include real-time 32-bit effects are using Cubase or other audio software that...
- Page 56 MOTU PCI SOUND MANAGER DRIVER For details about Sound Manager, see chapter 10, The MOTU PCI Sound Manager driver is placed “Sound Manager” (page 97). by the software installer in the Extensions Folder of the System Folder on your Mac’s startup disk. This...
-
Page 57: 2408Mk3 Front Panel Operation
2408mk3 Front Panel Operation CHAPTER OVERVIEW PCI MODE The 2408mk3 interface has two modes of PCI mode ....... . . 58 operation: What is PCI mode? . -
Page 58: Pci Mode
ADAT is turned off, the LEDs will also control of the PCI-424 card, and you can only flash. make changes to its settings with the MOTU PCI Audio Console software. You still have access to all Analog metering... - Page 59 PCI Mode, Analog metering Use the SELECT button to toggle the display ANALOG OUT bank of LEDs between the analog metering display (above) and the clock status display (below). If the 2408mk3 has no clock, it won’t switch out of the clock display (into metering). In PCI mode, these two rows display the current clock settings in the 2408mk3 (as set in the PCI PCI Mode,...
-
Page 60: Stand-Alone Format Conversion
PCI-424 driver. the next section), but there is no SPDIF signal ☛ If you have installed the MOTU PCI Sound detected, the 44.1 and 48 kHz LEDs will flash. Manager Driver Extension on your Macintosh, it... -
Page 61: Bounce
For the Dig and Wrd settings, however, the SET Wrd (word clock) Use the Wrd clock source setting when you are button cycles through low and high sample rate slaving the 2408mk3 to its word clock input. For settings only (44.1/48 and 88.2/96, respectively). example, if you have the 2408mk3 synchronized to Choose the pair that corresponds to the sample a word clock device that is also serving as a word... -
Page 62: Source
In most cases, when you make a digital audio Source The SOURCE setting determines the audio source transfer, you won’t need to bounce, as you’ll want for the transfer. Press the SELECT button the destination tracks to match their source tracks. repeatedly until the SOURCE LED is illuminated. -
Page 63: Analog Metering
All analog inputs are set to a -10 dB input level. A to A, B to B, and C to C. Mixed +4 /-10 Analog input levels match the settings specified in the MOTU PCI Audio Console (as explained in “Input Reference Level” on Analog metering page 72). - Page 64 Figure 5-11: The 2408mk3’s ADAT/TDIF activity LEDs are triggered by a signal of -40dB or greater. 2 4 0 8 M K 3 F R O N T P A N E L O P E R A T I O N...
-
Page 65: Accessing The Pci Audio Console Window
MOTU PCI Audio Console CHAPTER OVERVIEW ACCESSING THE PCI AUDIO CONSOLE WINDOW The MOTU PCI Audio Console Window gives you There are several ways to access the PCI Audio complete control over the settings in your PCI-424 Console window: hard disk recording system. -
Page 66: Motu Pci Audio Console
Figure 6-1: The PCI-424 settings at the top of the window are global that your Digital Timepiece, MIDI Timepiece AV settings that apply to the system as a whole, regardless of the MOTU or other digital audio synchronizer matches it as PCI audio interface connected to it. - Page 67 SPDIF input as their record source) or a 2408mk3 interface. (Only the 2408mk3 interface via the word clock output of your MOTU PCI supports this feature.) In this sync mode, the audio interface (if your DAT deck has a word clock system can also reference SMPTE time code via input).
- Page 68 The 24I/O: Word Clock In setting is unique because 2408mk3: SPDIF This setting refers to the SPDIF RCA input it switches the operation of the single BNC word connector on the 2408mk3 interface. This setting clock connector on the 24I/O interface. When you allows the entire PCI-424 system (including other choose the 24I/O: Word Clock In setting, the 24I/O’s 2408mk3 I/Os connect to the PCI-424 card) to...
-
Page 69: Samples Per Buffer
The Monitor Outputs option determines which delay of live audio as it is being processed by outputs the MOTU PCI Sound Manager driver will plug-ins. If you reduce the Samples Per Buffer, you use. -
Page 70: Interface Settings
INTERFACE SETTINGS work with the ADAT optical format on all three The middle portion of the MOTU PCI Audio banks. You can freely switch between formats at Console Window displays settings for the audio any time. interface(s) connected to your PCI-424 card. -
Page 71: Enable Routing
Disabling banks does not affect CueMix DSP PCI USE When you disable a bank as shown in Figure 6-4 Enabled banks (or individual inputs and outputs) above, it only affects PCI bus routing to the take up a small portion of your computer’s computer and your host software. -
Page 72: Interface Options
computers seem to have approximately 30-50 MB Input Reference Level These settings let you specific the input reference per second of PCI bandwidth for the 2408mk3 and level for the four analog input pairs on the other PCI cards in the computer. 2408mk3 interface. - Page 73 Word Out Rate Steal inputs The Word Out Rate menu lets you either double or Internally, the AES/EBU stereo section shares the halve the current PCI-424 system word clock rate. same bus as the analog section of the HD192. The Steal Inputs menu lets you choose which pair of If the current system word rate is a high sample rate analog inputs to replace with AES/EBU input.
- Page 74 As shown above in Figure 6-10, notice that the ‘ A ES Word In’ BNC jack. If necessary, the AES/EBU AES/EBU output can also directly mirror a pair of output signal will be sample rate converted to HD192 analog inputs. In effect, this lets you route match the AES Word In rate.
-
Page 75: Saving And Recalling Routings
LED remains illuminated after clipping you won’t change very often. occurs (see Figure 6-13 below). THE REFRESH BUTTON The Refresh button makes the MOTU PCI Audio The ‘Clip Time-Out’ option controls how long this LED remains illuminated. Console window query the audio interfaces This LED lights up momentarily. - Page 76 Some third-party host applications, however, lose their input and output settings if they are not available at the time you open the file. You can save yourself the time of reassigning them by saving a 424 configuration along with the file. For details, see “Saving and recalling routings”...
-
Page 77: Setting Up Your System
Setting up your system..... .77 will properly install and update everything for you. The MOTU PCI Audio Console window ..77 For your convenience, here is a brief summary of what Digital Performer requires to run with the Brief overview of PCI-424 settings . -
Page 78: Digital Performer
Digital Performer. For a more complete overview of the settings in the MOTU PCI Audio Console window, see chapter 6, “MOTU PCI Audio Console” (page 65). Sample rate Choose the desired overall sample rate for the PCI-424 system and Digital Performer. -
Page 79: Enabling Inputs And Outputs
Monitor Outputs The Monitor Outputs option determines which outputs the MOTU PCI Sound Manager driver will use. Samples Per Buffer Figure 7-2: When adjusting the ‘Samples Per Buffer’ to reduce patch thru latency, watch the ‘processor’ meter in the Performance Monitor. -
Page 80: Input Monitoring Mode
Direct video sync requires a 2408mk3 interface. SMPTE time code sync can be done with any MOTU PCI audio interface. Figure 7-3: Fine-tuning the timing of audio playback and recording. D I G I T A L P E R F O R M E R... -
Page 81: Midi Machine Control (Mmc)
ADATs, Alesis recorders, or any other devices Basic menu is checked. Make sure the Clock Source that support standard ADAT sample address setting in the MOTU PCI Audio Console window (ADAT Sync). is set to PCI-424: SMPTE or PCI-424: Video. Also, make sure that you’ve specified the SMPTE time... -
Page 82: Reducing Delay When Processing Live Inputs With
There are several ways to outputs you are working with. Use the MOTU PCI reduce this delay. For details, see chapter 12, Audio Console to uncheck input check boxes and “Reducing Monitoring Latency”... -
Page 83: Motu Folder (As Shown In Figure
The MOTU PCI Audio Driver must be in the ■ The MOTU PCI Audio Console window ..83 MOTU folder (as shown in Figure 4-1 on page 54). Brief overview of PCI-424 settings ...84 The MOTU Audio System item in the MOTU ■... -
Page 84: Audiodesk
If so, don’t worry. This effect For a more complete overview of the settings in the only affects what you hear: it is not present in what MOTU PCI Audio Console window, see chapter 6, is actually recorded. “MOTU PCI Audio Console” (page 65). -
Page 85: Enabling Inputs And Outputs
Consult the MOTU Audio System in the Performance monitor when making this adjustment. Be sure to try playing some audio, too, chapter in your AudioDesk manual for further as the processor meter can jump up significantly information about the settings in this dialog. - Page 86 SMPTE/MIDI time code sync. Make sure the Clock system to video and/or SMPTE time code, you can Source setting in the MOTU PCI Audio Console do so with or without a dedicated synchronizer. window has the appropriate setting for locking the PCI-424 system to the synchronizer.
-
Page 87: Midi Machine Control (Mmc)
If the meters get too high, you can reduce the load by reducing the number of inputs and Similarly, if you have Tascam recorders and a outputs you are working with. Use the MOTU PCI MOTU Digital Timepiece (or other Audio Console to uncheck input check boxes and MMC-compatible Tascam synchronizer), can set output source menus to None. - Page 88 A U D I O D E S K...
-
Page 89: Preparation
Preparation....... .89 and then see these chapters before proceeding: Run MOTU PCI Audio Console before Cubase 90 chapter 3, “Installing the PCI-424 Hardware”... -
Page 90: Cubase, Nuendo And Other Asio Software
Audio Setup>System from the Options menu, and then choose MOTU PCI from the ASIO C U B A S E , N U E N D O A N D O T H E R A S I O S O F T W A R E... -
Page 91: Number Of Channels
“Clock Source” on page 66. The Mac version of Cubase does not allow the OTHER SYSTEM DIALOG SETTINGS MOTU PCI Audio Console to run at the same time as Cubase. Therefore, the Launch button in the Consult your Cubase or Nuendo documentation... -
Page 92: Assigning Inputs
ASSIGNING INPUTS Once you’ve activated the PCI-424 system inputs as shown in the previous section, you can then assign them to Cubase or Nuendo audio channels in the channel mixers in the usual fashion. Figure 9-4: Activating PCI-424 inputs in Cubase VST. Figure 9-6: To assign a PCI-424 input to a Cubase VST audio channel: command-click the input button at the top of the channel strip. -
Page 93: Assigning Outputs
As shown earlier in Figure 9-2 on page 90, any To change the PCI-424 settings at any time, run the banks that you have enabled in the MOTU PCI MOTU PCI Audio Console. See “The Launch Audio Console will be available in Cubase or button”... -
Page 94: Synchronization
SMPTE time code input (if necessary) time code synchronization features disabled. in the MOTU SMPTE Console applet, as shown in Figure 3-23 on page 41 or Figure 3-24 on page 42. However, even though Cubase or Nuendo is not... - Page 95 2 Go to Cubase or Nuendo’s Synchronization setting in the MOTU PCI Audio Console window has the appropriate setting for locking the PCI-424 window, as shown below: system to the synchronizer. For example, in Figure 3-25 on page 43, word clock is being used to...
-
Page 96: 24-Bit Operation
Figure 9-9: Enabling the SYNC button. with. Use the MOTU PCI Audio Console to 6 Begin playback from the sample-accurate sync uncheck input check boxes and set output source source (ADAT, DA-88, etc.) Transport control is... -
Page 97: Sound Manager
Deactivating the driver ....100 The MOTU PCI Sound Manager Driver is a AudioTap and Digital Performer ... .100 standard Macintosh System Extension. -
Page 98: Sound Control Panel Is Required
To install the PCI-424 Sound Manager driver: As part of the standard PCI-424 software ■ installation, a copy of the MOTU PCI Audio 1 Insert the PCI-424 installer CD into your Console application is now on your hard drive. Macintosh. -
Page 99: Configuring The Sound Control Panel
2 Choose Alert Sounds from the menu. Figure 10-4: Choosing the desired input for Sound Manager. Any input pairs that are currently checked in the MOTU PCI Audio Console will appear in this list. 5 Click the Output tab and choose the PCI-424. To learn how to specify the output pair, see the next section, “Changing the output”. -
Page 100: Changing The Output
PCI-424 outputs you’ve chosen in the computer, or simply restart it with the MOTU PCI MOTU PCI Audio Console Monitor Outputs menu. Sound Manager Driver extension disabled. See the next section for how to do so. -
Page 101: Expanding Your Pci-424 System
Core system interface (#1) MOTU PCI audio interfaces are sold separately as Figure 11-1: You can connect up to four MOTU PCI audio interfaces to expanders for any MOTU core system. See your a single PCI-424 card. - Page 102 Enabling banks, or individual ins and outs Bank enabling, or enabling individual inputs and outputs, works the same for each interface in the MOTU PCI Audio Console window. Choose an interface from the Configure Interface menu (Figure 11-2) and then configure the banks (or individual outputs) as usual.
- Page 103 Figure 11-4. While the PCI-424 card can operate at sample rates as high as 192 kHz, not all MOTU PCI audio interfaces support the higher rates. When choosing high sample rates (above 48 kHz) interfaces that do not support the rate will be temporarily taken off line by the system.
- Page 104 E X P A N D I N G Y O U R P C I - 4 2 4 S Y S T E M...
- Page 105 If you do need to process a live input with plug-ins, or if you are playing virtual instruments live through your MOTU PCI audio hardware, you can significantly reduce latency — and even make it completely inaudible, regardless of what host audio application software you use.
-
Page 106: Reducing Monitoring Latency
There are two ways to monitor live audio input to use CueMix DSP with your audio software, or with a MOTU PCI-424 system: 1) through the with the included CueMix Console software. computer or 2) via CueMix™ DSP hardware If the material you are recording is suitable, there is monitoring. -
Page 107: Lower Latency Versus Higher Cpu Overhead
Figure 12-3: Lowering the ‘Samples Per Buffer’ setting in the MOTU patched through your software. If you reduce the PCI Audio Console Window reduces patch thru latency. But doing so... -
Page 108: Transport Responsiveness
To turn on CueMix DSP in AudioDesk and Digital about the same amount as one of today’s digital Performer: mixers). 1 From the Basics menu, choose MOTU Audio Secondly, CueMix DSP imposes no strain on the ■ System options>Input Monitoring Mode. -
Page 109: Using Cuemix With Sound Manager
10, “Sound Manager” (page 97). 2 Choose the desired output for Sound Manager in the MOTU PCI Audio Console window, as explained in “Monitor Outputs” on page 69. 3 Open the Sound Control Panel, click the Input tab, and check the Play sound through output device Figure 12-4: Enabling CueMix DSP in AudioDesk or Digital Performer. -
Page 110: Controlling Cuemix Dsp From Within Cubase
Controlling CueMix DSP from within Cubase Console. Instead, you now enjoy the benefits of To turn on CueMix in Cubase VST, enable the ASIO CueMix DSP monitoring in Cubase, plus separate, Direct Monitor check box in the Monitoring section independent mixing under CueMix Console, of the Audio System Setup window (Figure 9-3 on thanks to the much more powerful CueMix DSP page 90). - Page 111 CueMix Console CHAPTER OVERVIEW Advantages of CueMix monitoring..112 CueMix Console provides access to the flexible CueMix Console installation ....112 on-board mixing features of the PCI-424 system.
-
Page 112: Cuemix Console
ADVANTAGES OF CUEMIX MONITORING Many inputs to one output pair It might be useful to think of each mix as some CueMix Console provides several major number of inputs all mixed down to a stereo output advantages over monitoring live inputs through pair. -
Page 113: Shortcuts
Choosing a mix The Solo indicator LED (Figure 13-1) lights up To view mix, choose it from the Mix Selector menu when any input is soloed (including inputs that above the master fader, as shown in Figure 13-1. may currently be scrolled off-screen). The mix name appears in the tab at the bottom of ☛... -
Page 114: Message Center
CueMix DSP Up to 12 dB of boost with the global trim inputs that are enabled from within your MOTU or The global trim knob for each input (Figure 13-1) ASIO host software (see “Controlling CueMix DSP provides up to 12 dB of boost. -
Page 115: Cuemix Console Examples
CUEMIX CONSOLE EXAMPLES The Roland XV-5080 and Kurzweil K2500 ■ Figure 13-2 below shows some examples of how represent how you can feed the live input from you can use CueMix DSP: synthesizers, drum machines and other MIDI instruments — or any live inputs — into the All of these live inputs can be bussed to a pair of ■... - Page 116 C U E M I X C O N S O L E...
-
Page 117: Motu Smpte Console
SMPTE input, and any active channel, digital or analog, The MOTU SMPTE Console software provides a can be chosen as a SMPTE time code output. complete set of tools to resolve to video and SMPTE, and to generate SMPTE for striping, Clock/Address . - Page 118 The Clock/Address menu provides the same global and 29.97 fps time code. So if you are working with Clock Source setting as in the MOTU PCI Audio either of these rates, make sure you choose the Console (“Clock Source” on page 66), but it correct rate from this menu.
- Page 119 (and time code again. To make it stop, click the Stop individual outputs) you’ve enabled in the MOTU Freewheeling button. PCI Audio Console. See “Interface settings” on page 70.
- Page 120 Stripe Click this button to start or stop time code. To set the start time, click directly on the SMPTE time code display in the Generator section and type in the desired start time. Or drag vertically on the numbers. Click here to edit the start time, or drag vertically on...
-
Page 121: Troubleshooting
Cubase - Inputs and outputs are enabled in the another application. If you have the PCI-424 MOTU PCI Audio Console, but still not visible in Sound Manager driver enabled for Sound In and Cubase... - Page 122 ADAT-compatible or Tascam tape decks - to digital input. Tip: configure this in ClockWorks converting 48kHz tracks to 44.1kHz or AudioDesk if you want your decks to come up in If the audio on your ADAT or Tascam tape was the right mode when power cycled.
- Page 123 To remedy this, you can disable unused inputs and Clicks and pops due to hard drive problems outputs in the MOTU PCI Audio Console. Also If you have checked your clock settings and PCI check the CueMix Console message center for bandwidth and you are still getting clicks and pops details about PCI bus performance.
- Page 124 Check your Audio Wire connection to PCI Audio Console is blank make sure it is seated firmly at both ends. To The bottom half of the MOTU PCI Audio Console reestablish communication, open the PCI Audio will appear blank if the PCI-424 card is not Console, set the clock source to PCI-424 internal, communicating with your audio interface.
- Page 125 For details, see “Enable — AudioDesk routing” on page 71. — The version numbers of the items in the MOTU CUSTOMER SUPPORT Folder (in the Extensions Folder of your startup We are happy to provide customer support to our disk), including the PCI-424 Driver, the MOTU registered users.
- Page 126 A brief explanation of the problem, including the Our technical support department is dedicated to ■ exact sequence of actions which cause it, and the helping registered users solve their problems contents of any error messages which appear on the quickly.
-
Page 127: Index
2408mk3 input/output timing Interface options 53, 54 DAT connector MOTU Folder Overview of features 15, 65 Disk MOTU PCI Audio Console rear panel getting a replacement MOTU SMPTE Console 24i/o DSP Meter MTC sync installing Word Clock In setting... - Page 128 37, 40 2408mk3 sample rate sample-accurate sync 24I/O Sound Manager Driver Sync 41, 42, 43, 44, 45 7, 59 HD192 Source LED Tascam LED 8, 47, 68 Refresh button SPDIF TDIF sync Technical support sync setting Time code sync SPDIF LED Sample rate 7, 50 Stand-alone format conversion...
Need help?
Do you have a question about the PCI-424 and is the answer not in the manual?
Questions and answers