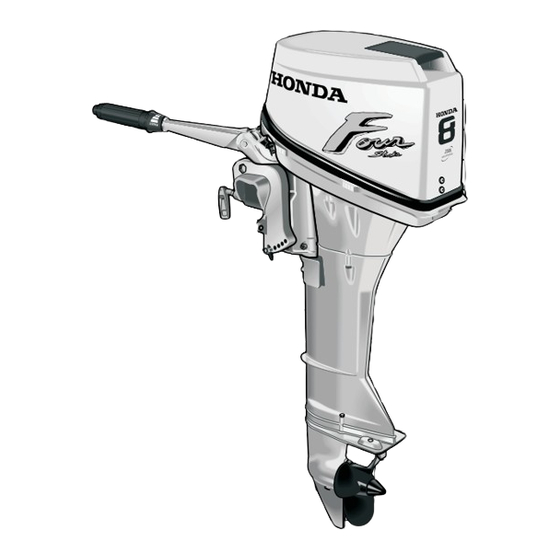
Honda BF8A Owner's Manual
Hide thumbs
Also See for BF8A:
- Owner's manual (100 pages) ,
- Owner's manual (52 pages) ,
- Owner's manual (89 pages)

Related Manuals for Honda BF8A


Summary of Contents for Honda BF8A
-
Page 1: Outboard Motor
Manual wner's Outboard Motor BF8A ©1990 American Honda Motor Co., Inc. — All Rights Reserved... - Page 2 The engine exhaust from this product contains chemicals known to the State defects or other reproductive harm.
- Page 3 Honda Motor Co., Ltd. reserves the right to make changes at any time without notice and without incurring any obligation. No part of this...
-
Page 4: Table Of Contents
CONTENTS SAFETY................;....3 COMPONENT IDENTIFICATION ............INSTALLATION ..............;....7 PRE-OPERATION CHECKS..............STARTING THE ENGINE ..............OPERATION ..................STOPPING THE ENGINE ..............MAINTENANCE ................. TRANSPORTING/STORAGE ............. TROUBLESHOOTING ................. SPECIFICATIONS ................WIRING DIAGRAM ................OPTIONAL PARTS ................WARRANTY SERVICE ................ -
Page 5: Safety
1. SAFETY Safety label locations Read all safety instructions before using the Outboard Motor. 1 GASOLINE FLAMMABLE DANGER 1 GASOLINE RAhlMABLE DANGER DANGER HARMFUL OR FATAL IF SWALLOWED. KEEP OUT OF REACH OF CHILDREN. IF SWALLOWED, DO NOT INDUCE VOMITING. CALL A,PHYSlClAN IMMEDIATELY. - Page 6 SAFETY INFORMATION For your safety and the safety of others, pay special attention to these precautions. Know to stop the engine quickly in case of emergency. Understand the use of all controls. Do not exceed the boat manufacturer’s power recommendation, and be sure the outboard motor is properly mounted.
-
Page 7: Component Identification
COMPONENT IDENTIFICATION STARTER GRIP CHOKE KNOB EMERGENCY STOP SWITCH ENGINE COVER TILLER HAN ENGINE COVER LOCK LEVER r;:k$OSE CONNECToR GEAR OIL LEVEL PLUG ~~l;,,, GEAR OIL DRAIN PLUG VENT KNOB FUEL GAUGE FUEL TANK FUEL CAP FUEL HOSE PRIMER BULB FUEL HOSE CONNECTOR (FEMALE) - Page 8 DC RECEPTACLE GEARSHIFT LEVER OIL LEVEL DlPSTlCK SPARE SHEAR PINS AND COTTER PINS STOP SWITCH FRICTION KNOB ’ EMERGENCY STOP SWITCH SERIAL NUMBER - *Always list the serial when ordering qv\+$!!JF ENGINE OIL DRAlN PLUG ADJUSTlNG ROD ANTI-VENTRATION PLATE...
-
Page 9: Installation
3. INSTALLATION It is your responsibility to choose a boat suitable for the engine. 8.0 HP (6.0 kW) STERN CENTER Do not exceed boat manu- facturer’s power recommendation. Damage and injury may result. 1. Installation position Install at the stern, at the center line of the boat. - Page 10 3. Motor attachment Attach stern bracket to the transom tighten clamp screws. Before operating the boat, check the tightness of the clamp screws. Tie a rope through the hole in the stern bracket secure other end of the rope to the boat. CLAMP SCREW This will prevent...
-
Page 11: Pre-Operation Checks
Running the engine with insufficient oil can cause serious engine damage. Use Honda 4-stroke oil, or an equiva- lent high detergent, premium quality motor oil certified to meet or exceed U.S. automobile manufactur- er’s... - Page 12 2. Fuel level Fuel tank capacity: 12 0 (3.0 US gal, 2.6 Imp gal) SAFE FILL LEVEL Check the fuel gauge and refill the tank to the SAFE FILL LEVEL mark if necessary. Gasoline is extremely flammable, gasoline vapor explode, causing serious injury...
- Page 13 If spark knock or pinging persists, see an aut i! orized Honda dealer. Running the engine with persistent spark knock or pinging can cause engine damage. Running the engine with persistent...
- Page 14 OXYGENATED FUELS Some conventional asolines are being blended with alcohol or an ether compound. T ese gasolines are collectively referred to as oxygenated fuels. To meet clean air standards, some, areas of the United States and Canada use oxygenated fuels to help reduce emissions.
- Page 15 3. Pre-operation check list: @Check the propeller, the shear pin, and the cotter pin to be sure they are secure and undamaged. @Check the stern bracket to be sure the motor is securely installed. @Check tiller handle operation. @Make sure you have the tool kit and spare parts with you (P. 27). @Check the condition of the fuel cap, fuel cap gasket, fuel hose, or fuel hose connectors.
-
Page 16: Starting The Engine
5. STARTING THE ENGINE Fuel line connection Check the fuel tank related components and fuel tank positioning (refer step @ and @I on page 12 1. Due to the fuel pump capacity, do not place the fuel tank more than 6 feet away from the motor or lower than 3 feet below the outboard fuel hose connector. - Page 17 Starting Exhaust contains poisonous carbon monoxide which can cause unconsciousness and may lead to death. Never run the outboard in a closed garage or confined area. INoTlCE The anti-ventilation plate must be lowered into the water and be at least 2 inches below the surface. Running the outboard motor out of the water will damage the water pump and overheat the engine.
- Page 18 3.Align the throttle grip START position with the mark on the tiller handle. START MARK 4. If the engine is “cold”, pull out the choke knob for starting and then push it in gradually as the engine waims 5. Pull the starter rope slowly until a resistance is felt, then pull briskly.
- Page 19 6.The oil pressure indicator light should be ON while the engine running. If the light goes off, stop the engine immediately, check the engine oil level and inspect engine for oil leaks. 01; PRESSURE INDICATOR LIGHT 7. After starting, be sure water is flowing out of the water check tube.
- Page 20 Emergency starting If the recoil starter is not working properly, the engine can be started with the spare starter rope in the tool kit. 1. Remove the engine cover. 2. Remove the recoil starter by removing the three 6 mm bolts. 3.
- Page 21 6. OPERATION For the first 10 hours of operation, run the outboard motor at low speed, and avoid abrupt operation of the throttle. 1. Gear shifting Put the tilt lever in the RUN position to prevent the outboard motor from tilting up, when operating in reverse (refer to page 22 1.
- Page 22 2. Steering To turn to the right, swing the tiller handle to the left. To turn to the left, swing the tiller handle to the right. Boats equipped with a remote control steering wheel are controlled the same way as a car. RIGHT TURN LEFTTURN Swing the tiller handle to the left.
- Page 23 3. Cruising With gearshift lever in the forward position F, turn the throttle grip toward FAST to increase speed. normal cruising, open throttle about 3/4. To hold the throttle at a steady setting, turn throttle friction knob clockwise. To free the throttle grip for manual speed control, turn...
- Page 24 4. Tilting the motor Tilt the motor to prevent the propeller and gear case from hitting bottom when the boat is beached or stopped in shallow water. 1. Stop the engine and put the gearshift lever into NEUTRAL. 2. Pull the tilt lever toward you, set the lever in the TILT position, raise the engine to either the 30”, 45”...
- Page 25 To avoid damaging the motor, use the utmost care when mooring boat, especially when its motor is tilted up. Don’t allow the motor to strike against the pier or other boats. never use it as a handle for lifting To avoid damaging the motor, moving the boat.
- Page 26 5. Battery charging The DC receptacle provides 12 V, 5 A current for 12 V battery charging. The circuit is protected by a 5 A fuse that is accessible by removing engine cover. An electrical plug for the DC receptacle is supplied with your motor.
- Page 27 6,000 feet above sea level, have your authorized Honda Outboard Motor dealer perform these carburetor modifications. Even with suitable carburetor jetting, engine horsepower will decrease approximately 3.5% for each 1,000 foot increase in altitude. The effect...
- Page 28 7. STOPPING THE ENGINE In an emergency Disengage the emergency stop switch clip from the engine stop switch by pulling the emergency stop switch lanyard. NOTE: It is a good idea to stop the engine with the emergency stop switch lanyard from time to time to be sure that the switch is operating...
- Page 29 Use only genuine HONDA parts or their equivalent. The use of re- placement parts which are not of equivalent quality may damage the motor.
- Page 30 Tool kit and spare parts The following tools and spare parts are supplied with the outboard motor for maintenance, adjustment, and emergency repairs. Spare shear pins and cotter pins are located on the stern bracket. SHEAR PINS COllER PINS Tool kit J----pi/ FLAT SCREWDRIVER 9 x 12 mm WRENCH...
- Page 31 Engine oil change The engine must be stopped. Drain the oil while the engine is still warm to assure rapid and complete draining. l.Remove the engine cover. Remove the oil drain plug and oil filler cap, and drain the oil into a suitable container.
- Page 32 If water is detected in the oil, the outboard motor should be inspected by an authorized Honda Outboard Motor dealer. Oil change Remove the level plug and drain...
- Page 33 Spark plug service Recommended spark plug: DR-5HS(NGK), XlSFSR-U(NlPPONDENS0) 1. Remove the engine cover. 2. Remove the spark plug caps. 3. Use the wrench supplied in the tool kit to remove the spark plugs. 4.Visually inspect the spark plugs. Discard the spark plugs if there is apparent wear, or if the insulators are cracked or chipped.
- Page 34 (With Honda flush kit) 1. Wash the outside of the outboard motor with clean, fresh water. 2. Flush the cooling system, using the Honda flush kit (optional). a.Attach a hose from a fresh water faucet...
- Page 35 (Without Honda flush kit) 1. Wash the outside of the outboard motor with clean, fresh water. 2. Remove the propeller. 3. Stand the motor in a suitable con- tainer of water. The water level must be at least 2 inches above the anti-ventilation plate.
- Page 36 Lubrication Apply marine anti-corrosion grease to the following areas: THROlTLE CABLE AND PIVOT CLAMP SCREWS SHIFT SHAFT AND PIVOT SWIVEL CASE HANDLE PIVOT PROPELLER SHAFT TILT LINKAGE NOTE: Apply anti-corrosion to pivot surfaces where grease cannot penetrate.
- Page 37 Shear pin change A shear pin is used to protect the propeller and drive mechanism from damage when the propeller strikes an obstruction. 1. Remove the cotter pin, the propeller cap, and the propeller. 2. Remove the broken shear pin and replace it with a new one. 3.
- Page 38 Fuel filter replacement The fuel filter is located between the fuel pump and the carburetor. Water or sediment accumulated in the fuel filter can cause loss of power or hard starting. To prevent engine malfunction, replace the fuel filter regularly.- (SERVICE PERIOD) Every 200 operating hours or every one year.
- Page 39 4. Remove the clamps used to close the fuel tubes. Connect the fuel tank line to the motor. Turn the fuel tank vent knob to the ON position, pump the primer bulb, and check for leaks. NOTE: If loss of power or hard starting is found to be caused by excessive water or sediment...
- Page 40 Engine cover lock adjustment The engine cover should fit tightly to keep the engine compartment dry. If adjustment is needed, reposition the lock hook. 1. Remove the engine cover, and loosen the lock hook bolt with a 10 mm wrench. 2.
- Page 41 (be sure the water level is at least 2 inches above the anti-ventrlation plate). 7.As soon as possible, take the motor to a Honda outboard motor dealer for inspection and service.
-
Page 42: Transporting/Storage
9. TRANSPORTING/STORAGE l.To carry, hold the motor by the carrying handle, and engine cover lock lever as shown here. Do not carry by the engine cover. 2.Transport and store the motor either vertically or horizontally, shown below,with the tiller handle raised. CASE PRiXECTOR INCORRECT Vertical transport... - Page 43 Preparation for storage 1. Disconnect the fuel line and install the cap on the engine fuel inlet. Firmly close the fuel cap vent knob. FUEL HOSE CONNECTOR ‘\ . . qi!J-& ‘\ -.._ ;:,z FUEL INLET 2. Loosen the carburetor drain screw, and drain the gasoline into a suitable container.
- Page 44 4. Change the engine oil. 5. Remove the spark plugs, and pour about a tablespoon of clean engine oil into the cylinders. Crank the engine several revolutions distribute the oil, then install the spark plugs. 6. Store the outboard motor in a clean, dry area. NOTE: Before storing,...
-
Page 45: Troubleshooting
‘IO. TROUBLESHOOTING Engine will not start: 1. Is the emergency stop switch clip in place? 2. Is the gearshift lever in neutral? 3. Is there fuel in the fuel tank? 4. Is the fuel cap vent knob turned to ON? 5. -
Page 46: Specifications
Gear change Forward-Neutral-Reversetdog type) Dry weight S Model 35.0 kg (77.2 Ibs) L Model 36.0 kg Ibs) (79.4 37.0 kg (81.6 lbs) X Model Honda outboards power rated accordance with NMMA procedures and using the ICOMIA standard 28/23. -
Page 48: Optional Parts
13. OPTIONAL PARTS ENGINE COVER... -
Page 49: Warranty Service
-Nature of the problem Your purchase of a Honda product is greatly appreciated by both your dealer and American Honda Motor Co.,lnc. We want to assist you in every way possible to assure your complete satisfaction with your purchase. - Page 50 Your owner's manual was written to cover most of the questions you might ask about your Honda. Any questions not answered in the owner's manual can be answered by your Honda dealer. If your dealer doesn't have an immediate answer, they should be able to get it for you.
- Page 51 MEMO...
- Page 53 POM53142-CVR KINKOS 31881722 80.2002.08 Printed on 00X31-881-7221 PRINTED IN U.S.A. Recycled Paper...
Need help?
Do you have a question about the BF8A and is the answer not in the manual?
Questions and answers