Advertisement
Quick Links
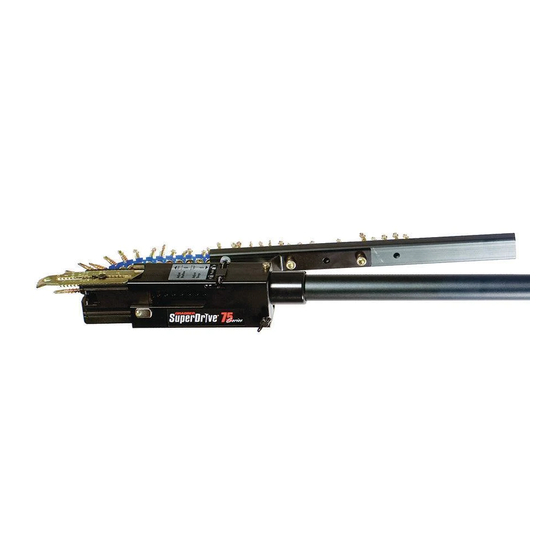
HITACHI SuperDrive Auto-feed Screw System
HITACHI SuperDrive tools and system components are warranted to the original purchaser at retail to be free from defects
in material and workmanship one year from the date of purchase.
The warranty shall only cover defects and not normal wear and tear, which occurs with use.
HITACHI SuperDrive assumes no responsibility whatsoever for malfunctions, failures or defects resulting from misuse,
abuse, neglect, alteration or modification. SuperDrive makes no warranty and shall not be liable as to the fitness of its tools
or fasteners for any particular uses or applications. No other warranties, representations or promises as to the quality or
performance of the SuperDrive fastening tool other than those contained herein are made.
ANY IMPLIED WARRANTY GRANTED UNDER STATE LAW, INCLUDING WARRANTIES OR MERCHANTABILITY OR FITNESS
FOR A PARTICULAR PURPOSE, ARE LIMITED TO DURATION TO THE EXPRESS WARRANTY GRANTED HEREUNDER. SUPER-
DRIVE IN NO EVENT SHALL BE LIABLE FOR DIRECT, INDIRECT, INCIDENTAL, OR CONSEQUENTIAL DAMAGES, SO THE
ABOVE LIMITATIONS AND EXCLUSIONS MAY NOT APPLY TO YOU.
725413
725470
725414 (GREEN DOT)
725475
725472
725473
725416
725474
725424
725422
725416
725425
725432
725423
725430
725476
Call 1-800-706-7337 or your sales rep. for replacement parts.
WARRANTY
PARTS LIST - 75 SERIES TOOL
725414
725471
725415
725413
725470
725471
725415 (GREEN)
725425
725424
725423
725422
725416
725416
725427
725428
725426
725432
DEPTH ADJUSTMENT PARTS
725472
725474
725473
725428
725475
725427
EXTENSION PARTS
725426
725476
729430
729431
725431
OPERATION
1. Check Driver Bit to make sure it is in good con-
dition.
• If it is broken or worn out, install a new one.
2. IMPORTANT! Make sure the forward-reverse
switch is in the forward position.
3. Insert a strip of screws into the feed track. Pull
it through and insert the front into the index mod-
QTY
ule until the first screw is in driving position in the
MODULE (GREEN DOT)
1
center of the nose piece. See Figure 1.
SPRING (GREEN) 1.7mm
1
NOSEPIECE FLAT HEAD SCREW
M4x10mm
1
NOSEPIECE SUBFLOOR AND
METAL-TO-METAL
1
NOSEPIECE DECK/DRYWALL
1
END PLATE FOR 75
1
WING SCREW FOR END PLATE
1
BODY HEX SOCKET CAP SCREW
M4x8
1
BODY HEX SOCKET CAP SCREW
M4x10
2
RETAINER SCREW - M3x6
2
RETAINER FOR MODULE 3mm
2
BRACKET FOR FEEDTRACK
2
FEED TRACK HEX SOCKET SCREW
1/4"-20 x 7.4mm
5
FEED TRACK
1
TUBE FOR END PLATE
1
QTY
DEPTH CONTROL RETAINER
1
DEPTH CONTROL SPRING
1
DEPTH CONTROL ADJUSTMENT
WHEEL
1
SNAP E RING E2
1
QTY
EXTENSION 19"
1
Appx. 1/4"
BIT EXTENSION
1
HANDLE ASSEMBLY
1
FIGURE 1.
4. Adjust the nosepiece so there is a 1/8" to 1/4"
gap between nose piece and tip of screw.
• Tighten the nosepiece screw securely. See
Figure 2.
5. Follow instructions on the sticker. Push slider in
to adjust. Then turn knob until it locks.
Operating Instructions
For SuperDrive 75 Series
FIGURE 2.
FIGURE 3.
6. Turn on the motor before starting to drive
screws.
• The motor can be locked to the ON position.
Advertisement

Related Manuals for Hitachi Super drive series


Summary of Contents for Hitachi Super drive series
-
Page 1: Operating Instructions
HITACHI SuperDrive Auto-feed Screw System WARRANTY HITACHI SuperDrive tools and system components are warranted to the original purchaser at retail to be free from defects in material and workmanship one year from the date of purchase. Operating Instructions The warranty shall only cover defects and not normal wear and tear, which occurs with use. - Page 2 OPERATION CONT. 9. Strip is binding in the feed track. • Do not use if parts stick. 6. Do not abuse cord. Never carry tool by cord or yank it to disconnect from receptacle. Keep 3. Occasionally lubricate the index module roller cord away from heat, oil, sharp edges, or moving Screws are not seating uniformly.
Need help?
Do you have a question about the Super drive series and is the answer not in the manual?
Questions and answers