Table of Contents
Advertisement
ESI
1. Introduction to Waveterminal 192X & 192L_____________________ 4
2. Hardware Installation ______________________________________ 6
1. System Requirement _______________________________________________ 6
2. Preparation for hardware installation ________________________________ 7
3. Installing Waveterminal 192X & 192L PCI card ________________________ 8
3. Waveterminal 192X & 192L Software Installation _______________ 10
4. Connection with external device - Waveterminal 192X ___________ 18
1. Waveterminal 192X Input/Output___________________________________ 18
5. Connection with external device - Waveterminal 192L ___________ 22
1. Waveterminal 192L Input/Output ___________________________________ 22
6. MI/ODI/O add-on card (sold separately) ______________________ 26
7. Waveterminal 192X Control Panel ___________________________ 29
1. Pull Down Menu _________________________________________________ 30
2. Clock___________________________________________________________ 31
3. Sample Rate _____________________________________________________ 31
4. Analog In _______________________________________________________ 31
5. DIGITAL IN - Digital Input selector ________________________________ 32
6. Digital Type -Digital format selector_________________________________ 33
7. Ana. IN/ Dig. IN - Input Level meter ________________________________ 33
8. OUT/MME -Output Level Adjust fader______________________________ 34
8. Waveterminal 192L Control Panel ___________________________ 35
1. Pull Down Menu _________________________________________________ 36
2. Clock___________________________________________________________ 37
3. Sample Rate _____________________________________________________ 37
4. Analog In _______________________________________________________ 37
INDEX
2
Waveterminal 192
Advertisement
Table of Contents

Related Manuals for ESI Waveterminal 192


Summary of Contents for ESI Waveterminal 192
-
Page 1: Table Of Contents
Waveterminal 192 INDEX 1. Introduction to Waveterminal 192X & 192L_____________________ 4 2. Hardware Installation ______________________________________ 6 1. System Requirement _______________________________________________ 6 2. Preparation for hardware installation ________________________________ 7 3. Installing Waveterminal 192X & 192L PCI card ________________________ 8 3. Waveterminal 192X & 192L Software Installation _______________ 10 4. - Page 2 Waveterminal 192 5. Digital IN – digital Input selector ___________________________________ 38 6. Digital Type –Digital format selector_________________________________ 39 7. MIC____________________________________________________________ 39 8. Ana. IN/ Dig. IN – Input Level meter ________________________________ 39 9. OUT/MME –Output Level Adjust fader______________________________ 40 9. Setting in Applications _____________________________________ 41 1.
-
Page 3: Esi Waveterminal
Waveterminal 192 1. Introduction to Waveterminal 192X & 192L Thank you for choosing ESI Waveterminal 192X & 192L. The Waveterminal 192X & 192L are Multimedia digital audio interfaces different from other conventional sound cards. You will be amazed at the various and powerful functions and features of Waveterminal 192X &... - Page 4 Waveterminal 192 software such as Sound Forge and Wave Lab; software sampler like GigaStudio, EXS and Halion and most of Virtual Instruments such as Reason, Reactor. 4. Multimedia/5.1 channel surround device Waveterminal 192X & 192L deliver super high-quality sound from Windows multimedia tools with various additional features, which will be worth to replace the soundcard in your computer.
-
Page 5: Hardware Installation
Waveterminal 192 2. Hardware Installation Waveterminal 192X & 192L require 3-steps of installation: ‘PCI card installation’, ‘Driver installtion’, and finally ‘Connection with external device’. The ‘PCI card installation’ step includes install the Waveterminal 192X & 192L PCI card into the PCI slot. -
Page 6: Preparation For Hardware Installation
Waveterminal 192 6. UDMA66/100 7200rpm hard disk drive 2. Preparation for hardware installation Waveterminal 192X or 192L PCI card and other components in the computer can be easily damaged by electrical shock. You need to use an anti-static device that can discharge the static electricity of your body to avoid potential static damage to the cards. -
Page 7: Installing Waveterminal 192X & 192L Pci Card
Waveterminal 192 5. When you need to hold the Waveterminal 192X & 192L PCI card, please hold it on the guide or he edge of card. Do not grab the card by the board. 3. Installing Waveterminal 192X & 192L PCI card Please look for an empty PCI slot. - Page 8 Waveterminal 192 Next, put the Waveterminal 192X & 192L PCI card into the slot and make sure it is placed in the slot correctly. The card will fit into your slot and then tighten the screw. Close the computer case.
-
Page 9: Waveterminal 192X & 192L Software Installation
Waveterminal 192 3. Waveterminal 192X & 192L Software Installation After completing the installation of hardware for Waveterminal 192X & 192L, you need to install its driver software to use it. The software installation is not too hard, even for computer beginners. Just follow the steps below and you will complete it without any hassel. - Page 10 Waveterminal 192 1 Turn your computer’s main power on. Windows will automatically detect a new device has been installed and “Found New Hardware Wizard” will appear. Choose Install from a list or specific location and click next. 2. Choose ‘Search for the best driver in these locations’ and Specify the location of the driver.
- Page 11 Waveterminal 192...
- Page 12 Waveterminal 192 3. On Windows 2000 and XP, there might be this kind of message appeared. You can simply ignore it and just select ‘Continue Anyway’.
- Page 13 Waveterminal 192 4. First Waveterminal 192X & 192L driver will be installed. 5. Windows will automatically install second driver. It’s same as above procedure.
- Page 14 Waveterminal 192...
- Page 15 Waveterminal 192 6. Windows will continuously install from Waveterminal 192 EWDM Wave2 to Wave5. And finally Windows will recognize and install ‘Waveterminal 192 EWDM Midi’. Even though, several devices will be recognized and installed, just follow above step 1 ~4. When your system keeps asking restart the computer, just ignore that and keep going to install.
- Page 16 Waveterminal 192 8. Restart your computer. After rebooting, go to ‘My computer -> Control Panel -> System -> Device Manager’. Check the devices under ‘Sound, video and game controllers’. If they are installed correctly.
-
Page 17: Connection With External Device - Waveterminal 192X
Waveterminal 192 4. Connection with external device - Waveterminal 192X Caution: This chapter is for Waveterminal 192X only Basically, Waveterminal 192X is a digital audio interface with analog 2 channel (stereo) input, analog 6 channel output and Digital stereo Optical output. Also with optional MI/ODI/O add-on card, you can add SPDIF Optical Input, SPDIF Coaxial In/Out and 1 In/1 Out MIDI interface. - Page 18 Waveterminal 192 Waveterminal 192X’s two input ports use Balanced connection. Using TRS 55 phone plug, connect as mono. As below picture, the plug to Waveterminal 192X is TRS 55 phone plug. The other side, you can use 55 phone plug or XLR(cannon)plug. * This connection is mono signal flows in one cable.
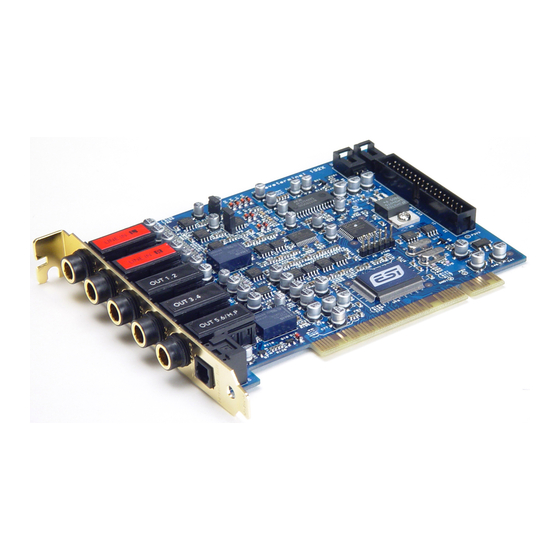
- Page 19 Waveterminal 192 <Waveterminal 192X PCI card> 1. LINE IN L – Analog Input 1 (Left channel, Mono) This is Left analog Line input. It is mono and +4dBu balanced connection. Two analog input of Waveterminal 192X are balanced mono channels. You can use Balanced or unbalanced cable for this port.
- Page 20 Waveterminal 192 6. SPDIF Optical Out/AC3(Dolby digital) This port can transfer 192X’s audio data without loss directly to an DAT, MD and CD- recorder, which support digital connection. This port sends out the signal indicated as ‘4-waveterminal 192 2ch’ on application’s device set up and also sends out AC3 encoded Dolby Digital signal.
-
Page 21: Connection With External Device - Waveterminal 192L
Waveterminal 192 5. Connection with external device - Waveterminal 192L Caution: This chapter is for Waveterminal 192L only Basically, Waveterminal 192L is a digital audio interface with analog 2 channel (stereo) input, 1 Mic channel(mono) input, analog 6 channel output and Digital stereo Optical output. - Page 22 Waveterminal 192 Waveterminal 192L’s MIC input port use traditional Balanced cable. As below picture, the plug to Waveterminal 192L is TRS 55 phone plug. The plug to Microphone is XLR. Waveterminal 192L’s output port use Y cable(stereo ↔mono x 2). As below picture, the plug to Waveterminal 192L is TRS 55 stereo phone plug.
- Page 23 Waveterminal 192 <Waveterminal 192L PCI card> 1. MIC IN This is MIC input of Waveterminal 192L. You can use dynamic or condenser microphone and it supplies +12V DC phantom power. You cannot use MIC input and Line input at the same time. You can choose MIC input or Line input on the control panel of 192L.
- Page 24 Waveterminal 192 5. Analog 5,6 Output/Headphone Out (stereo) This is stereo analog output. Same as Analog 1 2 / 3 4, this output use stereo TRS phone plug. Analog 5,6 send out the signal indicated as ‘3-waveterminal 192 2ch’ on application’s device set up.
-
Page 25: Mi/Odi/O Add-On Card (Sold Separately)
Waveterminal 192 6. MI/ODI/O add-on card (sold separately) Caution: MI/ODI/O add-on card is not included in Waveterminal 192X & 192L. It’s sold separately. The MI/ODI/O has one Coaxial Input/Output, one Optical digital Input and 16 channels MIDI Input/Output. The MI/ODI/O is designed to be used with the Waveterminal 192 series of audio cards as an add-on. - Page 26 Waveterminal 192 1. SPDIF Optical Input (24bit/96kHz) Using this Optical input port with Waveterminal 192X & L’s Optical output, you can use Optical In/Out with external device. Caution: Although MI/ODI/O’s Tos-Link Optical I/O port can’t support 192kHz in specification, we got the reports shows possibility while we were testing. However, it heavily depends on system environment, It may have problem on over 100kHz sample rate.
- Page 27 Waveterminal 192 3. Connector for Waveterminl 192 series Using provided cable, connect MI/ODI/O and Waveterminal 192X & 192L. 4. 5. In, Out – MIDI In/Out display When MIDI signal flows through MI/ODI/O, This LED will be blinking. 6. PWR It is MI/ODI/O power LED(Indicator). When connect MI/ODI/O on your computer and turn on computer, this LED will lit.
-
Page 28: Waveterminal 192X Control Panel
Waveterminal 192 7. Waveterminal 192X Control Panel Caution: This chapter is for Waveterminal 192X only If you complete the Waveterminal 192X hardware driver installation, you need to learn about the Waveterminal 192X Control Panel. This control panel is what you control your setup for the Waveterminal 192X. -
Page 29: Pull Down Menu
Waveterminal 192 1. Pull Down Menu The Waveterminal 192X control panel includes a pull down menu bar that contains the configuration menus for the Control Panel. 1. File - Exit File – Exit will close the Waveterminal 192X Control Panel window but it will not shut down the Control Panel. -
Page 30: Clock
Waveterminal 192 button shows you status of control panel of each card. For example, if you choose CARD2, The control panel becomes second card’s control panel. 2. Clock Select this menu for choosing digital clock source of the Waveterminal 192X. - Internal: Selecting ‘Internal’... -
Page 31: Digital In - Digital Input Selector
Waveterminal 192 Caution: When you select ‘Monitor & H.P.’ and start input monitoring, Output 5,6 will be changed as Headphone out. You can monitor same signal out of Line Out 1,2 through Output 5,6(H.P) Caution: Please do not use software monitoring and hardware monitoring in simultaneously. -
Page 32: Digital Type -Digital Format Selector
Waveterminal 192 Caution: It is not affect on recording in software. Regardless of this button, you can record in software safely. 1. Coaxial When you connect WT192X with MI/ODI/O, you can select MI/ODI/O’s Coaxial Input as digital input. 2. Optical When you connect WT192X with MI/ODI/O, you can select MI/ODI/O’s Optical Input as digital input. -
Page 33: Out/Mme -Output Level Adjust Fader
Waveterminal 192 8. OUT/MME –Output Level Adjust fader 1. OUT 1,2 3,4 5,6 – When you don’t use input monitoring. Output goes to Output port 1,2 3,4 5,6 directly as you set on your application. Click and drag to change Level. The numbers of bottom show the relative amount of level in dB. -
Page 34: Waveterminal 192L Control Panel
Waveterminal 192 8. Waveterminal 192L Control Panel Caution: This chapter is for Waveterminal 192L only If you complete the Waveterminal 192L hardware and driver installation, you need to learn about the Waveterminal 192L Control Panel. This control panel is what you control your setup for the Waveterminal 192L. -
Page 35: Pull Down Menu
Waveterminal 192 1. Pull Down Menu The Waveterminal 192L control panel includes a pull down menu bar that contains the configuration menus for the Control Panel. 1. File - Exit File – Exit will close the Waveterminal 192L Control Panel window but it will not shut down the Control Panel. -
Page 36: Clock
Waveterminal 192 2. Clock Select this menu for choosing digital clock source of the Waveterminal 192L - Internal: Selecting ‘Internal’ makes the Waveterminal 192L’s internal clock and it becomes master clock. When you use only one Waveterminal 192L or other device was set as slave, you have to choose this mode. -
Page 37: Digital In – Digital Input Selector
Waveterminal 192 Caution: It is not affect on recording in software. Regardless of this button, you can record in software safely. 1. LINE When you select this button, 192L accepts stereo LINE Input. 2. MIC When you select this button, 192L accepts MIC Input. 3. -
Page 38: Ana. In/ Dig. In – Input Level Meter
Waveterminal 192 1. Coaxial When you connect WT192L with MI/ODI/O, you can select MI/ODI/O’s Coaxial Input as digital input. 2. Optical When you connect WT192L with MI/ODI/O, you can select MI/ODI/O’s Optical Input as digital input. 3. MONITOR & H.P When you select this button, Digital Input signals goes to Output 1,2. -
Page 39: Out/Mme –Output Level Adjust Fader
Waveterminal 192 1. Ana. IN This is where to display Analog Input Level of WT192L. 2. Dig. IN This is where to display Digital Input Level of WT192L. 9. OUT/MME –Output Level Adjust fader 1.OUT 1,2 3,4 5,6 – When you don’t use input monitoring. Output goes to Output port 1,2 3,4 5,6 as you set on your application. -
Page 40: Setting In Applications
Waveterminal 192 9. Setting in Applications Waveterminal 192X & 192L are premium multimedia audio device designed to be used for professional audio work in a Windows environment. It has a wide range of usage from game sound to DVD surround sound. It is very easy to set up the WT192X & 192L in the multimedia setup of the windows control panel. -
Page 41: Windows Multimedia Setup
Waveterminal 192 1. Windows Multimedia setup The Windows Multimedia setup is required to use WT192X &192L as the sound system for Windows multimedia applications. Go to ‘My computer-> Control Panel -> Sounds and Audio Device Properties -> Audio tab. Select WT192 driver as your playback device. 2. - Page 42 Waveterminal 192 * You must check “DMA” in your DVD-Rom drive settings. IF you don’t check DMA, you cannot attain a crisp picture. On the Power DVD main applet, click the right mouse button, and choose ‘Configuration.’ Select ‘6 Speaker Output’. Now you can enjoy DVD with 5.1 channel surround sound.
- Page 43 Waveterminal 192 Caution: This is 5.1 channel surround sound route This order will be varied by your operating systems. Waveterminal 192 Output Speaker Front Front Center Woofer Surround Surround Left Right Left Right Caution. When you use 5.1 channel surround, you have to turn off ‘Input Monitor’.
-
Page 44: Asio 2.0- Cubase, Logic, Nuendo
Waveterminal 192 3. ASIO 2.0- Cubase, Logic, Nuendo -Cubase After launching Cubase, go to ‘System’ under ‘Audio’ menu. Select ‘ASIO 2.0 – Waveterminal 192’ for the ASIO device and ‘Waveterminal 192 Clock’ for the Audio clock source. - Page 45 Waveterminal 192 -Nuendo After launching Nuendo, go to Device -> Device setup ->VST Multitrack. Select ‘ASIO 2.0 –Waveterminal 192’ for the ASIO device and ‘Waveterminal 192 Clock’ for the Audio clock source. -Logic After launching Logic, go to Preference -> Audio Drivers2. Check the ‘ASIO’ and select ‘ASIO 2.0 –Waveterminal 192’.
- Page 46 Waveterminal 192 And go to ‘Synchronisation’ -> ‘MIDI’ and uncheck ‘Transmit MIDI Clock’ for better performance.
-
Page 47: Sonar/Cakewalk
Waveterminal 192 3. Sonar/Cakewalk Before you using Sonar, you have to do several setting first. You have to set proper latency on the control panel of 192X & 192L. After launching sonar, Go to ‘Option’ -> Audio and select ‘Wave Profiler’ of ‘General’ tab. - Page 48 Waveterminal 192...
-
Page 49: Sound Forge
Waveterminal 192 4. Sound Forge In Sound Forge, select ‘Option’ from menu bar. Select ‘Preference…’ then Wave tab. Choose ‘Waveterminal 192 2ch’ as Playback and Record device. -
Page 50: Wave Lab
Waveterminal 192 5. Wave Lab In Wave Lab, Go to Option -> Preferences -> Audio Card. Choose ‘Waveterminal 192 2ch’ as Playback and Record device. -
Page 51: Giga Studio (V. 2.20.42 Or Higher)
Waveterminal 192 6. Giga Studio (v. 2.20.42 or higher) If you want to use Waveterminal 192X & 192L with Giga Studio, you have to use Giga Studio v.2.20.42 or higher. Caution: If you want to use Giga Studio in Windows 2000 or XP, you need to use Giga Studio v.2.5. -
Page 52: Specifications
Waveterminal 192 10. Specifications 1. Waveterminal 192X 1. Input type : Analog Line_In - 2 Channel (1/4" TRS phone Plug) 2. Output Type : Analog Out - 6 Channel(3 Stereo 1/4" TRS phone Plug) Digital Out - Optical Out (TOS-LINK) 3. - Page 53 Waveterminal 192 2. Waveterminal 192L 1. Input type : Analog Mic_IN - 1 Channel(1/4" TRS phone plug) Analog Line_In - 2 Channel (Stereo 1/4" TRS phone Plug) 2. Output Type : Analog Out - 6 Channel (3 Stereo 1/4" TRS phone Plug) Digital Out - Optical Out (TOS-LINK) 3.
- Page 54 Waveterminal 192 3. MI/ODI/O 1. MIDI Interface 1) 16 Channel MIDI In/Out Interface 2. Coaxial Digital In/Out Spec 1) Format : IEC-958 Consumer(S/PDIF), IEC-958 Professional(AES/EBU) 2) Sample Rate : 16, 22, 24, 32, 44.1, 48, 88.2, 96, 176.4(192X only), 192 KHz 3) Resolution : 24 Bits 3.
Need help?
Do you have a question about the Waveterminal 192 and is the answer not in the manual?
Questions and answers