
Related Manuals for Apogee Trak2

Summary of Contents for Apogee Trak2
- Page 1 T T r r a a k k 2 2 2-channel mic preamplifier with 44.1/48/88.2/96 kHz sampling 24-bit A/D Converter Owner’s Manual UV22HR License Agreement ® v2.1 – March 2002...
- Page 2 Fax: +1 310/391-6262 Email: info@apogeedigital.com Web: http://www.apogeedigital.com/ This manual is copyright ©2001 by APOGEE ELECTRONICS CORPORATION. All rights reserved. Under copy- right laws, this manual may not be duplicated in whole or in part without the written consent of Apogee. Page 2...
- Page 3 Trak2 User’s Guide T T r r a a k k 2 2 2-channel mic preamplifier with 44.1/48/88.2/96 kHz sampling 24-bit A/D Converter Owner’s Manual UV22HR License Agreement ® v2.1 – March 2002...
-
Page 4: Warnings
AC voltage ratings for electrical power vary from area to area. Severe damage to your unit is possible if your Trak2 is configured incorrectly for your local power. If in doubt, consult an Apogee dealer. A label adjacent to the power connector indicates the voltage to which the unit was set on leaving the factory. -
Page 5: Registration & Warranty Information
This warranty is void if Apogee determines, in its sole business judgment, the defect to be the result of abuse, neglect, alteration or attempted repair by unauthorized personnel. -
Page 6: Declarations Of Conformity
• 89/336/EEC – EMC Directive Declaration of Conformity – Japan Apogee Electronics Corporation hereby declares that the Trak2, to which this declaration relates, is in material conformity with the VCCI Class A standard. Declaration of Conformity – Australia Apogee Electronics Corporation hereby declares that the Trak2 is in material conformity with AN/NZS standard requirements. -
Page 7: Licensing & Legal Information
Process provided with this license. You agree you will not copy the materials accompanying the Trak2. The material contained in this manual consists of information that is the property of Apogee and is intended solely for use by the purchasers of the equipment described in this manual. Apogee expressly prohibits the duplica- tion of any portion of this manual or the use thereof for any purpose other than the operation or maintenance of the equipment described in this manual without the express written permission of Apogee. -
Page 8: User's Installation Notes
Apogee. Remember — before calling technical support at Apogee, you must register this product either by sending in the registration card or by registering on the Apogee Web site (http://www.apogeedigital.com). The techni- cal support specialist will refer to the manual during your call and will expect that you have read it and under- stand the product to some degree. -
Page 9: Table Of Contents
Trak2 User’s Guide Table of Contents Warnings ...........................4 Registration & Warranty Information ................5 Service Information......................5 Declarations of Conformity....................6 Licensing & Legal Information ..................7 Owner’s record .........................7 User’s Installation Notes ....................8 About This Manual ......................8 The Manual Table of Contents......................9 General Product Description ..................11 Block Diagram..............................11 The Front Panel.......................12 Getting Around the Front Panel and LCD .....................12... - Page 10 Trak2 User’s Guide This page intentionally left blank Page 10...
-
Page 11: General Product Description
A two channel 24-bit/96kHz analog to digital converter • Balanced sends • One AES/EBU or S/PDIF output • Two Apogee Multimedia Bus (AMBus) card slots for optional digital interface cards • A serial/MIDI port • Optional 2-channel sample-rate converter card •... -
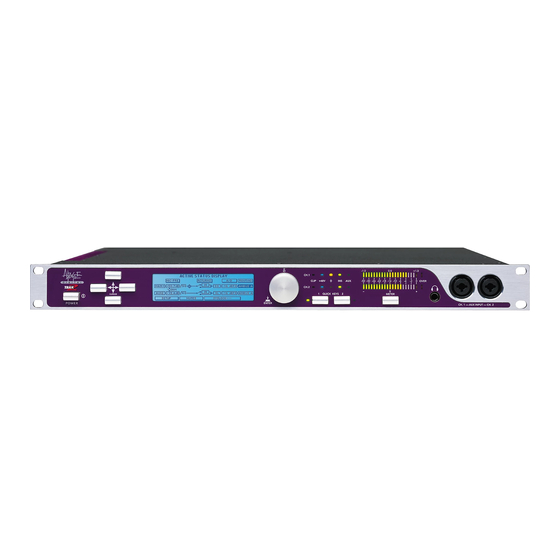
Page 12: The Front Panel
Trak2 User’s Guide Here are just some of the uses for the Trak2 (the possibilities are endless)… • Use the Trak2 to bypass the stock A/D and D/A converters on all your digital audio equipment – DAWs, MDMs, DATs, CDRs, FX processors, etc. with an audiophile quality, stand alone conversion solution that improves the sound of your recordings to any format. -
Page 13: Typical Uses For Line Input Mode
Trak2 User’s Guide The default screen is the Active Status Display (see opposite), which shows the overall configuration of the various inputs and outputs, gain, analog processing, and other useful information. It is possible to operate the Trak2 in most common recording situations just from the Active Status Display. Data wheel The data wheel allows data entry. - Page 14 Trak2 User’s Guide Typical uses for the line input mode • During mixdown from the line outputs of your console to the digital inputs of your DAT recorder, CD-R recorder, etc. • When recording balanced line level sources such as the direct output of a bass preamp. •...
- Page 15 Trak2 User’s Guide +4 dBu equals a reference level within a range from –20 dBFS to –10 dBFS. The unit comes calibrated from the factory so that +4 dBu = –16 dBFS. The OVER LEDs on the meters indicate a level of 0 dBFS or “full-scale” digital, that is, the highest level attainable in a digital system (a word of all binary 1’s).
-
Page 16: Tour Of The Back Panel
Trak2 User’s Guide Tour of the back panel MIC PRE IN: The microphone-level inputs are designed to accept many different types of microphones includ- ing dynamic, condenser, ribbon, tube, etc. +48V phantom power can be applied on the mic-pre inputs to power condenser microphones. -
Page 17: Aes/Ebu-S/Pdif Jumpers
G = GROUND AMBUS SLOTS A & B: The Apogee Multimedia Bus (AMBus) is a flexible digital I/O format that allows simul- taneous input and output of up to 8 channels of 24-bit audio. There are several AMBus cards currently available including: •... -
Page 18: Trak2 Lcd Display In Detail
Trak2 User’s Guide AES/EBU Jumper Setting S/PDIF Jumper Setting • To interface to S/PDIF (RCA) connectors, you will need a standard XLR-Female to RCA-Female adaptor such as those made by Neutrik and Switchcraft, or make up a cable in which XLR Pins 1 and 3 are connected to the sleeve of the RCA connector, and XLR Pin 2 is connected to the pin of the RCA connector. -
Page 19: Clocking Menu
Trak2 User’s Guide Trak2 Liquid Crystal Display in Detail The System Setup Menu The SYSTEM SETUP page is the topmost page in the menu hierarchy (continuing to EXIT from other pages will always get back to this page). You can navigate to any of the various screens from this page. - Page 20 Trak2 User’s Guide The Clocking Menu CRYSTAL: This field allows you to select the internal crystal (i.e., internal sync mode) and set the sampling frequency for the entire system. • Highlight the Crystal field using cursor keys. • Turn the data wheel to step through available crystal sampling frequencies (44.1, 48, 88.2, 96). •...
-
Page 21: Mic Preamp Menu
Trak2 User’s Guide Video Sync and Sampling Rates Video Horizontal Sync. Sample Rate(s) 60 Hz 15.75 44.056, 44.1, 44.144, 47.952, 48, 48.048 NTSC 15.734 44.056, 44.1, 44.144, 47.952, 48, 48.048 15.625 44.056, 44.1, 44.144, 47.952, 48, 48.048 XTAL 44.056, 44.1, 44.144, 47.952, 48, 48.048 Locking to a Video Sync Source Locking to a video sync source is very straightforward, thanks to the mediation of the microprocessor. - Page 22 Trak2 User’s Guide • Turn the data wheel clockwise to increase gain or counterclockwise to reduce gain. Gain ranges from –90 (attenuation) to +90 dB, with 0 being unity gain (no gain or attenuation). From the factory, this field defaults to incrementing in 1 dB steps. To change the size of the steps, cursor over to the ADVANCED field, press the data wheel to enter the advanced screen, and change the value in the GAIN STEP SIZE field using the data wheel.
-
Page 23: Advanced Mic Pre Menu
Trak2 User’s Guide • Highlight the “+48V” field for the desired channel. • Rotate the data wheel clockwise to turn on or counterclockwise to turn off phantom power. Mic Protect The Trak2 has a built-in feature to protect micro- phones (MICROPHONE PREAMPLIFIER/ ADVANCED MIC PRE SETTINGS) from accidental... -
Page 24: Line In/Returns Menu
Trak2 User’s Guide The Line In/Returns Menu This screen allows you to activate or de-activate the line-level inputs at the rear panel (LINE-IN). There are two basic input modes for the Trak2: Mic A/D and Line A/D. • Mic A/D mode (RETURN “OFF”) sends the signal from the mic preamplifier straight to the analog to dig- ital converter to be converted to digital and directed to the various digital outputs. -
Page 25: Advanced A/D Settings Menu
Trak2 User’s Guide Analog Reference This field sets the analog reference for the line-level inputs and the D/A outputs. There are two settings: • +4 dBu is usually used in professional audio equipment, including mixers, processors, and recorders. It is normally associated with XLR connectors. - Page 26 Trak2 User’s Guide To activate Confidence Monitoring: • Highlight the CONFIDENCE MONITOR field. • Press the data wheel to turn on Confidence Monitoring • Turn Data Wheel to select the AMBus Card source to monitor. You will hear the return from the selected card.
- Page 27 Trak2 User’s Guide Normal Monitoring (Confidence Monitor OFF) Pro Tools (Destination) Headphones/AES PRO TOOLS in AMBus A MATRIX AMBus B Mic/ Instrument Trak2 On DIGITAL IO screen, DIGITAL SOURCE: on DIGITAL TO ANALOG CONVERTER screen, CONFIDENCE MONITORING: PRO TOOLS In this NORMAL MONITOR setup, a mic or instrument is being routed to the routing matrix, and from there it is routed to all of the available I/O.
-
Page 28: Advanced D/A Settings Menu
Trak2 User’s Guide nel DAC) so that the DAC can be manually calibrated. The Trak2’s auto-calibration is very accurate so there is no need to further adjust the calibration once it has been auto-calibrated. The Advanced D/A Settings Menu This menu allows you to trim the D/A level manually, channel by channel, rather than by using the auto- matic calibration features of the unit. -
Page 29: Routing Menu
Trak2 User’s Guide The Routing Menu Routing in the Trak2 is extremely extensive; we suggest you read this section closely. The leftmost field of each of the four rows operates on all channels. So, for example, clicking on “UV22HR” will turn UV22HR on or off for all eight channels. THE TOP ROW: (From Left to Right) Digital In Displays which AMBus card is selected as a digital input to the Trak2. -
Page 30: Metering Menu
Trak2 User’s Guide • USER: Any of the above presets are modifiable by selecting an individual input channel field and turning the data wheel. As soon as you modify one of the presets, it becomes the User preset and the word ‘USER’ is displayed in the leftmost field. -
Page 31: Headphone Menu
Trak2 User’s Guide • Peak metering only with infinite peak hold • Peak and average metering with no hold • Peak and average metering with 2-second peak hold • Peak and average metering with infinite peak hold Over Threshold (OVER = ) This field allows selection of a “threshold”... -
Page 32: About Soft Limit
Apogee’s Soft Limit is not just another limiter. It uses a unique logarithmic algorithm with a ratio that gets steeper as the signal gets louder. With an extremely fast attack time (faster than you’ll find on almost any other limiter), it’s perfect for shaving spiky transients that cause digital overs but are not registered by the listener as... -
Page 33: Quick Key Definition Menu
Trak2 User’s Guide • CAUTION: The Soft Saturate feature is designed for tracking applications and may not lend itself so well to mixdown or mastering. The Quick Key Definition Menu Quick Keys (User assignable buttons): Quick Keys pro- vide ‘shortcuts’ to up to four commonly used fields. Note that the Quick Key press will only ‘jump’... -
Page 34: Oscillator Menu
Trak2 User’s Guide The Oscillator Menu Oscillator (ON/OFF) When turning on the oscillator, a 1 kHz sine wave is output via all of the Trak2’s available outputs (standard AES/SPDIF out, AMBus, analog outs and the headphone output). This test tone can be used to calibrate the operating levels of other analog and digital equipment to an accurate, central reference. - Page 35 Trak2 User’s Guide When recording live tracks, for example, you often need more headroom (because live tracks usually are fair- ly unpredictable in terms of level – you may be recording very low levels and very loud levels). For live tracking, you may want to calibrate the A/D converter to, say, -18 dBFs, so that you have 18 dB of headroom before hit- ting clipping.
-
Page 36: Trak2 Remote Control Application
Setting Up the Trak2 for Remote Control On your computer: Download the Trak2 Remote Control application from the Apogee web site, and install it on your computer. You will find the application at: http://www.apogeedigital.com/downloads/Trak2Remote035.hqx Install Open Music System (OMS) software on your computer; once the Trak2 is connected and configured (see below), create a new Midi Device which corresponds to the Trak2. -
Page 37: Saving And Loading Presets
Trak2 User’s Guide On the Trak2 Connect the Trak2 Option Cable to the COM port, and connect BOTH the MIDI Out and MIDI In to your Midi interface. Set the “COM PORT” field, in the COM menu, to MIDI. Remote Control of the Trak2 Once bidirectional communication is established between the Trak2 and the Remote Control application, it’s possible to control the parameters found in the three display windows shown below: When these parameters are changed either on the Trak2 or in the Remote Control application, their values are... -
Page 38: Updating The Trak2 Operating System
Updating the Trak2 Operating System To update the Trak2 Operating System, download the appropriate file from the Apogee website. The exact location from which the file can be downloaded will be noted on the web site when the an update is made avail- able. -
Page 39: About Uv22Hr Super Cd Encoding
In listening test after listening test, engineers and reviewers alike choose UV22 over all other systems. Many thousands of CD titles have already been mastered using Apogee UV1000 Super CD Encoders, the AD-1000, and the industry-standard AD-8000 and PSX-100. Apogee’s UV22 is today in use in the vast majority of US mastering houses, and it is estimated that as many as 80% of the hit records mastered in the United States today utilize UV22. -
Page 40: High-Density Conversion, Word Lengths And Interconnects
Glossary Apogee Bit-Splitting allows a 24-bit signal to be recorded to a normal 16-bit MDM such as an ADAT or DA-88 by using 2 tracks on the MDM for every 24-bit channel (for a maximum of four 24-bit tracks on the MDM). - Page 41 Soft Saturate Also a proprietary Apogee technology, Soft Saturate works similarly to Soft Limit but is more pronounced, emulating some of the compression and saturation characteristics of analog tape.
- Page 42 When recording a higher resolution signal (e.g., 24-bit) to a recorder that can only record a lower resolution (e.g., a 16-bit CD Recorder), the 8 least significant bits are discarded. Truncation can result in distortion and loss of audio quality. Dither, such as Apogee’s UV22, is used to combat the adverse effects of bit-reduction.
Need help?
Do you have a question about the Trak2 and is the answer not in the manual?
Questions and answers