Table of Contents
Advertisement
Advertisement
Table of Contents

Related Manuals for Sonic Frontiers Sonic Frontiers SFCD 1

Summary of Contents for Sonic Frontiers Sonic Frontiers SFCD 1
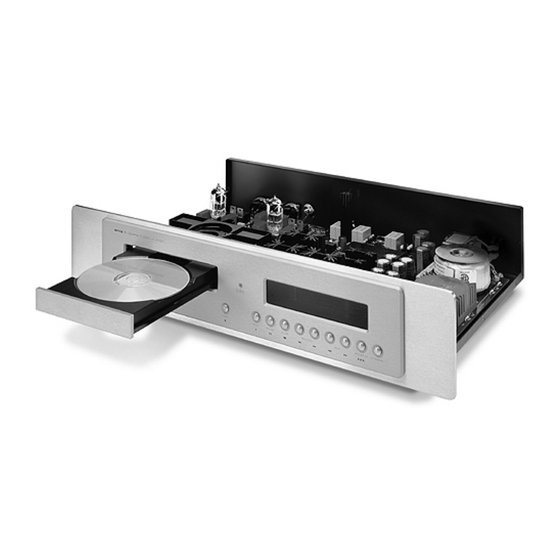
- Page 1 Operating Manual for the Sonic Frontiers SFCD 1 Compact Disc Player...
-
Page 2: Table Of Contents
Operating Manual for the Sonic Frontiers SFCD 1 Compact Disc Player We at Sonic Frontiers hope you will derive many years of listening pleasure with your new SFCD 1. This Operating Manual contains important information regarding the operation and care of this player. Be sure to read this manual carefully and follow these instructions in order to keep it performing and sounding its best. -
Page 3: Unpacking
Unpacking At this point we can assume that you have successfully opened the box flaps and found this manual. These boxes were designed to ensure the safe transport of the SFCD 1. Sonic Frontiers strongly recommends the storage of these boxes in a safe, dry place. In the event that the SFCD 1 may have to be shipped in the future, the original boxes are the best means for the protection and safety of the player during transportation. -
Page 4: Quick Setup
Quick Setup At this point we urge you to read and understand this manual in its entirety. But if you desire immediate action and have skill and/or past experience with tube hardware, fol- low these steps. 1. Place the player on a hard, flat, level surface. 2. -
Page 5: Reference Diagrams
Reference Diagrams This drawing is referred to as the “Chassis” within the instructional text. “A” indicates the tube socket location for the 6922 tubes labeled V500 and V600. Inspection of the printed board around the tube sockets reveals labels designating the sockets V500 and V600. - Page 6 This drawing is referred to as the “Front Panel” within the instructional text. This drawing is referred to as the “Rear Panel” within the instructional text. This drawing is referred to as the “Remote Control” within the instructional text.
- Page 7 Reference Diagram Labels Loading Drawer HDCD ® Display Window (Controls F thru M are also situated on the Remote Control) Load Button Play Button Pause Button Stop Button Search Forward and Reverse Buttons Skip Forward and Reverse Buttons Shuffle Button Standby/Power Button Main Power Switch Detachable Power Cord Socket...
-
Page 8: Installing The Tubes
Installing the Tubes Be sure the SFCD 1 is OFF (Main Power Switch on the rear panel in the “off” position) and the AC power cord is detached before installing any tubes or when any of the tube sockets are empty. Wearing the cotton gloves provided with the SFCD 1 when handling tubes will prevent skin oils from depositing on the glass surface of the tubes. -
Page 9: Controls, Functions And Connections
Controls, Functions and Connections Refer to Reference Diagrams. Front Panel Loading Drawer This is the mechanism for loading CDs for play in the SFCD-1. The drawer is opened by depressing the LOAD (F) button. A CD is placed in the tray‘s circular depression, label side up and lying flat. - Page 10 M Standby Button When depressed, this button will allow power to the player for full-function control. When (Power Button on this button is “off” and the MAIN POWER SWITCH (N) is “on”, a small amount of curre n t the remote control) will remain flowing through the tubes and certain sections of the player.
- Page 11 Refer to Reference Diagrams and to Front Panel Control descriptions. Remaining Remote Control Functions Numeric Keypad* This keypad allows tracks to be selected directly. Punch the desired track number and then the next function (either PLAY or PROGRAM) to complete the selection. Program Button* Tracks selected through the KEYPAD (S) or SKIP (K) buttons may be programmed for desired playback order by selecting a desired track then pushing the program button.
-
Page 12: Care And Maintenance
Care and Maintenance Placement The SFCD 1 must be placed on a hard, flat, level surface with plenty of unobstructed space around the player to allow for free movement of air for proper cooling. At no time should the air vents be covered or obstructed in any way. How do I know when to replace the tubes? Small signal tubes such as the 6922s generally age very slowly. - Page 13 Safety Instructions 1. Water and Moisture - This product should not be used near water. To prevent fire or shock hazard, do not expose this product to rain or moisture. 2. Heat - This product should be situated away from heat sources such as radiators, heat registers, stoves, or other appliances which produce heat.
-
Page 14: Warranty
Warranty Disclaimer of Liability Under no circumstances does Sonic Frontiers, Inc. assume liability or responsibility for injury or damages sustained in the use or operation of this equipment or for damages to any other equipment connected to it. Sonic Frontiers, Inc. reserves the right to make design changes or improvements without the obligation to revise prior versions. -
Page 15: Specifications
Specifications Note: Specifications ratings based on the nominal power line input. Intrinsic Jitter <8ps measured over bandwidth from DC to 40kHz Power Supply 3 toroidal power transformers featuring 12 stages of regulation Transport Mechanism Philips CDM 12.4 and L1210 loader D/A Converter UltraAnalog D20400A (1 Dual) Tube Complement...
Need help?
Do you have a question about the Sonic Frontiers SFCD 1 and is the answer not in the manual?
Questions and answers