Acer LCD monitor Quick Start Manual
Hide thumbs
Also See for LCD monitor:
- User manual (31 pages) ,
- Quick start manual (12 pages) ,
- Manual (9 pages)
Table of Contents
Advertisement
Quick Links
Precautions ....................................................................................................... 2
Special notes on LCD monitors........................................................................ 2
Package contents ............................................................................................. 3
Installation instructions ................................................................................... 3
Adjusting display settings................................................................................ 7
................................................................................................... 7
OSD options...................................................................................................... 8
.......................................................................................................... 8
Troubleshooting............................................................................................. 11
General specifications .................................................................................... 12
Table of Contents
.......................................................................................... 3
..................................................................................... 4
........................................................................................... 6
.............................................................................................. 7
1
Advertisement
Table of Contents

Related Manuals for Acer LCD monitor


Summary of Contents for Acer LCD monitor
-
Page 1: Table Of Contents
Table of Contents Precautions ....................... 2 Special notes on LCD monitors................ 2 Package contents ..................... 3 Installation instructions ................... 3 ..................3 Assembling the monitor ..................4 Adjusting the viewing angle ................... 6 Connecting the devices ....................7 Switching the power Adjusting display settings................ -
Page 2: Precautions
Recycling information Acer cares very much about protecting the environment, and firmly believes that the environment will be healthier if appropriate measures are taken to treat and recycle industrial technology products. Such products contain hazardous, poisonous substances that can seriously harm the environment. -
Page 3: Package Contents
Package contents LCD monitor Power cord Audio cable VGA cable DVI cable User's Guide (CD) Quick Start Guide Installation instructions Assembling the monitor Position the monitor on top of the base. Connect the base into the neck of the monitor along the track. -
Page 4: Adjusting The Viewing Angle
Adjusting the viewing angle The viewing angle of the monitor ranges from -5 – 20°. Adjusting the viewing angle (Only AL1923 h/AL1923 r) Your monitor features a multi-adjustable stand that will enable it move 100mm up/down (height adjustment), 25 degree forward/backward (tilt adjustment), 60 degree side/side (swivel adjustment). To make an adjustment, grasp the monitor with both hands on the right and left edge of the casing and move it to the desired position. -
Page 5: To Return To Original Position, Turn 90 Degrees In Counter Clockwise Direction. As Per Fig
Rotate Adjustment (Only AL1923 r): 1. Before adjusting the height, be sure to pull out the pin indicated in the figure. as per Fig. 1. 2. To rotate the screen, set the screen position to the highest height, as per Fig. 2. 3. -
Page 6: Connecting The Devices
Connecting the devices Caution: Make sure that the computer and the monitor are both disconnected from the power supply. Power cord Attach the monitor to the power cord, and then insert the power cord into a properly grounded electrical socket. VGA cable Connect the signal cable to the VGA input socket of the monitor, and connect the signal cable to the VGA output socket of the graphics card on the computer. -
Page 7: Switching The Power
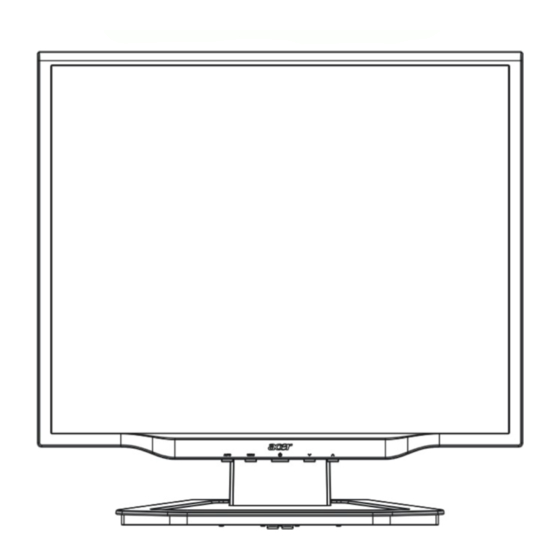
Switching the power First, switch on the hard-switch on the backside of monitor, then turn on PC and power button on monitor’s control panel. When you see the LED on the power button go green, this indicates the computer is ready for use. Allow about 10 seconds for the video signal to appear. If you do not see the green light on the power button or a video signal, check the connections. -
Page 8: Osd Options
OSD options Please refer to "External controls" on Page 7. To adjust the OSD settings: Press the Menu button to open the OSD menu. Use Plus/Minus buttons to toggle between the 10 OSD functions (and also to adjust the controls to desired levels once a function has been selected). - Page 9 Color adjustment: There are three ways to adjust color: Warm (reddish white) Cool (bluish white) User (you can adjust the colors red, green and blue to the intensity you desire) Language for Asia: Select the OSD menu language. Select from English, German, Spanish, Simplified Chinese, Traditional Chinese, French, Italian, and Japanese.
- Page 10 Input signal: Select either Analog Input or Digital Input video. Information: This shows information about the screen. Reset: Resets all settings to default levels. Exit: Exit from OSD.
-
Page 11: Troubleshooting
Troubleshooting Problem Possible Solutions Power LED is not ON Check to see if the power switch is in the ON position. Ensure that the Power Cord is connected. No picture Check to see if the power switch is in the ON position. Ensure that the power cord is connected. -
Page 12: General Specifications
General specifications Item Specification LCD panel Display 19-inch flat panel active-matrix TFT LCD Max resolution SXGA 1280×1024 pixels Pixel pitch 0.294 mm Color 16.2 M Brightness 280 cd/m² (Typical) Contrast ratio 1000:1 (Typical) Response time 8 ms (GTG) View angle of horizontal 178°...
Need help?
Do you have a question about the LCD monitor and is the answer not in the manual?
Questions and answers