Table of Contents
Advertisement
Quick Links
O
WNER'S
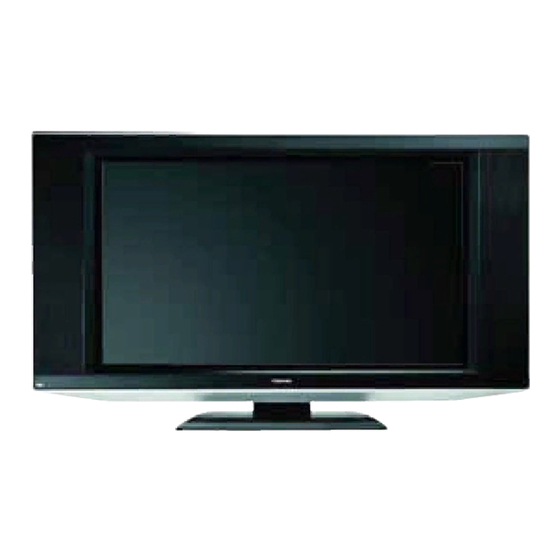
Plasma Color Television
42HP84
4
Downloaded from
www.Manualslib.com
M
ANUAL
manuals search engine
Owner's Record
The model number and serial number are on the back
of your TV. Record these numbers in the spaces below.
Refer to these numbers whenever you communicate
with your Toshiba dealer about this TV.
Model number:
Serial number:
E: ENGLISH
F: FRANÇAIS
S: ESPAÑOL
42HP84
E
F
S
Advertisement
Table of Contents

Related Manuals for Toshiba 42HPX84


Summary of Contents for Toshiba 42HPX84
-
Page 1: Plasma Color Television
Owner's Record The model number and serial number are on the back of your TV. Record these numbers in the spaces below. Refer to these numbers whenever you communicate with your Toshiba dealer about this TV. Model number: 42HP84 42HP84... -
Page 2: Child Safety
Dear Customer, Thank you for purchasing this Toshiba TV. This manual will Child Safety help you use the many exciting features of your new TV. Before operating the TV, please read this manual completely, and keep it nearby for future reference. -
Page 3: Important Safety Instructions
Important Safety Instructions Installation, Care, and Service Installation 1) Read these instructions. 2) Keep these instructions. Follow these recommendations and precautions and heed all 3) Heed all warnings. warnings when installing your TV: 4) Follow all instructions. 16) Never modify this equipment. Changes or modifications 5) Do not use this apparatus near water. - Page 4 (4:3) media on a widescreen (16:9) display (gray bars on left and right sides of screen). Care For better performance and safer operation of your TOSHIBA TV, follow these recommendations and precautions: Service WARNING: RISK OF ELECTRIC SHOCK! 27) If you use the TV in the room of 0°C or less, the picture...
- Page 5 Important notes about your Plasma TV The following symptoms are not signs of malfunction • Display a moving image whenever possible. but technical limitation. Therefore TACP/TCL • Always power down the display when you are finished using it. disclaims any responsibility for these symptoms. 6) Even though you follow the above recommendations, 1) Plasma display radiates infrared rays.
-
Page 6: Table Of Contents
Introduction ..............7 Using the programmed channel search function ..... 40 Using the favorite channel search function ....41 Welcome to Toshiba ............7 About the auto favorite feature ........ 41 Supplied accessories ............7 Using the LOCKS menu ..........42 Exploring your new TV ........... -
Page 7: Introduction
Plasma TV” on page 5. Welcome to Toshiba Thank you for purchasing this Toshiba TV, one of the most innovative plasma color TV. The goal of this manual is to guide you through setting up and operating your Toshiba TV as quickly as possible. -
Page 8: Exploring Your New Tv
Exploring your new TV You can operate your TV using the buttons on the side panel or the Remote control remote control. The A/V terminals for connecting other equipment to your TV are on the back panel and side panel (see illustrations below). POWER Also see “Connecting your TV”... -
Page 9: Connecting Your Tv
Component video cables come in sets of three and are for use with video devices with component video output. These cables are typically color-coded red, green, and blue. (ColorStream ® is Toshiba’s brand of component video.) Separate audio cables are required for a complete HDMI cable connection. -
Page 10: Connecting A Vcr
Connecting a VCR This connection allows you to watch local channels and video Note: programs, play or record on the VCR while watching TV, and record If you have a mono VCR, connect L/Mono to from one channel while watching another channel. VCR Audio OUT using only one audio cable. -
Page 11: Connecting A Cable Converter Box And Vcr
Connecting a cable converter box and VCR This connection allows you to watch and record basic and premium Note: cable channels, watch videotapes, and record one channel while If you have a mono VCR, connect L/Mono to watching another channel. To watch basic cable and use the TV’s VCR Audio OUT using only one audio cable. -
Page 12: Connecting A Dvd Player Or Satellite Receiver And A Vcr
Connecting a DVD player or satellite receiver and a VCR This connection allows you to watch DVD/satellite, VCR, and TV Note: programs, and record one TV channel while watching another For the highest possible picture quality from a DVD player or satellite receiver without channel. -
Page 13: Connecting A Dvd Player With Colorstream (Component Video) And A Vcr
Your TV has ColorStream ® (component video) inputs. Connecting between the TV and DVD player. your TV to a DVD player with component video (such as a Toshiba You can connect the component video cables ® DVD player with ColorStream... -
Page 14: Connecting A Dtv Receiver/Set-Top Box With Colorstream (Component Video) And A Vcr
Connecting a DTV receiver/set-top box with ® ColorStream (component video) and a VCR This connection allows you to watch DTV (digital TV), VCR, and Note: TV programs, and record DTV (component video) and TV For the highest possible picture quality, use component video cables (or an HDMI cable) programs. -
Page 15: Connecting Two Vcrs
Connecting two VCRs This connection allows you to record (dub/edit) from one VCR to Note: another VCR while watching a videotape. You also can record from If you have VCRs with S-video, use S-video cables instead of standard video cables for one TV channel while watching another TV channel. -
Page 16: Connecting An Hdmi™ Or A Dvi Device To The Hdmi Input
Connecting an HDMI™ or a DVI device to the HDMI input The HDMI input on your TV receives digital audio HDMI = High-Definition Multimedia Interface. and uncompressed digital video from an HDMI DVI = Digital Video Interface. device or uncompressed digital video from a DVI HDCP = High-bandwidth Digital Content Protection. -
Page 17: Connecting A Device To The Theaterlink
TV.) sensor ___________ *The TheaterLink OUT function has been verified for use with Toshiba infrared-controlled devices. Due to the wide variation in remote control operation among manufacturers, these functions may or may not operate with other brands. Downloaded from www.Manualslib.com... -
Page 18: Connecting An Audio System
Connecting an audio system This connection allows you to use an audio amplifier and external speakers, and adjust the audio level by using the TV’s remote control. To control the audio, turn on the TV and the stereo amplifier, and turn off the built-in speakers (see “Turning off the built-in speakers”... -
Page 19: Using The Remote Control
Preparing the remote control for use Note: Your TV’s remote control may not operate Your Toshiba TV remote control has one dedicated TV mode and five certain features on your VCR, cable TV universal modes: VCR, Cable/SAT, DVD, Audio1, and Audio2. The converter, or other electronic device. -
Page 20: Remote Control Functional Key Chart
Remote Control functional key chart Toshiba TV Cable Satellite DVD/LD Receiver CD/MD Cassette Key Label (TV) (CBL/SAT) (CBL/SAT) (AUDIO) (AUDIO) (VCR) LIGHT Lights the remote key, and toggles between enabled and disabled Illumination mode. SLEEP Sleep timer --- POWER Power... - Page 21 Toshiba TV Cable Satellite DVD/LD Receiver CD/MD Cassette Key Label (TV) (CBL/SAT) (CBL/SAT) (AUDIO) (AUDIO) (VCR) TV/VCR TV/SAT TV/VCR Reverse AM/FM DISC --- Disc shift AM/FM Disc shift Deck side A/B switch STOP Stop Stop Stop Stop REC** Record** Record**...
-
Page 22: Programming The Remote Control For Use With Your Audio/Video Devices
Programming the remote control for use with your audio/video devices Device code setup 1. Refer to the Device code table on pages 24–25 to find the code Note: for the brand of your device. • Every time you replace the batteries, you must reprogram the remote control. -
Page 23: Using The Volume Lock Feature (8000)
Using the volume lock feature (8000) For the TV, CABLE/SAT, VCR, and DVD modes, the volume controls (VOL yz and MUTE) can be programmed (locked) to the POWER selected device mode. This feature does not apply to the AUDIO1/2 LIGHT SLEEP CABLE/SAT modes. -
Page 24: Device Code Table
0139, 0110, 0127, TEXSCAN 1144 0111 0148, 0141, 0142 TOCOM 1135, 1136, 1147 TECHNICS 0121, 0122, 0123, MINOLTA 0100, 0145 TOSHIBA 1104, 1146 0124 MITSUBISHI 0138, 0140, 0147, UNIKA 1132, 1125 0148, 0141, 0142, TEKNICA 0124, 0127, 0112 UNIVERSAL 1122, 1132... - Page 25 7108, 7109, 7113 TECHNICS 3100 PANASONIC 7116, 7118 PIONEER 6108 THOMSON 3101 QUASAR 6125, 6127, 6124 PHILIPS 7122, 7121 TOSHIBA 3103 6147, 6137, 6138, PIONEER 7104, 7106 WAVE 3122 6131, 6152 7126, 7127, 7128, YAMAHA 3100, 3130 7134, 7135 SANSUI...
-
Page 26: Learning About The Remote Control
Learning about the remote control The buttons used only for operating the TV are described here. For a complete list of the remote control’s functions, see the “Remote Control functional key chart” on pages 20–21. turns the TV on and off POWER allows access to the automatic TV shut-off function (page 54) SLEEP... -
Page 27: Setting Up Your Tv
Setting up your TV Learning about the menu system TV side panel After you have installed the batteries and programmed the remote control, you will need to set some preferences on the TV by using the menu system. You can access the menu system using the buttons on your TV or the remote control. -
Page 28: Changing The On-Screen Display Language
Changing the on-screen display language You can choose from three different languages (English, French and TV side panel Spanish) for the on-screen display of adjustment menus and messages. To select a language: 1. Press MENU, and then press x or • until the SET UP menu appears. -
Page 29: Adding Channels To The Tv's Memory
Adding channels to the TV’s memory When you press Channel y or z, your TV will stop only on the Note: channels you program into the TV’s channel memory. To tune the TV to a channel not programmed in the channel memory, you must use the Follow the steps below and on the next page to program all active Channel Number buttons on the remote channels into the TV’s memory. -
Page 30: Adding And Erasing Channels Manually
Adding and erasing channels manually After you have automatically programmed the active channels into the TV’s channel memory, you can manually add or erase specific POWER channels. LIGHT SLEEP CABLE/SAT To add or erase channels: Channel AUDIO1 AUDIO2 1. Select the channel you want to add or erase. If you are adding a Number MODE channel, you must select the channel using the Channel Number... -
Page 31: Using The Tv's Features
Using the TV’s features Adjusting the channel settings Switching between two channels using Channel Return The Channel Return feature allows you to switch between two POWER LIGHT SLEEP CABLE/SAT channels without entering an actual channel number each time. To switch between two channels: Channel AUDIO1 AUDIO2... - Page 32 3. Press ENTER to display the FAVORITE CH menu. Note: CH INPUT will be highlighted. • The FAV buttons operate as MENU buttons when a menu is on-screen. • The favorite channel feature is not available FAVOR I TE CH in ANT2 mode.
-
Page 33: Labeling Channels
Labeling channels Channel labels appear above the on-screen channel number display each time you turn on the TV, change a channel, or press RECALL. You can choose any four characters to identify a channel. POWER LIGHT SLEEP CABLE/SAT To create channel labels: Channel 1. -
Page 34: Viewing The Wide-Screen Picture Formats (480I, 480P, And 1080I Signals Only)
Viewing the wide-screen picture formats (480i, 480p, and 1080i signals only) POWER LIGHT SLEEP CABLE/SAT You can view 480i, 480p, and 1080i format programs in a variety of Number AUDIO1 picture sizes—Natural, TheaterWide 1, TheaterWide 2, AUDIO2 TheaterWide 3, and Full. (The Full picture size is not selectable for MODE 1080i format programs.) PIC SIZE... - Page 35 TheaterWide 1 picture size (For 4:3 format programs) • The picture is non-uniformly Note: enlarged—the center of the • To select the picture size, press PIC SIZE picture remains close to its on the remote control or select PICTURE SIZE in the PICTURE menu. original proportion, but the left and right edges are stretched •...
-
Page 36: Scrolling The Theaterwide Picture (Theaterwide 2 And 3 Only)
® Scrolling the TheaterWide picture (TheaterWide 2 and 3 only) 1. Press PIC SIZE to select the TheaterWide 2 or 3 mode. 2. Press MENU, and then press x or • until PICTURE menu POWER LIGHT SLEEP CABLE/SAT appears. 3. Press y or z to highlight PICTURE SCROLL. AUDIO1 AUDIO2 MODE... -
Page 37: Using The Auto Aspect Feature
Using the AUTO ASPECT feature When the AUTO ASPECT feature is set to ON and the TV receives a Note: 480i signal, the picture size is automatically selected (as described in The AUTO ASPECT feature is available for the following table). additional formats when viewing HDMI sources because AUTO ASPECT operates based on information found in the digital... -
Page 38: Using The Pop Double-Window Feature
Using the POP double-window feature The POP (picture-out-picture) feature splits the screen into a double Note: window that allows you to watch two programs at the same time. The • The SPLIT buttons on the remote control operate the TV’s POP features. POP program can come from a TV broadcast or an external source, such as a VCR. -
Page 39: Switching The Main And Pop Pictures
Switching the main and POP pictures Press SWAP while you are using the POP feature to switch the main Note: and POP pictures. • If the POP program is not 480i format, it will not display in the main window when you press SWAP. -
Page 40: Double-Window Aspect Ratio
Double-Window aspect ratio The Double-Window feature displays each picture according to its Note: input signal aspect ratio, as illustrated below. • The AUTO ASPECT feature (page 37) does not operate in double-window mode. • Aspect ratio is the ratio of width to height of the picture. -
Page 41: Using The Favorite Channel Search Function
Using the favorite channel search function You can use the favorite channel search function to quickly scan your favorite channels (see “Programming your favorite channels” on page POWER 31). LIGHT SLEEP CABLE/SAT 1. Press FAVORITE. AUDIO1 The TV automatically enters multi-window mode, and begins a AUDIO2 MODE twelve-picture scan of your favorite channels in the... -
Page 42: Using The Locks Menu
Using the LOCKS menu The LOCKS menu includes the V-Chip, CH Lock, Video Lock, and Note: New PIN Code functions. You can use these functions after entering The V-Chip function is available for the U.S. the correct PIN code. V-Chip system only. The Canadian V-Chip system is not supported. -
Page 43: Enable Blocking
ENABLE BLOCKING 1. From the LOCKS menu, press z or y to highlight V-CHIP, and LOCKS menu then press ENTER. The V-CHIP menu appears. LOCKS 2. Press z or y to highlight V - CH I P CH LOCK V I DEO LOCK ENABLE BLOCKING, NEW P I N CODE V –... -
Page 44: Mpaa Rating (Independent Rating System For Movies)
MPAA RATING (Independent rating system for movies) 1. From the V-CHIP menu, press z or y to highlight MPAA RATING, and then press ENTER. MPAA RATING menu appears. V-CHIP menu 2. Press y or z to highlight MPAA RATING. MPAA RAT I NG NC17 PG13 PG V –... -
Page 45: Unlocking Programs Temporarily
Unlocking programs temporarily 1. If you try to watch a TV program that exceeds the rating limits you set, the TV enters program lock mode. After 4 seconds, the TV starts the auto favorite channel search function (page 41). You can either unlock the program temporarily (see steps 2–4 below) or select a non-locked program to watch. - Page 46 To unlock individual channels: 1. From the LOCKS menu, press y or z to highlight CH LOCK, then press ENTER. CH LOCK menu appears. 2. Press yzx • to highlight the channel you want to unlock, and then press ENTER. POWER CH LOCK CH LOCK...
-
Page 47: Locking Video Inputs
Locking the video inputs With the VIDEO LOCK feature, you can lock the input sources (Video 1, Video 2, Video 3, ColorStream HD1, ColorStream HD2, HDMI) and channels 3 and 4. You will not be able to select the input sources with the TV/VIDEO button or Channel buttons unless you clear the setting. -
Page 48: Adjusting The Picture
Adjusting the picture Selecting the picture mode Note: You can select your desired picture type from four picture modes: If you select one of the factory-set picture Sports, Standard, Movie, and Preference. modes (SPORTS, STANDARDS, or MOVIE) and then change a picture quality setting (for Mode Picture Quality example, increase the contrast), the picture... -
Page 49: Saving Your New Preferences
Saving your new preferences You can save the PICTURE qualities you adjusted (contrast, brightness, color, tint, sharpness, color temperature and CableClear DNR) in the picture PREFERENCE mode. To save your new preferences: 1. Press MENU, and then press x or • until the PICTURE menu appears. -
Page 50: Using Cableclear™ Dnr Feature
Using the CableClear™ DNR feature CableClear™ DNR reduces visible interference in your TV picture. This is useful when receiving a broadcast with a weak signal (especially a Cable channel) or playing a video cassette or disc damaged by repeated use. To turn on CableClear™... -
Page 51: Selecting The Cinema Mode
Selecting the cinema mode When you view a DVD movie (3:2 pulldown processed) from a DVD player connected to the ColorStream (component video) POWER LIGHT SLEEP inputs on the TV, smoother and more natural motion can be CABLE/SAT obtained by setting the CINEMA MODE to FILM (auto). AUDIO1 To set the CINEMA MODE to FILM (auto): AUDIO2... -
Page 52: Selecting The Video Input Source
Selecting the video input source Press INPUT on the remote control or TV/VIDEO on the TV to view a Note: signal from another device connected to your TV, such as a VCR or • When HDMI mode is selected, the VIDEO DVD player. -
Page 53: Using The Closed Caption Feature
Using the closed caption feature The closed caption feature has two options: POWER • Captions—An on-screen display of the dialogue, narration, and LIGHT SLEEP CABLE/SAT sound effects of TV programs and videos that are closed captioned (usually marked as “CC” in TV listings). AUDIO1 AUDIO2 •... -
Page 54: Setting The On-Timer
Setting the ON timer To set the ON timer to turn on the TV automatically: SLEEP 1. Press MENU, and then press x or • until the CUSTOM menu POWER POWER appears. LIGHT SLEEP CABLE/SAT 2. Press y or z to highlight ON TIMER, and then press ENTER. Number AUDIO1 AUDIO2... -
Page 55: Adjusting The Sound
Adjusting the sound Muting the sound Press MUTE to temporarily reduce (1/2 MUTE) or turn off (MUTE) the sound. While the sound is off, the screen will display “1/2 POWER MUTE” or “MUTE” in the lower right corner. Every time you press LIGHT SLEEP CABLE/SAT... -
Page 56: Using The Wow™ Surround Sound Feature
Using the WOW™ surround sound feature WOW is a special combination of SRS Labs audio technologies that Note: creates a thrilling surround sound experience with deep, rich bass If the broadcast is monaural, the WOW SRS from stereo sound sources. Your TV’s audio will sound fuller, richer, 3D surround sound effect will not work. -
Page 57: Adjusting The Sound Quality
Adjusting the sound quality You can change the quality of your TV’s sound by adjusting the bass, treble, and balance. To adjust the sound quality: 1. Press MENU, and then press x or • until the AUDIO menu appears. 2. Press y or z to highlight AUDIO SETTINGS, and then press ENTER. -
Page 58: Using The Stablesound Feature
® Using the StableSound feature When the signal source is changed, the StableSound feature limits the highest volume level to prevent extreme changes in volume (for example, to prevent the sudden increase in volume that often happens when a TV program switches to a commercial). To turn on the StableSound feature: 1. -
Page 59: Selecting The Audio Out Sound (Audio/Video Out Terminals)
Selecting the AUDIO OUT sound Note: When the POP window is closed, the sound of (AUDIO/VIDEO OUT terminals) the main program is output through the This feature allows you to select the sound source (MAIN or POP) AUDIO OUT terminals, even if POP is that is output from the AUDIO OUT terminals (for example, see selected in the AUDIO OUT menu. -
Page 60: Adjusting The Long Life Features
Adjusting the long life features The long life settings (Picture shift, Reverse, White, and Gray level) are to mitigate the phosphor burn-in of the plasma screen. Note : To reduce the risk of phosphor burn-in, the Picture shift Picture shift function activates as default. (Set The picture moves around the screen intermittently. - Page 61 White A white pattern is displayed on the whole screen. To display the white pattern: 1. Press MENU, and then press x or • until the SET UP menu appears. POWER LIGHT SLEEP CABLE/SAT 2. Press y or z to highlight WHITE, and then press ENTER. The white pattern will be displayed.
-
Page 62: Selecting The Background Of The Menu Display
Selecting the background of the menu display You can change the background of the menu display by selecting from two preset types: shaded and solid (gray). POWER LIGHT SLEEP CABLE/SAT To select the background: 1. Press MENU, and then press x or • until the CUSTOM menu AUDIO1 AUDIO2 appears. -
Page 63: Appendix
WARNING: RISK OF ELECTRIC SHOCK ! Never attempt to service the TV yourself. Opening and removing the covers may expose you to dangerous voltage or other hazards. Refer all servicing to a Toshiba Authorized Service Center. Television System HDMI INPUT:... -
Page 64: Troubleshooting
Troubleshooting Before calling a service technician, please check the following table for a possible cause of the symptom and some solutions. Symptom Solution TV will not turn on • Make sure the power cord is plugged in, then press POWER. •... -
Page 65: Limited United States Warranty
THE ORIGINAL CONSUMER PURCHASER AND TO NO OTHER For plasma TVs purchased in the United States, except Hawaii, PURCHASER OR TRANSFEREE. visit TACP’s web site at www.toshiba.com/tacp, or call toll PRODUCTS PURCHASED IN THE U.S.A. AND USED IN free 1-800-631-3811. -
Page 66: Limited Canada Warranty
Limited Canada Warranty for Wide Plasma Color TV Toshiba of Canada Limited (“TCL”) makes the following limited How to Obtain Warranty Services warranties to original consumers in Canada. If, after following all of the operating instructions in this manual and checking the “Troubleshooting”... -
Page 67: Index
Index Picture adjustments COLOR TEMPERATURE ..........49 ANT 1/2 ...................28 Picture mode ..............48 Antenna cables ..............9 Picture quality ..............48 AUDIO OUT sound, selecting ........59 Picture-out-picture (POP) Audio system connection ..........18 CH SCAN button ............40 Auto aspect ................37 POP CH yz buttons ............ - Page 68 Manufactured under license from Dolby Laboratories. “Dolby” and the double-D symbol are trademarks of Dolby Laboratories. ColorStream, StableSound, and TheaterWide are registered trademarks of Toshiba America Consumer Products, L.L.C. CableClear and SurfLock are trademarks of Toshiba America Consumer Products, L.L.C.
Need help?
Do you have a question about the 42HPX84 and is the answer not in the manual?
Questions and answers