Table of Contents
Advertisement
Advertisement
Table of Contents

Related Manuals for Tevion 4683

Summary of Contents for Tevion 4683
-
Page 2: Table Of Contents
Contents. Welcome Safety Information. Safety Instructions Features Before you start Inserting batteries in Remote Control Remote Control Controls and Connections Display Connection to external apparatus Getting Started Initial Setup DVD,HDD & USB Playback (Basic) DVD,HDD & USB Record (Basic) Instant Recording DVD,HDD &... -
Page 3: Welcome
Welcome. Congratulations on choosing to buy a Tevion product. By doing so you have now the assurance and peace of mind that comes with purchasing a product made by one of Europes leading manufacturers. All products brought to you by Tevion are manufactured to the highest standards of performance and safety, and, as part of our philosophy of customer service and satisfaction, are backed by our comprehensive 3 Yeat warranty. -
Page 4: Safety Information
Safety Information The lightning flash with arrowhead symbol, within an equilateral triangle, is intended to alert the user to the presence of un-insulated “dangerous voltage” within the products enclosure that may be of sufficient magnitude to constitute a risk of electric shock to the persons. The exclamation point within an equilateral triangle is intend to alert the user to the presence of important operating and maintenance (servicing) instructions in the literature accompanying the appliance. -
Page 5: Safety Instructions
2. Safety Instructions CAUTION. PLEASE READ AND OBSERVE ALL WARNINGS AND INSTRUCTIONS GIVEN IN THIS USER MANUAL AND MARKED ON THE APPLIANCE. RETAIN THIS BOOKLET FOR FUTURE USE. This set has been designed and manufactured to assure your personal safety. Improper use can result in Electric shock or Fire hazard. -
Page 6: Features
Features Apart from general DVD player functions, the DHR(DVD Harddisc recorder)system,RW+HDD+USB,features recording of live TV programs and life slices with higher video &audio quality,which will bring you sweet memory. Top recording function LPCM/MPEG digital audio decoder,AC-3/DTS Dolby digital audio output Hi-Fi audio quality,96KHz/24bit digital audio processing. -
Page 7: Before You Start
Before you start. In the box. Place the batteries as shown below, ensure Please check the contents of your player before that the + and - on the batteries continuing, you should have the following corresponds to the + and - inside the accessories:- compartment SCART Lead... -
Page 8: Remote Control
Remote Control 1. Standby 2. Open / Close 3. Numeric 0 – 9 4. Record Timer 5. Record (immediate) 6. Pause play 7. Fast Backwards 8. Previous track chapter 9. Fast Forward 10. Stop 11. Navigate Up. 12. Next track / chapter 13. -
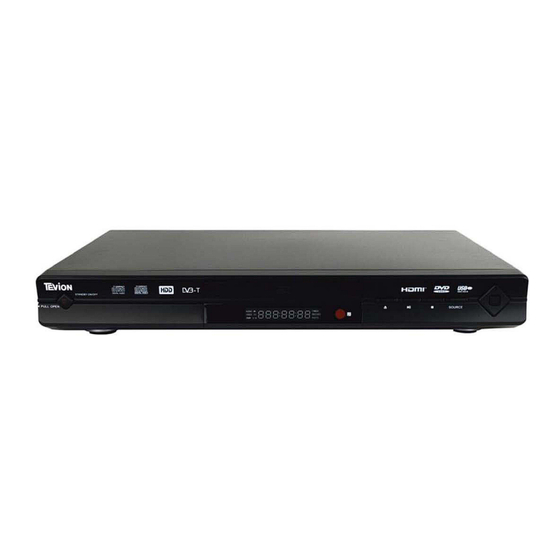
Page 9: Controls And Connections
Controls and Connections Front view 10 11 12 13 1415 16 17 1 2 3 4 5 1. Standby 9. Remote Control sensor 2. Video input 10. Open / Close 3. Audio input (Left) 11. Play / Pause 4. Audio input (Right) 12. -
Page 10: Display
Controls and Connections Display. 1. Video. Has video data on disc (DVD/ VCD). 2. Audio. Has audio data on disc (CD / DVD /VCD) 3. Play. Displays when playing disc. 4. Pause. Displays when disc is paused 5. Timer. Displays when Timer is set. 6. -
Page 11: Connection To External Apparatus
Controls and Connections Basic TV / Recorder connections Alternative AV connections SCART IN SCART OUT VCR or DVD player AV / S-VIDEO + Audio inputs. Note :- If using S-VIDEO connection do not use the Yellow CVBS video input. HELPLINE No UK / Northern Ireland 01422 26 32 98. Rep . Ireland No 1800 88 23 90. WEB SUPPORT. - Page 12 Controls and Connections Y Pb,Pr /Y Cb,Cr and External Audio amplifier connections Hi Fi audio amplifier Note :- Do not select “Progressive scan” if your TV cannot display progressive video. Connections to 5.1Ch Audio Amplifier Amplifier 5.1Ch audio inputs HELPLINE No UK / Northern Ireland 01422 26 32 98. Rep . Ireland No 1800 88 23 90. WEB SUPPORT.
- Page 13 Controls and Connections Connections to Digital audio amplifier Digital audio amplifier Coaxial Optical Input Input Choose input option Connections to DV and USB DV connection from Camcorder Note :- When you use the USB port to import signals you need to press mode USB memory pod first, then select USB IN.
-
Page 14: Getting Started
Getting Started. After unpacking the recorder, place on a firm stable surface and, if the room is warm, allow 15 to 20 minutes to acclimatise before using as there may be condensation on the laser optical lens. Please remember to keep the packaging away from small children and animals and keep safe, it may be needed in the future. -
Page 15: Initial Setup
Getting Started. System Menu DVBt (digital tuning setup). Fig 1 Press the SETUP button and using the ▲/▼/►/◄ buttons select “Setup”. (Fig 1). Press SELECT. Select one of the buttons 01/01/2008 12:00:00 AM Setup NO DISC Remain 00:00:00 SP Digital Tv. System DTV Channel Fig 2... - Page 16 Getting Started. Setup NO DISC Remain 00:00:00 SP Digital Tv. System DTV Channel England Playing Area Setting Germany Using the ►button enter the next menu using the ▼ button A / V Set Area Scan Italy Recording Manual Scan France select “Area Setting”.
-
Page 17: Dvd,Hdd & Usb Playback (Basic)
DVD, HDD and USB Playback. Basic When the disc is inside the recorder it will be “Read” and then the screen will display (DVD) in the top left corner. Some discs will start playing automatically, some will display a Disc contents menu. Using the ▲/▼/►/◄... -
Page 18: Usb Playback
DVD, HHD and USB Playback. Basic HDD Playback cont.. All the functions buttons have the same effect as DVD playback, when playing files from HDD. Fast forward and Fast reverse, Play, Pause, Stop. Next Chapter and Previous Chapter will select the Next and Previous files on the HDD Fig 10 Title List... -
Page 19: Dvd,Hdd & Usb Record (Basic)
DVD, HHD and USB Record. Basic Quick Recording. If you are watching a programme that you decide to record, press the REC button on the remote control or the Record button on the recorder. If there is no DVD disc in the recorder a message will be shown, “No Disc”. - Page 20 DVD, HHD and USB Record. Basic Timer Recording cont.. To move from box to box, press SELECT To move in a box press ▲/▼ then press R-AV SELECT TIMER SOURCE F-AV F –S VIDEO To Move backwards press RETURN SCART ONCE DATE MODE...
-
Page 21: Instant Recording
Instant Recording Fig 14 Instant Recording. Instant Recording NO DISC Remain 00:00:00 HQ The first item is “SOURCE”. To select the recording source move the cursor (Fig 14). If LEFT RIGHT Source you are recording from TV or DTV, you will need to select the Target DISC channel required. -
Page 22: Dvd,Hdd & Usb Operation (Advanced)
DVD, HDD and USB Operation. Advanced Disc Utility Fig 15 This feature is necessary to allow complete flexibility of discs that are to be recorded or have been recorded, to allow playing on other DVD players. The disc need to be formatted before recording Do you want to format it? FORMAT. - Page 23 DVD, HDD and USB Operation. Advanced DVD EDIT. Fig 22 To manage the DVD+VR contents , select DVD using the “SWITCH” button on the control. Press EDIT on the remote control, a menu will be displayed as in Fig 22. remote Rename Protect...
- Page 24 DVD, HDD and USB Operation. Advanced DVD EDIT cont. The following features are available when the disc is playing. Insert a home recorded Fig 30 DVD disc and start it playing. Press EDIT and select .. Insert Chapter INSERT CHAPTER. (Fig 30) Delete Chapter Mark Delete All Chapter Mark To insert a chapter, press SELECT when this feature is selected.
- Page 25 DVD, HDD and USB Operation. Advanced DVD Playing options. This recorder also plays discs of various types :- DVD, VCD, SVCD,CD audio,CD ROM, WMA, MPEG4, MP3/JPEG Each type of disc has different file structures. DVD . Pre Recorded. In most cases the disc will have a Menu system that can be viewed by pressing the TITLE button.
- Page 26 DVD, HDD and USB Operation. Advanced DVD Playing options cont.. Fig 49 WMA cont. [ \ \ ] 0001------WMA 01.\ 001. 001 - - - - - - - - - - 002. 002 - - - - - - - - - - - 003.
- Page 27 DVD, HDD and USB Operation. Advanced DVD Playing options cont.. Program Playing. (compatible with DVD,SVCD,VCD,CD, CD-G, MP3/JPEG and MP4 discs). All discs with file structures may be programmed to play the files in your preferred order, shown below is a typical file structure. Insert a disc and wait for the menu listing to be shown on screen (Fig 41).
- Page 28 DVD, HDD and USB Operation. Advanced DVD Playing options cont.. Subtitles. (DVD/SVCD). Most DVD’s have subtitles in various languages, depending on the title. To select the subtitle, press the button and a subtitle header will be shown, showing the language. Press the button until the title you require is shown.
- Page 29 DVD, HDD and USB Operation. Advanced HDD EDIT. Fig 42 To manage the HDD+VR contents, select HDD using the “SWITCH” button on the remote Rename control. Press EDIT on the remote control, a menu will be displayed as in Fig 42. Protect Delete Delete All Chapter Mark...
- Page 30 DVD, HDD and USB Operation. Advanced USB (Memory stick) EDIT. Fig 50 To manage the USB contents, select USB using the “SWITCH” button on the remote control. Press EDIT on the remote control, a menu will be displayed as in Fig 20 Rename Delete Copy...
-
Page 31: Time Shift
DVD, HDD and USB Operation. Advanced Time Shift. This recorder allows time shifting. You may record a programme to HDD and view it as it is recording with a time delay. Method 1. Time shift with Title Generation. To enter Time Shift, select HDD. Press SWITCH and select HDD. Select the source, i.e TV or DTV. -
Page 32: Setup
Setup Setup Fig 55 Setup 01/01/2008 12:00:00 AM NO DISC Remain 00:00:00 SP The Setup item is an entry for basic and advanced system settings. And the advanced settings are mainly for DVD playback. System TV System Playing Sereen Saver A / V Set Sys Language Recording... -
Page 33: Video Output
Setup Reset Setting Setup 01/01/2008 12:00:00 AM NO DISC Remain 00:00:00 SP Set all options back to the factory settings. System Audio Lang Playing Playing Subtitle Lang A / V Set Password Recording Menu Lang This item includes the following settings: Audio Lang (audio language), Subtitle Lang TV Tuner Rating Digital TV... -
Page 34: Spdif Output
Setup Notes: When using CVBS or S-Video out jack to connect to TV, you can select any of them. When TV is in the progressive scan mode, RGB can be selected. The default is YCbCr. TV Type In this item , three options are included, they are:4:3PS,4:3LB,16:9. PS 4:3: Pan Scan, available for general TV. -
Page 35: Channel Set
Setup Speaker In this item , there are 3 options to select , options are: All LG ,All sm,mixed. Recording In this item,three options are included:DVD quality,MEPG4 quality,AUTO chapter Take the selected quality of the MPEG 4 qualitity as an example, after selected the MPEG 4,there will be display six record quality as before. -
Page 36: Tv Operation (Advanced)
TV Operation (Advanced) Analog TV. Fig 59 After the basic setup, there are many other useful features to allow the full System TV Signal features of the recorder to be realised. Playing Auto Tuning A / V Set Channel Set Recording Manual Tuning Auto Tuning. - Page 37 TV Operation (Advanced) Analog TV cont. Manual Tune. Fig 62 This allows the user to add another channel if you need to. Before you start, Select an unused channel using Channel Number. Manual Tune Then select Manual Tune. Next Previoue Select START and press SELECT, the display (Fig 62) will be shown.
- Page 38 TV Operation (Advanced) Fig 68 Digital TV cont.. Channel Mode. (Fig 68 ). You may set the channels into groups, there are 8 to chose from :- 1 None, Channel Grouping Channel name 2 News, 3 Science, 4 Sports, 5 Movies, 6 Kids, 7 Music, 8 Fashion. 1 None 2 News 0003...
-
Page 39: Trouble Shooting Guide
Trouble shooting Guide This product has been tested to a thorough schedule, however should you experience a problem please consult the guide below before calling the Customer Help line at the bottom of the page. Symptom Possible cause Remedy Dead. No display. Power not connected. -
Page 40: Specification
Specifications HELPLINE No UK / Northern Ireland 01422 26 32 98. Rep . Ireland No 1800 88 23 90. WEB SUPPORT. www.ekey.co.uk Model number 4683... -
Page 41: Warranty
Warranty This product is guaranteed for twelve months from the date of the original purchase. In the unlikely event of any defect arising due to faulty materials or workmanship, the unit will be either replaced, a refund will be given or the unit will be repaired free of charge (where possible) during this period by the dealer from whom you purchased the unit.
Need help?
Do you have a question about the 4683 and is the answer not in the manual?
Questions and answers