Table of Contents
Advertisement
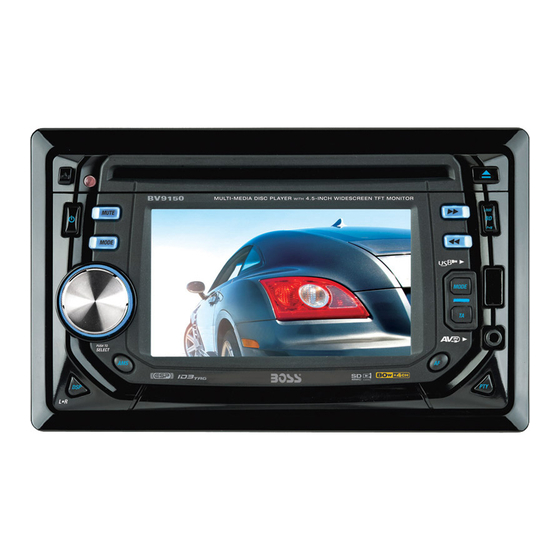
BV9150
MP3-COMPATIBLE DOUBLE-DIN IN-DASH DVD/MP3/CD
AM/FM RECEIVER WITH 4.5" (114mm) WIDESCREEN
TOUCHSCREEN TFT MONITOR
WITH USB AND SD MEMORY CARD PORTS AND
FRONT PANEL AUX INPUT
02.2012
iPod® is a trademark of Apple, Inc.
registered in the U.S. and other countries.
tech support: www.bossaudio.com/support
BOSS Audio Systems
3451 Lunar Court • Oxnard, CA 93030
www.bossaudio.com
800.999.1236
Boss Audio Systems is not affiliated with Apple, Inc.
User's Manual
BV9150
MP3-COMPATIBLE DOUBLE-DIN
IN-DASH DVD/MP3/CD AM/FM
RECEIVER WITH 4.5" (114mm)
WIDESCREEN TOUCHSCREEN
TFT MONITOR
WITH USB AND SD MEMORY CARD
PORTS AND FRONT PANEL AUX INPUT
Advertisement
Table of Contents

Related Manuals for Boss Audio Systems BV9150


Summary of Contents for Boss Audio Systems BV9150
- Page 1 FRONT PANEL AUX INPUT 02.2012 BOSS Audio Systems 3451 Lunar Court • Oxnard, CA 93030 www.bossaudio.com iPod® is a trademark of Apple, Inc. registered in the U.S. and other countries. 800.999.1236 Boss Audio Systems is not affiliated with Apple, Inc. tech support: www.bossaudio.com/support...
- Page 2 To ensure safety while driving and to comply with laws, drivers should not watch video or operate the video device while driving.
- Page 3 4.5" In-Dash Double-DIN DVD/MP3/CD Receiver with USB, SD Memory Card Ports and Front Panel AV Input...
-
Page 4: Handling Compact Discs
1. HANDLING COMPACT DISCS MOISTURE CONDENSATION On a rainy day or in a very damp area, moisture may condense on the lenses inside the unit. Should this occur, the unit will not operate properly. In such a case, remove the disc and wait for about an hour until the moisture has evaporated. -
Page 5: Installation
2. INSTALLATION Before finally installing the unit, connect the wiring temporarily and make sure it is all connected up properly and the unit and system work properly. Use only the parts included with the unit to ensure proper installation. The use of unauthorized parts can cause malfunctions. -
Page 6: Din Rear-Mount (Method B)
DIN REAR-MOUNT (METHOD B) Installation using the screw holes on the sides of the unit. Fastening the unit to the factory radio mounting bracket. Note: the mounting box, outer trim ring,and half-sleeve are not Screw Factory radio mounting bracket used for this installation. Note: The mounting box, metal half sleeve, hook &... -
Page 7: Electrical Connection
3. ELECTRICAL CONNECTION a. Make sure your car battery is a 12 volt (6 filler caps) negative ground system (if not, a converter will be necessary). b. Before starting wiring connections, disconnect the power supply by removing the fuse from the fuse box. - Page 8 BAND/ LOUDNESS/ PANEL APL/NTSC MUTE MODE POWER RELEASE BUTTON BUTTON BUTTON BUTTON BUTTON ENCODER SCAN FUNCTION VOLUME BUTTON SELECT BUTTON KNOB DISPLAY BUTTON INFRARED BUTTON EJECT REMOTE BUTTON SENSOR DSP/ AMS/ TUNING / LEFT/ FM MONO / PLAY/PAUSE SEEK RIGHT BUTTON STEREO UP/DOWN...
-
Page 10: Basic Operation
5. BASIC OPERATION PANEL RELEASE BUTTON Press this button to remove the control panel. POWER BUTTON Press power button to turn on/off the unit. DISPLAY BUTTON( DISP ) Press this button briefly, the LCD will display the clock for about 3 seconds, MUTE BUTTON ( MUTE) Press MUTE button to mute the sound quickly. -
Page 11: System Setup
6. SYSTEM SETUP Basic operation of menu setup 1. General setup menu In main menu,touch " " to enter into" SETTINGS" mode. 2.Choose menu setup * Touch cursor and choose setup menu. 3.Enter or exit menu * Touch in the menu and enter into" SETTINGS" menu. * Touch in the SETTINGS menu to exit current setup menu. -
Page 12: Radio Operation
7 . RADIO OPERATION RADIO FUNCTION KEY Touch the icon in any mode to go back to the main menu and select" RADIO" to enter the radio mode. 87.50MHZ 90.10MHZ 12:06 CH-00 98.10MHZ 87.50M 106.10MHZ 107.90MHZ 87.50MHZ Function description Serial number Name Information CURRENT BAND AND FREQUENCY... - Page 13 FM MONO / STEREO BUTTON (MONO) Use this control to select stereo or mono reception for FM radio stations. You can sometimes improve reception of distant stations by selecting mono mode. LOCAL / DX BUTTON (LOC) This control can be used to change between Local and Distant (-DX) tuning mode. Local mode improves reception in some areas where the signal is too strong.
-
Page 14: Name Function
8. DISC/MULTI-MEDIA FILES OPERATIONS The playing file is a Music file. The playing file is a Photo file. File Switch Region: Displays the file type of the playing and the switching. Function KEY AUDIO MENU TITLE DESCRIPTION NAME FUNCTION Menu CURRENT DIRECTORY NAME Information DISPLAY DISC INFO RMATION... -
Page 15: Play/Pause Button
MULTI-MEDIA FILE OR FOLDER SEARCHING CD SLOT Insert the disc into CD slot. The CD will begin to play. EJECT BUTTON Press this button to eject the CD from the unit. The receiver will switches to radio mode automatically. PLAY/PAUSE BUTTON ( Press this button briefly to pause disc play, press again to resume play. - Page 16 GO TO BUTTON (GO TO) Using GO TO feature to select track number or specific time. A. Press GO TO button,the screen will display the following message: T R K 0 0 1 / 0 2 1 0 0 : 0 1 : 5 6 B.
- Page 17 9. PLAY MULTI-MEDIA FILES OPERATION Place a disc into the player, and the player will automatically search the directories saved files. After searching, it will auto go to the first directory saved files (to the disc containing both Music and Photo files;...
- Page 18 10. MMC/SD CARD & USB DEVICE OPERATIONS START THE USB DEVICE MODE USB SOCKET P .1 1.The USB mini socket is accessible as indicated in picture 1.(P .1) 2.Plug in the USB drive / device completely as indicated in picture 2(P .2) and display will show “USB” to indicate that the USB drive / device is being plugged in correctly &...
- Page 19 START THE SD/MMC MODE P .4 1.Press panel release button to release the front panel.(P .4) 2.The SD/MMC card slot is located on top of the front panel as indicated in (P .5). 3. Insert the SD/MMC card into the card slot in the correct direction until a “CLICK”...
- Page 20 11. VIDEO DISC OPERATIONS DVD TT 01/05 CH 011/018 01:11:56 AUDIO MENU TITLE Name Function Description Information bar DISPLAY DISC INFO. ANGLE BACK TO MAIN MENU MOVE CURSOR UP/DOWN/LEFT/RIGHT CONFIRM SELECTED INFORMATION PAUSE/PLAY BACK TO MAIN MENU OF DISC PREVIOUS MUSIC/ NEXT MUSIC BACKWARD/ FORWARD...
-
Page 21: Play Button
10 11 HUE - / HUE + USER/STDY /BRIG/ SOFT /SHAR PLAY BUTTON ( Press this button briefly to pause disc play, press again to resume play. STOP BUTTON( Stop the current disc playback. Briefly press the STOP button to stop the unit playback,when the PLAY button is pressed,normal playback will continue. - Page 22 NUMERIC BUTTONS Use when playback disc which need numeric Selection or Input, like in the Goto function, etc. PAL/NTSC BUTTON (P/N) In order to achieve the best image display effect, you must adjust the player signal system to match your TV set. 3 types of TV color signal system are available: NTSC, PAL60 or Automatic mode.
- Page 23 PBC FUNCTION BUTTON (PBC) Press the “PBC” button to turn on PBC function. The unit will show the song list on the screen of the monitor after the WARNING from the Video CD. Then you can choose the song by pressing the desired number key. Press PBC key return to manual of Video CD, NOTE:This only operates with the PBC function on VCD.
-
Page 24: Osd Button
SUBTITLE BUTTON (SUBTITLE) 1. Press SUBTITLE button to bring up the subtitle information which will be shown on the top right corner of the screen. 2. Each time you press SUBTITLE, you can switch to another subtitle available in the disc. NOTE:This only operate if the disc with the SUB TITLE function. -
Page 25: Setup Menu Operation
12. SET UP MENU OPERATION General Steps of Setup Menu 1) Press the Setup button, the main setup menu appears. When the main menu displayed, the Video will auto pause. 2) Press the Left and Right arrow buttons to highlight the icon of the desired page, then press the Down or Right arrow button to activate that page;... -
Page 26: Screen Saver
4) Press the Arrow buttons to highlight the Exit Setup option, then press Enter or Setup again to exit Setup Menu. NOTE: When setup, the pressing setup buttons will turn off the setup menu, while the choices that have been changed will be saved. Setup Items Introduction 1) SYSTEM SETUP The system setup options are illustrated below:... -
Page 27: Language Setup
TV TYPE 16 : 9 (Wide Screen): Choose this setting if your Multi-Media player is connected to a wide screen TV. If you choose this setting and you don't have a wide screen TV, the images on the screen may appear distorted due to vertical compression. 4 : 3 LB (Letter Box): Choosing this setting if your Multi-Media player is connected to a normal... - Page 28 OSD LANGUAGE Highlight the OSD LANGUAGE option, and press the Arrow buttons to choose the OSD language you prefer. Press Enter to confirm, and it will display OSD in that language. AUDIO LANG Highlight the AUDIO LANG option, and press the Arrow buttons to choose the audio language you prefer.
-
Page 29: Specifications
13. SPECIFICATIONS CD PLAYER Compact disc audio system System Compact disc, CD-R, CD-RW Usable disc 44.1KHz Sampling frequency 1bit No of quantization bits 5-20,000Hz Frequency 2 stereo Number of channels 70dB S/N Ration RADIO SECTION 87.5 -108 MHz (EURO) Frequency Range 87.5 -107.9 MHz (USA) 10.7 MHz Intermediate Frequency...
Need help?
Do you have a question about the BV9150 and is the answer not in the manual?
Questions and answers