Table of Contents
Advertisement
Advertisement
Table of Contents

Related Manuals for Acer AT2001


Summary of Contents for Acer AT2001
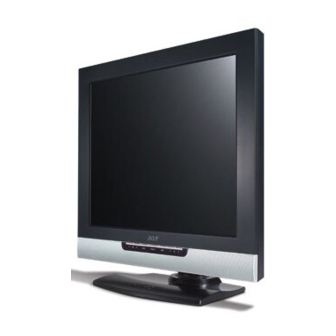
- Page 1 Acer LCD TV AT2001 User's Guide...
- Page 2 All Rights Reserved. Acer AT2001 User' s Guide Original Issue: May 2005 Acer and the Acer logo are registered trademarks of Acer Incorporated. Other companies’ product names or trademarks are used herein for identification purposes only and belong to their respective companies...
-
Page 3: Table Of Contents
Contents Important safety instructions...................5 Taking care of your remote control................. 6 Cleaning and servicing....................6 Declaration of Environmental Protection Conformity..........6 BEFORE YOU START ....................7 What’s in the Box .................... 7 YOUR LCD TV AT A GLANCE..................8 Control Panel ....................8 Left-side Connectors.................. - Page 4 6-1-1 ADJUSTING THE VOLUME ..............26 6-1-2 SELECTING PROGRAMMES ............... 28 Using the On-Screen Display (OSD) .............. 29 6-2-1 MAKING ADJUSTMENTS..............29 OSD Menus and Options ................30 6-3-1 With Source Input Set to TV..………….........30 ADVANCED SETTINGS ....................34 Setting the Sleep Timer................. 34 Displaying Teletext ..................
-
Page 5: Important Safety Instructions
Important safety instructions Read these instructions carefully. Save them for future reference. Follow all warnings and instructions marked on the product. Unplug this product from the power outlet If an extension cord is used with this product, before cleaning. Use a soft, moist cloth for make sure that the total ampere rating of cleaning. -
Page 6: Taking Care Of Your Remote Control
Taking care of your remote control Follow these steps to ensure proper care of your remote control: • Handle the remote control with care. Dropping it, placing it in direct sunlight, or allowing it to get wet may cause damage. •... -
Page 7: Before You Start
1 BEFORE YOU START 1 BEFORE YOU START 1-1 What’s in the Box 1-1 What’s in the Box When you receive your LCD TV, unpack it carefully, and check to make sure When you receive your LCD TV, unpack it carefully, and check to make sure you have all the items below. -
Page 8: Your Lcd Tv At A Glance
2 YOUR LCD TV AT A GLANCE 2-1 Control Panel BUTTON VIEWING FUNCTION (OSD OFF) MENU FUNCTION (OSD ON) Lowers the sound level. Reduces a menu option value. Increases the sound level. Displays a submenu with selections for the current menu option. Increases a menu option value. -
Page 9: Left-Side Connectors
2-2 Left-side Connectors To access these connectors , you will need to open the protective cover. CONNECTOR DESCRIPTION TUNER (UHF/VHF-CATV) - Connect to antenna, cable service, or VCR. S-Video - Connect an S-video device, such as a DVDplayer or VCR, to this connector. -
Page 10: Back Connectors
2-3 Back Connectors CONNECTOR DESCRIPTION DC-in - Connect the AC power adapter to this. VGA - Connects to a computer’s VGA terminal output. Audio-in - Connects to a computer’s audio out jack. Audio-out - Connect a headphone, external amplifier, or speakers to this. -
Page 11: Your Remote Control At A Glance
3 YOUR REMOTE CONTROL AT A GLANCE 3 YOUR REMOTE CONTROL AT A GLANCE... - Page 12 BUTTON DESCRIPTION POWER Turns the selected component ON/OFF. Selects a programmed TV. INPUT Changes the input source. Changes the audio output. SLEEP Turns on the sleep timer. UP/DOWN Navigates up and down in the on-screen display (OSD) menus. LEFT/RIGHT Navigates left and right in the on-screen display (OSD) menus.
-
Page 13: Basic Lcd Tv Setup
4 BASIC LCD TV SETUP 4 BASIC LCD TV SETUP 4-1 Connecting to the Aerial 4-1 Connecting to the Aerial Connect the outdoor aerial (antenna) cable lead or your cable TV box to the Connect the outdoor aerial (antenna) cable lead or your cable TV box to the TUNER (UHF/VHF-CATV) jack on the back of your LCD TV using an RF (coaxial) TUNER (UHF/VHF-CATV) jack on the back of your LCD TV using an RF (coaxial) 2-2 Left-side Connectors... -
Page 14: Plugging In Your Lcd Tv
4-3 Plugging In Your LCD TV 1. Connect the power cord to the power cord connector on the back of your LCD TV. 2. Plug the other end of the power cord into a properly grounded electrical outlet or surge protector. -
Page 15: Turning On The Power
4-4 Turning ON the Power Press the Power button on the top of the LCD 2-1 Control Panel TV (see for location). The Status LED on the front turns green and your LCD TV turns on. -OR- Press the POWER button on your remote control. -
Page 16: Tuning Channels Automatically (Auto Setup)
4-5 Tuning Channels Automatically (AUTO SETUP) Use this option to quickly add all channels that have a signal to the channel list. TO TUNE CHANNELS AUTOMATICALLY 1. Press the MENU button on the remote control to open the OSD. 2. Press the buttons to select SETUP. -
Page 17: Programme Sort
4-6 Programme Sort To sort the channels so that, for example, BBC1 is stored as number “1”, follow the steps below: 1. Press the MENU button. The Main Menu will appear. 2. Press the buttons to highlight SETUP. 3. Press to select. - Page 18 Now you will be able to select programmes using the number pad or the CH+/- buttons on your remote control. NOTE: You may also change the CHANNEL number (middle column) allocated to the PRG numbers (left column) as follows: In the Programme Sort menu... 1.
-
Page 19: Naming Channels
4-7 Naming Channels Use this option to give a channel a name, e.g. BBC1. 1. Press the MENU button on the remote control to open the Main menu. 2. Press the buttons to select SETUP. 3. Press to select. The Setup menu opens. 4. -
Page 20: Tuning Channels Manually (Manual Tuning)
4-8 Tuning Channels Manually (MANUAL TUNING) Use this option to add certain channels to the channel list. TO ADD CHANNELS MANUALLY 1. Press the MENU button on the remote control to open the OSD. 2. Press the buttons to highlight SETUP. 3. -
Page 21: Connecting External Devices
5 CONNECTING EXTERNAL DEVICES Read this section to learn how to connect the following devices: DVD players HDTV decoder set-top boxes VCRs Computers WARNING! Before connecting any external components, make sure to unplug your LCD TV and any connecting devices to prevent damage. -
Page 22: Connecting A Composite Device
5-2 Connecting a Composite Device 1. Connect the yellow video jack from your composite device to the yellow AV jack on the side of your LCD TV with an RCA cable (not supplied). 2. Connect the red (R) and white (L) audio jacks from your composite device to the AV R and L audio-in jacks on the side of your LCD TV. -
Page 23: Connecting A S-Video Device
5-3 Connecting a S-Video Device 1. Connect one end of the S-video cable (not supplied) to your device and the other end to the S-video jack on the left-side of your LCD TV. 2. Connect the red (R) and white (L) audio jacks from your device to the AV R and L audio-in jacks on the side of your LCD TV. -
Page 24: Connecting A Vcr Using Coaxial (Rf)
5-4 Connecting a VCR Using Coaxial (RF) 1. Connect the “output to TV” (RF out or Antenna out) jack on the back of your VCR to the TUNER (UHF/VHF-CATV) jack on the back of your LCD TV with the supplied RF lead. 4-4 Turning ON the Power 2. -
Page 25: Connecting Speakers
5-5 Connecting Speakers Connect a headphone or speakers to the Audio-out jack on the back of your 2-3 Back Connectors Connectors LCD TV. See for the location of the Audio-out jack. -
Page 26: Adjusting Settings
6 ADJUSTING SETTINGS 6-1 Basic Operations 6-1-1 ADJUSTING THE VOLUME You can adjust the volume in two ways - from your LCD TV’s front panel or by using the remote control. To adjust volume from the front panel: Press to increase/decrease the sound level. - Page 27 TO ADJUST VOLUME FROM THE REMOTE TO ADJUST VOLUME FROM THE REMOTE Press VOL Press VOL (see illustration for location) to turn the volume up or down. TO TEMPORARILY TURN OFF VOLUME (MUTE) Press the MUTE button on the remote control. TO TURN VOLUME BACK ON Press the MUTE button again or press VOL...
-
Page 28: Selecting Programmes
6-1-2 SELECTING PROGRAMMES TO SELECT PROGRAMMES FROM THE LCD TV Press to select programmes. TO SELECT PROGRAMMES FROM THE REMOTE Press CH (see illustration for location). Press the number buttons on the number pad (see Your Remote Control At a Glance for location). -
Page 29: Using The On-Screen Display (Osd)
6-2 Using the On-Screen Display (OSD) 6-2 Using the On-Screen Display (OSD) Your LCD TV features an on-screen display (OSD) that lets you adjust and save Your LCD TV features an on-screen display (OSD) that lets you adjust and save contrast, brightness, and other settings. -
Page 30: Osd Menus And Options
6-3 OSD Menus and Options You can use these OSD menus and options to adjust various settings for your LCD TV. 6-3-1 With Source Input Set to TV Main Menu Input Select Menu Use this menu to switch between available signal input sources. NOTE: AV shares the either S-video or CVBS (RCA phono). - Page 31 Picture Menu Brightness - Adjusts the luminance of the image. Contrast - Adjusts the contrast ratio. Colour - Adjusts the colour saturation, making colours more or less intense. Sharpness - Adjusts the sharpness of the image. Restore - Select ON to use factory default image settings.
- Page 32 Language Menu Use this menu to change the language of the OSD menu. Special Features Menu Sleep Timer - Turns the sleep timer ON/OFF. Select 30, 60, or 90 minutes. Teletext - Choose between displaying the FASTEXT line and a LIST of menu commands.
- Page 33 Setup Menu Country - Select the appropriate country signal. If your country is not listed, choose one that uses the same TV system. Colour System - Select a colour system. Choices are Auto, PAL, and SECAM. Sound System - Select from BG, DK, I, and L.
-
Page 34: Advanced Settings
7 ADVANCED SETTINGS 7-1 Setting the Sleep Timer The sleep timer allows your LCD TV to automatically turn OFF after a given amount of time. TO SET THE SLEEP TIMER USING THE REMOTE CONTROL 1. Press the TV button. 2. Press the SLEEP button on the remote control. -
Page 35: Displaying Teletext
7-2 Displaying Teletext Many television stations provide Teletext, a written information service, in addition to regular television broadcasting. Information such as television program times, news bulletin, weather forecast, stock exchange prices, and closed captioning for the deaf, are sent by a TV station to your LCD TV through special Teletext signals and displayed on screen. -
Page 36: Troubleshooting And Support
TROUBLESHOOTING AND SUPPORT Before contacting customer service, use the following information to solve common problems. No Picture Make sure that the power cord is properly plugged into a grounded electrical outlet. Make sure that the main power switch and power button are turned ON. Make sure that the selected video input source is connected to a working device. - Page 37 Normal Picture, No Sound Make sure that the volume is not turned down. Make sure that the sound is not muted. Make sure that your audio input source cables are connected securely and correctly. Wrong Image Size If you are using VGA mode, make sure that the H-Position and V-Position in the OSD is set correctly.
-
Page 38: Product Specifications
PRODUCT SPECIFICATIONS Model Name AT2001 Panel spec Resolution 800*600 Brightness (typ.) 450 nits Contrast Ratio (typ.) 500:1 Display color 16.7 M Viewing Angle (typ.) H:160 ; V:120 Response Time (typ.) 16 ms (gray to gray) Power Supply Input 100V~240V-AC Max. Power Power Saving Mechanical Dimensions (W*H*D)
Need help?
Do you have a question about the AT2001 and is the answer not in the manual?
Questions and answers