Table of Contents
Advertisement
Advertisement
Table of Contents

Related Manuals for AEG LAVAMAT 62840


Summary of Contents for AEG LAVAMAT 62840
- Page 1 LAVAMAT 62840 User manual Washing machine...
- Page 2 Dear Customer Thank you for choosing one of our high-quality products. With this appliance you will experience the perfect combination of functional design and cutting edge technology. Convince yourself that our appliances are engineered to deliver the best performance and control - indeed we are setting the highest standards of excellence.
-
Page 3: Table Of Contents
Contents Contents Instruction for the user Safety information Product description Detergent dispenser drawer Control panel First use Personalization Acoustic signals Child safety lock Daily use Load the laundry Measure out the detergent and the fabric softener Select the required programme Select the spin speed or the Rinse Hold option Programm option button Select the PREWASH option... - Page 4 Contents Opening the door after the programme has started At the end of the programme Washing programmes 20-21 Programme information Preparing the wash cycle 23-27 Sorting out the laundry Temperatures Before loading the laundry Maximum loads Laundry weights Removing stains Detergents and additives Quantity of detergent to be used Degrees of water hardness...
- Page 5 Contents Something not working 34-37 Techinical Data Consumption value Installation 40-46 Unpacking 40-41 Positioning and levelling Water inlet 42-43 Water-stop device Water drainage 43-44 In the interest of the environment Electrical connection 45-46 Enviroment concerns Packaging materials Old machine Ecological hints Guarantee Customer service centres...
-
Page 6: Instruction For The User
Instruction for the user Safety information Prior to using for the first time The safety of AEG/ELECTROLUX appliances complies with the industry ● standards and with legal requirements on the safety of appliances. However, as manufacturers, we feel it is our duty to provide the following safety notes. - Page 7 Safety information Wash small items such as socks, laces, washable belts etc in a washing bag or ● pillow case as it is possible for such items to slip down between the tub and the inner drum. Do not use your washing machine to wash articles with whalebones, material ●...
-
Page 8: Safety Information
Safety information Before washing, ensure that all pockets are empty and buttons and zips are ● fastened. Avoid washing frayed or torn articles and treat stains such as paint, ink, rust, and grass before washing. Underwired bras must NOT be machine washed. -
Page 9: Product Description
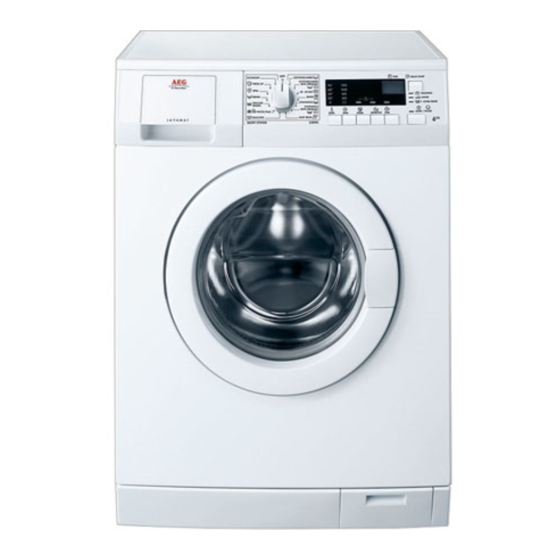
Product description Product description Your new appliance meets all modern requirements for effective treatment of laundry with low water, energy and detergent consumption. Detergent dispenser drawer Rating plate Control panel Drain pump Door opening handle Adjustable feet Detergent dispenser drawer Compartment for prewash phase used for prewash. -
Page 10: Control Panel
Control panel Control panel Henceforth the programme selector dial, the buttons and the display will be indicated with the numbers given in this table. Programme selector dial SPIN button PREWASH button STAIN button SENSITIVE button TIME button Display START/PAUSE button DELAY START button Programme progress display... -
Page 11: First Use
First Use Ensure that the electrical and water connections comply with the installation instructions. Remove the polystyrene block and any material from the drum. Pour 2 litres of water into the main wash compartment of the detergent drawer in order to activate the ECO valve. Then run a cotton cycle at 95°C, without any laundry in the machine, to remove any manufacturing residue from the drum and tub. -
Page 12: Daily Use
Daily Use Load the laundry 1. Open the door by carefully pulling the door handle outwards. Place the laundry in the drum, one item at a time, shaking them out as much as possible. 2. Close firmly the door. You must hear a click during closing. -
Page 13: Select The Required Programme
Select the required programme (Position 1 on the control panel picture) You can choose the right programme for any type of laundry following the descriptions on the washing programme tables (see Washing Programmes). Turn the programme selector dial to the required programme. The programme selector determines the type of washing cycle (e.g. -
Page 14: Programm Option Button
reduce the spin speed if needed, by means of the relevant button ● depress button 8 ● when the programme has finished the display shows a flashing. The pilot ● lights DOOR goes off and the door can be opened. Programme option button Depending on the programme, different functions can be combined. -
Page 15: Select The Time Option
Select the TIME option (Button 6) This option allows you to modify the washing time, automatically proposed by the washing machine. By pressing this button, the relative pilot light comes on and the washing duration will be reduced to wash daily soiled laundry. On the display will be visualized the decreased washing time. -
Page 16: Select The Start/Pause
displayed for about 2 seconds and the yellow pilot light of button 8 light starts blinking. Alarm codes In the event of operating problems, some alarm codes can be displayed, for example (see paragraph «Something not working»). End of programme When the programme has finished a blinking zero is displayed, the DOOR and WASHING pilot lights and the pilot light of button 8 go out and... -
Page 17: Select The Delay Start
If you wish to add laundry in the machine during the delay time you will press button 8 to put the machine in pause. Add the laundry, close the door and press button 8 again. Selecting the delayed start. Select the programme and the required options. ●... -
Page 18: Altering An Option Or A Running Programme
Press simultaneously the buttons 2 and 3 for some seconds: the EXTRA RINSE pilot light comes on in the programme progress display. This function stays per- manently on. To remove it press the same buttons again until the EXTRA RINSE light goes off. -
Page 19: At The End Of The Programme
At the end of the programme The machine stops automatically, the pilot light of button 8 goes off, the DOOR and WASHING lights go off and a flashing will appear on the display. If the RINSE HOLD option have been selected, the DOOR pilot light illuminates, a flashing will appear on the display, the pilot light of button 8 goes off and the door remains locked to indicate that the water must be emptied out before... -
Page 20: Washing Programmes
Washing programmes Washing programmes P P r r o o g g r r a a m m m m e e / / D D e e s s c c r r i i p p t t i i o o n n o o f f T T y y p p e e o o f f l l a a u u n n d d r r y y O O p p t t i i o o n n s s T T e e m m p p e e r r a a t t u u r r e e... -
Page 21: Washing Programmes
Washing programmes Washing programmes P P r r o o g g r r a a m m m m e e / / D D e e s s c c r r i i p p t t i i o o n n o o f f T T y y p p e e o o f f l l a a u u n n d d r r y y O O p p t t i i o o n n s s T T e e m m p p e e r r a a t t u u r r e e... -
Page 22: Programme Information
Programme information Programme information Selecting this programme the laundry is gently washed and spun to avoid any creasing. In this way ironing is EASY IRON PLUS easier. Furthermore the machine will perform additional rinses. Washing programme for machine washable wool WOOL PLUS (HANDWASH) well as for hand washable woollens and delicate fabrics with the “hand washing”... -
Page 23: Preparing The Wash Cycle
Preparing the wash cycle Preparing the wash cycle Sorting out the laundry Follow the wash code symbols on each garment label and the manufacturer’s washing instructions. Sort the laundry as follows: whites, coloureds, synthetics, delicates, woollens. Temperatures for normally soiled white cottons and linen (e.g. tea cloths, 95°... -
Page 24: Maximum Loads
Preparing the wash cycle Maximum loads Recommended loads are indicated in the washing programme charts. General rules: Cotton, linen: drum full but not too tightly packed; Synthetics: drum no more than half full Delicate fabrics and woollens: drum no more than one third full. Washing a maximum load makes the most efficient use of water and energy. -
Page 25: Removing Stains
Preparing the wash cycle Removing stains Stubborn stains may not be removed by just water and detergent. It is therefore advisable to treat them prior to washing. Blood: treat fresh stains with cold water. For dried stains, soak overnight in water with a special detergent then rub in the soap and water. -
Page 26: Detergents And Additives
Preparing the wash cycle Detergents and additives Good washing results also depend on the choice of detergent and use of the correct quantities to avoid waste and protect the environment. Although biodegradable, detergents contain substances which, in large quantities, can upset the delicate balance of nature. The choice of detergent will depend on the type of fabric (delicates, woollens, cottons, etc.), the colour, washing temperature and degree of soiling. -
Page 27: Degrees Of Water Hardness
Preparing the wash cycle Degrees of water hardness Water hardness is classified in so-called “degrees” of hardness. Information on hardness of the water in your area can be obtained from the relevant water supply company, or from your local authority. Note: A water softener must be added when water has a medium-high degree of hardness (from degree of hardness II). -
Page 28: International Wash Code Symbols
International wash code symbols International wash code symbols These symbols appear on fabric labels, in order to help you choose the best way to treat your laundry. Energetic wash Max. wash Max. wash Max. wash Max. wash temperature temperature temperature temperature 95°C 60°C... -
Page 29: Care And Cleaning
Care and cleaning Care and cleaning You must DISCONNECT the appliance from the electricity supply, before you can carry out any cleaning or maintenance work. Descaling The water we use normally contains lime. It is a good idea to periodically use a water softening powder in the machine. -
Page 30: Washing Drum
Care and cleaning 2. Remove the conditioner insert from the middle compartment. 3. Clean all parts with water. 4. Put the conditioner insert in as far as it will go, so that it is firmly in place. 5. Clean all parts of the washing ma- chine, especially the nozzles in the top of the washing-in chamber, with a brush. - Page 31 Care and cleaning 4. Place a container close to the pump to collect any spillage. 5. Release the emergency emptying hose, place it in the container and remove its cap. 6. When no more water comes out, unscrew the pump and remove it. Always keep a rag nearby to dry up spillage of water when removing the pump.
-
Page 32: Water Inlet Filter
Care and cleaning Warning! When the appliance is in use and depending on the programme selected there can be hot water in the pump. Never remove the pump cover during a wash cycle, always wait until the appliance has finished the cycle, and is empty. When replacing the cover, ensure it is securely retightened so as to stop leaks and young children being able to remove it. -
Page 33: Frost Precautions
Care and cleaning 7. replace the emergency emptying hose in its seat after having plugged it; 8. screw the pump again and close the door. Frost precautions If the machine is installed in a place where the temperature could drop below 0°C, proceed as follows: 1. -
Page 34: Something Not Working
Something not working Something not working Certain problems are due to lack of simple maintenance or oversights, which can be solved easily without calling out an engineer. Before contacting your local Service Centre, please carry out the checks listed below. During machine operation it is possible that the y y e e l l l l o o w w pilot light of button 8 blinks, one of the following alarm codes appears on the display and at the same some acoustic signals sound every 20 seconds to indicate that the machine is not working:... - Page 35 Something not working Problem Possible cause/Solution The end of the drain hose is too low. The machine fills then empties • Refer to relevant paragraph in «water drainage» immediately: section. The drain hose is squashed or kinked. • Check the drain hose connection. The drain pump is clogged.
- Page 36 Something not working Problem Cause possible/Solution The programme is still running. • Wait the end of washing cycle. The door lock has not been released. • Wait some minutes. The door will not open: There is water in the drum. •...
- Page 37 Something not working If you are unable to identify or solve the problem, contact our service centre. Before telephoning, make a note of the model, serial number and purchase date of your machine: the Service Centre will require this information.
-
Page 38: Techinical Data
Technical data Techinical Data Width 60 cm Height 85 cm Dimensions Depth 63 cm (door included) Electrical connection Voltage - Information on the electrical connection is given on the rating Overall power - Fuse plate on the inner edge of the appliance door Minimum 0,05 MPa Water supply pressure... -
Page 39: Consumption Value
Consumption value Consumption value Water consumption Energy consumption Programme duration Programme (in litres) (in kWh) (in minutes) 95° White Cottons 40° Cottons 60° Easy-Cares 0° 0.35 Easy Iron Plus 4 40° Delicates 0.55 30° 0.25 Wool Plus (Handwash) Rinses Drain Spin 30°... -
Page 40: Installation
Installation Installation Unpacking All transit bolts and packing must be removed before using the appliance. You are advised to keep all transit devices so that they can be refitted if the machine ever has to be transported again. 1. After removing all the packaging, carefully lay machine on it’s back to remove the polystyrene base from the bottom. - Page 41 Installation 4. Unscrew and remove the two large rear bolts B and the six smaller bolts C. 5. Remove the bracket D and tighten up the six smaller bolts C. Slide out the relevant plastic spacer E. 6. Open the porthole, take out the inlet hose from the drum and remove the polystyrene block fitted on the door seal.
-
Page 42: Positioning And Levelling
Installation Positioning and levelling Install the machine on a flat hard floor. Make sure that air circulation around the machine is not impeded by carpets, rugs etc. Before placing it on small tiles, apply a rubber coating. Never try to correct any unevenness in the floor by putting pieces of wood, cardboard or similar materials under the machine. -
Page 43: Water-Stop Device
Installation 3. Set the hose correctly by loosening the ring nut. After positioning the inlet hose, be sure to tighten the ring nut again to prevent leaks. 4. Connect the hose to a tap with a 3/4” thread. Always use the hose supplied with the appliance. - Page 44 Installation When discharging into a standpipe ensure that the top of the standpipe is no more than 90 cm (35.4'') and no less than 60 cm (23.6'') above floor level. The drain hose may be extended to a maximum of 4 metres. An additional drain hose and joining piece is available from your local Service Force Centre.
-
Page 45: In The Interest Of The Environment
Installation In the interest of the environment Washing machines and dishwashers should be connected to the FOUL drainage system, the water will then be taken to a sewage works for treatment before being discharged safely into a river. It is essential that these appliances are not connected to the surface water drainage system as this water is discharged directly into a river or... - Page 46 The plug must not be used if the fuse cover/carrier is lost. The cover/carrier is indi- cated by the coloured insert at the base of the plug. A replacement cover/carrier must be obtained from your local AEG/ELECTROLUX Service Centre. The power supply cable must be easily accessible after installing the machine.
-
Page 47: Enviroment Concerns
Enviroment concerns Enviroment concerns Packaging materials The materials marked with the symbol are recyclable. >PE<=polyethylene >PS<=polystyrene >PP<=polypropylene This means that they can be recycled by disposing of them properly in appropriate collection containers. Old machine Use authorised disposal sites for your old appliance. Help to keep your country tidy! The symbol on the product or on its packaging indicates that this product may not be treated as household waste. -
Page 48: Guarantee
Guarantee/Customer Service Standard guarantee conditions We, AEG-Electrolux , undertake that if within 12 months of the date of the pur- chase this AEG-Electrolux appliance or any part thereof is proved to be defective by reason only of faulty workmanship or materials, we will, at our option repair or... - Page 49 Bedfordshire, LU4 9QQ Tel: 08705 350 350 (*) (*) Calls may be recorded for training purposes For Customer Service in The Republic of Ireland please contact us at the address below: AEG/ELECTROLUX Electrolux Group (Ire) Ltd Long Mile Road Dublin 12...
-
Page 50: European Guarantee
European Guarantee European Guarantee This appliance is guaranteed by Electrolux in each of the countries listed at the back of this user manual, for the period specified in the appliance guarantee orotherwise by law. If you move from one of these countries to another of the countries listed, the appliance guarantee will move with you subject to the following qualifications: The appliance guarantee starts from the date you first purchased the appliance... -
Page 51: Customer Service Centres
Customer service centres www.electrolux.com Albania +35 5 4 261 450 Rr. Pjeter Bogdani Nr. 7 Tirane Belgique/België/Belgien +32 2 363 04 44 Bergensesteenweg 719, 1502 Lembeek Česká republika +420 2 61 12 61 12 Budějovická 3, Praha 4, 140 21 Danmark +45 70 11 74 00 Sjællandsgade 2, 7000 Fredericia... - Page 52 www.aeg-electrolux.uk...
Need help?
Do you have a question about the LAVAMAT 62840 and is the answer not in the manual?
Questions and answers