
Related Manuals for 8e6 Technologies ProxyBlocker MSA-004-005

Summary of Contents for 8e6 Technologies ProxyBlocker MSA-004-005
-
Page 1: Quick Start
ProxyBlocker ® QUICK START GUIDE Model: ProxyBlocker MSA-004-005 Release: 1.0.00 / Updated: 02.11.08... - Page 2 8e6 Technologies. Every effort has been made to ensure the accuracy of this document. However, 8e6 Technologies makes no war- ranties with respect to this documentation and disclaims any implied warranties of merchantability and fitness for a particular purpose.
-
Page 3: Table Of Contents
ontents ...............1 roxy loCker ntroduCtIon About this Document ........................2 Conventions Used in this Document ................... 2 ..................3 ervICe nformatIon ..............4 relImInary etuP roCedures Unpack the Unit from the Carton ....................4 Select a Site for the Server ......................5 Rack Mount the Server ........................ - Page 4 roxy locker uick tart uide...
-
Page 5: E 6 P Roxy B Locker I Ntroduction
Thank you for choosing to evaluate the 8e6 Technologies ProxyBlocker. The Proxy- Blocker offers a solution for organizations using an Internet filtering product other than 8e6’s R3000 Enterprise Filter. 8e6 ProxyBlocker tracks each user’s online activity of... -
Page 6: About This Document
Introduction - This section is comprised of an overview of the ProxyBlocker product and how to use this document • Service Information - This section provides 8e6 Technologies contact information • Preliminary Setup Procedures - This section includes instructions on how to physi- cally set up the ProxyBlocker in your network environment •... -
Page 7: S Ervice I Nformation
The user should not attempt any maintenance or service on the unit beyond the proce- dures outlined in this document. Any initial hardware setup problem that cannot be resolved at your internal organiza- tion should be referred to an 8e6 Technologies solutions engineer or technical support representative. 8e6 Corporate Headquarters (USA) Local 714.282.6111... -
Page 8: P Reliminary S Etup P Rocedures
relImInary etuP roCedures Unpack the Unit from the Carton Inspect the packaging container for evidence of mishandling during transit. If the packag- ing container is damaged, photograph it for reference. Carefully unpack the unit from the carton and verify that all accessories are included. Save all packing materials in the event that the unit needs to be returned to 8e6 Tech- nologies. -
Page 9: Select A Site For The Server
Select a Site for the Server The server operates reliably within normal office environmental limits. Select a site that meets the following criteria: • Clean and relatively free of excess dust. • Well-ventilated and away from sources of heat, with the ventilating openings on the server kept free of obstructions. -
Page 10: Rack Mount The Server
Rack Mount the Server Rack Setup Precautions Warning: Before rack mounting the server, the physical environment should be set up to safely ac- commodate the server. Be sure that: • The weight of all units in the rack is evenly distributed. Mounting of the equipment in the rack should be such that a hazardous condition is not achieved due to uneven mechanical loading. - Page 11 Rack Mount Instructions Optional: Install the Chassis Rails NOTE: If your chassis does not come with chassis rails, please follow the procedure listed on the last page of this sub-section to install the unit directly into the rack. CAUTION: Please make sure that the chassis covers and chassis rails are installed on the chassis before you install the chassis into the rack.
- Page 12 3. Locate the three holes on each side of the chassis and locate the three correspond- ing holes on each of the inner rail. 4. Attach an inner rail to each side of the chassis and secure the inner rail to the chas- sis by inserting three Type G screws through the holes on each side of the chassis and the inner rail.
- Page 13 Optional: Install the Traditional UP Racks After you have installed the inner rails on the chassis, you are ready to install the outer rails of rail assemblies to the rack. NOTE: The rails are designed to fit in the racks with the depth of 28” to 33”. •...
- Page 14 7. Slide the chassis into the rack as shown below. NOTE: The chassis may not slide into the rack smoothly or easily when installed the first time. Some adjustment to the slide assemblies might be needed for easy installation. 8. You will need to release the safety taps on both sides of the chassis in order to com- pletely remove the chassis out of the rack.
- Page 15 Optional: Install the Open Racks After you have installed the inner rails on the chassis, you are ready to install the outer rails of rail assemblies to the rack. NOTE: The rails are designed to fit in the racks with the depth of 28” to 33”. •...
- Page 16 3. Attach the front (short) bracket to the front end of the rack, and secure it to the rack with two Type H screws and Type I washers as shown below. (See the previous page for descriptions of Type H and Type I hardware components.) 4.
- Page 17 6. Slide the inner rails which are attached to the chassis into the outer rails on the rack. roxy locker uick tart uide...
- Page 18 Install the Chassis into the Rack CAUTION: Before installing the chassis into the rack: • Make sure that the rack is securely anchored onto an unmovable surface or structure before installing the chassis into the rack. • Unplug power cord(s) of the rack before installing the chassis into the rack. •...
-
Page 19: Check The Power Supply
Check the Power Supply This server is equipped with a universal power supply that handles 100-240 V, 50/60 Hz. A standard power cord interface (IEC 950) facilitates power plugs that are suitable for most European, North American, and Pacific Rim countries. Power Supply Precautions Warning: •... -
Page 20: General Safety Information
• Do not expose the server to rain or use near water. If liquids of any kind should leak into the chassis, power down the server, unplug it, and contact 8e6 Technologies technical support. • Disconnect power from the server before cleaning the unit. Do not use liquid or aero- sol cleaners. -
Page 21: Electrical Safety Precautions
AC Power Cord and Cable Precautions Warning: • The AC power cord for the server must be plugged into a grounded, power outlet. • Do not modify or use a supplied AC power cord if it is not the exact type required in the region where the server will be installed and used. - Page 22 Motherboard Battery Precautions Caution: The battery on the motherboard should not be replaced without following instructions provided by the manufacturer. Only qualified service personnel should replace batteries. The battery contains energy and, as with all batteries, a malfunction can cause heat, smoke, or fire, release toxic materials, or cause burns.
-
Page 23: I Nstall The S Erver
nstall the erver Step 1: Setup Procedures This step requires you to link the workstation to the ProxyBlocker. You have the option of using the text-based wizard setup procedures described in Step 1A, or the Administrator console setup procedures described in Step 1B. Wizard Setup Requirements The following hardware can be used for the wizard setup procedures: •... -
Page 24: Step 1A: Wizard Setup Procedures
Step 1A: Wizard Setup Procedures Link the Workstation to the ProxyBlocker Monitor and Keyboard Setup A. Connect the PC monitor and keyboard cables to the rear of the chassis: Fig. 1 - Portion of chassis rear B. Turn on the PC monitor. C. - Page 25 HyperTerminal Setup Procedures If using a serial console, follow these procedures to create a HyperTerminal session on the serial console. A. Launch HyperTerminal by going to Start > Programs > Accessories > Communica- tions > HyperTerminal: B. In the Connection Description dialog box, enter any session Name, and then click OK to open the Connect To dialog box: roxy locker...
- Page 26 C. At the Connect using field, select the COM port assigned to the serial port on the laptop (probably “COM1”), and then click OK to open the Properties dialog box, dis- playing the Port Settings tab: D. Specify the following session settings: •...
- Page 27 F. In the HyperTerminal session window, go to File > Properties to open the Properties dialog box, displaying the Connect To and Settings tabs: G. Click the Settings tab, and at the Emulation menu select “VT100”. H. Click OK to close the dialog box, and to go to the login screen. NOTE: If using a HyperTerminal session, the login screen will display with black text on a white background.
- Page 28 Login screen The login screen displays after powering on the ProxyBlocker unit. NOTE: If the screensaver currently displays on your screen, press the Enter key to display the login screen. A. At the login prompt, type in menu. B. Press the Enter key to display the Password prompt. C.
- Page 29 NOTES: Changing your password using option C, “Change administration password”, will change the password for the console menu but not the ProxyBlocker console login screen. Option A, “Reset system to factory defaults”, should only be used by an 8e6 Technologies technical representative. roxy locker...
- Page 30 System Status Screen The System Status screen contains the following information: • Capturing Interface specified in screen 3 (Configure network interface LAN1) • LAN1 IP address and netmask specified in screen 3, and current status (“Active” or “Inactive”) • Management and Blocking Interface specified in screen 4 (Configure network inteface LAN2) •...
-
Page 31: Step 1B: Console Setup Procedures
Step 1B: Console Setup Procedures Preliminary Setup Create a “setup workstation” using a Windows-based laptop or desktop machine with a network card and Internet Explorer 5.5 (or later). The setup workstation will be used for accessing the ProxyBlocker server on the network and configuring the unit. NOTE: The Java Plug-in version specified for the ProxyBlocker software ver- sion must be installed on your workstation. - Page 32 Link the Workstation to the ProxyBlocker The procedures outlined in this sub-section require the use of the CAT-5E crossover cable. A. Plug one end of the CAT-5E crossover cable into the ProxyBlocker’s LAN 2 port. NOTE: When facing the rear of the chassis, the LAN 2 port is the port on the right.
-
Page 33: Network Setup
If you wish to verify that the unit has been booted up, you can perform the following test on your workstation: 1. Go to your taskbar and click Start > Run. 2. In the dialog box, type in cmd (type in command if using Windows ME). 3. - Page 34 The Introductory Window displays minimized when the login dialog box of the Proxy- Blocker Administrator console application opens (see image on the next page). Log in to ProxyBlocker Administrator Console In the login dialog box, you need to enter the generic Username and Password: A.
- Page 35 Network Click the System button at the top of the screen to go to the System section of the con- sole: In this section of the console you will: • Specify the device(s) the ProxyBlocker will use for listening to traffic and sending traffic •...
- Page 36 Network: Operation Mode From the navigation panel at the left of the screen, click Mode and choose Operation Mode from the pop-up menu: Make the following entries in the Operation Mode window: A. In the Listening Device frame, select the device for listening to traffic, generally “LAN1”.
- Page 37 (the NetBIOS name must be capitalized). It is important to enter something identifiable, because once the product is registered, this host name is used by 8e6 Technologies to recognize your account for library updates. This name needs to be a valid DNS entry.
- Page 38 E. Enter the Secondary IP address of the second DNS name server. The ProxyBlocker will use this name server to resolve the domain name requested by users from the LAN if the first DNS isn’t working. F. Enter the Gateway IP address for the default router or firewall that is the main gate- way for the entire network.
- Page 39 NOTE: If you need to find another NTP server to use, most university Web sites provide these servers for public usage. A. In the NTP Server field, enter the IP address of the primary NTP server you wish to use for clock settings on your server. B.
- Page 40 B. At the Location pull-down menu, select the time zone for the specified region. If necessary, select a language set from the Language pull-down menu to display that text in the console. C. Click Apply to apply your settings, and to reboot the ProxyBlocker. Physically Connect the ProxyBlocker to the Network Once your ProxyBlocker network parameters are set, you must physically connect the unit to your network.
-
Page 41: Step 2: Test The Proxyblocker Console Connection
Did you restart the ProxyBlocker after changing the network settings? • Do you have both LAN ports connected to your network hub? • If still unsuccessful, contact an 8e6 Technologies solutions engineer or technical sup- port representative. roxy locker uick... -
Page 42: Step 3: Test Filtering
A. Test the ProxyBlocker’s filtering by opening a browser window on a network worksta- tion, and going to http://test.8e6.net (an empty site for testing pornography filtering). B. You should receive a block page. If you do not, contact an 8e6 Technologies solu- tions engineer or technical support representative. - Page 43 You may wish to print the confirmation page for future reference in dealing with tech- nical issues. Perform a Complete Library Update Your ProxyBlocker was shipped with the latest library update for the current software release. However, as new updates continually become available, before you begin using the ProxyBlocker you must perform a complete library update to ensure you have the latest library updates.
- Page 44 Monitor the Library Update Process To verify that the library is being updated: A. From the navigation panel, click Updates and select Library Update Log from the menu. B. In the Library Update Log window, click View Log to display the update activity: NOTE: You will be notified in the log when the library has been completely updated by the message: “Full URL Library Update has completed.”...
-
Page 45: C Onclusion
onClusIon Congratulations; you have completed the ProxyBlocker quick start procedures. Now that the ProxyBlocker is filtering your network, the next step is to set up groups and create filtering profiles for group members. To activate a default filter profile more appropriate for your operations, or to specify a more limited IP range to filter, consult Chapter 2: Group screen in the Global Adminis- trator Section of the ProxyBlocker User Guide. -
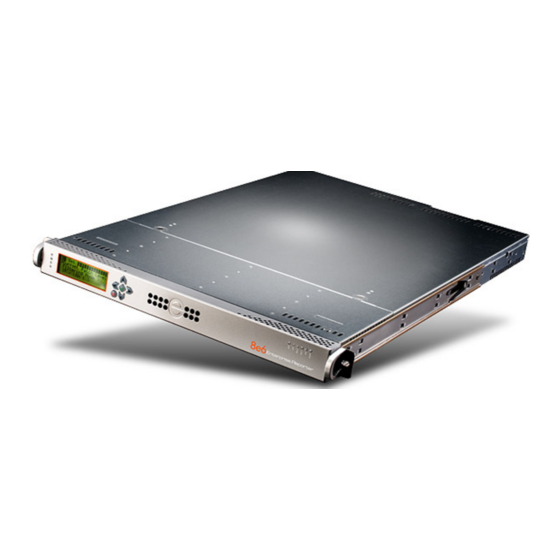
Page 46: Led I Ndicators And B Uttons
led I ndICators and uttons MSA Units Front LED Indicators and Buttons for Hardware Status Monitoring LED indicators and buttons for hardware status monitoring display on the front panel, located on the right side of the chassis (see diagram below). LED Indicator Key Button Key A = Power F = Reset... -
Page 47: R Egulatory S Pecifications And D Isclaimers
egulatory PeCIfICatIons and IsClaImers Declaration of the Manufacturer or Importer Safety Compliance USA: UL 60950-1 2nd ed. 2007 Europe: Low Voltage Directive (LVD) 2006/95/EC to CB Scheme EN 60950: 2006 International: UL/CB to IEC 60950-1:2006 Electromagnetic Compatibility (EMC) USA: FCC CFR 47 Part 15, Verified Class A Limit Canada: IC ICES-003 Class A Limit Europe:... -
Page 48: Declaration Of Conformity
EC Declaration of Conformity European Community Directives Requirement (CE) Declaration of Conformity Manufacturer’s Name: 8e6 Technologies Manufacturer’s Address: 828 W. Taft Avenue Orange, CA 92865 Application of Council Directive(s): Low Voltage • 2006/95/EC • 2004/108/EC Standard(s): Safety • EN60950: 2006 •... -
Page 49: I Ndex
ndex Activate and Register the ProxyBlocker 38 Boot Up 28 crossover cable 19, 28, 36 EMC 43, 44 FCC 43 HyperTerminal Setup 21 ICES-003 43 Login screen 24 Log in to ProxyBlocker Administrator Console 30, 37 LVD 43 MSA 20, 28, 42, 43 Physically Connect the ProxyBlocker to the Network 36 Power Supply Precautions 15 R3000 1... - Page 50 UL 43 wizard setup 19, 26 roxy locker uick tart uide...
- Page 51 roxy locker uick tart uide...
- Page 52 8e6 Corporate Headquarters (USA): 828 West Taft Avenue Orange, CA 92865-4232 • Tel: 714.282.6111 or 888.786.7999 Fax: 714.282.6116 (Sales/Technical Support) • 714.282.6117 (General Office) Satellite Office: 8e6 Taiwan: 7 Fl., No. 1, Sec. 2, Ren-Ai Rd., Taipei 10055, Taiwan, R.O.C. Tel: 886-2-2397-0300 •...
Need help?
Do you have a question about the ProxyBlocker MSA-004-005 and is the answer not in the manual?
Questions and answers