Table of Contents
Advertisement
Quick Links
Advertisement
Table of Contents

Subscribe to Our Youtube Channel
Related Manuals for AGFA sensor 505-D


Summary of Contents for AGFA sensor 505-D
- Page 1 sensor 505-D User manual...
- Page 2 Thank you for purchasing this AgfaPhoto digital camera. Please read these operating instructions carefully in order to use the digital camera correctly. Keep the instructions in a safe place after reading so that you can refer to them later. Notice: This User's Manual has been written for the following camera models: AgfaPhoto sensor 500-D, AgfaPhoto sensor 505-D and AgfaPhoto sensor 510-D.
-
Page 3: Disclaimer
Disclaimer We assume no responsibility over and above the provisions of the Product Liability Law for damages suffered by the user or third parties as a result of inappropriate handling of the product or its accessories, or by their operational failure and by their use. We reserve the right to make changes to this product and its accessories without prior notice. -
Page 4: Table Of Contents
Contents RECAUTIONS IDEO ETUP ISCLAIMER SING YOUR BATTERIES BASIC RECORDING_________________ 19 XTENDING BATTERY LIFE CONTENTS ________________________ III ECORDING TILL MAGES ELECTING THE ESOLUTION AND UALITY GETTING STARTED __________________ 1 SING THE UNCTION SING THE LASH SING ANUAL SING THE ELFTIMER ACKAGE ONTENTS SING THE... - Page 5 ROTECTING ILES HOOSING A TARTUP MAGE ETTING THE DITING MAGES OTATING TILL MAGES RINTING MAKING CONNECTIONS_____________ 39 ONNECTING THE AMERA TO A ONNECTING THE AMERA TO A ) 40 SING A EADER NOT INCLUDED ONNECTING THE AMERA TO A WITH USB C ABLE SYSTEM REQUIREMENTS ___________ 41...
-
Page 6: Getting Started
Getting Started Using This Manual Getting Started This section contains information you should know prior to using this camera. Basic Operation This section explains all recording features of the camera. Basic Recording This section explains how to record still images, movies and audio files. Other Recording Functions This section explains common operations when recording images. -
Page 7: Package Contents
Package Contents AgfaPhoto sensor USB / AV cable 2 x AAA batteries l l a CD-ROM Quick guide... -
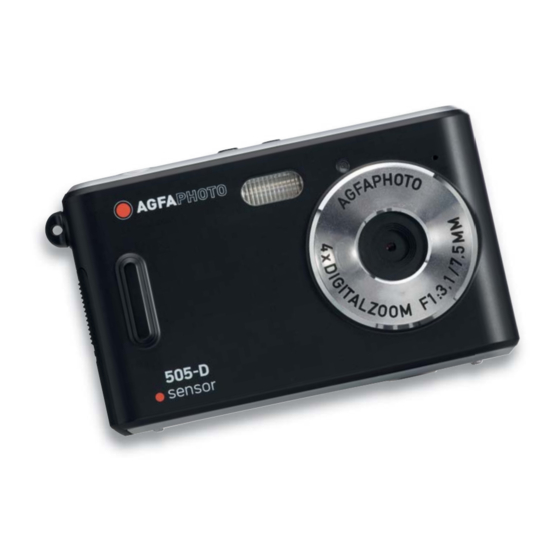
Page 8: Parts Of The Camera
Parts of the Camera 1. Flash 2. Self-timer lamp 3. Microphone 4. Lens 5. Operation lamp 6. LCD display Five-way control button 7. Vertically (OK) 8. Rightward 9. Downward 10. Upward 11. Leftward 12. Playback button 13. Menu button... - Page 9 4. Shutter button 15. Mode button 16. Power button 17. Strap mount 18. Battery cover 19. USB jack 20. Tripod socket...
-
Page 10: Attaching The Strap
Attaching the Strap Attach the strap to your camera as shown in the image. Do not swing the camera around by the strap Inserting the Batteries The camera is powered by two AAA-size alkaline batteries or rechargeable NiMH batteries. Open the battery cover. Slide the battery cover in the direction indicated by the arrows. -
Page 11: Low Battery Indicator
Low Battery Indicator A low battery indicator appears on the LCD screen when the batteries are nearly exhausted. Batteries should be replaced promptly when the low battery indicator appears. There is a risk of explosion if the battery is replaced by an incorrect type. Dispose of used batteries according to instructions. -
Page 12: About Camera Memory
If you insert or remove the card while the camera is powered on, it may damage the card or data. Do not touch the connection terminals on the back of the card. About Camera Memory This camera is equipped with an internal memory. If a memory card is not inserted in the camera, all images and movie clips recorded by the camera will be stored in the internal memory. -
Page 13: Setting The Displayl
The power saving feature will not activate in the following situations: When recording movie clips or audio files When playing movie clips or audio files When playing the slideshow When connecting the camera to a computer or printer with the USB cable Setting the Display Language / Date &... -
Page 14: Setting Date & Time
Setting Date & Time Turn the power on, and set the camera to the Setup Menu ( page 17). Select [Date/Time]. Press on the five-way control button to select [Date/Time] and then press on the five-way control button to launch the submenu. Set date and time. -
Page 15: Capture Mode
Capture Mode Capture mode Resolution indicator 2592 x 1944 2048 x 1536 1600 x 1200 1280 x 960 640 x 480 White balance indicator: Quality indicator: Cloudy Super Daylight Fine Fluorescent Normal Tungsten Auto Memory card inserted Date stamp Images taken/image capacity EV value -2.0EV-------------2.0EV Battery level indicator:... -
Page 16: Video Mode
Empty 20 seconds Half Full 10 seconds Digital zoom bar Video Mode Video mode Resolution indicator: 640 x 480 320 x 240 White balance indicator: Memory card inserted Cloudy Daylight Fluorescent Tungsten Auto Recording time Battery level indicator: Empty Half Full Digital zoom bar... -
Page 17: Playback Mode
Playback Mode Playback mode: Protect indicator Audio file Video file Still image Battery level indicator: Number of current file/total number Empty of recorded files Half Full... -
Page 18: Basic Operation
Basic Operation Turning Power On & Off Press the Power button (1) to turn on the camera in the Capture mode. The power turns on and the LED (2) lights red. Press the Power button (1) again to turn the power off. The power turns off and the LED turns off. -
Page 19: Mode
Selecting the REC Mode Press the Power button to enter the Capture mode. If the camera is in Playback mode, press the Playback button to change to REC mode. Press the Mode button (1) to change the REC mode. Each time the Mode button is pressed the REC mode icon changes. It includes three modes in REC mode: Capture mode, Video mode and Audio mode. -
Page 20: Using The Menu In Rec Mode
Using the Menu in REC Mode When a menu is displayed, the five-way control button is used to make the desired settings. The Audio mode does not have a menu so the MENU button will not work in Audio mode. Capture menu. -
Page 21: Capture Menu List
Capture Menu List Available settings Menu item Resolution Quality White balance Color effect Color / Sepia / Monochrome Exposure -2.0EV-------------2.0EV Date stamp Enable / Disable Selftimer Disable / 10 sec. / 20 sec. Burst-Snapshot Single/ Burst Video Menu List Set the camera in Video mode then press the MENU button to display the menu. Available settings Menu item Resolution... -
Page 22: Etup Menu
Setup Menu Turn the power on and set the camera to the REC or Playback mode ( page 13). Press the MENU button (2) to open the REC or Playback menu. The menu displayed depends on whether you are in the REC mode or the Playback mode. - Page 23 Menu item Function Select a language for the Display menu and other information from the following languages: [English]: English, [Italiano]: Italian, [Français]: French, [Nederlands]: Dutch, [Čestina]: Czech, [Русский]: Russian, [Türk]: Turkish, Language [Deutsch]: German, [Español]: Spanish, [Português]: Portuguese, [Magyar]: Hungarian, [Polski]: Polish, [Ελληνικά]: Greek, [体中文]: S. Chinese, [日本語] Japanese To save power, the camera is turned off automatically after a period of time.
-
Page 24: Basic Recording
Firmware This function will show the software version. Basic Recording Recording Still Images Turn the power on, and set the camera to the Capture mode. page 13). Compose the subject on the monitor. Point the center area of the LCD screen at the subject that you want to take a photo of. - Page 25 Selecting the Resolution and Quality You can select a lower image resolution and quality to decrease the image size in order to capture more images. Choose a suitable setting according to the desired image quality and purpose. Image size Picture size AgfaPhoto sensor 505-D 2592 x 1944 Printing larger than A4 size...
-
Page 26: Sing The Oom Unction
The resolution and quality will affect the required storage space of the images. Compression Purpose Super To shoot higher quality Higher Quality images. Fine To shoot normal quality images. Normal To shoot images. Lower Quality Using the Zoom Function Your camera has a digital zoom function that allows you to zoom in or zoom out on subjects. -
Page 27: Sing The Lash
The digital zoom works by enlarging the center portion of an image through a software interpolation process. The digital zoom is used to achieve magnification levels up to approx. 4 times. The higher the digital zoom, the lower the image quality. Using the Flash The flash is not only for taking pictures when there is insufficient light, but also for when the subject is in shade or with backlight conditions. -
Page 28: Sing The Elftimer
The flash charging time may increase when the battery is low. The screen is blank when the flash is charging. The next image can be shot only when charging is completed. Shooting with a flash in a bright environment may cause incorrect exposure. Using the Selftimer Use the selftimer to set a delay from the time the shutter button is pressed to the time the image is shot. -
Page 29: Sing The Urst Napshot
Using the Burst-Snapshot Use this function to take 3 pictures continuously. Turn the power on, and set the camera to the Capture mode ( page 13). Open the Capture menu ( page 15). Change the setting Press the Mode button to launch the submenu. Press on the five-way control button to select [Burst-Snapshot]. -
Page 30: Ecording Movie Clips
Recording Movie Clips Turn the power on, and set the camera to the Video mode ( page 13). Compose the subject on the monitor. Point the center area of the LCD screen at the subject that you want to take. Start recording. -
Page 31: Ecording Udio
Recording Audio Turn the power on, and set the camera to the Audio mode page 13). Press the shutter button (1) to start recording. The voices are recorded via the microphone (2) of the camera. Be careful to avoid touching the microphone while recording. -
Page 32: Other Recording Functions
Other Recording Functions Setting the White Balance Adjust the white balance to suit different light sources such as sunlight, incandescent (tungsten) lighting or fluorescent lighting. Option Description Automatically corrects white balance. Ideal for general photography. Adjusts for bright sunlight conditions or natural light conditions. Adjusts for normal indoor lighting conditions. -
Page 33: Etting The Olor Ffect
Setting the Color Effect Set the color effect to add a color tone to the picture. Option Description Color Reflects the true color of the object. Sepia Adds a sepia color tone to the picture Monochrome The pictures only have two colors: white and black. Setting the Exposure Set the exposure value manually to compensate for unusual lighting conditions such as indirect indoor lighting, dark backgrounds, and strong backlighting. -
Page 34: Etting Ate Tamp
Setting Date Stamp The date stamp function can be used to add a date to your pictures as you take them. Option Description Enable Add the recording date & time to printed images. Disable Do not add the recording date & time to printed images. -
Page 35: Playback
Playback Playing Back Images Turn the power on, and set the camera to the Playback mode ( page 13). The latest recorded image appears on the LCD display. If there are no images stored, a message [No file] appears. Pressing on the five-way control button displays the previous or next image. -
Page 36: Playback Mode
Using the Menu in Playback Mode When a menu is displayed, the five-way control button is used to make the desired settings. Using the Menu in Playback Mode Turn the power on and set the camera to the Playback mode page 13). -
Page 37: Iewing Humbnails
Viewing Thumbnails Turn the power on and set the camera to the Playback mode page 13). Press on the five-way control button: a thumbnail screen is displayed. You can also view the thumbnail screen in the following way: Set the camera to the Playback mode, then press the MENU button to display the menu. -
Page 38: Eleting Files
Deleting Files Deleting a Single File Turn the power on, and set the camera to the Playback mode ( page 13). Select the file you want to delete. When the file is shown in full screen, press on the five-way control button to select the file you want to delete. -
Page 39: Eleting Ll Iles
Deleting All Files Turn the power on, set the camera to Playback mode. Open the menu Press the MENU button. Then press on the five-way control button to select [Delete all]. Delete the files Press on the five-way control button to delete the files. •... -
Page 40: P Rotecting F Iles
Protecting Files Turn the power on and set the camera to the Playback mode page 13). Select a file to be protected. If you want to protect a single file select it before operating the following steps. Press on the five-way control button to select a recorded file Open the menu. -
Page 41: Choosing A Startup Image
Choosing a Startup Image Setting the Logo Turn the power on, and set the camera to the Playback mode. Select a still image as startup image. Press on the five-way control button to select a still image. Open the menu. Press the MENU button, then use the five-way control button to select [Set Logo] then press on the five-way control button to launch the submenu: [Yes];... -
Page 42: E Diting I Mages
Editing Images Rotating Still Images Turn the power on, and set the camera to the Play mode ( page 13). Press on the five-way control button to select the image you want to rotate. Open the menu. Press the MENU button, then use the five-way control button to select [ Rotate] and finally press on the five-way control button to launch the submenu: [90°]: Rotates the image 90 degrees clockwise... -
Page 43: P Rinting
Printing The Digital Print setting allows you to directly print from a camera to a printer by connecting them via a USB cable. Photos can be printed quickly and easily from your digital camera without using a computer Turn the power on, set the camera to the Playback mode and press on the five-way control button to select a still image page 13). -
Page 44: Making Connections
Making Connections Connecting the Camera to a TV You can display recorded images on a television with the supplied AV cable. Set the TV-out to match the TV system that you are using. Turn off the camera and the TV. Use the supplied AV cable to connect the camera to the TV set. -
Page 45: Connecting The Camera To A Pc
Connecting the Camera to a PC There are two ways to download files from the camera's internal memory or memory card to a computer: • By inserting the memory card into a card reader • By connecting the camera to a computer using the supplied USB cable. Using a Card Reader (not included) Eject the memory card from the camera and insert it into a card reader that is connected to... -
Page 46: System Requirements
System Requirements • PC with processor better than MMX Pentium 233 MHz • Windows XP/ 2000/ Vista32 • Minimum 32 MB RAM • USB port • CD-ROM drive • 800 x 600 pixels, 16-bit color display compatible monitor *Specifications are subject to change without prior notice. -
Page 47: Appendix
Appendix About the Folder & File Names Your digital camera automatically creates a directory of folders in the internal memory or on the memory card that it uses to organize still images, movie clips and other information. Folder Structure The folder name begins with a 3-digit number from 100 to 999 and is followed by "DCIM". -
Page 48: T Roubleshooting
Troubleshooting Problem Cause Solution Power does not turn camera Batteries are inserted in the Reload batteries in the correct wrong direction. direction. Batteries are dead. Replace or recharge batteries. The battery compartment door Make sure the battery is open. compartment door is securely closed. -
Page 49: S Pecifications
Specifications AgfaPhoto AgfaPhoto AgfaPhoto sensor 505-D sensor 510-D sensor 500-D 5 MegaPixel CMOS, 5 MegaPixel CMOS, 3 MegaPixel CMOS, Sensor Size: 1/2.5 inch Size: 1/2.5 inch Size: 1/2.5 inch 2.4" TFT color LCD 2.4" TFT color LCD 2.0" TFT color LCD Display 150cm ~ infinity 150cm ~ infinity... - Page 50 steps steps steps Included Included Included Burst Auto, Always on, Always Auto, Always on, Always Auto, Always on, Always Flash Color, Sepia, Color, Sepia, Color, Sepia, Photo effect Monochrome Monochrome Monochrome Disable / 10 / 20 sec. Disable / 10 / 20 sec. Disable / 10 / 20 sec.
-
Page 51: C Ustomer Care
73066 Uhingen Germany AgfaPhoto is used under license of Agfa-Gevaert NV & Co. KG. Agfa-Gevaert NV & Co. KG. does not manufacture this product or provide any product warranty or support. For service, support and warranty information, contact the distributor or manufacturer. -
Page 52: Union
Disposal of Waste Equipment by Users in Private Households in the European Union This symbol on the product or on its packaging indicates that this product must not be disposed of with your other household waste. Instead, it is your responsibility to dispose of your waste equipment by handing it over to a designated collection point for the recycling of waste electrical and electronic equipment. - Page 53 Any changes or modifications not expressly approved by the party responsible for compliance could void the user’s authority to operate the equipment. When shielded interface cables have been provided with the product or when specified additional components or accessories have elsewhere been designated to be used with the installation of the product, they must be used in order to ensure compliance with FCC regulations.
Need help?
Do you have a question about the sensor 505-D and is the answer not in the manual?
Questions and answers