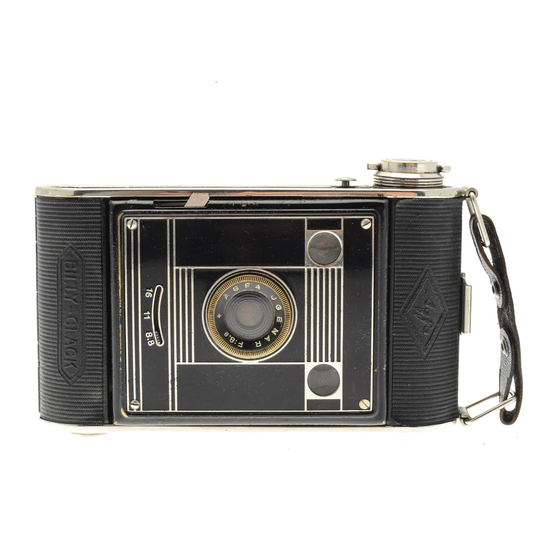
Summary of Contents for AGFA Billy Clack
- Page 1 Instructions manual for the 4.5 x 6 cm No.51 / Roll film B2-8 Translated from German by Matthew Godino *Denotes a note made by Matthew Godino...
- Page 2 This camera manual is for reference and historical purposes, all rights reserved. This page is copyright © by M. Godino, NC. This page may not be sold or distributed without the expressed permission of the producer. Created on 19.12.20...
- Page 3 Loading the Billy-Clack with Agfa roll film B2-8. Fold up latch 1 (Fig.1) on the rear of the camera and open the camera by pulling it...
- Page 4 Grasp lower spool holder by the bent tab and pull out from inside the camera (Fig.3). Tilt the spool holder 2 in the direction of the arrow (fig. 4), insert the full film spool, turn the spool holder back so that the holder pin engages in the round hole of the spool, then swivel the spool holder back into the camera.
- Page 5 Hang the bent end of the paper into the longer slot on the empty spool (Fig.5). Remove the adhesive tape. By turning the film key 3 a few times to the right, two to three layers of the red paper are wound onto the empty spool. Attention! Align the protective paper by sliding it back and forth until it is just wound up between the two discs of the...
- Page 6 There are two red windows in the back of the camera for observing the film framing indicators (Fig. 7). When you continue to turn the film (be careful! Do not touch the lenses of the lens and the viewfinders!) after loading, a few preliminary signals (hand and dots) first appear in the lower observation window, which is farther away from the film key, and then the number...
- Page 7 The Exposure. Before taking a picture, make sure that the lens is clean; if necessary, it is cleaned with a soft linen cloth. Slightly tilted downwards, the camera automatically opens into the ready position when you press button 4 (Fig. 8). No further distance setting is necessary.
- Page 8 During the exposure, the image is viewed with the aid of the viewfinder 12 (Fig.9) [portrait] or 13 (Fig.9) [horizontal shot]. The Billy-Clack enables instantaneous exposures and time exposures. For Instantaneous exposures, move pointer 5 (fig. 9) to (·). Release the shutter by fully depressing the lever 6.
- Page 9 The shutter can also be triggered with the aid of a cable release that can be screwed into the opening 7. For time exposures, move hand 5 to (-). The shutter remains open as long as the lever 6 is depressed. For time exposures, the camera must be placed on a firm base, for which the support 8 (Fig.
- Page 10 Attention! Before closing the camera, the support 8 must be swiveled in again. A tripod socket (see Fig. 2) is provided for mounting on a tripod. For flash exposures, set pointer 5 (Fig. 9) to (-). Move lever 6 (Fig. 9) downward and then hold it in place by engaging the switch 9 (Fig.
- Page 11 A prerequisite is the use of Agfa-Isochrom Film 26° Scheiner. (~ISO 25)* Outdoors: Glacier, snowy landscape, open beach: Instantaneous with Aperture 16.
- Page 12 Closing the Camera: Before closing the camera, remove the cable release and turn back support 8 (Fig. 10). Take the device in both hands. Push the front plate back with both thumbs until it snaps into place, applying even pressure. When the camera is closed, the shutter release lever is locked so that unintentional film exposure during the Billy-Clack is...
- Page 13 Removal of the exposed film. After the last (i.e. 16th) exposure, the film is completely exposed. The passing of the paper backing can be observed through the red film windows in the back of the camera. Then open the back as described on page 3 (Figs.
- Page 14 Check the film holder. Push the spool holder 14 away and remove the exposed film spool (Fig. 13). Make sure that the protective paper does not become loose. Wrap the free end of the paper tightly around the roll, fold it over at the point indicated by the imprint, and secure it with the adhesive strip.
- Page 15 Now remove the empty spool from the lower spool holder and insert it into the upper spool holder with its slotted end facing the film key (Fig. 14). Turn the spool holder back and push the spool holder back into the camera. Push the film key in while turning it clockwise until it grips the empty spool.


Need help?
Do you have a question about the Billy Clack and is the answer not in the manual?
Questions and answers