Table of Contents
Advertisement
Product Service Manual--Level 2
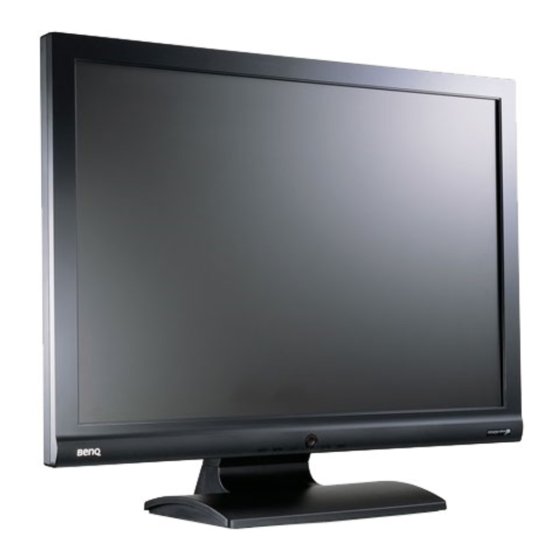
Service Manual for BenQ:
G2010W
P/N: 9H.0CALN.IXX
Applicable for All Regions
Version: 001
Date:2008/5/8
Notice:
- For RO to input specific "Legal Requirement" in specific NS regarding to responsibility and liability
statements.
- Please check BenQ's eSupport web site, http://esupport.benq.com, to ensure that you have the most
recent version of this manual.
First Edition (June, 2006)
© Copyright BenQ Corporation 2006. All Right Reserved.
1
Advertisement
Table of Contents

Related Manuals for BenQ G2010WP


Summary of Contents for BenQ G2010WP
- Page 1 - For RO to input specific “Legal Requirement” in specific NS regarding to responsibility and liability statements. - Please check BenQ’s eSupport web site, http://esupport.benq.com, to ensure that you have the most recent version of this manual. First Edition (June, 2006)
-
Page 2: Table Of Contents
Content Index Abbreviations & Acronyms ....................3 1. About this manual ......................3 1.1 Trademark ........................... 3 2. Precautions & Safety Notices................... 4 2.1 Safety Precaution ........................4 2.2 Product Safety Notice......................4 2.3 Service Notes........................4 3. Product Overview......................5 3.1 Power Supply ........................ -
Page 3: Abbreviations & Acronyms
The following terms are trademarks of BenQ Corporation: BenQ Importance Only trained service personnel who are familiar with this BenQ Product shall perform service or maintenance to it. Before performing any maintenance or service, the engineer MUST read the “Safety Note”... -
Page 4: Precautions & Safety Notices
2. Precautions & Safety Notices 2.1 Safety Precaution This monitor is manufactured and tested on a ground principle that a user’s safety comes first. However, improper used or installation may cause damage to the monitor as well as to the user. WARNINGS: This monitor should be operated only at the correct power sources indicated on the label on the rear of the monitor. -
Page 5: Product Overview
3. Product Overview 3.1 Power Supply Item condition Spec Remark √ Universal 100~240VAC Input Voltage range input full range √ 100Vac 1.5A (max.) Input Current range 240Vac 0.7A (max.) ≤55W without Audio, √ Power consumption LED: Green normal “on” operation √... -
Page 6: Video Performance
Cable Detect DDC_CLK DVI: TMDS ¼Æ¾Ú TMDS ¼Æ¾Ú TMDS ¼Æ¾Ú ¼ÒÀÀ««ª½ TMDS ¼Æ¾Ú TMDS ¼Æ¾Ú DCC ®ÉÄÁ DCC ¼Æ¾Ú 2/4 «Ì½ª ¦P¨B ±µ¦a (+5V, TMDS ¼Æ¾Ú TMDS ¼Æ¾Ú TMDS ¼Æ¾Ú Hot Plug TMDS ¼Æ¾Ú TMDS ¼Æ¾Ú +5V ¹q·½ ¼ÒÀÀ 1/3 «Ì½ª Detect Sync) TMDS ¼Æ¾Ú... -
Page 7: Plug & Play Ddc2B Ddc-Ci Support
√ Vertical Sync polarity: (+) or (-) 55~76Hz 3.5 Plug & Play DDC2B DDC-CI Support Item condition Spec Remark √ DDC channel type DDC 2B √ EDID Version 1.3... -
Page 8: Support Timings
3.6 Support Timings Preset Pixel Horz Freq Horz Vert Freq Vert Polarity Pixel Format (kHz) Polarity (Hz) (MHz) 640 x 350 31.47 70.09 25.18 Preset 640 x 350 37.86 85.08 31.50 Fail safe mode 640 x 400 31.47 70.09 25.18 Non preset 640 x 400 37.86... - Page 9 Preset Pixel Horz Freq Horz Vert Freq Vert Polarity Pixel Format (kHz) Polarity (Hz) (MHz) 1152 x 864 67.50 75.00 108.00 Non preset 1152 x 864 77.09 85.00 121.50 fail safe mode 1152 x 870 68.68 75.06 100.00 Preset 1152 x 900 61.80 65.95 92.94...
- Page 10 Preset Pixel Horz Freq Horz Vert Freq Vert Polarity Pixel Format (kHz) Polarity (Hz) (MHz) 1400 x 65.32 59.98 121.75 Non preset 1050 1400 x 82.28 74.87 179.50 Non preset 1050 1400 x 93.88 84.96 179.50 Non preset 1050 1440 x 55.496 59.901 88.75...
-
Page 11: Operational & Function Specification
Preset Pixel Horz Freq Horz Vert Freq Vert Polarity Pixel Format (kHz) Polarity (Hz) (MHz) 1392 mode 1856 x 112.50 75.00 288.00 Out of range 1392 mode 1920 x 66.587 59.934 138.5 fail safe mode 1080-R 1920 x 67.158 59.963 fail safe mode 1080 1920 x... - Page 12 CIE coordinate of white x--0.313 ± 0.020; y--0.329 ± 0.020 Display colors 16.7M (6bit+Hi-FR 3.7.2 Brightness Adjustable Range Item condition Spec Remark √ Brightness adjustable range At default ¡Ù 240 cd/m contrast level (Setting (saturate brightness max. point)& value 100%; Min. Full-white brightness value) color pattern...
-
Page 13: Lcd Characteristics
Unpackage vibration Drop shock 3.7.6 Electrostatic discharge Requirements Item condition Spec Remark Electrostatic discharge 3.7.7 Reliability Items Condition Spec Note MTBF 90% Confidence ¡Ù 60,000 Hours CCFL Life time Luminance becomes 50% 50000(Min)Hours Note. Display an all WHITE field at mid Brightness and Contrast settings 3.7.8 Audio performance Items Specification... -
Page 14: User Controls
3.9 User Controls User’s hardware control definition: CONTROL KEY KEYS FUNCTION A. When OSD displays, press [MENU] to return to previous level menu B. When OSD isn’t shown on screen, press [MENU] to enter OSD interface [MENU] C. Press [MENU] to enter Service Page When OSD isn’t shown on screen in Service Page Mode A. -
Page 15: Pallet & Shipment
√ Texture MT11000&MT11010& 1.BEZEL: MT11000 MT11020& & & polishing5000& polishing2000& polishing2000 polishing3000& 2.BACK COVER: polishing5000& MT11000 & polishing6000 MT11020& Special Texture polishing2000 3.STAND: MT11010& polishing2000 4.POWER KEY BUTTON: polishing2000 5.LED: polishing6000 Others:MT11010 √ Color BCS-7015A(BLACK)/B CS-T8110C(SILVER) Bezel painting 3.10.4 Carton Carton:Item condition Spec... - Page 16 20’ Without Pallet 40’ 3.11.2 Carton Specification Product: Net Weight (Kg) Gross Weight(Kg) Dimension w/o Base Dimension w/ Base LxWxH (mm) LxWxH (mm) 4.07±0.5 Kg ( Net) 5.12±0.5Kg 472.54X62.2X373.5mm 472.54X166.66X383.67mm Package: Carton Interior Dimension (mm) Carton External Dimension (mm) LxWxH LxWxH 538X134X446mm 528X124X428mm...
-
Page 17: Level 1 Cosmetic / Appearance / Alignment Service
4 Level 1 Cosmetic / Appearance / Alignment Service 4.1 Software / Firmware Upgrade Process Upload firmware to MCU via VGA Cable 1. Connect ISP board between monitor and PC as below configuration. LCD Monitor D-Sub ISP Board Insert to Parallel Port on PC 2. - Page 18 When OSD displays, press [Enter] to perform function of menu icon that is highlight or enter next level menu Activate the OSD Main menu When OSD isn’t shown on screen, press[Enter] to change input source • “[ ], [ ]” When “MENU OSD”...
- Page 19 Ï嵀 Senseye Demo ×Ô¶¯±äΪ Photo Sharpness ²»¿Éµ÷ ½ Ú 2. Senseye Demo ´¦ ÓÚ ON ʱ ,×ö Auto ×Ô¶¯±äΪ sRGB Sharpness ²»¿Éµ÷ ½ Ú Senseye Demo (ON/OFF) Full full Display Mode Aspect Input (D-sub/DVI) -EU version: 14 languages (English/Français/Deutsch/Italiano/Espanol/Po lish/Czech/Hungarian/Serbo-croatian/Romani an/Netherlands/Russian/Swedish/Protuguese) Language English...
- Page 20 Item Content Equipment Test OSD 1.Signal is set as1680×1050@60Hzunder General-1 Chroma function 2.Checking whether each single function key and compound function key can be Signal Generator worked. Contrast Check 1. Set input mode to 1680×1050@60Hz Chroma 2. Set Pattern to 32 gray shades Signal Generator 3.
- Page 21 Power Key Off...
-
Page 22: Level 2 Disassembly/Assembly/Circuit Board/Standard Parts Replacement
5. Level 2 Disassembly/Assembly/Circuit Board/Standard Parts Replacement 5.1 Exploded Diagram... - Page 23 PCBA I/F BOARD *1 ASSY CHASSIS PCBA Power *1 SCREW,P,CROSS, CHASSIS SCREW,P,CROSS,W/WAS,M3 W/WAS,M3*6,Zn-Cc *1 PANEL *1 HRN LVDS FFC *1 FOIL,AI,DOUBLE,COND,60x35xT0.07mm, LEFT LE2016*1 BEZEL *1 FUNCTION BUTTON ASSY BEZEL *1 PCBA KEY PAD*1 POWER BUTTON *1 KEY PAD CABLE *1 LENS *1 ASSY,BACK COVER *1 BACK COVER *!
-
Page 24: Assembly Block
5.2 Assembly Block Assemble the panel with front-bezel Assemble chassis & Plug in the LVDS Keypad assembly Plug in the lamp lines... - Page 25 Back cover assembly Assemble the stand Lock screw Base assembly...
-
Page 26: Disassembly Block
5.3 Disassembly Block LE 20D6 LCD Monitor BASE, LE20D6*1 ASSY BASE Rubber Foot , *5 STAND FRONT *1 ASSY STAND STAND BACK *1 ASSY,BACK COVER *1 HINGE *1 BACK COVER *! SCREW,P,CROSS,M4*8,BLACK, SCREW,B,CROSS,T.T-4*10,BLK ,ROHS *3 LOGO BACK *1 NL(NYLOK£ © *2 BEZEL *1 ASSY FRONT BEZEL PCBA KEY PAD*1... - Page 27 Disassemble the stand(take out screw) Move out the stand Disassemble back cover Move out LVDS disassemble keypad...
- Page 28 Disassemble the LVDS Take apart the chassis aside...
-
Page 29: Block Diagram
IC803 F801 TLV431ALP 2.5A/250V R824 10K 1% C801 C802 CN801 1000p/400V 1000p/400V VCC5V InnoLux BenQ G2010W ON/OFF BRIGHTNESS Document Number : SIZE : APPRO BY : 80mm 6P P801 AC_SKT C827 TITLE : TO SCALER BD CN101 0.1/50V CHECK BY :... -
Page 32: Circuit Operation Theory
470K 1% 820 1% C518 0.01/50V R537 10K 1% R519 C519 R539 0.1/50V 5K1 1% D506 InnoLux BenQ G2010W BAT54 Document Number : SIZE : APPRO BY : R538 C517 10K 1% Custom 6800p/50V TITLE : CHECK BY : Inverter... - Page 33 The current flowing through CCFL is sensed and regulated through sense resistor R528, R523. The feedback voltage connected to Pin4 (ISEN), then compared with a reference voltage (3.3V) via a current amplifier, resulting in PWM drive outputs to PUSH-PULL switches. 5.5.2 Power board diagram: AC Current Input Circuit P801 is a connector for connecting AC Power.
- Page 34 5.5.3.2 Buttons Control - Button “Power” in middle of bezel connects to U108 #9 through R156, via CN104#8. - Button “UP” “DOWN ““MENU” “ENTER” in the bottom of bezel connects to U108 #21,#22,#14 through R189,R188,R159 via CN104 #1, #2,#3 - U106 is an EEPROM IC which memory OSD setting and save the value adjusted by user. - LED Indicator on Front Bezel a.
-
Page 35: Trouble Shooting Guide
5.6 Trouble Shooting Guide Inverter trouble shooting Backlight can’t be turned on No raster? LED Green? Backlight can’t be turned on. Is there 5Vdc Check power voltage on pin2 of supply Is there high-level voltage Check I/F board Is Ok R501? on pin8 of IC501? R501 open Are connected rightly... - Page 36 Power trouble shooting_1 No Power & Power LED Off No power Check IC802, Check circuit Check primary C805, T801 if short rectifier voltage Check F801, P801, D801 Check pin3 of Check R801, R805, IC802 voltage R822, R823, R817 about 1V Check R803, R807, Check pin2 of IC802 R824, R825...
- Page 37 Power trouble shooting_2 DC output voltage is unstable Output Voltage Unstable Check Vbe of Check ZD801, Check circuit if Q801 below short ZD802 , ZD803 , Check Q801, Q802 Check Pin R of Check R809, R814, Check reference IC801, R818 IC803 voltage voltage Check R810, R811...
- Page 38 Power trouble shooting_3 Output power is unstable Unstable power Check R810, Check sampling R811, R818 Circuit Change R810, R811, Change Check the R pin Check the C pin voltage of IC803 voltage of IC803 Check R809, R808, R814, Check pin1 of Check D806, C815 if IC802 voltage short...
- Page 39 Black Screen Black Screen Check power supply: Power Fail Pin1, 2 of CN101 Check power supply Check U101 Of U108 f U108 Check Reset Check C164 Of U108 Check Crystal of U108 Check: X101 Check CCFL - Enable Check pin5 of Inverter Fail CN101 of U108...
- Page 40 White Screen White Screen LVDS Cable Workmanship Reinsert Change LVDS LVDS Cable NG Cable Check VLCD Check LVDS Panel Fail Is 5V? Signals Check Panel - Enable Check the HW Reset U108 Fail Of U108 is High? Of U108 Check R107, R109, R110 Q101, Q104 Check the pins Of U108...
- Page 41 Bad Screen Bad Screen LVDS Cable Workmanship Reinsert Change LVDS LVDS Cable NG Cable Check Crystal Of U108 Check: X101 Check the communication of the U108 and U105 Check :RTD_SCLK, Check the Pins of RTD_SD3/SDI,Reset The U108 and U105...
Need help?
Do you have a question about the G2010WP and is the answer not in the manual?
Questions and answers