Table of Contents
Advertisement
- W ashing Machine
Installation & User Instructions
HW50-1010
Important
– Please read these instructions fully before installing or using
These instructions contain important information which will help you get the best fr om your
appliance and ensur e safe and corr ect installation, use and maintenance.
- Please keep for future reference
。
30
C
。
90
C
。
。
40
C
60
C
。
40
C
Advertisement
Table of Contents

Related Manuals for Haier HW50-1010


Summary of Contents for Haier HW50-1010
- Page 1 - W ashing Machine Installation & User Instructions - Please keep for future reference HW50-1010 。 。 。 。 。 Important – Please read these instructions fully before installing or using These instructions contain important information which will help you get the best fr om your...
-
Page 2: Table Of Contents
Parts Installation 。 。 。 。 Unpacking your washing machine 。 HW50-1010 Removing the packing bolts Levelling your washing machine W ater inlet hose connection Drain hose connection Electrical connection Contr ol Panel Functions Pr ogramme Selection Guide User Instructions 11-13 Befor e fi... -
Page 3: Safety Information
Safety Information Important – Please r ead these instructions fully befor e installation Befor e use During use • The installation of this appliance is best carried • This appliance is not to be used by childr en or out by 2 people. persons with r educed physical, sensory or mental capabilities, or lack of experience and knowledge, •... -
Page 4: Parts
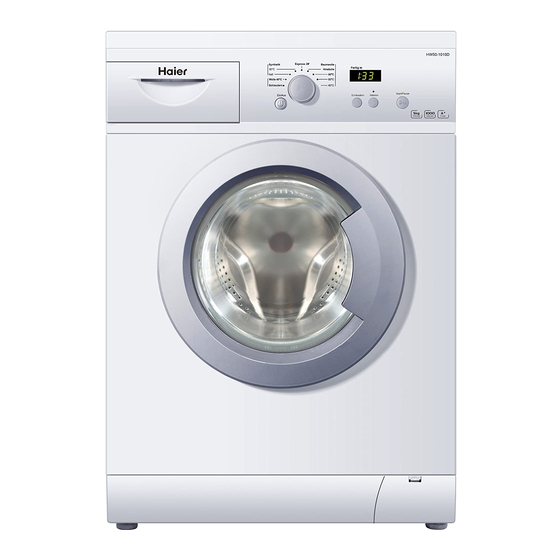
Parts Please familiarise yourself with the parts and accessories listed below 。 。 。 。 。 HW50-1010 Front Back Filter 1. Detergent drawer 10. Back plate 2. Top panel 11. Packing bolt x 3 3. Power button 12. Earth terminal Programme selection dial 13. -
Page 5: Installation
Installation Unpacking your washing machine Caution: 2 people are required to unpack and handle the washing machine, it is recommended that gloves are worn. a: Carefully remove all packaging materials including the foam base, dispose of corr ectly . Hose/ Note: When opened, water droplets may be cable visible in the drum etc. -
Page 6: Levelling Your Washing Machine
。 。 。 。 。 This will minimise vibrations and noise during HW50-1010 use plus reduce wear and tear. Level by adjusting the feet under the appliance. First adjust the feet by hand to get the appliance level then tighten the nuts up to... -
Page 7: Drain Hose Connection
Installation Drain hose connection - options Three connection options are available: General notes: The end of the drain hose must not be under water, it must be secur ely fixed and leak-free. If the drain hose is placed on the ground or the height of the pipe is less than 80cm, the washing machine will continuously drain while being filled (self-syphoning). -
Page 8: Electrical Connection
。 。 。 。 that indicated in the HW50-1010 The blue wire must be connected to the terminal technical specifi cations that is marked with the letter N. (page 18) and the The brown wire must be connected to the terminal appliance rating plate that is marked with the letter L. -
Page 9: Contr Ol Panel Functions
。 。 。 。 。 4. Speed button 5. Intense button HW50-1010 6. Start/pause button 1. Detergent drawer The drawer contains thr ee compartments: 1: Main wash deter gent 2: Fabric softener 3: Pr ewash deter gent 2. Power button 。... -
Page 10: Contr Ol Panel Functions
Control Panel Functions 5. Intense button Touch this button lightly, the indicator light will be light on . you can increase the washing time, rinsing times in main wash stage of the selected program, which is suitable for dirty clothes. 6. -
Page 12: User Instructions
User Instructions Before first use Important: Before using the washing b: Set the programme knob to quick wash . machine for the first time it is recommended Press the start/pause button and the washing that you run the machine empty and with machine will start. -
Page 13: Using Your Washing Machine
User Instructions Using your washing machine 1. Loading a: Open the door, place laundry item by item 。 。 。 。 。 into the washing machine, firmly close the door. b: Do not overload the washing machine (see the programme selection guide for maximum load information, page 10). -
Page 14: User Instructions
User Instructions Using your washing machine 6. Start washing When the washing machine is connected to the power socket and a program is selected, lightly touch this button to start operation. Du- ring a wash cycle, touch it lightly ,operation will stop and the indicator light start blinking. -
Page 15: Error Signals
Error Signals The door lock light will flash in different combinations to signal when ther e is an error, see the table below for the meanings. Error message Cause Solution Error Door not shut pr operly. Shut door pr operly. The start indicator wasn't lighted,and the buzzer sound abnormaly. -
Page 16: Care And Maintenance
Care and Maintenance General Important: Always unplug the washing machine from the power socket during cleaning and maintenance. • After each wash, turn off the machine and switch of f at the mains to save electricity and for safety. Wipe clean the lower part of the porthole. •... -
Page 17: Transporting The Washing Machine
Care and Maintenance Transporting the washing machine If the washing machine is to be transported, the packing bolts and rubber spacers should be replaced to pr event damage. a: Remove the back cover plate, by removing the 3 screws shown and sliding down the back cover plate (4 &... -
Page 18: Trouble Shooting
Trouble Shooting In the unlikely event of difficulties with your washing machine please follow the trouble shooting guide below. If the problem persists, contact the retailer if the machine is still under guarantee. If the machine is out of guarantee, contact an approved service agent on 0845 600 4632. If an error signal is displayed, please refer to error signals table on page 14. -
Page 19: T Echnical Specifi Cations
Technical Specifications Model / Item HW50-1010 Power supply (220-240) V~/50Hz Maximum working current 10 amp Water pr essure Maximum: 1 MPa Minimum: 0.03 MPa Washing power 170 watt Spinning power 400 watt Maximum washing load 5 kg Spinning speed 1000 rpm...
Need help?
Do you have a question about the HW50-1010 and is the answer not in the manual?
Questions and answers
My machine having drain problem and giving signal E02 I don't know how to resolve issue