Samsung SV-DVD40 Instruction Manual
Hide thumbs
Also See for SV-DVD40:
- Instruction manual (38 pages) ,
- User manual (35 pages) ,
- Training manual (189 pages)
Table of Contents
Advertisement
Available languages
Available languages
Quick Links
Advertisement
Table of Contents

Related Manuals for Samsung SV-DVD40


Summary of Contents for Samsung SV-DVD40
- Page 1 DVD-VCR DVD-VIDEOMAGNÓ SV-DVD40 SV-DVD50 SV-DVD55 I n s t r u c t i o n M a n u a l Használati útmutató STANDBY/ON OPEN/CLOSE EJECT STANDBY/ON PROG www.samsungvcr.com www.samsungvcr.com...
-
Page 2: Table Of Contents
Contents Contents ECORDING ELEVISION ROADCASTS OREWORD Selecting the Recording Speed....................Safety Instructions........................ Protecting a Recorded Cassette ....................Disc Type and Characteristics ..................... Recording a Programme Immediately..................DVD-VCR O VERVIEWS Recording a Programme with Automatic Stop ................. Front View of the DVD-VCR....................Using the ShowView Feature .................... - Page 3 Contents Safety Instructions (cont.) The following illustrations represent precautions. OLVING ROBLEMS Technical Specifications ...................... 67 Problems and Solutions (VCR).................... 68 Troubleshooting Guide (DVD) ..................... 69 The lightning bolt is a warning sign alerting you to dangerous voltage inside the product. DO NOT OPEN THE DVD-VCR.
-
Page 4: Disc Type And Characteristics
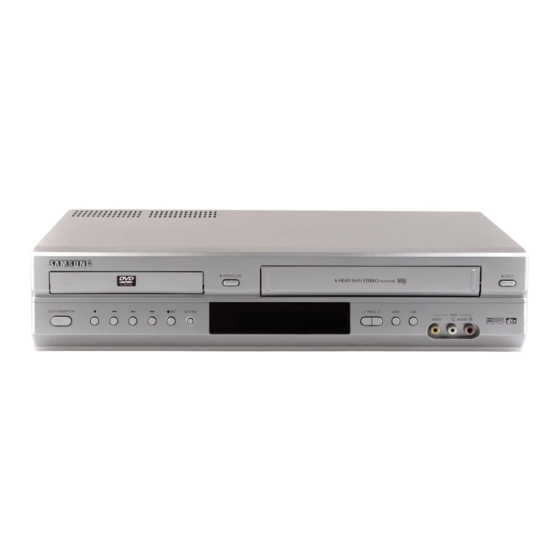
Disc Type and Characteristics Front View of the DVD-VCR ( SV-DVD 40 ) This DVD player is capable of playing the following types of discs with the corresponding logos : STANDBY/ON OPEN/CLOSE VCR SELECT BUTTON DVD DECK VIDEO CASSETTE BUTTON BUTTON COMPARTMENT REW /SKIP BACK... -
Page 5: Rear View Of The Dvd-Vcr
Rear View of the DVD-VCR Infrared Remote Control ( SV-DVD 40 ) ( SV-DVD 40 ) AV2 (DEC./EXT.) SCART DIGITAL AUDIO OUT (EURO-21) SOCKET STANDBY/ON AERIAL IN SOCKET (COAXIAL) CONNECTOR STANDBY/ON OPEN/CLOSE AUDIO L, R OUT SHUTTLE << / >> SOCKETS CLEAR DVD, VCR SELECT... -
Page 6: Display Indicators
Accessories 28 RIGHT 29 OK 30 EZ VIEW 31 DISC MENU You have just purchased a SAMSUNG Video Cassette Recorder (DVD-VCR). 32 MARK Together with your DVD-VCR, you will find the following accessories in the box. SEARCH 33 MODE REPEAT REMOTE CONTROL AUDIO &... -
Page 7: Connecting Dvd-Vcr To The Tv Using The Coaxial Cable
Deciding How to Connect DVD-VCR Connecting DVD-VCR to the TV using the Coaxial Cable To receive television programmes a signal must be received from one of the following sources: An outdoor aerial You must take into account various factors when connecting audio or video systems: An indoor aerial Types of connectors available on your systems A cable television network... -
Page 8: Plug & Auto Set Up
Connecting DVD-VCR to a Satellite Receiver or Other Equipment Plug & Auto Set up You can connect your DVD-VCR to a Satellite receiver or other DVD-VCR using the SCART cable if the appropriate outputs are available on the equipment chosen. The following illustrations give a few examples Your DVD-VCR will automatically set itself up when it is plugged of the connection possibilities. -
Page 9: Tuning Your Television For The Dvd-Vcr
Tuning Your Television for the DVD-VCR Deck Control Keys You must tune your television for the DVD-VCR only if you are not The DVD-VCR uses one set of controls to operate both decks. The following keys are helpful in successfully controlling each deck. using a Scart cable To view pictures from your DVD-VCR when a Scart cable STANDBY/ON Button... -
Page 10: Basic Tv Tuner Operations
Basic TV Tuner Operations Inserting Batteries in the Remote Control You must insert or replace the batteries in the remote control when you: The following buttons are used when watching television via the DVD-VCR’s built-in TV tuner. Purchase the DVD-VCR Find that the remote control is no longer working TV/VCR Button correctly... -
Page 11: Menu Language
Setting the Menu Language Presetting the Stations Automatically You do not need to preset the stations if you have already set them automatically (see Plug & Auto Set Up on page 15). Open “MENU” Your DVD-VCR contains a built-in tuner used to receive television Language : English broadcasts. -
Page 12: Presetting The Stations Manually
Presetting the Stations Manually Clearing a Preset Station You do not need to preset the stations manually if you have already set them automatically. If you have stored a TV station: That you do not require After pressing the MENU, press the OK or ❿ . Language : English Language... -
Page 13: Changing The Preset Station Table
Changing the Preset Station Table Selecting the RF OUT Sound Mode (B/G-D/K) You can rearrange the Station Table and give different programme You can choose the sound mode (B/G or D/K) according to the TV numbers to the stations listed according to your own preferences. set connected to your VCR. -
Page 14: Selecting The Colour Mode
Selecting the Colour Mode Intelligent Picture Control The Intelligent Picture Control Feature allows you to adjust the Before recording or playing back a cassette, you can select the sharpness of the image automatically, according to your own Language : English required system standard. -
Page 15: Selecting The Cassette Type
ShowView Extend (SV-DVD 50 /SV-DVD55 Only) Screen Messages To prevent delays or over-runs the VCR has a function called Your DVD-VCR displays most information both on the DVD-VCR and the television. ShowView EXTEND allowing you to extend the recording time by Language : English up to 60 minutes. -
Page 16: S-Vhs Play
Repeat Play Selecting the Recording Speed You can set repeat play to repeat the tape continuously from You can record a cassette at two different speeds: beginning to end. SP (Standard Play) Type Recording Time (in SP) LP (Long Play) E-180 180 mins. -
Page 17: Protecting A Recorded Cassette
Protecting a Recorded Cassette Recording a Programme with Automatic Stop Video cassettes have a safety tab to prevent accidental erasure. When this tab has been removed, you cannot record on the tape. This function enables you to record up to nine hours (LP) of programmes. -
Page 18: Modifying Showview Programming
Using the ShowView (SV-DVD50/SV-DVD55 Only) Modifying ShowView Programming Before presetting your DVD-VCR: If you wish to correct the programme displayed or modify certain elements, such as the recording speed, you can do so before you press RETURN a second time to confirm. Switch on both the television and your DVD-VCR Check that the date and time are correct If you wish to... -
Page 19: Using The Timer Programming Feature
Using the Timer Programming Feature Checking a Preset Recording The Timer Programming feature allows you to preset the DVD-VCR You can check your preset recordings: Date Start Stop Speed to record a programme up to one month before that programme is Timer Method When you have finished presetting the DVD-VCR WE 1... -
Page 20: Adjusting Picture Alignment Manually
Playing a Cassette Selecting the Audio Output Mode You can select the mode in which the sound is reproduced on the This function allows you to play back any pre-recorded cassette. loudspeakers and AV outputs. The following options are available. Switch on both the television and your DVD-VCR. -
Page 21: Playing A Sequence Frame By Frame
Playing a Sequence Frame by Frame Searching for a Specific Sequence You can: Each time you record a cassette on this DVD-VCR, an “index” is automatically marked on the tape when recording starts. Stop the cassette at a given frame (image) The Search function allows you to fast-forward or rewind to a specific Advance one frame at a time index and start playback from that point. -
Page 22: Using The Tape Counter
Using the Tape Counter Searching for a Specific Sequence Intro Scan The tape counter: Indicates the elapsed time in the play and record modes After pressing the SEARCH, press the corresponding ❷ (hours, minutes and seconds) buttons, until the Intro Scan option is selected. -
Page 23: Connecting An Rca Audio/Video Input Cable
Connecting an RCA Audio/Video Input Cable Using the Assemble Edit Function This function allows you to start a new recording at a specific position on the cassette while maintaining a very smooth scene You can connect other audio/video equipment to your DVD-VCR change. -
Page 24: Using The Tv Buttons On The Remote Control
Using the TV Buttons on the Remote Control (SV-DVD 50 /SV-DVD55 Only) Choosing a Connection Your DVD-VCR remote control will work with Samsung televisions The following show examples of connections commonly used to connect the DVD -VCR player with and compatible brands. -
Page 25: Setting Up The Language Features
Setting Up the Language Features Setting Up the Language Features Language Setup If you set the player menu, disc menu, audio and subtitle language Using the Audio Language Disc Menu : English in advance, they will come up automatically every time you watch a Audio : English movie. -
Page 26: Setting Up The Audio Options
Setting Up the Display Options Setting Up the Audio Options With the unit in Stop mode, press the MENU button. With the unit in Stop mode, press the MENU button. Setup buttons, then OK or ❿ button. buttons, then OK or ❿ button. Select DVD using Select DVD using ❷... -
Page 27: Setting Up The Parental Control
Setting Up the Parental Control A/V Receiver Connections The Parental Control function works in conjunction with DVDs that To take full advantage of the movie theater experience that DVD offers, you may want to connect your DVD-VCR to a complete have been assigned a rating - which helps you control the types of Setup Setup... -
Page 28: Special Playback Features
Special Playback Features During DVD/CD playback you can select from the following ❿ special playback options. To resume normal playback, press the (Play/Still) button. Still ❿ Press the ll (Play/Still) button on the remote control during playback. • The picture will still and the audio will mute. ❿... -
Page 29: Adjusting The Aspect Ratio (Ez View)
Adjusting the Aspect Ratio (EZ View) To play back using aspect ratio (DVD) Press the EZ VIEW button. • The screen size changes when the button is pressed repeatedly. • The screen zoom mode operates differently depending on the screen setting in the initial DVD menu. •... -
Page 30: Using The Display Function
Adjusting the Aspect Ratio (EZ View) Using the Display Function When Playing a DVD/CD If you are using a 4:3 TV During play, press the INFO. button on the remote. For 16:9 aspect ratio discs Use the buttons to select the desired item. ❷... -
Page 31: Changing The Camera Angle
Changing the Camera Angle Repeat Play Repeat the current track, chapter, title, a chosen section (A-B), or all Using the ANGLE button of the disc. When a DVD contains multiple angles of a particular scene, you can select the Angle function. When playing a DVD Press the ANGLE button to see if an ANGLE ) mark is present at the upper left hand corner of the screen. -
Page 32: Selecting The Audio Language
Selecting the Audio Language Using the Mark Function You can select a desired language quickly and easily with the This feature lets you bookmark sections of a DVD so you can AUDIO button. quickly find them at a later time. Using the Mark Function (DVD) Using the AUDIO button During play, press the MARK button on the remote. -
Page 33: Mp3/Wma Play
MP3/WMA Play MP3/WMA Play When an MP3/WMA Disc is inserted into the DVD player, the first CD-R MP3/WMA discs song file of the first folder plays. • If more than two file extensions are present, select the media of your When playing CD-R/MP3 or WMA discs, please follow all the recommendations for CD-R above, plus the choice. -
Page 34: Program Play & Random Play
Program Play & Random Play Picture CD Playback • Select JPEG in the menu to view a Photo CD. • To change the currently playing media, press the STOP ( ) button Program Play (CD/MP3/WMA) twice and then press the DISC MENU button. •... -
Page 35: Technical Specifications
Picture CD Playback Technical Specifications Rated voltage 220 - 240V~, 50Hz CD-R JPEG Discs Power consumption 23 Watts Weight 4.5 Kg • Only files with the ".jpg" and ".JPG" extensions can be played. General Size 430mm X 330mm X 100mm •... -
Page 36: Problems And Solutions (Vcr)
Problems and Solutions (VCR) Troubleshooting Guide (DVD) Before contacting the Samsung after-sales service, perform the following simple checks. Before requesting service (troubleshooting) Problem Explanation/Solution No power Check that the power plug is connected to a wall outlet. Problem Action Page Have you pressed the STANDBY/ON button? Ensure that the disc is installed with the label side facing up. - Page 37 SAMSUNG EUROPEAN BLOC WARRANTY...
- Page 39 Magyar...
- Page 40 ............
- Page 41 40°C 5°C...
- Page 42 ( SV-DVD 40 ) STANDBY/ON PROG ( SV-DVD 50 ) EJECT STANDBY/ON PROG ( SV-DVD 55 ) STANDBY/ON PROG...
- Page 43 ( SV-DVD 40 ) ( SV-DVD 40 ) STANDBY/ON STANDBY/ON OPEN/CLOSE SHUTTLE << / >> CLEAR DVD, VCR SELECT AUDIO TRK REWIND SKIP BACK STOP AV2 (DEC./EXT) SUBTITLE 10 MENU AV1 (EURO AV) 11 UP 12 LEFT 13 DOWN 14 SPEED SP/LP 15 RECORD 16 TIMER...
- Page 44 ( SV-DVD 50/ SV-DVD 55) STANDBY/ON STANDBY/ON OPEN/CLOSE SHUTTLE << / >> CLEAR TV MUTE. AUDIO VOLUME +/– STEREO REWIND SKIP BACK STOP SUBTITLE 10 MENU 11 UP 12 LEFT 13 DOWN 14 SPEED SP/LP 15 RECORD 16 TIMER 17 ANGLE 18 OPEN/CLOSE 19 0-9 20 TV/VCR...
- Page 45 AV2 (DEC./EXT) AV1 (EURO AV) AV1 (EURO AV) AV2 (DEC./EXT) AV1 (EURO AV) AV1 (EURO AV) Audio Audio/Video Video AV2 (DEC./EXT) AV1 (EURO AV)
- Page 46 AV2 (DEC./EXT) AV1 (EURO AV) LANGUAGE SET AV2 (DEC./EXT) AV1 (EURO AV) Auto setup Please wait... 00 % Clock Set Time Date Year 12 : 00 1 / JAN / 2003 WED Auto Clock : On AV2 (DEC./EXT) AV1 (EURO AV)
- Page 47 STANDBY/ON OPEN/CLOSE STANDBY/ON STANDBY/ON ❿ II „A DVD- VIDEOMAGNÓ kimeneti csatornájának a beállítása” „Néhány egyszerû hiba és azok kijavítása"...
- Page 48 Language : English Install User Set Auto Power Off : Off Screen Messages : On ❿ Clock Set Time Date Year ❷ 12 : 00 1 / JAN / 2003 WED Clock Set ➛ ❿...
- Page 49 ❿ ❿ Language : English Install User Set Auto Power Off : Off Screen Messages : On Language Set English Français Deutsch Español Italiano Nederlands...
- Page 50 Language : English Install User Set Auto Power Off : Off Screen Messages : On ❿ Install Auto Setup Install ❷ Manual Setup TV System VCR Output CH : CH 36 Install ❷ Auto Setup ❷ Auto Setup Your date will be lost Press OK to continue Menu to exit...
- Page 51 Language : English ❿ Language : English Install User Set Install Install Auto Power Off : Off ❷ User Set Screen Messages : On Auto Power Off : Off ❿ Screen Messages : On Install ❷ Manual Setup Install ❷ TV STATION TABLE Install Install...
- Page 52 Language : English Language : English ❿ Install Install ❿ User Set User Set Auto Power Off : Off Auto Power Off : Off Screen Messages : On Screen Messages : On ➛ ❿ ❷ Install Install ❷ Install Clock Set ❿...
- Page 53 Language : English Install User Set Language : English Auto Power Off : Off ❿ Screen Messages : On Install User Set User Set Auto Power Off : Off Screen Messages : On ❿ SV-DVD 50/SV-DVD 55 User Set ❿ ❿...
- Page 54 Language : English Language : English Install Install User Set User Set Auto Power Off : Off Auto Power Off : Off Screen Messages : On ❿ Screen Messages : On ❿ User Set ❷ ❷ ❿ Screen Messages User Set ❿...
- Page 55 Language : English ❷ Install User Set ❿ Auto Power Off : Off Screen Messages : On ❷ ❿ VCR Setup Tape Select : E180 Repeat Play : Off S-VHS : Off ❷ Language : English Install ❿ User Set Auto Power Off : Off Screen Messages...
- Page 56 EJECT PROG STANDBY/ON LENGTH 2:30 SET LENGTH : PRESS...
- Page 57 ➛ ❿ Timer Method Standard ShowView ShowView ShowView ❷ ShowView Timer is full (SV-DVD40) ➛ ❿ ShowView Timer Method ❷ If you want to set ShowView the timer program, ➛ press the key. ➛ ❿ ❷ ➛ ❿ ShowView ShowView ❷...
- Page 58 Timer Method Date Start Stop Speed Standard WE 1 19 : 00 19 : 30 ShowView Standard Standard TIMER PROGRAMMING TIMER PROGRAMMING Start Stop Speed ❿ ❷ WE 1 19 : 00 19 : 30 ❷ ➛ ❿ ❿ ❷ ❷...
- Page 59 ❿ EJECT...
- Page 60 MONO ❿ ❿ ❿ ❿ ❿ ❿ ➛ ➛ ❿...
- Page 61 ❿ ❿ ❿ ❷ ❿ ❿ ❷ ❿...
- Page 62 ❷ ❿ ➛ ➛ ❿ ❿ 0:00:00 INTRO SCAN : ❿ II ➛ ➛ ❿ ❿ INDEX SEARCH : ❷ ❿ ➛ ➛ ❿ ❿ ➛ ➛ ❿ ❿ ➛ ➛ ❿ ❿✌ ❿ II...
- Page 63 ❿ ❿ ❿ EJECT STANDBY/ON PROG...
- Page 64 A TV mûködtetése a videomagnó távvezérlôjével A csatlakoztatás kiválasztása (SV-DVD 50 /SV-DVD55) A videomagnó Samsung és azzal kompatibilis márkájú TV készülékkel STANDBY/ON OPEN/CLOSE kapcsolható össze. Az alábbi ábra a DVD-játszó televízióval és egyéb készülékkel történô szokásos csatlakoztatását ismerteti. Hogy az Ön által használt TV kompatibilis-e vagy sem, megtudja, ha Csak a DVD-játszó...
- Page 65 Language Setup Disc Menu : English Audio : English Subtitle : Automatic Setup ❷ Setup ❿ Display Setup Setup ❷ ❿ ❷ ❿ ❷ ❷ ❿ Language Setup ❷ ❿ Disc Menu : English Audio : English ❷ Subtitle : Automatic ❿...
- Page 66 ❷ ❷ Setup Setup ❿ ❿ Setup Setup Display Setup Display Setup Setup ❷ ❷ Setup ❿ ❿ ❷ ❷ ❿ ❿ Display Setup TV Aspect : 4:3 L-Box Black Level NTSC Disc Output : PAL 60Hz DVD Out : RGB Dolby Digital Out MPEG-2 Digital Out GyôzŒdjön meg arról, hogy a megfelelô...
- Page 67 Setup Setup Display Setup Setup vagy Dolby Digital dekóderrel szerelt ❷ AV rádió erôsítô digitális audió ❿ bemenetéhez. ❷ Parental Setup ❿ Use Password : No ❿ (SV-DVD50/SV-DVD55) ❷ ❿ ❷ ❿ ❷ ➛...
- Page 68 ❿ ❿ ❿ ❿ ❿ ❿ ➛➛ ❿ ❿ ➛➛ ➛➛ ❿ ❿ ➛➛ ❿ ❿ ❿ ❿ ❿ ❿ ❿ ❿ ❿...
- Page 69 ❷ ➛ ❿ ENG 5.1CH TITLE CHAPTER TIME ENG 5.1CH AUDIO SUBTITLE 3D SOUND ENG 5.1CH...
- Page 70 ➛ ❿ Chapter Title A - B ➛ ❿ ➛ ❿ Track Disc A - B ➛ ❿ ➛ ❿ ❷...
- Page 71 ➛ ❿ ➛ ❿ ➛ ❿ ➛ ❿ – – CLEAR ➛ ❿ ❿ ➛ ❿...
- Page 72 ➛ ❿ ❷ ❷ PROGRAM RANDOM...
- Page 73 PROGRAM RANDOM ❷ ➛ ❿ ❷ PROGRAM 01 PROGRAM 01 ❿ Track Program order Album Photo : 1 /215 ➛ ❿ ❷ ❿ CLEAR ❿ ❿ ➛➛ PROGRAM RANDOM ➛ ❿ Photo : 1 /215 Timer : ➛ ❿ ❷...
- Page 75 ❿ SETUP SETUP AUDIO OPTIONS ❿❿ ➛ ➛ PARENTAL CREATE PASSWORD...
- Page 76 THIS APPLIANCE IS DISTRIBUTED BY ELECTRONICS www.samsung.com AK68-00169K...
Need help?
Do you have a question about the SV-DVD40 and is the answer not in the manual?
Questions and answers