Dynex DX-E101 Quick Setup Manual
Fast ethernet adapter
Hide thumbs
Also See for DX-E101:
- User manual (44 pages) ,
- Installation manual (46 pages) ,
- Manual (28 pages)
Table of Contents
Advertisement
Available languages
Available languages
Quick Links
Advertisement
Table of Contents

Related Manuals for Dynex DX-E101


Summary of Contents for Dynex DX-E101
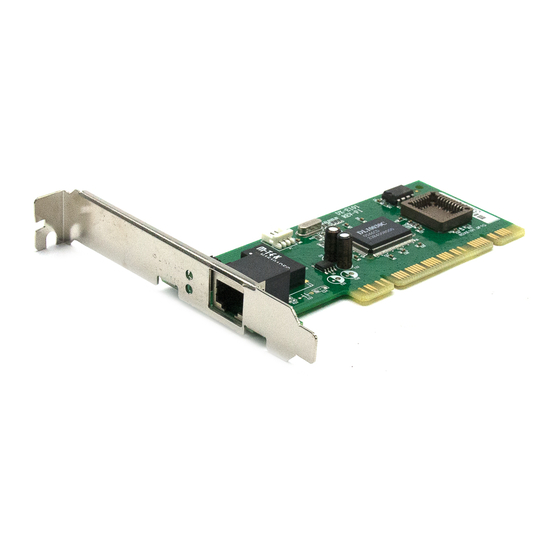
- Page 1 Dynex Fast Ethernet Adapter Carte Ethernet rapide de Dynex Adaptador de Ethernet rápido Dynex DX-E101 Q U I C K S E T U P G U ID E G U I D E D ’ I N S TA L L AT I O N R A P I D E • GU ÍA D E INSTAL AC IÓ N R Á PIDA...
-
Page 2: Installing The Adapter
Legal notices ..................6 your computer), then remove the backplate. Français ............7 5 If the bracket on the DX-E101 is too tall to fit your computer’s case, Español ............12 remove the bracket and replace with the includ3d half-height bracket. - Page 3 To install the driver in Windows 2000: 1 The Found New Hardware Wizard runs automatically. Click NEXT. 3 Insert the DX-E101 DC into your CD or DVD drive. The Dynex PCI Adapter window opens automatically. Click Exit. 2 Insert the DX-E101 CD into your CD or DVD drive. The Dynex PCI Adapter window runs automatically.
- Page 4 Installing the driver 2 Insert the DX-E101 CD into your CD or DVD drive. The Dynex PCI Adapter window runs automatically. Click EXIT. 4 In the Locate Driver Files window, click CD-ROM drives. Click to clear all other checkboxes, and then click Next.
- Page 5 Novell Netware 5.0, 5.1, 6.0, 6.5, ODI driver, NDIS driver, Packet driver, Linux 3 Connect one end of the cable to the DX-E101 WOL connector on the adapter. Both ends of the WOL cable are identical, so you can use either end.
-
Page 6: Legal Notices
Legal notices Legal notices Copyright and disclaimer © 2007 Dynex. DYNEX and the DYNEX logo are trademarks of Best Buy FCC STATEMENT Enterprise Services, Inc. Other brands and product names are trademarks or registered trademarks of their respective holders. Specifications and This equipment has been tested and found to comply with the limits for features are subject to change without notice or obligation. -
Page 7: Table Of Contents
Español ............37 arrière de l’ o rdinateur), puis le retirer. 5 Si le support de la carte DX-E101 est trop grand pour s’adapter au boîtier de l’ o rdinateur, le retirer pour le remplacer par le support Contenu de l'emballage demi-hauteur fourni. - Page 8 (Recommended) (Installer le logiciel automatiquement [recommandé]), puis sur Next (Suivant). 2 Insérer le CD de la carte DX-E101 dans le lecteur de CD ou DVD. La fenêtre de la carte PCI de Dynex PCI s’affiche automatiquement. Appuyer sur EXIT pour quitter.
-
Page 9: Windows 98/ Windows Me
CD-ROM. Cliquer pour désactiver toutes les cases, puis cliquer sur Next. 2 Insérer le CD de la carte DX-E101 dans le lecteur de CD ou DVD. La fenêtre de la carte PCI de Dynex s’affiche automatiquement. -
Page 10: Activation Du Réveil Par Le Réseau
5 Cliquer sur Next (Suivant). Windows installe les pilotes de la carte DX-E101. 3 Connecter une extrémité du câble au connecteur pour le réveil par le réseau à la carte DX-E101. Les deux extrémités du câble pour le réveil par le réseau sont identiques et peuvent être utilisées indifféremment du sens. -
Page 11: Problèmes Et Solutions
Humidité : 10 % à 90 % d’humidité relative (sans condensation) © 2007 Dynex. DYNEX et le logo de DYNEX sont des marques de commerce de Best Buy Enterprise Services, Inc. Les autres noms de marques et de produits sont des marques de commerce ou des marques Compatibilité... -
Page 12: Contenido De La Caja
Español ............37 posterior de su computadora), luego quite la placa posterior. 5 Si el soporte en el DX-E101 es demasiado alto para caber en la caja de su computadora, remueva el soporte y reemplácelo con el Contenido de la caja soporte de media altura suministrado. - Page 13 Completing the Found New Hardware Wizard (Finalización del Asistente para hardware nuevo encontrado). 3 Inserte el CD del DX-E101 en su unidad de CD o DVD. La ventana Dynex PCI Adapter (Adaptador PCI Dynex) se abrirá automáticamente. Haga clic en Exit (Salir).
- Page 14 Next (Siguiente). 2 Inserte el CD del DX-E101 en su unidad de CD o DVD. La ventana Dynex PCI Adapter (Adaptador PCI Dynex) se abrirá automáticamente. Haga clic en EXIT (Salir).
- Page 15 5 Haga clic en Next (Siguiente). Windows instala los controladores del DX-E101. 3 Conecte un extremo del cable al conector WOL DX-E101 del adaptador. Ambos extremos del cable WOL son idénticos, por lo tanto puede usar cualquier extremo.
-
Page 16: Avisos Legales
Humedad: 10 a 90 % de humedad relativa, sin condensación © 2007 Dynex. DYNEX y el logotipo de DYNEX son marcas comerciales de Best Buy Enterprise Services, Inc. Otras marcas y nombres de productos Compatibilidad con FCC Clase B; VCCI Clase B; CISPR B;... - Page 17 Avisos legales...
- Page 18 (800) 305-2204 © 2007 Best Buy Enterprise Services, Inc. All rights reserved. DYNEX is a registered trademark of Best Buy Enterprise Services, Inc. All other products and brand names are trademarks of their respective owners. Distributed by Best Buy Purchasing, LLC 7601 Penn Ave.
Need help?
Do you have a question about the DX-E101 and is the answer not in the manual?
Questions and answers