Table of Contents
Advertisement
Advertisement
Table of Contents

Related Manuals for Dynex DX-C114191


Summary of Contents for Dynex DX-C114191
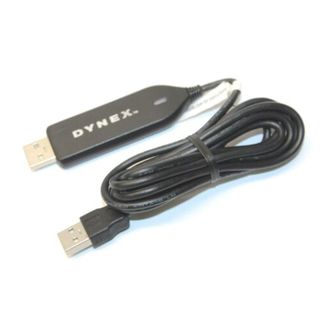
- Page 1 PC/Mac USB File Transfer Adapter DX-C114191 USER GUIDE...
-
Page 3: Table Of Contents
Dynex DX-C114191 PC/Mac USB File Transfer Adapter Important safety instructions ...3 Introduction...4 Features...5 Package Contents...5 System Requirements ...5 LED status ...6 Installing and using the adapter...6 Specifications...23 Legal notices...24 One-year limited warranty ...27 Important safety instructions Always read the safety instructions carefully: •... -
Page 4: Introduction
• If any of the following situation arises, get the equipment checked by a service technician: • The equipment has been exposed to moisture. • The equipment has been dropped and damaged. • The equipment has obvious sign of breakage. •... -
Page 5: Features
Features • Simple USB2.0 Plug-n-Play functionality. • Bi-directional data transfer between two computers or different operating systems: • Notebooks and desktops • Windows 2000, Windows XP, Windows Vista, and Windows 7 operating system compatible (For PC- to-PC) • Windows and MAC operating system compatible (For PC-to-MAC) •... -
Page 6: Led Status
1 Plug one end of the USB adapter into your local PC and the other end into your remote PC. When the User Interface screen opens, click Dynex to start. Description One of the two USB ports is connected to a host. - Page 7 - OR - If you are using Windows Vista or Windows 7, when the message box opens, click Run Dynex Transfer Adapter.exe to start.
- Page 8 The following work area opens, showing the local and remote computers. 2 To transfer files, click and drag the files from one side to the other side.
- Page 9 When the file appears on the other side, it is available for use. Note: If you close the program, or the program fails to autorun, you can start it from My Computer by double-clicking Dynex Link.
- Page 10 Under Windows XP/2000...
- Page 11 Under Windows Vista or Windows 7...
- Page 12 XP, Windows Vista, or Windows 7 to Mac (PC-to- Mac): 1 Plug one end of the USB adapter into your local PC and the other end into your Mac. When the User Interface screen opens for your PC, click Dynex to start. - OR -...
- Page 13 If you are using Windows Vista, when the message box opens, click Run Dynex Transfer Adapter to start.
- Page 14 2 Double-click Dynex Link on your Mac desktop. 3 When the pop-up window opens, double-click Dynex Transfer Adapter.
- Page 15 4 A warning box opens. Click OK to continue the installation.
- Page 16 5 The following work areas open, showing the local (PC) and remote (Mac) computers. Local (PC) Remote (Mac)
- Page 17 6 To transfer files, click and drag the files from one side to the other side. When the file appears on the local side or your Mac, it is available for use.
- Page 18 Notes: If you close the program or the program fails to autorun, on the PC side you can start it from My Computer by double-clicking Dynex Link and repeat above steps in "Under PC Interface. " On the Mac side, double-click Dynex Link on desktop and repeat above steps in "Under Mac Interface.”...
- Page 19 To install and use from Windows 7 to Mac (PC-to- Mac): 1 Plug one end of the USB adapter into your local PC and the other end into your Mac. The User Interface screen opens for your PC.
- Page 20 2 Click Run Dynex Transfer Adapter.exe. The Dynex start box opens.
- Page 21 3. Click Dynex to start. The UAC box opens.
- Page 22 3 Click Yes. The following work areas open, showing the local (PC) and remote (Mac) computers.
-
Page 23: Specifications
Specifications Item Power mode Host interface Standard interface and I/O requirement Description USB bus power - 5 V USB 2.0 Standard - USB 1.1/2.0 supports Interface - USB Type A female... -
Page 24: Legal Notices
Item Maximum line rate Operating system support Working environment Operating temperature - 32°F~122°F (0~50°C) Dimensions Weight Cable length Housing Safety requirement RoHS Specifications subject to change without notice. Legal notices Description Over 12 MB/s, up to 20 MB/s Windows 2000/Windows XP/Windows Vista/ Windows 7 (PC-to-PC) Windows and Mac OS X v10.4 or later (PC-to-Mac) Storage temperature - -40°F~131°F (-40~55°C) -
Page 25: Fcc Warning
FCC Part 15 This device complies with Part 15 of the FCC Rules. Operation of this product is subject to the following two conditions: (1) this device may not cause harmful interference, and (2) this device must accept any interference received, including interference that may cause undesired operation. -
Page 27: One-Year Limited Warranty
(2) replace the Product at no charge with new or rebuilt comparable products or parts. Products and parts replaced under this warranty become the property of Dynex and are not returned to you. If service of products and parts are required after the Warranty Period expires, you must pay all labor and parts charges. -
Page 28: What Does The Warranty Not Cover
To obtain in-home warranty service for a television with a screen 25 inches or larger, call 1-888-BESTBUY. Call agents will diagnose and correct the issue over the phone or will have an Dynex-approved repair person dispatched to your home. Where is the warranty valid? This warranty is valid only to the original purchaser of the Product in the United States, Canada, and Mexico. - Page 29 • Products where the factory applied serial number has been altered or removed REPAIR REPLACEMENT AS PROVIDED UNDER THIS WARRANTY IS YOUR EXCLUSIVE REMEDY. DYNEX SHALL NOT BE LIABLE FOR ANY INCIDENTAL OR CONSEQUENTIAL DAMAGES FOR THE BREACH OF ANY EXPRESS OR IMPLIED WARRANTY ON THIS PRODUCT, INCLUDING, BUT NOT LIMITED TO, LOST DATA, LOSS OF USE OF YOUR PRODUCT, LOST BUSINESS OR LOST PROFITS.
- Page 30 7601 Penn Avenue South, Richfield, Minnesota, U.S.A. 55423-3645 © 2010 BBY Solutions, Inc. All rights reserved. DYNEX is a trademark of BBY Solutions, Inc. Registered in some countries. All other products and brand names are trademarks of their respective owners.
- Page 31 7601 Penn Ave. South, Richfield, MN 55423 U.S.A. © 2010 BBY Solutions, Inc. All rights reserved. DYNEX is a trademark of BBY Solutions, Inc. Registered in some countries. All other products and 09-0777 brand names are trademarks of their respective ENGLISH owners.
Need help?
Do you have a question about the DX-C114191 and is the answer not in the manual?
Questions and answers