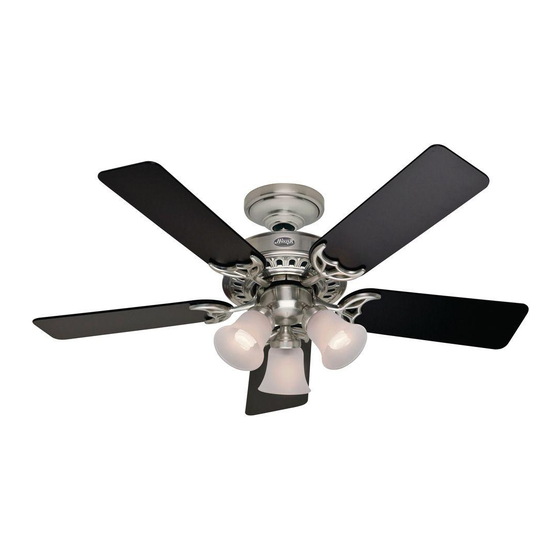
Hunter 21361 Owners And Installation Manual
Type 2 models
Hide thumbs
Also See for 21361:
- Installation manual (1 page) ,
- Manual de installatión y operatión (13 pages) ,
- Parts manual (2 pages)
Advertisement
Table of Contents
- 1 Table of Contents
- 2 Preparing the Fan Site
- 3 Getting Ready
- 4 Installing the Ceiling Plate
- 5 Assembling and Hanging the Fan
- 6 Wiring the Fan
- 7 Installing the Canopy and Canopy
- 8 Assembling the Blades
- 9 Completing Your Installation with a Multi Staked Light Fixture
- 10 Operating and Cleaning Your
- 11 Troubleshooting
- Download this manual
See also:
Installation Manual
For Your Records and
Warranty Assistance
For reference, also attach your receipt or a copy
of your receipt to the manual.
__________________________________________
Model Name
__________________________________________
Model No.
__________________________________________
Date Purchased
__________________________________________
Where Purchased
Form# 42671-01
20100527
©2010 Hunter Fan Co.
Type 2 Models
Type 2 Models
Type 2 Models
Owner's Guide and Installation Manual
Advertisement
Table of Contents

Summary of Contents for Hunter 21361
- Page 1 Warranty Assistance For reference, also attach your receipt or a copy of your receipt to the manual. Owner’s Guide and Installation Manual __________________________________________ Model Name __________________________________________ Model No. __________________________________________ Date Purchased __________________________________________ Where Purchased Form# 42671-01 20100527 ©2010 Hunter Fan Co.
-
Page 2: Table Of Contents
9 • Troubleshooting . . . . . . . . . . . . . . . . . . . . 15 • To reduce the risk of fire, electrical shock, or motor damage, do not use a solid-state speed control with this fan . Use only Hunter speed controls . -
Page 3: Preparing The Fan Site
If you want to use an existing fan site, complete the following checklist to System determine if the site is acceptable and safe for your new Hunter fan . If you cannot check off every item, prepare a new fan site as described on this page . - Page 4 ANSI/NFPA 70 . If your ceiling fan, go to your fan manual and continue with Section 2 • Installing the you are unfamiliar with wiring, use a Ceiling Plate. qualified electrician . 42671-01 • 05/27/10 • Hunter Fan Company...
- Page 5 Support Brace Hunter’s patented 3-position mounting system provides you maximum installation flexibility and ease . You can install your Hunter fan in one of three ways, depending on ceiling height and your preference: Low Profile, Standard, or Angled mounting . The steps in this manual include Ceiling instructions for all three Installer’s Choice mounting methods .
-
Page 6: Getting Ready
Parts Guide . Check for any shipping damage to the motor blade irons (if applicable) in sets, or fan blades . If any parts are missing or damaged, contact your Hunter as they were shipped . dealer or call Hunter Technical Support Department at 888-830-1326 . -
Page 7: Installing The Ceiling Plate
. Tighten the screws into the 9/64” pilot holes; do not use lubricants on the screws . Do not over tighten . Ceiling Plate Flat Washer 3” Wood Steps 2-3 – 2-6 Screw 42671-01 • 05/27/10 • Hunter Fan Company... -
Page 8: Assembling And Hanging The Fan
3-7 . Raise the fan and align the slots in the canopy with the hooks on the ceiling plate . Low Profile Washer 3-8 . Place the slots over the hooks to hang the fan . 42671-01 • 05/27/10 • Hunter Fan Company... -
Page 9: Wiring The Fan
. 4-7 . Spread the wires apart, with the grounded wires on one side of the outlet box and the ungrounded wires on the other side of the outlet box . 42671-01 • 05/27/10 • Hunter Fan Company... -
Page 10: Installing The Canopy And Canopy
Note: Should you need to remove the trim ring, press firmly on Canopy opposite sides of the trim ring directly above the groove in the Trim hanger ball . The tabs will flex out releasing the canopy trim ring . Ring Canopy Screw 42671-01 • 05/27/10 • Hunter Fan Company... -
Page 11: Assembling The Blades
6 • Assembling the Blades Step 6-1 (Detail) Hunter fans use several styles of fan blade irons (brackets that hold the blade to the fan) . 6-1 . Your fan may include blade grommets . If your fan has grommets, insert them by hand into the holes on the blades . -
Page 12: Completing Your Installation With A Multi Staked Light Fixture
. Attach the lower switch housing to the upper Plug Connector switch housing with three #6-32 x 3/8” housing assembly screws . Detail Steps 7-5 – 7-6 Lower Switch Housing Housing Assembly Screw 42671-01 • 05/27/10 • Hunter Fan Company... - Page 13 7-7 . Install and tighten the three thumb screws . Do not overtighten . 7-8 . Install included 14w CFL bulbs . Note: Glass shade style and number of lights may vary . Shade Cup Glass Shade Step 7-7 – 7-8 Thumb Screw 42671-01 • 05/27/10 • Hunter Fan Company...
-
Page 14: Operating And Cleaning Your
. 8-5 . The blades on this fan have been treated with Hunter’s Dust Armor protection, making the blades less likely to attract dust and dirt . -
Page 15: Troubleshooting
If you need parts or service assistance, please call 888-830-1326 (In Canada, call 866-268-1936) or visit us at our Web site at http://www . h unterfan . c om . Hunter Fan Company 7130 Goodlett Farms Parkway #400 Memphis, Tennessee 38016 42671-01 • 05/27/10 • Hunter Fan Company...


Need help?
Do you have a question about the 21361 and is the answer not in the manual?
Questions and answers