Sony STR-DA2800ES Operating Instructions Manual
Multi channel av receiver
Hide thumbs
Also See for STR-DA2800ES:
- Service manual (214 pages) ,
- Activation manual (7 pages) ,
- Quick setup manual (2 pages)
Table of Contents
Advertisement
Quick Links
Advertisement
Table of Contents

Related Manuals for Sony STR-DA2800ES


Summary of Contents for Sony STR-DA2800ES
- Page 1 4-429-113-12(1) Multi Channel AV Receiver Operating Instructions Please read the Quick Setup Guide supplied with the receiver first. This allows you to understand the connections and operations flow of the receiver more easily. ©2012 Sony Corporation Printed in Malaysia STR-DA2800ES...
-
Page 2: Important Safety Instructions
Record these numbers in the space provided below. Refer to them whenever you call To reduce the risk of fire, do not cover the ventilation upon your Sony dealer regarding this product. opening of the appliance with newspapers, Model No. - Page 3 14)Refer all servicing to qualified service personnel. – Consult the dealer or an experienced radio/TV Servicing is required when the apparatus has technician for help. been damaged in any way, such as power-supply CAUTION cord or plug is damaged, liquid has been spilled or objects have fallen into the apparatus, the You are cautioned that any changes or modifications apparatus has been exposed to rain or moisture,...
-
Page 4: About This Manual
• The instructions in this manual are for model All other trademarks and registered trademarks are STR-DA2800ES (the receiver). Check your model of their respective holders. In this manual, ™ and ® number by looking at the lower right corner of the marks are not specified. - Page 5 The source code for the software used in this product is subject to the GPL and LGPL, and is available on the Web. To download, please access the following: URL: http://www.sony.net/Products/Linux Please note that Sony cannot answer or respond to any inquiries regarding the content of this source code.
-
Page 6: Main Features Of The Receiver
Main features of the receiver Compatible with a variety of connections and formats Feature Description Page 7.2 channels The receiver can output up to 7.2 channels. 23, 25 The receiver supports a bi-amplifier connection of a front speaker. Compatible with various The receiver is compatible with various audio formats, such as standards Dolby TrueHD, DTS-HD Master Audio, DSD, multi-channel... -
Page 7: Useful Functions
Better image and sound quality Feature Description Page Image up-conversion The receiver upscales or downscales analog video signals. The signals can be upscaled to 4k using an HDMI output jack. The receiver also upscales or downscales analog video signals for zone 2. - Page 8 Others Feature Description Page Environment-friendly The Auto Standby function switches the receiver to standby mode function automatically if you do not operate the receiver for a specific period of time or when there is no signal input to the receiver. More useful You can operate the receiver using a smartphone equipped with “ES Remote”...
-
Page 9: Table Of Contents
Table of Contents Main features of the receiver ......6 Using the Universal Remote Description and location of parts ....11 Control Function Selecting the equipment you want to Getting Started operate ...........65 Read the following before you connect any Operating the AV equipment ......65 equipment .......... - Page 10 Operating the receiver using a smartphone ..........86 Using the sleep timer ........86 Recording using the receiver ......87 Switching the command mode of the receiver and the remote control ......87 Using a bi-amplifier connection ....88 Reverting back to the factory default settings ...........89 Adjusting Settings Using the setting menu .......90...
-
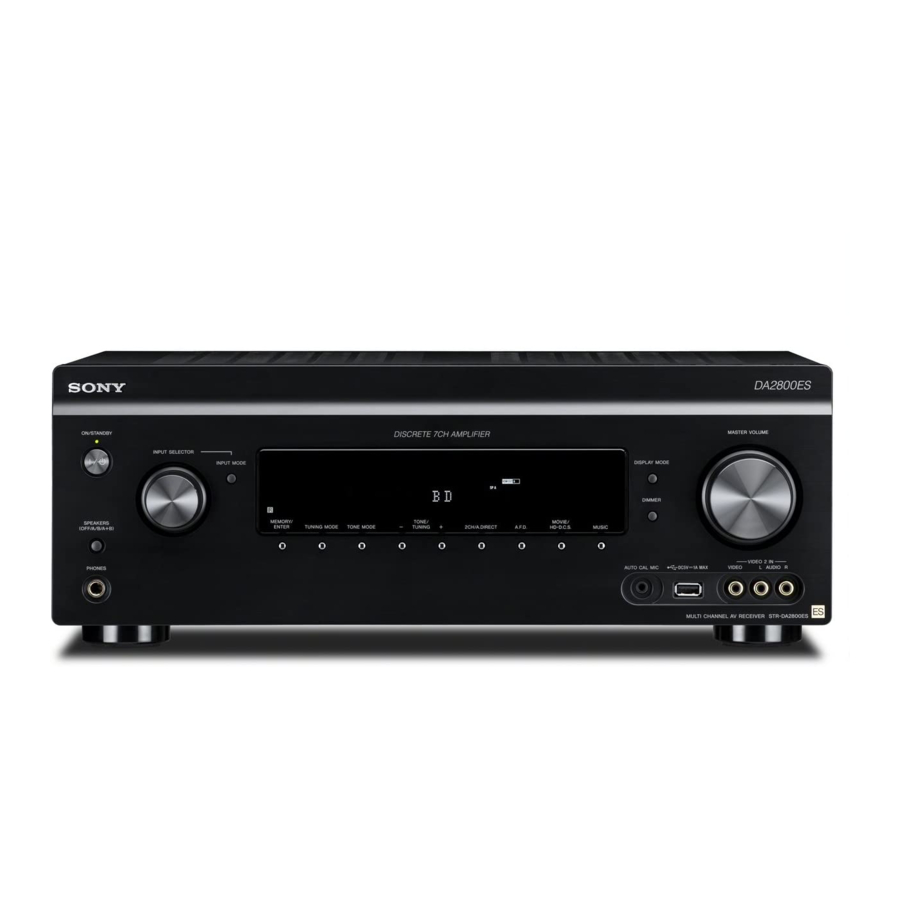
Page 11: Description And Location Of Parts
Description and location of parts Front panel A ?/1 ON/STANDBY G MASTER VOLUME (page 49) Turns the receiver on or off. H SPEAKERS (OFF/A/B/A+B) The lamp above the button lights up as (page 45) follows: I PHONES jack Green: The receiver is turned on. Connects to headphones. - Page 12 Indicators on the display A SW H Playback channel indicator Lights up when subwoofer(s) is (are) Indicates the speaker that is designated to connected and the audio signal is output output sound. Shows how the receiver from the SUBWOOFER jack(s). down-mixes or up-mixes the source sound, based on the speaker settings.
- Page 13 R DTS-HD indicator Surround Back Lights up when the receiver is decoding Example: DTS-HD. Recording format: 5.1 DTS-HD Speaker pattern: 3/0.1 Lights up constantly with the one of the Sound Field: A.F.D. Auto following indicators. MSTR DTS-HD Master Audio HI RES I LFE DTS-HD High Resolution Audio Lights up when input signals being...
-
Page 14: Rear Panel
Rear panel A DIGITAL INPUT/OUTPUT section E Control jacks for Sony and other external equipment OPTICAL IN jacks IR REMOTE IN/OUT (page 27, 31, 32) jacks (page 72) COAXIAL IN jacks Connect an IR repeater (not supplied) to (page 30, 37) IN to use the Multi-zone function. - Page 15 F VIDEO/AUDIO INPUT/OUTPUT section (page 27, 30, 31, 32, 33, 37) AUDIO IN/OUT jacks VIDEO IN/OUT* jacks AUDIO OUT jacks VIDEO OUT jack (page 72) SUBWOOFER jacks Connect to an external subwoofer(s). G UWA-C4Z Connect the supplied Lighting Control Adapter (UWA-C4Z) to this port. H COMPONENT VIDEO INPUT/ OUTPUT section (page 27, 30, 32) Y, P...
- Page 16 MEM, then press the numeric buttons (wd) to select a preset number to which a station is stored during tuner operation. G SEN Accesses the home page of the Sony Entertainment Network (SEN), a network service provided by Sony. H WATCH, LISTEN (page 49) I PAGE +/–...
-
Page 17: Input Buttons
1) 2) O m/M V Input buttons ./> Press one of the buttons to select the Press the buttons to operate the DVD equipment you want to use. When you player, Blu-ray Disc Player, CD player, press any of the input buttons, the receiver MD deck, tape deck, equipment turns on. - Page 18 A tactile dot is attached to these buttons (5/VIDEO 2, N, CH +). Use it as a mark of operation. Functions are available only for a USB input or a Sony Entertainment Network (SEN). Note The above explanations are intended to serve as...
-
Page 19: Getting Started
Getting Started Read the following before you connect any equipment Before connecting cords, make sure to disconnect the AC power cord (mains lead). Installing Speakers See “1: Installing speakers” (page 23). Connecting the monitor See “2: Connecting the monitor” (page 27). Connecting the video equipment The image quality depends on the connecting jack. -
Page 20: Function For Conversion Of Video Signals
Function for conversion of video signals This receiver is equipped with a function for converting video signals. • Composite video signals can be output as HDMI video and component video signals. • Component video signals can be output as HDMI video and video signals. As the factory default setting, video signals input from the connected equipment are output to the HDMI OUT or MONITOR OUT jacks as shown in the table below. -
Page 21: Digital Audio Formats Supported By The Receiver
Digital audio formats supported by the receiver Digital audio formats that this receiver can decode depend on digital audio input jacks of the equipment connected. This receiver supports the following audio formats. Connection between the playback equipment and the receiver Maximum number COAXIAL/ Audio format... - Page 22 Network/USB Type of content File format Extensions Music “.wav” 1) 2) 5) “.wma” “.mp3” “.m4a” 1) 2) 5) FLAC “.flac” 1) 2) Video MPEG-1 Video/PS “.mpg,” “.mpeg,” “.m2ts,” “.mts” 1) 3) MPEG-2 Video/PS, TS 1) 2) MPEG-4 AVC “.mkv,” “.mp4,” “.m4v,” “.m2ts,” “.mts” 1) 2) WMV9 “.wmv,”...
-
Page 23: 1: Installing Speakers
1: Installing speakers 7.1 channel speaker system This receiver allows you to use up to a 7.2 using front high speakers channel system (7 speakers and two subwoofers). You can enjoy vertical sound effects (e.g., Pro Logic IIz mode). AFront left speaker Examples of speaker system BFront right speaker configuration... - Page 24 6 channel speaker system Recommended speaker • Place the surround back speaker behind the placement seating position. 7 channel speaker system • The angle A shown in the illustration should be the same. Since the subwoofer does not emit highly directional signals, you can place it wherever you want.
-
Page 25: Connecting Speakers
Connecting speakers Before connecting cords, make sure to disconnect the AC power cord (mains lead). A Monaural audio cord (not supplied) If you have an additional front speaker B Speaker cords (not supplied) system, connect it to the SURROUND BACK/FRONT HIGH/FRONT B/ZONE 2 AFront speaker A (L) terminals. - Page 26 When you connect a subwoofer with an auto standby function, turn off the function when watching movies. If the auto standby function of the subwoofer is set to on, it goes into standby automatically based on the level of the input signal to the subwoofer, and the sound may not be output.
-
Page 27: 2: Connecting The Monitor
It is not necessary to connect all the cords. Connect cords according to the jacks of your equipment. A Optical digital cord (not supplied) E HDMI cable (not supplied) B Audio cord (not supplied) We recommend that you use a Sony HDMI cable. C Video cord (not supplied) D Component video cord (not supplied) - Page 28 TV type Audio Return Channel Required cable (cord) (ARC) Video Audio HDMI equipped Compatible* – Incompatible A or B** Non-HDMI equipped – D or C A or B** * You can output the TV’s sound (multi-channel surround sound) from the receiver only by connecting the TV with an HDMI cable.
-
Page 29: 3: Connecting The Video Equipment
If your equipment does not have an HDMI jack, see page 30. DVD player, Blu-ray Disc Player Video/audio signals A HDMI cable (not supplied) We recommend that you use a Sony HDMI cable. * You can connect any equipment with HDMI output jacks to the HDMI IN jacks of the receiver. - Page 30 To connect equipment with jacks other than HDMI jacks It is not necessary to connect all the cords. Connect cords according to the jacks of your equipment. DVD player, Blu-ray Disc Player Audio signals Video signals A Coaxial digital cord (not supplied) C Video cord (not supplied) B Audio cord (not supplied) D Component video cord (not supplied)
- Page 31 Connections required for playing video games PlayStation 3 (video game with an HDMI jack) Video/audio signals Audio signals Video signals Video game without an HDMI jack It is not necessary to connect all the cords. Connect cords according to the jacks of your equipment. A HDMI cable (not supplied) C Audio cord (not supplied) B Optical digital cord (not supplied)
- Page 32 Video game type Required cable (cord) Video Audio HDMI equipped* – Non-HDMI equipped B or C** * You can output the video game’s sound (multi-channel surround sound) from the receiver only by connecting the video game with an HDMI cable. ** If you want to output multi-channel surround sound from the receiver, use B for the audio connection.
- Page 33 A HDMI cable (not supplied) D Video cord (not supplied) B Optical digital cord (not supplied) E Component video (not supplied) C Audio cord (not supplied) Satellite tuner/Cable Required cable (cord) box type Video Audio HDMI equipped* – Non-HDMI equipped E or D B or C** * You can output the satellite tuner/cable box’s sound (multi-channel surround sound) from the receiver only...
- Page 34 Connections required for watching content via a camcorder To the VIDEO 2 IN jacks Video/audio signals Camcorder without an HDMI jack Camcorder with an HDMI jack A Video/audio cord (not supplied) B HDMI cable (not supplied)
-
Page 35: Notes On Connecting Cables
This signal properly. supports Dolby Digital, DTS, DSD, and • Sony recommends that you use an HDMI- Linear PCM. For details, see “Digital audio authorized cable or Sony HDMI cable. formats supported by the receiver”... -
Page 36: 4: Connecting The Audio Equipment
CD player, Super Audio CD player Video/audio signals A HDMI cable (not supplied) We recommend that you use a Sony HDMI cable. * You can connect any equipment with HDMI output jacks to the HDMI IN jacks of the receiver. - Page 37 To connect equipment with jacks other than HDMI jacks It is not necessary to connect all the cords. Connect cords according to the jacks of your equipment. CD player, Super Audio CD player A Coaxial digital cord (not supplied) B Audio cord (not supplied) * When you connect equipment with a coaxial digital jack, set “Audio Input Assign”...
- Page 38 Note on playing a Super Audio CD on a Super Audio CD player No sound is output when playing a Super Audio CD on a Super Audio CD player connected to only the COAXIAL jack on this receiver. When you play a Super Audio CD, connect the player to the SA-CD/CD IN jacks, or connect a player which can output DSD signals from the HDMI jack to the receiver...
- Page 39 Connections required for listening to the radio AM loop antenna (aerial) (supplied) FM wire antenna (aerial) (supplied) Notes • To prevent noise pickup, keep the AM loop antenna (aerial) away from the receiver and other equipment. • Be sure to fully extend the FM wire antenna (aerial).
-
Page 40: 5: Connecting The Ir Blaster
IR blaster is placed just above or below the remote sensor. Remote sensors on Sony products are identified by the symbol. Note The IR blaster is equipped with double-sided sticker... -
Page 41: 6: Making Connections For Using Lighting Control
6: Making connections for using Lighting Control To operate Control4-compatible equipment with the supplied remote control, plug the supplied Lighting Control Adapter (UWA-C4Z) into the receiver. A Lighting Control Adapter (UWA-C4Z) (supplied) Note Do not remove the Lighting Control Adapter while the receiver is turned on. -
Page 42: 7: Connecting To The Network
7: Connecting to the network If you have an Internet connection, you can connect this receiver to the Internet. Configuration example The following illustration is a configuration example of a home network with the receiver, a computer. We recommend that you use a wired connection. Router LAN cable Modem... -
Page 43: 8: Preparing The Receiver And The Remote Control
• If the receiver is used in an environment in Turning on the receiver which there is power supply noise from electric products or in a noisy network environment, use a shielded-type LAN cable. 8: Preparing the receiver and the remote control Press ?/1 to turn on the receiver. -
Page 44: 9: Setting Up The Receiver Using The Easy Setup
Inserting batteries into the 9: Setting up the receiver remote control using the Easy Setup Insert two R6 (size-AA) batteries in the RM-AAU155 remote control. You can set the basic settings of the receiver Observe the correct polarity when installing easily by operating the receiver in accordance batteries. - Page 45 • If you connect a subwoofer with an auto • When you connect front speakers to both the standby function, set it to off (deactivated). FRONT A and SURROUND BACK/ FRONT HIGH/FRONT B/ZONE 2 terminals, connect the speakers with a nominal impedance of 8 ohms or higher.
-
Page 46: 10: Setting Up Connected Equipment
– Switching inputs connected equipment. – Changing the setting of SPEAKERS (OFF/ For a Sony Blu-ray Disc Player, check that A/B/A+B) “Audio (HDMI),” “DSD Output Mode,” – Connecting headphones “Dolby Digital/DTS,” “Dolby Digital,” and “DTS”... -
Page 47: 11: Preparing A Computer To Use As A Server
11: Preparing a computer Guide to on-screen to use as a server display operation A server is a device which delivers content You can display the menu of the receiver on (music, photos, and videos) to a DLNA device the TV screen and select the function you want to use on the TV screen by pressing V/v/B/b on a home network. -
Page 48: Using The Menu
(page 68). Example: When you select “Watch.” Sound Effects Enables you to enjoy sound development provided by various Sony proprietary technologies or functions (page 59). Settings Enables you to adjust the settings of the receiver (page 90). -
Page 49: Enjoying Images/Sound From Connected Equipment
Turn on the equipment and start playback. Enjoying images/sound When a Sony BD/DVD player or other device is equipped with the IR blaster, Enjoying images/sound you can turn them on or off. (Operation of all the devices is not guaranteed.) -
Page 50: Usb Device/Walkman
Notes USB Device/WALKMAN • Do not remove the USB device during operation. To avoid data corruption or damage to the USB device, turn the receiver off when removing the You can play video/music/photo files on the USB device. connected USB device. •... -
Page 51: Ipod/Iphone
Select “iPod (front),” then press iPod/iPhone The video/music files are listed on the TV screen. You can enjoy the music/video/photo and If you select “iPod (front)” on “My charge the battery of an iPod/iPhone via the Photo,” select a photo file using the receiver. -
Page 52: Home Network (Dlna)
• Connect the receiver to your home network from this receiver. (page 42) • Sony cannot accept responsibility in the event that • Prepare other DLNA-certified equipment. data recorded to iPod/iPhone is lost or damaged For details, refer to the operating when using an iPod/iPhone connected to this instructions of the equipment. - Page 53 To play remote files by operating the receiver (Renderer) via a DLNA controller ® You can operate the receiver with a DLNA-certified controller, such as Windows Media Player 12, when playing files stored on a DLNA server. Computer This receiver (server, controller) (renderer) Control this receiver using a DLNA controller.
-
Page 54: Internet Video
B Playing status bar Internet video Status bar, cursor indicating the current position, playing time, duration of the video file You can play back a variety of Internet content C Network condition indicator using the receiver. D Network transmission speed Connect the receiver to a E The next video file name network (page 42). -
Page 55: Fm/Am
Available options FM/AM Item Details Favorites List Displays the Favorites List. You can listen to FM and AM broadcasts Add to Favorites Adds Internet content to the through the built-in tuner. Before operation, Favorites List. make sure you have connected the FM and Remove from Removes Internet content AM antennas (aerials) to the receiver... -
Page 56: Direct Tuning
Press V/v. V scans from lower to higher frequency stations and v for scanning higher to lower. SHIFT The receiver stops scanning whenever a station is received. Numeric buttons D.TUNING In case of poor FM stereo reception Tune in the station you want to listen to using Auto Tuning, Direct Tuning, or select the preset station you want (page 57). -
Page 57: Tuning To Preset Stations
Repeat steps 1 to 4 to program • The tuning scale for direct tuning is shown below. – FM band 100 kHz another station. – AM band 10 kHz* You can store stations as follows: * The AM tuning scale can be changed (page 58). •... - Page 58 Changing the AM tuning scale You can change the AM tuning scale to either 9 kHz or 10 kHz on the receiver. All preset stations will be erased when you change the tuning scale. TUNING MODE Press ?/1 to turn off the receiver.
-
Page 59: Enjoying Sound Effects
Enjoying Sound Effects Selecting the sound field Select “Sound Effects,” from the home menu, then press Select “Sound Field,” then press Select the sound field you want. Playing back with 2-channel sound You can switch the output sound to 2-channel sound regardless of the recording formats of the software you are using, the playback equipment connected, or the sound field settings of the receiver. -
Page 60: Enjoying A Surround Effect For Movies
Sound field Effect HD-D.C.S. HD Digital Cinema Sound (HD-D.C.S.) is Sony’s new innovative home theater technology using the latest acoustic and digital signal processing technologies. It is based on the precise response measurement data of a mastering studio. With HD-D.C.S., you are able to enjoy Blu-ray and DVD movies at home with not only the high quality of sound, but also the best sound ambience, just as the movie’s sound engineer intended in the mastering process. - Page 61 About the effect type for HD- D.C.S. HD-D.C.S. has three different types: Dynamic, Theater, and Studio. Each type has different reflection and reverberation sound mixture levels and is optimized to match a listener’s room uniqueness, taste and mood. x Dynamic The “Dynamic”...
-
Page 62: Enjoying A Surround Effect For Music
Enjoying a surround effect for music You can take advantage of surround sound simply by selecting one of the receiver’s pre- programmed sound fields. They bring the exciting and powerful sound of concert halls into your home. Sound field Effect Berlin Philharmonic Hall Reproduces the sound characteristics of the Berlin Philharmonic Hall. -
Page 63: Using The Sound Optimizer Function
About the gain level for PLIIz Using the Sound Height You can adjust the gain level of the front height Optimizer function channels for Pro Logic IIz mode (common for movie and music). The Sound Optimizer function imparts a sense of presence and intensity of sound to playback x Low of high volume sound, regardless of the... -
Page 64: Adjusting The Equalizer
To adjust all the speakers at one Adjusting the equalizer time (All EQ Adjustment) You can adjust the tonal quality (bass/treble) of all the speakers at one time. You can use following parameters to adjust the tonal quality (bass/treble level) of front, Select “Settings”... -
Page 65: Using The Universal Remote Control Function
Operating the AV Using the Universal Remote equipment Control Function Press the appropriate button on the Selecting the equipment remote control to operate the you want to operate equipment. The receiver will transmit infrared commands By using the remote control supplied with the to operate the selected AV equipment via the receiver, you can control AV equipment, such IR blaster connected to the IR REMOTE OUT... - Page 66 Table of buttons available to operate the equipment Projector Blu-ray Disc Cable box Disc Changer Satellite VCR/MD/ Equipment Category Player/DVD Receiver Camcorder player/Game Button Numeric buttons GUIDE Color buttons INFO/OPTIONS RETURN/EXIT V/v/B/b, ./> N, X, x CH +/– MENU PAGE +/– Note The above buttons are typically set so they are available to operate the equipment.
-
Page 67: Turning Off All Connected Equipment (Room Off)
Control wizard, you can make settings required for Universal Remote Control of the AV equipment you want to use. The remote control is initially set to operate Sony products. Press HOME. Select “Settings,” then press Select “Home Control Settings,” then press... -
Page 68: Using The Home Automation Function
Using the Home Automation Function Saving various settings for the receiver and recalling those settings all at one time (Easy Automation) As well as the settings for the receiver operations, you can save various settings with the player, monitor, lighting, or curtain conditions at home, according to your listening and viewing style. -
Page 69: Recalling The Settings Saved To The Scene
Select the menu you want, then Setting Default value press item 1: Movie 2: Music 3: Party 4: Night HDMI Out No Menu Explanation Change Change Change Change Edit a saved Allows you to customize and save Party Mode No Scene the settings to suit your Change... -
Page 70: Lighting Control
Selecting a lighting scene Lighting Control Select “Lighting” on the home You can operate Control4-compatible lighting menu. devices in your home via the on-screen GUI The lighting devices available are with the supplied remote control, or via “ES displayed. Remote” on your iPod touch/iPhone/Android smart phone. - Page 71 Select “Settings” from the home menu, then press Select “Home Control Settings,” then press Select “Lighting Scenes,” then press The Lighting Scenes wizard starts and the current lighting scenes list appears. Select the lighting scene you want to edit with V/v then press Follow the on-screen instructions to set each lighting device.
-
Page 72: Zone 2 Connections
When using an IR repeater (not supplied), you can operate both a device in the main zone and Using Multi-zone Features Sony receiver in zone 2 from zone 2 using the remote control. What you can do with the Use an IR repeater when you install the... - Page 73 2 Outputs sound from speakers in zone 2 using the receiver and another amplifier. Setting the speakers in zone 2 is required (page 75). Main zone Zone 2 monitor STR-DA2800ES IR REMOTE IN ZONE 2 VIDEO OUT* ZONE 2 AUDIO OUT Remote control A IR repeater (not supplied)
- Page 74 Note You can connect the HDMI ZONE 2 OUT jack directly to a TV in zone 2 (without any amplifier/receiver). It is recommended, however, that you connect a TV via an amplifier/receiver for higher audio/video capabilities, reducing possible effects on the main zone. When you select the same HDMI input for both the main zone and zone 2, the audio/video capabilities in the main zone will be limited in accordance with those in zone 2.
-
Page 75: Setting The Speakers In Zone 2
Parameter Explanation Setting the speakers in Fixed The volume control is fixed to ±0 dB. Recommended zone 2 when using a device with the variable volume control. When the speakers in zone 2 are connected to the SURROUND BACK/FRONT HIGH/ FRONT B/ZONE 2 terminals of the receiver Setting the HDMI output (page 72), make the setting so that the sound... -
Page 76: Operating The Receiver From Another Zone (Zone 2 Operations)
Setting the priority for the main Operating the receiver zone and zone 2 from another zone When the Zone2 Out function is enabled and (ZONE 2 operations) you select the same HDMI input for both the main zone and zone 2, there may be some You can operate the receiver from zone 2. - Page 77 Press ?/1. For zone 2, HDMI signals, component video signals, analog video and audio signals are output. The zone function is activated. When you select SOURCE, the signals of the current input in the main zone are output. Press one of the input buttons “TV”...
-
Page 78: Using Other Features
We recommend that you connect the receiver to products featuring “BRAVIA” Sync. features Notes • The following features may operate with non-Sony equipment. However, compatibility with all non- What is “BRAVIA” Sync? Sony equipment is not guaranteed. – System Power-Off “BRAVIA”... -
Page 79: System Audio Control
(page 34). However, you do not need to perform these steps If you use a Sony camcorder, the TV is when you use an HDMI IN 1, IN 2, or IN 3 jack. turned on in conjunction with the receiver,... -
Page 80: Remote Easy Control
the receiver, the sound is output from the TV Scene setting on the TV Sound field speaker. Graphics A.F.D. Auto • When you adjust the TV volume, the System Audio Control function adjusts the receiver’s volume simultaneously. Home Theater Control You can also operate this function using the TV menu. -
Page 81: Switching The Monitors That Output The Hdmi Video Signals
Press HDMI OUTPUT. Switching the monitors Each time you press the button, the output will be switched as follows: that output the HDMI HDMI A t HDMI B t OFF t video signals HDMI A… You can also use the HDMI OUT button on the receiver. -
Page 82: Switching Between Digital And Analog Audio
HDMI signals from When you connect equipment to both digital the receiver’s HDMI OUT A jack. Sony recommends this and analog audio input jacks on the receiver, setting if you use a TV that you can fix the audio input mode to either of... -
Page 83: Using Other Video/Audio Input Jacks
Select the audio and/or video • OPT Appears only when an optical jack is signals you want to assign to assigned to the input and selects the each input. optical input jack automatically. Notes • COAX • If you assign an input to any of the HDMI IN 1 to Appears only when a coaxial jack is IN 8 jacks in “Video Input Assign”... - Page 84 Input name GAME SAT/ VIDEO 1 VIDEO 2 VIDEO 3 VIDEO 4 SA-CD/ CATV Assignable video COMPONENT IN 1 input jacks (DVD) COMPONENT IN 2 (SAT/CATV) HDMI IN 1 (VIDEO 1) HDMI IN 2 (BD) HDMI IN 3 (SA-CD/CD) HDMI IN 4 (GAME) HDMI IN 5 (DVD) HDMI IN 6 (SAT/CATV)
-
Page 85: Preview For Hdmi
Tips Preview for HDMI • This function does not work under the following conditions: – An HDMI device is not connected. You can turn on a live picture-in-picture – A specific HDMI device is connected while its preview of HDMI inputs connected to this power is off. -
Page 86: Operating The Receiver Using A Smartphone
Operating the receiver Using the sleep timer using a smartphone You can set the receiver to turn off automatically at a specified time. You can operate the receiver using a smartphone equipped with the “ES Remote” application software. The “ES Remote” application software can be downloaded from the App Store (for iPod touch/iPhone) or the SHIFT... -
Page 87: Recording Using The Receiver
Switch the command mode from the factory default setting to the appropriate setting, if other Sony equipment is operated accidentally by the same remote control, when you are operating the receiver using the remote control supplied with the receiver. -
Page 88: Using A Bi-Amplifier Connection
Switching the command mode of Using a bi-amplifier the remote control connection RM SET If you are not using surround back speakers and front high speakers you can use the SURROUND BACK/FRONT HIGH/ SHIFT FRONT B/ZONE 2 terminals for the front speakers for use with a bi-amplifier 1, 2 connection. -
Page 89: Reverting Back To The Factory Default Settings
To set up speakers Reverting back to the For details, see “Speaker Connection” in the Speaker Settings menu (page 94). factory default settings Notes • Make the bi-amplifier settings before you perform You can clear all memorized settings and the Auto Calibration function. revert the receiver back to the factory default •... -
Page 90: Adjusting Settings
Select the menu item you want, then press to access the Adjusting Settings menu item. Using the setting menu Example: When you select “Audio Settings.” You can adjust the various settings for speakers, surround effects, multi-zone, etc., using the setting menu. Select the parameter you want, then press to enter. - Page 91 Setting menu list Settings Easy Setup (page 93) Speaker Settings Auto Calibration (page 93) Auto Calibration Setup Position Calibration Type Front Reference Type Name In Automatic Phase Matching Speaker Connection Center Speaker Lift Up Speaker Setup Test Tone Distance Unit Audio Settings Digital Legato Linear (page 97)
- Page 92 Network Settings Internet Settings (page 106) Connection Server Settings Renderer Options Renderer Access Control External Control Network Standby Internet Services Parental Control Password Settings Parental Control Area Code (page 107) Internet Video Parental Control Internet Video Unrated Home Control TV Control Settings (page 67) AV Equipment Control Lighting Control...
-
Page 93: Easy Setup
Easy Setup Speaker Settings Re-runs the Easy Setup to make the basic You can set up your viewing environment settings. Follow the on-screen instructions (with the speaker system you are using) either (page 44). automatically or manually. Auto Calibration Performs the D.C.A.C. (Digital Cinema Auto Calibration) function. -
Page 94: Speaker Connection
Sets the frequency to match that of the frequency of the input signals, depending on the audio format. Sony listening room standard. • Front Reference Adjusts the characteristics of all the Speaker Connection speakers to match the characteristics of the front speakers. -
Page 95: Speaker Setup
x Front B Select “Level,” then press You can adjust the level from –20 dB to x No Assign +10 dB in 0.5 dB intervals. You can adjust the front left level from Note FL–10.0 dB to FL+10.0 dB in 0.5 dB If the speaker pattern is set so that there are surround intervals. -
Page 96: Test Tone
Notes • Auto • When headphones are connected, Size and The test tone is output from each speaker Distance cannot be set. in sequence. • The surround back speakers will be set to the same • L, C, R, SR, SL, SB*, SBL, SBR, LH, setting as that of the surround speakers. -
Page 97: Audio Settings
Lets you output front 2 channel source Digital Legato Linear (D.L.L.) sound (instead of the test tone) sequentially from adjacent speakers. The D.L.L. function is Sony proprietary Some items may not be displayed, technology that allows low quality digital depending on the setting of the speaker audio signals and analog audio signals to be pattern. -
Page 98: Dual Mono
Equalizer Dynamic Range Compressor Lets you adjust the bass and treble level for Lets you compress the dynamic range of the each speaker (page 64). soundtrack. This may be useful when you want to watch movies at low volumes late at night. Dynamic range compression is possible with Subwoofer Muting Dolby Digital and Dolby TrueHD sources... -
Page 99: Sound Field
x Auto A/V Sync (Synchronizes audio Automatically switches the input mode and video output) between Dolby Digital, DTS, or PCM. Notes Lets you delay the output of audio to minimize • This function does not work in the following cases. the time gap between audio output and visual –... -
Page 100: Video Settings
Video Settings You can adjust settings for video. Resolution (Converting video signals) Lets you convert the resolution of analog video input signals and output the converted signals. x Direct x 480p/576p Lets you output analog video input signals x 720p directly. - Page 101 Output from “Resolution” HDMI OUT MONITOR MONITOR VIDEO menu setting jacks COMPONENT OUT jack Input from VIDEO OUT jacks 480i/576i, 480p/ HDMI IN jacks – – – 576p COMPONENT VIDEO IN – jacks VIDEO IN jacks – 720p, 1080i HDMI IN jacks –...
-
Page 102: Playback Resolution
Playback Resolution This function targets content via a USB device, a home network, and Internet video. x 480i/576i x 1080i x 480p/576p x 1080p x 720p Output HDMI OUT MONITOR MONITOR ZONE 2 ZONE 2 video jacks COMPONENT VIDEO OUT COMPONENT VIDEO OUT resolution... -
Page 103: D Output Settings
3D Output Settings HDMI Settings This function targets content via a USB You can adjust the required settings for device, a home network, and Internet video. equipment connected to the HDMI jacks. x Auto Select this to display 3D compatible content in Subwoofer Level Lets you set the level of the subwoofer to 0 dB x Off... -
Page 104: Control For Hdmi
x AMP Priority The HDMI audio signals from the playback equipment is only output to speakers Lets you set the priority when you select the connected to the receiver. The multi-channel same input for both the main zone and zone 2. sound can be played back as it is. -
Page 105: Input Settings
x Analog Input Settings Factory default setting You can adjust the settings for the connections Video Input Assign of the receiver and other equipment. Lets you set the video input jack(s) assigned to each input. Input Edit For details, see “Using other video/audio input jacks”... -
Page 106: Network Settings
Renderer Access Control Network Settings Lets you set whether or not to accept You can adjust the settings for the network. commands from DLNA controllers. Internet Settings External Control Lets you check or change the network settings. Lets you turn the function which controls the You can change the settings for the following receiver from “ES Remote”... -
Page 107: Internet Services Settings
Internet Video Unrated Internet Services Settings Lets you set whether or not access to allow playback of unrated Internet videos. x Allow Parental Control Password Allows the playback of unrated Internet videos. Lets you set or change the password for the parental control function. -
Page 108: Home Control Settings
Control and Lighting Control features. To find a local Control4 dealer and upgrade your receiver to full Control4 Automation, go to http://www.control4.com/sony. TV Control Lets you set up a connection between a display device and the receiver via an IR blaster, so that the remote control of the receiver can operate the device. -
Page 109: Zone Settings
Adjust the volume, then press Zone Settings Zone Setup You can adjust settings for the main zone, zone 2. To preset the volume for main zone/zone 2 Zone Control You can preset the volume of turning the power on for each zone. To turn the power on or off for Select the zone for which you want to zone 2... -
Page 110: System Settings
x Off System Settings Lets you turn off output of 12V triggers even when the main receiver is turned on. You can customize the settings of the receiver. x Ctrl Lets you turn the output of 12V triggers on or off manually using the control command of an Language external control device. -
Page 111: System Information
On For information about update functions, refer to the following web site: http://www.sony.com/essupport Software Update Notification The GUI and display window of the receiver Lets you set whether or not to inform you of are turned off, and the lamp above the ?/1 ON/... -
Page 112: Operating Without Using The Gui
Press V/v repeatedly to select Operating without using the menu item, then press The parameter appears. the GUI You can operate the receiver using the display window of the receiver even if the TV is not connected to the receiver. Press V/v repeatedly to select the parameter you want, then press... - Page 113 Menu list (in the display window) The following options are available in each menu. “xx…” in the table signifies the parameter for each item. Menu Item Parameter <AUTO CAL> A.CAL START (Auto (Auto Calibration Start) Calibration) FH USE: x? Y, N 5 4 3 2 1 TONE T.S.P.
- Page 114 Menu Item Parameter <LEVEL> TEST TONE OFF, FL to RH (AUTO), FL to RH (FIX) (Level settings) P. NOISE OFF, FL/FR, FL/CNT, CNT/FR, FR/SR, (Phase noise) SR/SBR, SR/SB, SBR/SBL, SR/SL, SB/SL, SBL/SL, SL/FL, LH/RH, FL/SR, SL/FR, FL/RH, LH/FR P. AUDIO OFF, FL/FR, FL/CNT, CNT/FR, FR/SR, (Phase audio) SR/SBR, SR/SB, SBR/SBL, SR/SL,...
- Page 115 Menu Item Parameter <SPEAKER> SP PATTERN 5/2.1 to 2/0 (20 patterns) (Speaker settings) (Speaker pattern) CNT LIFT OFF, 1 to 10 (Center Speaker Lift Up) FRT SIZE LARGE, SMALL (Front speakers size) CNT SIZE LARGE, SMALL (Center speaker size) SUR SIZE LARGE, SMALL (Surround speakers size) FH SIZE...
- Page 116 Menu Item Parameter <SPEAKER> FH CROSS CROSS 40 Hz to CROSS 200 Hz (10 Hz (Speaker settings) (Front high speakers crossover frequency) step) <INPUT> NAME IN (Naming inputs) For reference on this function, see“Input (Input settings) Edit” in Input Settings menu (page 105). INPUT SKIP (Input skip) SHOWN, HIDDEN H.A.
- Page 117 Menu Item Parameter <ZONE> P.VOL MAIN OFF, –∞,–92.0 dB to +23.0 dB (0.5 dB (Multi-zone (Preset Volume (MAIN)) step) settings) P.VOL ZONE2 OFF, –∞,–92 dB to +23 dB (1 dB step) (Preset Volume (Zone2)) Z2 LINEOUT FIXED, VARIABLE (Zone2 Line Out Level Type) 12V TRIG.
- Page 118 Menu Item Parameter <SYSTEM> RS232C RS232C ON, RS232C OFF (System settings) (RS232C Control Mode) NET STBY STBY ON, STBY OFF (Network Standby) AUTO STBY STBY ON, STBY OFF (Auto Standby) VER xxxx (Version) To change the display The display panel provides various information of the receiver status such as sound field.
-
Page 119: Additional Information
• Before operating the receiver, check that the concerning your receiver, please consult your operating voltage is identical with your local nearest Sony dealer. power supply. The operating voltage is indicated on the nameplate on the back of the receiver. -
Page 120: Troubleshooting
There is no picture or an unclear problem. Should any problem persist, consult picture appears on the TV screen or your nearest Sony dealer. monitor, regardless of type of picture. • Select the appropriate input on the receiver (page 49). - Page 121 HDMI ZONE 2 Music,” “My Photo,” “Internet Video,” OUT jack. “Internet Music,” “Network,” or “Sony • The audio and video signals of the HDMI Entertainment Network” from the IN jacks will not be output from the HDMI...
- Page 122 • When the Zone2 Out function is enabled The Pass Through function does not and you select the same HDMI input for work. both the main zone and zone 2, there may • “HDMI B” or “Off” is selected. Select be some interference on the audio and “HDMI A”...
- Page 123 HDMI input • Make sure you have connected both the L and R jacks to a monaural device, analog • When “2ch Analog Direct” is being used, device requires both L and R jack the sound is not output. Use other sound connections.
- Page 124 Analog 2 channel input • If the TV does not have System Audio Control function, set the “Audio Out” • Check to make sure the selected audio settings in the HDMI Settings menu to (analog) input jack is not assigned to other –...
-
Page 125: Usb Device
• Audio input signals via the HDMI IN jacks • The signal strength of the stations is too cannot be recorded. weak with automatic tuning. Use direct • Check the connection of the recording tuning. deck according to the audio signals you •... - Page 126 • USB device formatted with file systems – The memory capacity is excessive. other than FAT12/16/32, VFAT, or NTFS – The internal memory is fragmented. are unsupported.* Thus, we recommend following the • If you use partitioned USB device, only guideline.
- Page 127 • On the “My Music,” “My Photo,” and “My • Picture/sound quality may be improved by Video” screens, the receiver displays only changing the connection speed. Sony the content that can be played back with recommends a connection speed of at least the receiver from among the content 2.5 Mbps for standard definition video and...
-
Page 128: Remote Control
– Recording equipment (Blu-ray Disc “BRAVIA” Sync (Control for recorder, DVD recorder, etc.): up to 3 HDMI) devices – Playback equipment (Blu-ray Disc Player, DVD player, etc.): up to 3 “Control for HDMI” cannot be set to “On.” devices – Tuner-related equipment: up to 4 •... -
Page 129: Universal Remote Control
Lighting face different directions or use an IR shield Control function again. on the other Sony product to shield the IR • Hold down ?/1 on the receiver until the from interference from the receiver IR lamp above ?/1 flashes in green to reboot remote. -
Page 130: Error Messages
You can check the status of the receiver by the message. See the following to solve the problem. If any problem persists, consult your nearest Sony dealer. PROTECTOR The receiver is covered and ventilation holes are blocked. The receiver will automatically turn off after a few seconds. - Page 131 Message list after Auto Calibration measurement Display Explanation Code 30 Headphones are connected. Remove the headphones and perform auto calibration again. Code 31 SPEAKERS (OFF/A/B/A+B) is set to OFF. Set to other speaker settings and reperform the measurement. Code 32 None of the speakers were detected.
-
Page 132: Specifications
(8 ohms 1 kHz, THD 0.7%) Refer to the following web site for details of FRONT: the latest information on the receiver. 110 W + 110 W http://www.sony.com/essupport CENTER: 110 W SURROUND: 110 W + 110 W SURROUND BACK: 110 W + 110 W... - Page 133 Inputs (Digital) IN 1 (DVD) (Coaxial) Impedance: 75 ohms S/N: 96 dB (A, 20 kHz LPF) IN 1 (SAT/CATV), IN 2 S/N: 96 dB (TV) (Optical) (A, 20 kHz LPF) Outputs VIDEO 1, ZONE 2, Voltage:150 mV (AUDIO OUT) Impedance: 1 kohm SUBWOOFER Voltage: 2 V Impedance: 1 kohm...
- Page 134 HDMI Video Input/Output (HDMI Repeater block) Format Frame packing Side-by-Side Over-Under (Half) (Top-and-Bottom) 4096 × 2160p @ 23.98/24 Hz – – – 3840 × 2160p @ 29.97/30 Hz – – – 3840 × 2160p @ 25 Hz – – – 3840 ×...
- Page 135 General Power requirements 120 V AC, 60 Hz Power consumption 290 W Power consumption (during standby mode) 0.5 W (When “Control for HDMI” (page 104), “Pass Through” (page 104), “Network Standby” (page 106), and “RS232C Control” (page 111) are set to “Off,”...
-
Page 136: Index
Index Numerics Connections antenna (aerial) 39 12V Trigger 109 audio equipment 36 2 channel 59 monitor 27 2ch Analog Direct 59 Network 42 2ch Stereo (mode) 59 speakers 25 3D Output Settings 103 video equipment 29 5.1 channel 23 Control for HDMI 104 7.1 channel 23 Crossover Frequency 96 A.F.D. - Page 137 HDMI Settings 103 Neo:6 (Cinema) 60 Home Control Settings 108 Neo:6 (Music) 62 Home Theater Control 80 Network Settings 106 Network Standby 106 Network Update 111 Initialize Personal Information 111 Input Edit 105 INPUT MODE 82 One-Touch Play 79 Input Settings 105 Internet content 54 Internet Services Settings 107 Parental Control Area Code 107...
- Page 138 Setting menu 90 Watch 49 Settings 90 Settings Lock 110 Sleep timer 86 Zone Control 109 Small 95 Zone Settings 109 Software License 111 Zone Setup 109 Software Update Notification 111 Zone2 Out 104 Sound Effects 59 Sound Field 59 Sound Optimizer 63 Speaker Connection 94 Speaker pattern 94...
Need help?
Do you have a question about the STR-DA2800ES and is the answer not in the manual?
Questions and answers