Table of Contents

Subscribe to Our Youtube Channel
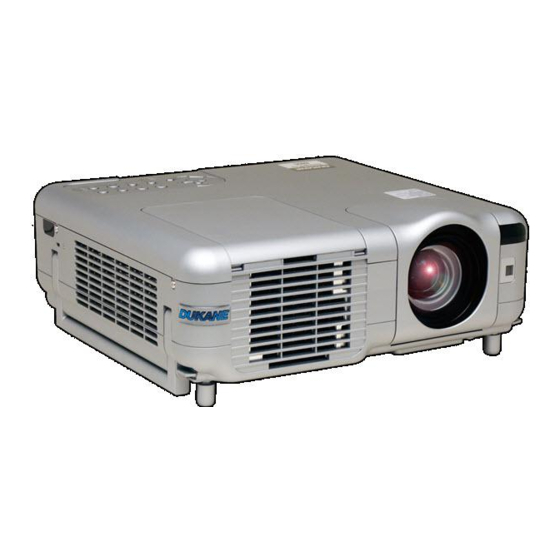
Related Manuals for Dukane 8946


Summary of Contents for Dukane 8946
- Page 1 Liquid Crystal Projector Models 8805 & 8946 USER'S MANUAL...
-
Page 2: Safety Cautions
Important Information Safety Cautions Precautions Please read this manual carefully before using your Dukane 8805/ 8946 Projector and keep the manual handy for future reference. Your serial number is located on the right side of your projector. Record it here: CAUTION To turn off main power, be sure to remove the plug from power outlet. -
Page 3: Fire And Shock Precautions
8. Handle the power cable carefully and avoid excessive bending. A damaged cord can cause electric shock or fire. 9. If the projector is not to be used for an extended period of time, disconnect the plug from the power outlet. -
Page 4: Table Of Contents
Switching to Slides Directly from Other Input Modes ... E-32 Viewing Digital Images ... E-32 Storing Images Displayed on the Projector on the PC card (Capture) ... E-32 Deleting Captured Images ... E-33 Using the PC Card Files Fucntion (PC Card Files) ... E-33 USING ON-SCREEN MENU ... -
Page 5: Introduction
Congratulations on Your Purchase of The 8946/ 8805 Projector The 8805/8946 is one of the very best projectors available today. The 8805/8946 enables you to project precise images up to 500 inches across (measured diagonally) from your PC or Macintosh com- puter (desktop or notebook), VCR, DVD player, document camera, a laser disc player or Viewer. -
Page 6: Part Names Of The Projector
Ensure that the power cable and any other cables connecting to video sources are disconnected before moving the projector. When moving the projector or when it is not in use, cover the lens with the lens cap. Remote Sensor (See page E-11 and -48) -
Page 7: Top Features
Use this button to turn the power on and off when the main power is supplied and the projector is in standby mode. NOTE: To turn on or off the projector, press and hold this button for a mini- mum of two seconds. -
Page 8: Terminal Panel Features
Connect your remote control cable here for wired operation. 11. PC CONTROL Port (D-Sub 9 Pin) Use this port to connect your PC to control your projector via a serial cable. This enables you to use your PC and serial communication protocol to control the projector. -
Page 9: Part Names Of The Remote Control
5. POWER ON Button When the main power is on, you can use this button to turn your projector on. NOTE: To turn on the projector, press and hold the POWER ON button for a minimum of two seconds. 6. POWER OFF Button You can use this button to turn your projector off. - Page 10 OFF, MENU, ASPECT, 3D REFORM, HELP, POINTER, MAGNIFY, VIEWER, FOLDER LIST, or SLIDE LIST button is pressed, the PJ button lights red to indicate that you are in the Projector mode. If no buttons are pressed within 60 seconds, the light goes out and the Projector mode is canceled.
-
Page 11: Battery Installation
22 feet/7 m and within a 60-degree angle of the remote sensor on the projector cabinet. • The projector will not respond if there are objects between the re- mote control and the sensor, or if strong light falls on the sensor. -
Page 12: Setting Up The Screen And The Projector
The further your projector is from the screen or wall, the larger the image. The minimum size the image can be is approximately 25" (0.64 m) measured diagonally when the projector is roughly 39.4 inches (1.0 m) from the wall or screen. The largest the image can be is 500" (12.7 m) when the projector is about 614.2 inches (15.6 m) from the wall or screen. -
Page 13: Throw Distance And Screen Size
Throw Distance and Screen Size The following shows the proper relative positions of the projector and screen. Refer to the table to determine the position of installation. Distance Chart Screen Width Screen Diagonal Screen Height Screen center Throw Angle ( ) -
Page 14: Connecting Your Pc Or Macintosh Computer
Making Connections NOTE: When using with a notebook PC, be sure to connect between the projector and the notebook PC before turning on the power to the notebook PC. In most cases signal cannot be output from RGB output unless the notebook PC is turned on after connecting with the projector. -
Page 15: Connecting An External Monitor
Note that the RGB OUT connector will not out- put RGB signal during Standby mode. • When the projector is in the Idle mode, the image may not be correctly dis- played while the cooling fans are running immediately after turning on or off the power. -
Page 16: Connecting Your Dvd Player
Component video RCA 3 cable (not supplied) DVD player You can connect your projector to a DVD player with component output or Video output. To do so, simply: 1. Turn off the power to your projector and DVD player. 2. If your DVD player has the component video (Y,Cb,Cr) output, use a... -
Page 17: Connecting Your Vcr Or Laser Disc Player
To make these connections, simply: 1. Turn off the power to the projector and VCR, laser disc player or document camera. 2. Connect one end of your RCA cable to the video output connector on the back of your VCR or laser disc player, connect the other end to the Video input on your projector. -
Page 18: Projecting An Image (Basic Operation)
If you want, you can select the menu language later. See "Language" on page E-45. NOTE: To turn the projector on by plugging in the power cable, first turn on the Main Power switch to ON and use the menu and enable the "Auto Start" feature. -
Page 19: Selecting A Source
ZOOM FOCUS FOLDER SLIDE LIST NOTE: If no input signal is available, the projector will display a blue background (factory preset). Selecting from Source List Source List Press and quickly release the SOURCE button on the projector cabinet to display the Source list. Each time the SOURCE button is pressed, the input source will change as follows: "RGB1", "RGB2"... -
Page 20: Correcting The Horizontal And Vertical Keystone Distortion (3D Reform)
Geometric Correction Tool is available. This program (Geometric Correction Tool) enables the geometrical distortion correction of an image when projected onto a special shaped screen with an Dukane projector. Additionally, this program allows control of the projector via a computer. For additional information visit: US : http://www.dukcorp.com/av... - Page 21 Selecting "Undo" will exit without saving changes. When using the USB connected to the projector Preparation: Connect the USB mouse to the projector. See page E-28. 1. Project an image so that the screen is smaller than the area of the raster.
-
Page 22: Optimizing Rgb Picture Automatically
Focus and the Auto Wall Color Correction feature instead of the Auto Adjust feature. Turning Up or Down Volume Sound level from the speaker and the AUDIO OUT jack (RCA) on the projector can be adjusted. VOLUME Volume bar Using the Laser Pointer You can use the laser to draw your audience's attention to a red dot that you can place on any object. -
Page 23: Setting The Function Switch
There are two switches on the bottom of the battery case: an applicable projector selector switch (1) and laser enable/disable switch (2). Check the projector being used and decide whether to enable or disable laser, then set these switches as necessary using the tip of a thin ball-point pen. -
Page 24: Connecting To Your Computer For The Remote Mouse Function
POINTER or magnified image. • If no buttons are pressed within 60 seconds, the PJ button's light goes out to indicate that you are in the Computer mode. To enable the projector menu operation again, press the PJ button to light red. -
Page 25: Auto 3D Reform
• The Auto 3D Reform feature supports screen sizes between 30” and 200”. • If the screen has the same brightness as its background, the built-in image sensor on the front of the projector can fail to recognize the outline or outer frame of the screen. - Page 26 “Lower”. If the built-in sensor sensitivity is too weak to recognize the screen, select “Higher”. NOTE: If you failed to correct for placing the image inside of the screen using [Inside], the projector automatically corrects to project the image larger than the outer frame of the screen. E-26...
-
Page 27: Turning Off The Image And Sound
Turning Off the Image and Sound Press the Picture Mute button to turn off the image and sound for a short period of time. Press again to restore the image and sound. PIC-MUTE Freezing a Picture Press the Freeze button to freeze a picture. Press again to resume motion. -
Page 28: Using A Usb Mouse
• The PCs using the USB Host Controller may not be available. to adjust the bright- • When connecting a USB hub to the USB port (type B) on the projector, be sure to use a USB hub capable of supplying 500mA per port of downstream current. -
Page 29: Making Freehand Drawings On A Projected Image (Chalkboard)
• The drive for ”USB 1-4” is displayed only when the USB memory device or USB memory card reader is connected to the projector. The drive for “USB 1- 4” may be displayed differently from the one in the USB memory card reader. -
Page 30: Making The Most Out Of The Viewer Function
The Viewer feature allows you to view slides stored on a PC memory card (referred to as PC card in this manual) on the projector. Even if no computer is available, presentations can be conducted simply with the projector. -
Page 31: Operating The Viewer Function From The Projector (Playback)
A tool bar will appear when you press the MENU button on the remote control or the projector cabinet or clicking with the right button of a mouse. Prev Play... -
Page 32: Storing Images Displayed On The Projector On The Pc Card (Capture)
NOTE: * Unless a PC card is inserted into the PC Card slot of the projector, the Capture feature is not available. * The "Card Error" display means that the free space of the PC card is insufficient for saving images. -
Page 33: Using The Pc Card Files Fucntion (Pc Card Files)
Deleting Captured Images Using the Delete button on the tool bar for Viewer can delete captured images. Prev Play Jump Drive Drag Next Stop Select To delete captured images: 1. Select Viewer and display a folder list of captured images. 2. -
Page 34: Basic Menu Operation
NOTE: The on-screen menu may not be displayed correctly while interlaced mo- tion video image is projected. 1. Press the MENU button on the remote control or projector cabinet to display the Basic, Advanced or Custom Menu. NOTE: When using a USB mouse, click the mouse button to display the menu. -
Page 35: Menu Tree
Menu tree Advanced Menu RGB1 Source Select RGB2 Picture Video Sound S-Video Image Options DVI (DIGITAL) Picture Management Viewer Projector Options Tools more Help Factory Default Picture Volume, Bass, Treble Aspect Ratio Blanking Position/Clock Resolution Overscan Video Filter Noise Reduction... - Page 36 Advanced Menu Source Select Picture Sound Image Options 3D Reform Picture Management Wall Color Correction Projector Options Menu Tools Setup Help Lamp Setting Factory Default Screen Auto Functions LAN Mode Password Security Setup Page 1 Orientation Desktop Front, Ceiling Rear,...
- Page 37 Advanced Menu Source Select Picture 3D Reform Volume Wall Color Correction Image Options Menu Picture Management Setup Projector Options Lamp Setting Tools Screen Help Auto Functions Factory Default LAN Mode Password Security Sleep Timer Capture PC Card Files ChalkBoard Contents...
-
Page 38: Menu Elements
Menu Elements Title bar Check box Drag Tool bar Menu windows or dialog boxes typically have the following elements: Title bar ... Indicates the menu title. Highlight ... Indicates the selected menu or item. Solid triangle ... Indicates further choices are available. A highlighted triangle indicates the item is active. -
Page 39: Entering Alphanumeric Characters By Using The Menu
Entering Alphanumeric Characters by Using the Menu Alphabet or numeric characters are used for your IP address or projec- tor name. To enter IP Address or projector name, use the software key- board. For using the software keyboard, see page E-64. -
Page 40: Selecting Aspect Ratio
See page E-49 for setting image positions. Copyright Please note that using this projector for the purpose of commercial gain or the attraction of public attention in a venue such as a coffee shop or hotel and em- ploying compression or expansion of the screen image with a "Aspect Ratio" or "Screen"... -
Page 41: Selecting Noise Reduction Level
NOTE: * When "Resolution" is set to "Native", "3D Reform", "Aspect Ratio", "Screen" and "Overscan" are not available. * While you are displaying an image with higher resolution than the projector's native resolution, “Resolution” is not available. Selecting Overscan Percentage Select overscan percentage (0%, 5%, 10% and 25%) for signal. -
Page 42: Projector Options
You can zoom in or out, while keeping an image that was corrected using Keystone, without again having to make those adjustments. Improvements in 3D Reform performance allows the projector's adjust- ment range (horizontal and vertical combinations) to be wider by ap- proximately 25% in the maximum telephoto position when compared to initial units shipped. -
Page 43: Using Adapting Color Correction
Correction" will be displayed. This message means that there may be an obstacle between the wall and the image sensor on the projector, or the image sensor may not work because of too much ambient light. Make corrections to what seems to be the problem and try again. - Page 44 4. Place the white paper for Wall Color Correction over the working area in the Manual Wall Color Correction (Red) screen. Paste the white paper for Wall Color Correction loosely or get some- one to hold it. Position of the white paper for Wall Color Correction NOTE: The size of the above Manual Wall Color Correction screen changes de- pending on the screen size.
- Page 45 USB mouse. Selecting Menu Display Time: This option allows you to select how long the projector waits after the last touch of a button to turn off the menu. The preset choices are "Manual", "Auto 5 sec", "Auto 15 sec", and "Auto 45 sec".
- Page 46 Setting Viewer Options [Viewer Options] Show Folder List: If this option is checked, when the Viewer source is selected on the projector, the folder lists will be displayed and allows you to select the presentation from a PC card. Auto Play: If this option is checked, when the Viewer source is selected on the projector any given slide will start to play automatically.
-
Page 47: Selecting Signal Format [Signal Select]
* The RGB OUT connector will not output signal during the Standby mode. * Via the USB interface the projector can be turned on from your PC using Dynamic Image Utility 2.0 during the Standby or Idle mode. On the LAN connection the projector can be controlled or monitored from your PC us- ing Dynamic Image Utility 2.0 only in the Idle mode. -
Page 48: Selecting Lamp Mode And Lamp Type
Selecting Default Source [Default Source Select]: You can set the projector to default to any one of its inputs each time the projector is turned on. Last ... Sets the projector to default to the previous or last active input each time the projector is turned on. -
Page 49: Selecting Aspect Ratio And Position For Screen
Phase) will be performed instead of Auto Focus and Auto Wall Color Cor- rection. 2. Due to specifications of the image sensor on the projector, Auto Functions are effective to image sizes between 40" and 150"(diagonal). Also in some cases Auto Functions may not work correctly depending on projection conditions such as textured material of the screen or ambient light. -
Page 50: Network Type
Setting LAN Mode This feature allows you to set various setting items when the projector is used on your network. Consult with your network administrator about these settings. NOTE: • A LAN card is required for LAN connection; NEC's optional wireless LAN card is available. -
Page 51: Mail
This option notifies your computer of an error message via e-mail when using wireless or wired LAN. The error message will be notified when the projector lamp has reached the end of its usable life or an error occurs in the projector. -
Page 52: Status
MAC Address . Indicates the MAC address of the LAN card. Setting a Password A password can be set for your projector to avoid operation by an unau- thorized person. There are two password options: one for menu and the other for logo. -
Page 53: Security
There is also an option to lock the projector by using a registered PC card as a protect key. Once you have registered your PC card as a protect key, you are required to insert the registered PC card into the PC card slot of the projector each time you turn on the projector. -
Page 54: Returning To Factory Default
The Release Code input screen will be displayed as well as your Request Code (24 alphanumeric characters). 3. Enter your Release Code in the Release Code Input screen. * If the projector is turned on by entering the Release Code, your Se- curity will be disabled. NOTE: * Some types of PC cards cannot be registered as your protect key. -
Page 55: Maintenance
4. Insert a new lamp housing until the lamp housing is plugged into the socket. CAUTION: Do not use a lamp other than the Dukane replacement lamp (Standard life lamp: 456-8946 (8946), 456-8805 (8805) or Ex- tended life lamp: MT60LPS). -
Page 56: Cleaning
Cleaning Cleaning or Replacing the Filter The air-filter sponge keeps the inside of the projector from dust or dirt and should be cleaned after every 100 hours of operation (more often in dusty conditions). If the filter is dirty or clogged, your projector may over- heat. -
Page 57: Troubleshooting
TROUBLESHOOTING This section helps you resolve problems you may encounter while setting up or using the projector. Power Indicator Indicator Condition Blinking light Green 0.5 sec ON, 0.5 sec OFF 2.5 sec ON, 0.5 sec OFF Orange 0.5 sec ON, 0.5 sec OFF... -
Page 58: Common Problems & Solutions
• Make sure there are no obstacles between you and the projector. • Stand within 22 feet (7 m) of the projector. See page E-11. • Make sure that you are in the Projector mode and the PJ button lights in red. If not, press the PJ button. See page E-24. -
Page 59: If There Is No Picture, Or The Picture Is Not Displayed Correctly
NOTE: You can check the horizontal frequency of the current signal in the projector’s menu under Information. If it reads “0kHz”, this means there is no signal being output from the computer. -
Page 60: Specifications
SPECIFICATIONS This section provides technical information about the 8946 Projector's performance Model Number 8946 Optical LCD Panel 1.0" p-Si TFT active-matrix with Micro Lens Array Resolution 1024 768 pixels up to UXGA with Advanced AccuBlend Lens Motorized zoom and focus: F1.74 –... - Page 61 Meets Low Voltage Directive (EN60950, TUV GS Approved) For additional information visit: US : http://www.dukcorp.com/av Email: avsales@dukcorp.com Phone: 800-676-2485 LCD panels are inherently susceptible to pixel defects. For additional information regarding pixel data, please contact Dukane. The specifications are subject to change without notice. E-61...
-
Page 62: Appendix
APPENDIX Cabinet Dimensions Pin Assignments of D-Sub RGB Input Connector Mini D-Sub 15 Pin Connector Signal Level Video signal : 0.7Vp-p (Analog) Sync signal : TTL level * RGB 1 Input only 334(13.15") Lens center 16(0.63") Pin No. RGB Signal (Analog) Green or Sync on Green Blue Ground... -
Page 63: Compatible Input Signal List
Compatible Input Signal List Signal Resolution ( Dots ) NTSC – – SECAM – VESA VESA VESA VESA VESA VESA VESA VESA VESA VESA VESA 1024 VESA 1024 VESA 1024 1024 VESA 1024 VESA 1024 VESA 1152 1152 1152 1152 VESA 1280 VESA... -
Page 64: Pc Control Codes And Cable Connection
Using Software Keyboard 1 to 0 and Characters ... Use to type in IP address or projector name SP ... Inserts a space BS ... Deletes one character backward ... Returns to the previous ... -
Page 65: Operation Using An Http Browser
IP address of the projector has been registered to the domain name server by a network administrator, or the host name corresponding to the IP address of the projector has been set in the “HOSTS” file of the computer being used. - Page 68 Dukane Corporation Audio Visual Products Division 2900 Dukane Drive St. Charles, IL 60174-3395 E-mail: avsales@dukcorp.com Phone: (630) 762-4040 Orders: (800) 676-2485 Fax: (630) 584-5156 Parts & Service: (800) 676-2487 Fax: (630) 584-0984 Audio Visual Products Part # 401-8805/8946-00...
Need help?
Do you have a question about the 8946 and is the answer not in the manual?
Questions and answers