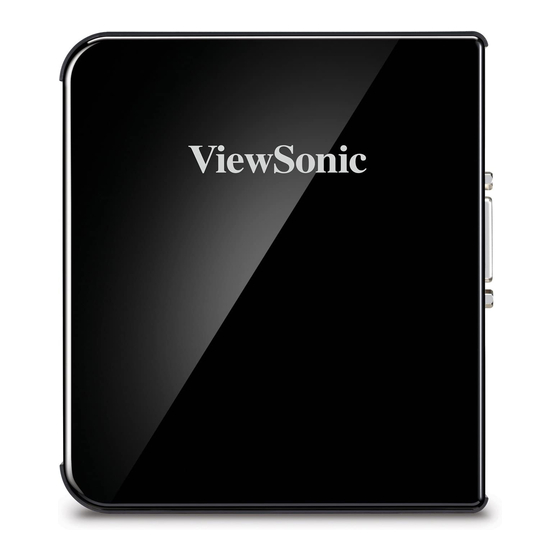
ViewSonic VOT125 User Manual
Vot125 user guide (english)
Hide thumbs
Also See for VOT125:
- Manual de l'utilisateur (40 pages) ,
- Specifications (2 pages) ,
- User manual (38 pages)

Related Manuals for ViewSonic VOT125


Summary of Contents for ViewSonic VOT125
- Page 1 ViewSonic ® VOT125 - User Guide PC Mini - Guide de l’utilisateur - Guía del usuario Model No. : VS13172...
- Page 2 This wireless module device complies with part 15 of FCC Rules. Operation is subject to the following two conditions: (1) this device may not cause harmful interference, and (2) this device must accept any interference received, including interference that may cause undesired operation. ViewSonic VOT125...
- Page 3 15 min of ® NERGY user inactivity for the display and less than 30 min of inactivity for the computer. Move the mouse or click any button on the keyboard to wake the computer from Sleep mode. ViewSonic VOT125...
- Page 4 ViewSonic VOT125...
- Page 5 4. Lead as an allotting element in steel containing up to 0.35% lead by weight, aluminium containing up to 0.4% lead by weight and as a cooper alloy containing up to 4% lead by weight. ViewSonic VOT125...
-
Page 6: Product Registration
Serial Number: Purchase Date: Product disposal at end of product life ViewSonic respects the environment and is committed to working and living green. Thank you for being part of Smarter, Greener Computing. Please visit ViewSonic website to learn more. USA: http://www.viewsonic.com/company/green/ Europe: http://www.viewsoniceurope.com/uk/support/recycling-information/... -
Page 7: Table Of Contents
Exit Menu.................... 21 Chapter 4 System Recovery.................. 23 When to Use System Recovery ............23 Running Recovery Manager ............... 23 Chapter 5 FAQ & Troubleshooting ................. 26 Frequently asked questions ..............26 Troubleshooting .................. 27 ViewSonic VOT125... - Page 8 Figure 10 Use a Kensington lock ............... 11 Figure 11 Computer Stand ................. 12 Figure 12 Stand Dimension................ 12 Table 1 VOT125 product specifications............2 Table 2 BIOS Main Menu ................14 Table 3 IDE Device Setting Menu .............. 14 Table 4 System Information................
-
Page 9: Chapter 1 Introduction
Chapter 1 Introduction Overview The VOT125 is a surprisingly affordable, space-saving PC mini that will capably ® serve your everyday computing needs with ease. Featuring the Intel GMA graphics ® solution coupled with the Intel Processor, it perfectly balances extreme value with functionality. -
Page 10: Product Specifications
Temperature/ Operating: 0°C to 40°C, 0%-90%, non-condensing Humidity Storage: -20°C to 80°C, 0%-90%, non-condensing Dimensions 39 x 130 x 115 mm (WxHxD) Weight 650 g/1.4 lbs Mounting Desktop, VESA-mount Others Kensington Lock support Table 1 VOT125 product specifications ViewSonic VOT125... -
Page 11: System Tour
MIC-IN The microphone jack is designed to connect the microphone used for video conferencing, voice narrations, or simple audio recordings. ViewSonic VOT125... - Page 12 WiFi LED When the data is transferring, the WiFi LED will blink. Card Reader LED When the data is transferring, the Card Reader LED will blink. Power Switch The power switch allows powering ON and OFF the system. ViewSonic VOT125...
-
Page 13: Figure 2 Rear Panel
To clear the CMOS, use the tip of a pen to press the Reset button briefly (for less than three seconds). DVI Port The Digital Visual Interface (DVI-I) port supports a high quality VGA-compatible device such as a monitor or LCD TV to allow viewing on a larger external display. ViewSonic VOT125... - Page 14 PC, always use the supplied power adapter. Kensington Lock Slot The slot is used for attaching a lock-and-cable apparatus. Locks are generally secured in place with a key or combination lock attached to a rubberized metal cable. ViewSonic VOT125...
-
Page 15: Chapter 2 Getting Started
Chapter 2 Getting Started Setting up your PC Connecting the monitor Connect the HDMI cable from your display to the HDMI port. Figure 3 Connect the HDMI cable ViewSonic VOT125... -
Page 16: Figure 4 Connect The Dvi Cable
To connect a VGA display, you need the DVI to VGA adapter to connect a display with a VGA connector. Connecting USB mouse & keyboard Your VOT125 does not come with a keyboard and mouse, but you can use any USB keyboard or mouse with your computer. Figure 5 Connecting USB mouse & keyboard... -
Page 17: Figure 6 Network Cable With Rj45 Connector
Figure 6 Network cable with RJ45 connector Turning on the system Connect the power adapter cable to the DC jack (DC IN) of the VOT125 Connect the power cable to the power adapter Connect the power cable to a power outlet... -
Page 18: Mounting Your Pc To A Monitor
To fasten the mounting bracket your monitor must have VESA75 or VESA100 standard holes. The VESA mounting kit is optional.. Place the VOT125 on the VESA mounting bracket. Make sure the air vents are hooked by the VESA mounting bracket and VOT125 is solidly secured to the display. -
Page 19: Anti-Theft Protection With A Kensington Lock
VESA Mounting Kit Dimension (Unit: mm) Anti-theft protection with a Kensington Lock The VOT125 has a Kensington lock slot for use with the the Kensington MicroSaver anti-theft device. With the MicroSaver, which has a sturdy steel cable, you can attach your VOT125 to a stationary object and protect your PC from theft. -
Page 20: Computer Stand
Use the stand to position the computer to your preference and for stability to the computer. Please do not block the ventilation holes and be sure to leave sufficient space around the unit for ventilation. Figure 11 Computer Stand Computer Stand Dimension (Unit: mm) Figure 12 Stand Dimension ViewSonic VOT125... -
Page 21: Chapter 3 Ami Bios Setup
This chapter provides a description of the AMI BIOS. The BIOS setup menus and available selections may vary from those of your product. For specific information on the BIOS for your product, please contact ViewSonic. NOTE: The BIOS menus and selections for your product may vary from those in this chapter. -
Page 22: Main Menu
Enables or disables the LBA (Logical Block Addressing)/ Large mode. Setting to Auto enables the LBA mode if the device supports this mode, and if the device was not previously formatted with LBA mode disabled. Options: Disabled, Auto ViewSonic VOT125... -
Page 23: Advanced Menu
> OnBoard Peripherals Configuration ↑↓ Select Item > Hardware Health Configuration +- Change Field Tab Select Field F1 General Help F10 Save and Exit ESC Exit V02.61 (C)Copyright 1985-2006, American Megatrends, Inc. Press <Enter> to select a sub-menu for detailed options. ViewSonic VOT125... -
Page 24: Table 6 Cpu Configuration
> On-Chip ATA Devices V02.61 (C)Copyright 1985-2006, American Megatrends, Inc. USB Functions [Enabled] Options: Enabled, Disabled USB 2.0 Controller [Enabled] Options: Enabled, Disabled Legacy USB Support [Enabled] Options: Enabled, Disabled, Auto Onboard LAN Controller [Enabled] Options: Enabled, Disabled ViewSonic VOT125... -
Page 25: Table 8 Hardware Health Configuration
+19V :19.012 V :5.090 V +3.3V :2.997V V02.61 (C)Copyright 1985-2006, American Megatrends, Inc. FAN1 Mode Setting [Smart Fan Mode] Options: Smart Fan Mode, Manual Mode If the value is [Manual Mode] FAN1 PWM Value: Min 0, Max: 255 ViewSonic VOT125... -
Page 26: Boot Menu
When set to Enabled, the system waits for F1 key to be pressed when error occurs. Options: Disabled, Enabled Hit ‘F2’ Message Display [Enabled] When set to Enabled, the system displays the message ‘Press DEL to run Setup’ during POST. Options: Disabled, Enabled ViewSonic VOT125... -
Page 27: Chipset Menu
F10 Save and Exit ESC Exit V02.61 (C)Copyright 1985-2006, American Megatrends, Inc. Internal Graphics Mode Select [Enabled, 32MB] Options: Enabled 32MB, Enabled 64MB, Enabled 128MB DVMT Mode Select [DVMT Mode] DVMT/FIXED Memory [256MB] Options: 128MB, 256MB, Maximum DVMT ViewSonic VOT125... -
Page 28: Power Menu
Restore On AC Power Loss [Power Off] Options: Power Off, Power On, Last State Resume From S3 By USB Device [Disabled] Options: Disabled, Enabled Resume By PCI-E Device [Disabled] Options: Disabled, Enabled Resume On RTC Alarm [Disabled] Options: Disabled, Enabled ViewSonic VOT125... -
Page 29: Security Menu
Discard Changes and Exit Discard Changes Load Optimal Defaults <> Select Screen ↑↓ Select Item Load Failsafe Defaults +- Change Field Tab Select Field F1 General Help F10 Save and Exit ESC Exit V02.61 (C)Copyright 1985-2006, American Megatrends, Inc. ViewSonic VOT125... - Page 30 Load Optimal Default values for all the setup values. This option allows you to load failsafe default values for each of the parameters on the Setup menus, which will provide the most stable performance settings. The F8 key can be used for this operation. ViewSonic VOT125...
-
Page 31: Chapter 4 System Recovery
However all files and other data on drive C: will be deleted. Running Recovery Manager To run system recovery, follow the steps below: ® Turn on the PC Mini. The system boots up and the ViewSonic logo appears. Recovery source 2.1 Recovery from DVD... - Page 32 If Windows operating system starts up before you press F3 and you still wish to run System Recovery, restart the PC Mini then follow the same procedures above. Another confirmation message appears as below. Click OK. System recovery is initiated and the following screen appears. ViewSonic VOT125...
- Page 33 After the system has been restored, the system will restart. NOTE Restarting may take several seconds to finish. After restarting, Windows Setup Wizard appears to help you configure basic settings. Follow the on screen instructions to complete setup and start using your PC Mini. ViewSonic VOT125...
-
Page 34: Chapter 5 Faq & Troubleshooting
HDD. Q3: How to set the WOL (Wake on LAN) function? A3: The WOL function is the default support for the VOT125 so you do not have to do any modification setting in VOT125 BIOS. -
Page 35: Troubleshooting
2.1. Check the display power is in “Power On” status. Check that the display is in a Power On status 2.2. Check that you have connected the VOT125 to the display with the correct connector 2.3. Check that the connection between the VOT125 and the display is connected correctly 2.4. - Page 36 (Mexico) Renta y Datos, 29 SUR 721, COL. LA PAZ, 72160 PUEBLA, PUE. Tel: 01.222.891.55.77 CON 10 LINEAS Electroser, Av Reforma No. 403Gx39 y 41, 97000 Mérida, Yucatán. Tel: 01.999.925.19.16 Other places please refer to http://www.viewsonic.com/la/soporte/index.htm#Mexico Latin America (Peru) www.viewsonic.com/la/ T= 0800-54565 soporte@viewsonic.com...
-
Page 37: Limited Warranty
If a product proves to be defective in material or workmanship during the warranty period, ViewSonic will, at its sole option, repair or replace the product with a similar product. Replacement Product or parts may include remanufactured or refurbished parts or components. - Page 38 Exclusion of damages: ViewSonic’s liability is limited to the cost of repair or replacement of the product. ViewSonic shall not be liable for: 1. Damage to other property caused by any defects in the product, damages based upon...
Need help?
Do you have a question about the VOT125 and is the answer not in the manual?
Questions and answers