Asus PhysX P1 Installation Manual
Asus physx installation guide english version e2498
Hide thumbs
Also See for PhysX P1:
- User manual (26 pages) ,
- Quick start manual (120 pages) ,
- Installation manual (56 pages)
Table of Contents
Advertisement
Quick Links
Download this manual
See also:
User Manual
Advertisement
Table of Contents

Related Manuals for Asus PhysX P1


Summary of Contents for Asus PhysX P1
-
Page 1: Installation Guide
ASUS PhysX ® Installation Guide... - Page 2 Product warranty or service will not be extended if: (1) the product is repaired, modified or altered, unless such repair, modification of alteration is authorized in writing by ASUS; or (2) the serial number of the product is defaced or missing.
-
Page 3: Table Of Contents
Contents Notices ....................iv Safety information ................v 1. ASUS PhysX installation ® 1.1 Installation requirements ............1 1.2 Card Installation ..............1 1.3 Driver Installation ...............3 2. PhysX control panel 2.1 Lanuching PhysX Control Panel ..........6 2.2 Info ..................7 2.3 Demo .................7 2.4 Settings ................8... -
Page 4: Notices
This digital apparatus does not exceed the Class B limits for radio noise emissions from digital apparatus set out in the Radio Interference Regulations of the Canadian Department of Communications. This class B digital apparatus complies with Canadian ICES-003. ASUS PhysX Installation Guide... -
Page 5: Safety Information
The symbol of the crossed out wheeled bin indicates that the product (electrical and electronic equipment) should not be placed in municipal waste. Check local regulations for disposal of electronic products. ASUS PhysX Installation Guide... -
Page 6: Asus ® Physx Tm Installation
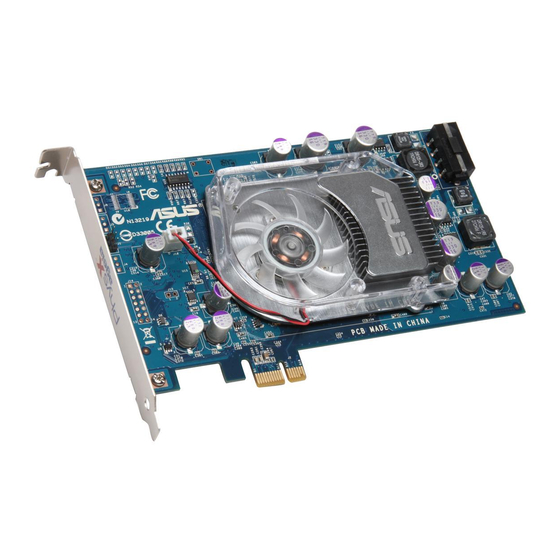
50MB free hard disk space or greater • PCI Slot revision 2.2 or later, 3.3V • Free 4-pin Peripheral Power Cable Before the installation, check your ASUS PhysX card package for the following items: • ASUS PhysX PPU card •... - Page 7 7. Secure the bracket screw that holds the PhysX card in place. Refer to the picture below for the barcket screw hole. 8. Connect one 4-pin Peripheral Power Cable to the power connector on the card as shown below. ASUS PhysX Installation Guide...
-
Page 8: Driver Installation
(Note: The version and content of the driver CD are subject to change without notice.) If you have already installed the ASUS PhysX card, the Found New Hardware Wizard window may pop up before or during driver installation. See figure below. - Page 9 4. Double click the optical drive icon. The ASUS PhysX Card Driver screen appears. 5. From the ASUS Card Driver screen, double click Install Driver. The Setup prepares the InstallShield Wizard which will guide you through the program setup process.
- Page 10 8. Click I Agree on the License Agreement window, or click Cancel to exit the installation program. The ASUS PhysX device drivers are copied onto your system. The installation may take several minutes to complete. 9. Click Close on the Setup...
-
Page 11: Physx Control Panel
Note: If you have not installed the ASUS PhysX card yet, a window will tell you to install the card and a pop-up dialog box provides additional instructions. 10. Select Yes to restart your computer, or select No to restart your computer later. -
Page 12: Info
2.2 Info The Info tab displays the PhysX driver and hardware information. 2.3 Demo In the Demo tab, you can click the PhysX boxes Demo icon to launch the installed demo. ASUS PhysX Installation Guide... -
Page 13: Settings
Desktop. • Click Start Extended Diagnostics to run extended diagnostics on the ASUS PhysX card. The text box displays the result of the diagnostics. • Click Save Report to File to save the diagnostics result for future technical support use. -
Page 14: Troubleshooting
Problem successfully installed Cause Follow the instruction in “Verifying the PhysX card” Solution on page 10. I need to verify the ASUS PhysX device driver is Problem successfully installed Cause Follow the instruction in “Verifying the PhysX card Solution driver” on page 11. -
Page 15: Tm Card
Status text box displays “This device is working properly” messege. if it does, go to step 9. 8. If Device Status does not show the message, try re-installing ASUS PhysX device driver, or use Windows troubleshooting. Exit Device Manager. ASUS PhysX... -
Page 16: Tm Driver
1. On your PC desktop, right-click My Computer icon, then select Properties > Hardware tab. 2. Click Device Manager. 3. If the ASUS PhysX card and driver have been successfully installed and power is supplied to the card, the PhysX card icon is listed in the Device Manager window. -
Page 17: Uninstalling The Driver And Utilities
4. Select the language of the uninstaller then click OK. 5. In PhysX Uninstall dialog box, click Yes to uninstall PhysX driver and utilities from your computer. Click No to keep the PhysX driver and utilities on your computer. ASUS PhysX Installation Guide... - Page 18 ASUS PhysX Installation Guide...
Need help?
Do you have a question about the PhysX P1 and is the answer not in the manual?
Questions and answers