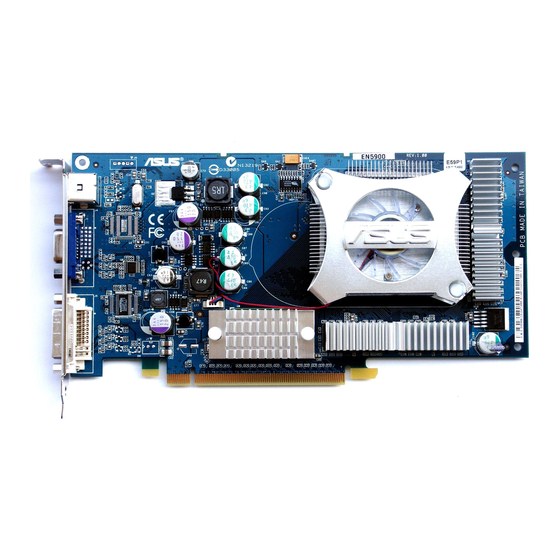
Asus EN5900 Installation Manual

Asus EN5900 Installation Manual

Graphic card
Hide thumbs Also See for EN5900:

Advertisement

Graphics Card
Drivers and Utilities
Installation Guide

Advertisement

Table of Contents
loading

Summary of Contents for Asus EN5900

  • Page 1 Graphics Card Drivers and Utilities Installation Guide...
  • Page 2 Product warranty or service will not be extended if: (1) the product is repaired, modified or altered, unless such repair, modification of alteration is authorized in writing by ASUS; or (2) the serial number of the product is defaced or missing.
  • Page 3: Table Of Contents

    Installing Webcam driver ......... 20 Installing the Gamepad drivers ........ 22 Removing Webcam driver ........24 Removing the Gamepad drivers ....... 25 ASUS Contact information ............ 26 Other information ..............27 Browse Support CD ..........27 View readme file ............28 Appendix: Basic troubleshooting .............
  • Page 4: Notices

    Notices Federal Communications Commission Statement Federal Communications Commission Statement Federal Communications Commission Statement Federal Communications Commission Statement Federal Communications Commission Statement This device complies with Part 15 of the FCC Rules. Operation is subject to the following two conditions: • This device may not cause harmful interference, and •...
  • Page 5: Safety Information

    Safety information Electrical safety Electrical safety Electrical safety Electrical safety Electrical safety • When adding or removing devices to or from the system, ensure that the power cables for the devices are unplugged before the signal cables are connected. If possible, disconnect all power cables from the existing system before you add a device.
  • Page 6: About This Guide

    A S U S W e b s i t e s The ASUS websites worldwide provide updated information on ASUS hardware and software products. The ASUS websites are listed in the ASUS Contact Information on the inside front cover of this installation guide.
  • Page 7: Support Cd Information

    • The contents of the support CD are subject to change at any time without notice. Visit the ASUS website (www.asus.com) for updates. To begin using the support CD, simply insert the CD into your CD-ROM 2 D / 3 D G r a p h i c s &...
  • Page 8: Vga Drivers

    If you are replacing an old graphics card with a new ASUS graphics card, make sure to remove the old display driver from your system. Refer to section “2.3 Removing display drivers”...
  • Page 9 The Setup prepares the Install Shield Wizard which will guide you through the program setup process. N e x t N e x t Click N e x t N e x t N e x t from the Install Shield Wizard welcome screen.
  • Page 10 NVIDIA ® display driver installation process. After installing the NVIDIA ® display drivers, the setup installs the ASUS Enhanced display drivers. The following screen displays the Microsoft ® DirectX™ setup. I a c c e p t t h e...
  • Page 11 F i n i s h . F i n i s h . F i n i s h . F i n i s h . The ASUS VGA installation program will restart your computer after all components are installed into your computer.
  • Page 12 10. After the installation is complete, select Y e s , I w a n t Y e s , I w a n t Y e s , I w a n t Y e s , I w a n t Y e s , I w a n t t o r e s t a r t m y c o m p u t e r t o r e s t a r t m y c o m p u t e r...
  • Page 13 ® driver for your graphics card. A S U S A S U S A S U S - installs the ASUS A S U S A S U S Enhanced drivers to support the bundled ASUS utilities including ASUS GameFace Live! and SmartDoctor.
  • Page 14 ® driver from the custom install screen. The ASUS Enhanced Display drivers installation process appears only if you selected ASUS drivers from the custom install screen. The following screen displays the Microsoft ® DirectX™ setup. Select I a c c e p t t h e...
  • Page 15 F i n i s h . F i n i s h . F i n i s h . F i n i s h . The ASUS VGA installation program will restart your computer after all components are installed into your computer.
  • Page 16 VGARTD driver for the chipset on your motherboard. The ASUS AGP VGARTD driver installation process appears only if you selected the VGART item from the custom install screen. The final tasks of the setup process is displayed on the progress bar.
  • Page 17: Updating The Windows Display Driver

    Updating the Windows display driver Updating the Windows display driver Updating the Windows display driver The latest display driver for your ASUS graphics card is available at the ASUS website (www.asus.com). Visit the ASUS website to download driver updates. To update the Windows display driver: Boot your computer.
  • Page 18 I n s t a l l f r o m a l i s t I n s t a l l f r o m a l i s t Select the I n s t a l l f r o m a l i s t I n s t a l l f r o m a l i s t I n s t a l l f r o m a l i s t o r s p e c i f i c l o c a t i o n...
  • Page 19: Removing Display Driver

    2 . 3 2 . 3 Removing display driver Removing display driver 2 . 3 2 . 3 2 . 3 Removing display driver Removing display driver Removing display driver If you want to replace your display driver or if you no longer need the display driver for your card, follow the procedures in this section to completely remove the display driver from the system.
  • Page 20: Utilities

    This utility also allows you to adjust the graphics card clock settings. • The ASUS Smart Doctor utility works only for graphics card models with a built-in hardware monitor IC. If the hardware monitor IC is not present, only the SmartDoctor overclocking function will be installed.
  • Page 21: Utilities Installation

    3 . 1 3 . 1 Utilities installation Utilities installation 3 . 1 3 . 1 3 . 1 Utilities installation Utilities installation Utilities installation To install the utilities: Method 1: Complete installation Method 1: Complete installation Method 1: Complete installation Method 1: Complete installation Method 1: Complete installation The Complete installation method installs all the available program features.
  • Page 22 The setup displays the target directory for the utilities, click N e x t N e x t N e x t. N e x t N e x t After the installation is complete, click F i n i s h F i n i s h F i n i s h F i n i s h.
  • Page 23 Click N e x t N e x t N e x t N e x t from the Install Shield N e x t Wizard welcome screen. Select C u s t o m C u s t o m C u s t o m C u s t o m then click N e x t C u s t o m...
  • Page 24: Removing Installed Utilities

    After the installation is complete, click F i n i s h F i n i s h F i n i s h F i n i s h F i n i s h. 3 . 2 3 . 2 3 .
  • Page 25 Click the check box of the item you want to remove then click N e x t N e x t. N e x t N e x t N e x t Click F i n i s h F i n i s h F i n i s h to restart your F i n i s h...
  • Page 26: Accessories Drivers

    Accessories Drivers You can install additional accessories such as a webcam or game pad that enhances your computer’s multimedia features. You can install or remove the drivers for any of the following accessories: 4 . 1 4 . 1 4 . 1 4 .
  • Page 27 Click N e x t N e x t N e x t N e x t on the following N e x t screen. The setup displays the installation progress. Click C a n c e l C a n c e l C a n c e l if you want to abort C a n c e l C a n c e l...
  • Page 28: Installing The Gamepad Drivers

    4 . 2 4 . 2 Installing the Gamepad drivers Installing the Gamepad drivers 4 . 2 4 . 2 4 . 2 Installing the Gamepad drivers Installing the Gamepad drivers Installing the Gamepad drivers To install the gamepad drivers: Insert the support CD into your CD-ROM drive.
  • Page 29 The setup prepares the files for installation. After the installation is F i n i s h F i n i s h complete, click F i n i s h F i n i s h F i n i s h. You can now use your game pad.
  • Page 30: Removing Webcam Driver

    4 . 3 4 . 3 Removing Webcam driver Removing Webcam driver 4 . 3 4 . 3 4 . 3 Removing Webcam driver Removing Webcam driver Removing Webcam driver To remove the webcam drivers: Insert the support CD into your CD-ROM drive.
  • Page 31: Removing The Gamepad Drivers

    4 . 4 4 . 4 Removing the Gamepad drivers Removing the Gamepad drivers 4 . 4 4 . 4 4 . 4 Removing the Gamepad drivers Removing the Gamepad drivers Removing the Gamepad drivers To remove the gamepad drivers: Insert the support CD into your CD-ROM drive.
  • Page 32: Asus Contact Information

    ASUS Contact information To display the ASUS contact information: Insert the support CD into your CD-ROM drive. If autorun is enabled, the 2D/3D Graphics & Video Accelerator appears automatically. If autorun is disabled, run S e t u p . e x e S e t u p .
  • Page 33: Other Information

    Other information 6 . 1 6 . 1 Browse Support CD Browse Support CD 6 . 1 6 . 1 6 . 1 Browse Support CD Browse Support CD Browse Support CD To browse the support CD: Insert the support CD into your CD-ROM drive.
  • Page 34: View Readme File

    6 . 3 6 . 3 View readme file View readme file 6 . 3 6 . 3 6 . 3 View readme file View readme file View readme file To view the readme file: Insert the support CD into your CD-ROM drive.
  • Page 35: Appendix: Basic Troubleshooting

    Appendix: Basic troubleshooting If you encounter any of the following conditions after installing your graphics card, try performing one of the possible solutions before calling for technical support. P r o b l e m P r o b l e m P r o b l e m P r o b l e m P r o b l e m...
  • Page 36 P r o b l e m P r o b l e m W r o n g c o l o r b a l a n c e W r o n g c o l o r b a l a n c e P r o b l e m P r o b l e m P r o b l e m...
  • Page 37 P r o b l e m P r o b l e m P r o b l e m T h e s c r e e n i m a g e i s g a r b l e d . T h e s c r e e n i m a g e i s g a r b l e d .
  • Page 38 A - 4 A - 4 A - 4 A S U S N V I D I A s e r i e s g r a p h i c s c a r d A S U S N V I D I A s e r i e s g r a p h i c s c a r d A S U S N V I D I A s e r i e s g r a p h i c s c a r d A - 4 A - 4...

Table of Contents