LG ARUB076BT2 Installation Manual
Multi v syncii system heat recovery outdoor unit arub series
Hide thumbs
Also See for ARUB076BT2:
- Installation manual (247 pages) ,
- Installation manual (84 pages) ,
- Installation manual (94 pages)
Table of Contents
Advertisement
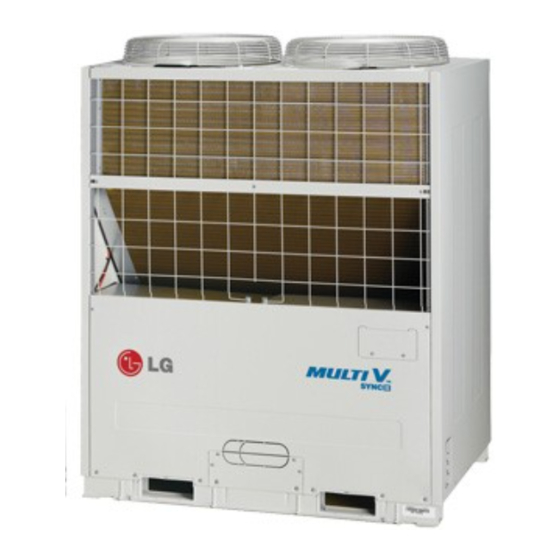
Heat Recovery Outdoor Unit
INSTALLATION MANUAL
MODELS: ARUB Series
website http://www.lgservice.com
System
IMPORTANT
• Please read this installation manual completely before
installing the product.
• Installation work must be performed in accordance with
the national wiring standards by authorized personnel
only.
• Please retain this installation manual for future reference
after reading it thoroughly.
LG
R410A
Advertisement
Table of Contents

Related Manuals for LG ARUB076BT2


Summary of Contents for LG ARUB076BT2
-
Page 1: Installation Manual
website http://www.lgservice.com System Heat Recovery Outdoor Unit R410A INSTALLATION MANUAL MODELS: ARUB Series IMPORTANT • Please read this installation manual completely before installing the product. • Installation work must be performed in accordance with the national wiring standards by authorized personnel only. -
Page 2: Outdoor Unit
IMPORTANT! Please read this instruction sheet completely before installing the product. This air conditioning system meets strict safety and operating standards. As the installer or service person,it is an important part of your job to install or service the system so it operates safely and efficiently. -
Page 3: Table Of Contents
ARUB Series Outdoor Unit Installation Manual TABLE OF CONTENTS Safety Precautions........4 Installation Process ......12 Outdoor Unit Information ....14 Environment-friendly Alternative Refrigerant R410A.......15 Select the Best Location ....15 Installation Space .......17 Lifting method ........20 Installation ...........22 Refrigerant piping installation...24 Electrical Wiring........41 HR unit PCB.........49 Main PCB ..........60 Test Run..........67... -
Page 4: Safety Precautions
Safety Precautions Safety Precautions To prevent injury to the user or other people and property damage, the following instructions must be followed. I Incorrect operation due to ignoring instruction will cause harm or damage. The seriousness is classified by the following indications. This symbol indicates the possibility of death or serious injury. - Page 5 Safety Precautions For re-installation of the installed product, Do not install, remove, or re-install the unit always contact a dealer or an Authorized by yourself (customer). Service Center. • There is risk of fire, electric shock, explosion, or • There is risk of fire, electric shock, explosion, or injury.
-
Page 6: Safety Precautions
Safety Precautions Ventilate before operating air conditioner Securely install the cover of control box and when gas leaked out. the panel. • It may cause explosion, fire, and burn. • If the cover and panel are not installed securely, dust or water may enter the outdoor unit and fire or electric shock may result. - Page 7 Safety Precautions I Operation Do not damage or use an unspecified power Use a dedicated outlet for this appliance. cord. • There is risk of fire, electric shock, explosion, or • There is risk of fire or electrical shock. injury. Be cautious that water could not enter the Do not touch the power switch with wet product.
- Page 8 Safety Precautions Do not open the inlet grill of the product during operation. (Do not touch the electrostatic filter, if the unit is so equipped.) • There is risk of physical injury, electric shock, or product failure. I Installation Always check for gas (refrigerant) leakage Do not install the product where the noise or after installation or repair of product.
- Page 9 Safety Precautions Keep the unit away from children. The heat When installting the unit in a hospital, com- exchanger is very sharp. munication station, or similar place, provide sufficient protection against noise. • It can cause the injury, such as cutting the finger. •...
- Page 10 Safety Precautions Make the connections securely so that the Be sure the installation area does not deteri- outside force of the cable may not be applied orate with age. to the terminals. • Inadequate connection and fastening may gen- • If the base collapses, the air conditioner could erate heat and cause a fire.
- Page 11 Safety Precautions Do not touch any of the refrigerant piping Do not operate the air conditioner with the during and after operation. panels or guards removed. • It can cause a burn or frostbite. • Rotating, hot, or high-voltage parts can cause injuries.
-
Page 12: Installation Process
Installation Process Installation Process Indicate clearly who is to be responsible for switch settings Determination of division work Make relationship between outdoor, indoor, remote controller, and option connections clear. Preparation of contract drawings (Prepare control circuit diagram) Take account of gradient The foundation must be level Sleeve and insert work Outdoor unit foundation work... - Page 13 3) Select a well-drained place. 1. If you can’t meet above guide line in the seaside installation, please contact LG Electronics for the additional anticorrosion treatment. 2. Periodic ( more than once/year ) cleaning of the dust or salt particles stuck on the heat exchanger by using water...
-
Page 14: Outdoor Unit Information
A combination operation over 100% cause to reduce the total capacity. Power Supply: Outdoor Unit (3Ø, 208/230V, 60Hz) I Heat pump 1 Outdoor Unit 2 Outdoor Units Unit 8(6.5) 10(8.0) 12(9.5) 16(12.5) Model(HP(Ton)) Model ARUB076BT2 ARUB096BT2 ARUB115BT2 ARUB154BT2 ARUB076BT2 ARUB076BT2 Product Charge kg(lbs) 8(17.6) 8(17.6) 8(17.6) 8+8(17.6+17.6) -1(-2.2) -
Page 15: Environment-Friendly Alternative Refrigerant R410A
Select the Best Location Environment-friendly Alternative Refrigerant R410A • The refrigerant R410A has the property of higher operating pressure in comparison with R22. Therefore, all materials have the characteristics of higher resisting pressure than R22 ones and this character- istic should be also considered during the installation. R410A is an azeotrope of R32 and R125 mixed at 50:50, so the ozone depletion potential (ODP) of R410A is 0. - Page 16 Select the Best Location I Select installation location of the HR unit suitable for following conditions • Avoid a place where rain may enter since the HR unit is for indoor. • Sufficient service space must be obtained. • Refrigerant pipe must not exceed limited length. •...
-
Page 17: Installation Space
Installation Space Installation Space Individual Installation I Basic space required A space of at least 250mm(9-13/16 inch) is necessary at the back for inlet air. Taking servicing, etc. from the rear into account, a space of about 915mm(36 inches) should be provided, the same as at the front. 915mm(36 inches) or more (Control box is open/close type) 250mm(9-13/16 inch) or more Top discharge (open in principle) - Page 18 Installation Space I When unit is surrounded by walls 915mm(36 inches) or more (Control box is of a open/close type) 250mm(9-13/16 inch) or more Rear Side Rear Side Front Side Front Side I When there is an obstruction above the unit 45°...
- Page 19 Installation Space Collective / Continuous installation Space required for collective installation and continuous installation:When installing several units, leave space between each block as shown below considering passage for air and people. (Be opened) 915mm(36 inches) or more (control box is of a open/close type) 250mm(9-13/16 inch) or more 150mm(5-7/8 inch) or more Rear Side...
- Page 20 Installation Space Seasonal wind and cautions in winter • Sufficient measures are required in a snow area or severe cold area in winter so that product can be operated well. • Get ready for seasonal wind or snow in winter even in other areas. •...
-
Page 21: Lifting Method
Lifting Method Lifting method • When carrying the suspended, unit pass the ropes under the unit and use the two suspension points each at the front and rear. • Always lift the unit with ropes attached at four points so that impact is not applied to the unit. •... -
Page 22: Installation
Installation Installation Location of anchor bolt(To be applied to 1, 2 Units installation) I Individual installation Unit: mm(inch) 10(3/8) 900±2 900±2 (35-7/16±1/16) (35-7/16±1/16) (15-1/16) I Collective installation (5-7/8) 10(3/8) 10(3/8) 900±2 900±2 900±2 900±2 (15-1/16) (20-15/16) (35-7/16±1/16) (35-7/16±1/16) (15-1/16) (35-7/16±1/16) (35-7/16±1/16) I Installation foot(Location of anchor bolt) (UW1) - Page 23 Installation Foundation for Installation • Fix the unit tightly with bolts as shown below so that unit will not fall down due to earthquake or gust. • Use the H-beam support as a base support • Noise and vibration may occur from the floor or wall since vibration is transferred through the installation part depending on installation status.
-
Page 24: Refrigerant Piping Installation
Refrigerant piping installation Refrigerant piping installation WARNING Always use extreme care to prevent the refrigerant gas (R410A) from leakage while using fire or flame. If the refrigerant gas comes in contact with the flame from any source, such as a gas stove, it breaks down and generates a poisonous gas which can cause gas poisoning. - Page 25 Refrigerant piping installation When connecting the pipes from the front of the outdoor unit, remove part and part When connecting the pipes from the side of the outdoor unit, remove part (the whole "Knock out" part). (Front) WARNING After installing the pipe, clog the pipe excavation inlet of the front panel and the side panel (Wire may be damaged due to entering of rats, animals, etc).
-
Page 26: Refrigerant Piping Installation
Refrigerant piping installation Connection of Outdoor Units 2 outdoor units [Unit:mm(inch)] Model Low Pressure Gas Pipe Liquid Pipe High Pressure Gas Pipe Ø 9.52(3/8) Ø34.9(1-3/8) Ø22.2(7/8) Ø19.05(3/4) Ø28.58(1-1/8) Ø12.7(1/2) Ø28.58(1-1/8) Ø31.8(1-1/4) Ø19.05(3/4) Ø12.7(1/2) Ø15.88(5/8) Ø19.05(3/4) Ø28.58(1-1/8) Ø22.2(7/8) Ø12.7(1/2) Ø22.2(7/8) Ø22.2(7/8) Ø28.58(1-1/8) Ø15.88(5/8) ARCNB20... - Page 27 Refrigerant piping installation Installation procedure for HR unit 1. Using an insert-hole-in- anchor, hang the hanging bolt. 2. Install a hexagon nut and a flat washer (locally-procured)to the hanging bolt as shown in the figure in the bottom, and fit the main unit to hang on the hanger metal. Six-sided Nut (M10 or M8) 3.
- Page 28 Refrigerant piping installation Type of HR Unit Select an HR unit according to the number of the indoor units to be installed. HR units are classified into 3 types by the number of connectable indoor units. Ex) Installation of 6 indoor units Consists of HR unit for 4 rooms and HR unit for 2 rooms.
- Page 29 Refrigerant piping installation [ Reducers for indoor unit and HR unit ] [Unit:mm(inch)] Gas pipe Models Liquid pipe High pressure Low pressure Indoor unit reducer OD9.52(3/8) Ø6.35(1/4) OD15.88(5/8) Ø12.7(1/2) Ø15.88(5/8) OD19.05(3/4) Ø15.88(5/8) Ø12.7(1/2) OD22.2(7/8) Ø19.05(3/4) PRHR020A OD9.52(3/8) Ø6.35(1/4) OD12.7(1/2) Ø9.52(3/8) OD15.88(5/8) Ø12.7(1/2) HR unit reducer...
- Page 30 Refrigerant piping installation Caution 1. Use the following materials for refrigerant piping. • Material: Seamless phosphorous deoxidized copper pipe • Wall thickness : Comply with the relevant local and national regulations for the designed pressure 3.8MPa. We recommend the following table as the minimum wall thickness. Outer diameter 6.35(1/4) 9.52(3/8)
- Page 31 Refrigerant piping installation WARNING When installing and moving the air conditioner to another site, be sure to make recharge refrigerant after perfect evacuation. - If a different refrigerant or air is mixed with the original refrigerant, the refrigerant cycle may malfunction and the unit may be damaged.
-
Page 32: Refrigerant Piping System
Refrigerant piping installation Refrigerant piping system Example : 3 outdoor units, 4 HR units and 11 indoor units Outdoor unit Y branch HR unit Indoor unit Slave 1 Master "a" "b" I Case 1 ("a") : Maximum height is 15m(236ft) if you install with Y branch. I Case 2 ("b") : Height is zero(0) m in HR unit serial connector. - Page 33 Refrigerant piping installation ➲ Refrigerant pipe diameter between branches and HR units (B,C,D) Gas pipe [mm(inch)] Liquid pipe Downward indoor unit total capacity [mm(inch)] [kW(Btu/h)] Low pressure High pressure ≤ 5.6 (19,100) Ø6.35(1/4) Ø12.7(1/2) Ø9.52(3/8) < 16.0 (54,600) Ø9.52(3/8) Ø15.88(5/8) Ø12.7(1/2) <...
- Page 34 Refrigerant piping installation N Outdoor Unit Connection ➲ Refrigerant pipe diameter before 1st branch (A,E,F) Gas pipe [mm(inch)] Liquid pipe Upward outdoor unit total capacity [mm(inch)] [HP] Low pressure High pressure Ø9.52(3/8) Ø19.05(3/4) Ø15.88(5/8) Ø9.52(3/8) Ø22.2(7/8) Ø19.05(3/4) Ø12.7(1/2) Ø28.58(1-1/8) Ø19.05(3/4) 14, 16 Ø12.7(1/2) Ø28.58(1-1/8)
- Page 35 Refrigerant piping installation N The Amount of Refrigerant The calculation of the additional charge should take account of the length of pipe. Product charge(1unit)(kg(lbs)) Ex) 10HP Outdoor unit Additional charge (kg(lbs)) HR unit (1EA) Indoor unit Total liquid pipe (m(ft)): Ø22.2mm(7/8inch) x 0.237 lbs/ft x 0.178 lbs/ft Total liquid pipe (m(ft)): Ø19.05mm(3/4inch)
- Page 36 Refrigerant piping installation Branch pipe Fitting Y branch To Outdoor Unit To Branch Piping or Indoor Unit • Ensure that the branch pipes are attached horizontally or vertically (see the diagram below.) Horizontal Facing Facing plane downwards upwards Within +/- 10° Viewed from point A in direction of arrow Within ±...
- Page 37 Refrigerant piping installation N Y branch pipe [Unit:mm(inch)] Models Low Pressure Gas Pipe Liquid pipe High Pressure Gas Pipe I.D. 9.52(3/8) I.D. 6.35(1/4) I.D. 15.88(5/8) I.D. 12.7(1/2) I.D. 19.05(3/4) I.D. 12.7(1/2) I.D. 12.7(1/2) I.D. 9.52(3/8) I.D. 12.7(1/2) I.D. 9.52(3/8) I.D. 15.88(5/8) I.D.
- Page 38 Refrigerant piping installation Leak Test and Vacuum (1) Leak test Leak test should be made by pressurizing nitrogen gas to 3.8 MPa(551 psi). For the test method, refer to the following figure. (Make a test with the service valves closed. Be also sure to pressurize low pressure gas pipe and liquid pipe simultaneously) The test result can be judged good if the pressure has not be reduced after leaving for about one day after completion of nitrogen gas pres-...
- Page 39 Refrigerant piping installation (3) Refrigerant Charged Method After vacuum completion, primarily charge the calculated amount of additional refrigerant through the high pressure gas pipe and the liquid pipe. If the refrigerant is not charged any more, secondarily charge the remaining refrigerant through the low pressure gas pipe and the liquid pipe. Vacuum and Primary charging Secondary charging High pressure gas pipe...
-
Page 40: Thermal Insulation Of Refrigerant Piping
Refrigerant piping installation Thermal insulation of refrigerant piping Be sure to give insulation work to refrigerant piping by covering liquid pipe and gas pipe separately with enough thickness heat-resistant polyethylene, so that no gap is observed in the joint between indoor unit and insulating material, and insulating materials themselves. -
Page 41: Electrical Wiring
Electrical Wiring Electrical Wiring Caution 1. Follow ordinance of your governmental organization for technical standard related to electrical equipment, wiring regulations and guidance of each electric power company. WARNING Be sure to have authorized electrical engineers do the electric work using special circuits in accordance with regulations and this installation manual. - Page 42 Electrical Wiring Outdoor Unit Outdoor Unit Indoor Indoor Indoor Indoor Unit Unit Unit Unit Remote Remote Remote Remote controller controller controller controller Outdoor Unit Outdoor Unit Indoor Indoor Indoor Indoor Unit Unit Unit Unit Remote Remote Remote Remote controller controller controller controller 2-Core Shield Cable...
-
Page 43: Electrical Wiring
Electrical Wiring Control box and connecting position of wiring - Remove all of the screws on front panel, and remove the front panel by pulling it forward. - Connect communication line between master and slave outdoor unit through the terminal block. - Connect communication lines between outdoor unit and indoor units through the terminal block. - Page 44 Electrical Wiring Communication and Power Lines 1) Communication cable • Types : shielding wire CVVS or CPEVS • Use wires of size : over 1.25mm • Insulation material : PVC • Maximum allowable temperature: 140°F • Maximum allowable line length: under 300m(984ft) 2) Remote control cable •...
-
Page 45: Wiring Of Main Power Supply And Equipment Capacity
Electrical Wiring N Wiring of Main Power Supply and Equipment Capacity 1. Use a separate power supply for the outdoor unit and indoor unit. 2. Bear in mind ambient conditions (ambient temperature,direct sunlight, rain water,etc.) when proceeding with the wiring and con- nections. - Page 46 Electrical Wiring N Precautions when laying power wiring Use round pressure terminals for connections to the power terminal block. Power wire Round pressure terminal When none are available, follow the instructions below. • Do not connect wiring of different thicknesses to the power terminal block. (Slack in the power wiring may cause abnormal heat.) •...
- Page 47 Electrical Wiring N Example Connection of Transmission Cable I 1 Outdoor Unit - 3Ø, 208/230V 3 Phase 3 Wires Power line(R, S, T) Communication line (3 line): Wired remote control Single Phase of power supply line(L, N) Power supply switch (Switch fuse : ELCB) Communication line (2 shield line): Between Indoor Unit and Outdoor Unit 3 Phase 3 Wires...
-
Page 48: Outdoor Units
Electrical Wiring N Example Connection of Transmission Cable 2 Outdoor Units I When the power source is supplied to 3 Phase 3 Wires Power line(R, S, T) Each outdoor unit individually. Communication line (3 line): Wired remote control Single Phase of power supply line(L, N) Power supply switch Communication line (2 shield line): (Switch fuse : ELCB) -
Page 49: Hr Unit Pcb
HR Unit PCB HR Unit PCB #4 valve housing #1 valve housing #1 cooling valve LED(green) #1 heating valve LED(red) 7-SEG SW05M (Switch for addressing HR unit) SW01M SW02M SW01M/SW03M/SW04M (Dip switch for setup of (Switch for manual valve SW03M SW04M the function of HR unit) addressing) - Page 50 HR Unit PCB 2) Selection of the model of the HR unit (For 2 rooms) (For 3 rooms) (For 4 rooms) PRHR020A PRHR030A PRHR040A Initial Setting 1 room Connected 2 rooms Connected 3 rooms Connected 4 rooms Connected ❈ Each model is shipped with the switches No.2 and No.3 pre-adjusted as above in the factory. WARNING •...
-
Page 51: Branch Pipe
HR Unit PCB 3) Setting the Valve Group. DIP S/W setting Example Indoor Unit Indoor Unit Not control Indoor Unit Indoor Unit Indoor Unit No.1, 2 Valve Indoor Unit Large capacity indoor unit Control Indoor Unit No.2, 3 Valve Large capacity indoor unit Control Indoor Unit No.3, 4 Valve... - Page 52 HR Unit PCB 2. SW05M (Rotary S/W for addressing HR unit) Must be set to '0' when installing only one HR unit. When installing multiple HR units, address the HR units with sequentially increasing numbers starting from '0'. Ex) Installation of 3 HR units 3.
- Page 53 HR Unit PCB Flow chart for auto addressing for indoor units and HR units 1) Auto addressing for indoor unit 2) Auto pipe detection 3) Manual pipe detection(Execute in case of Auto pipe detection failure) • Turn off all the indoor units before auto addressing. If indoor unit is operated, auto addressing would not be completed.
- Page 54 HR Unit PCB WARNING 1. Execute auto addressing and auto pipe detection again whenever the indoor PCB and HR unit PCB is replaced. • Operation error occurs unless power is applied to the indoor and HR units. 2. Error No.200 occurs if the number of connected indoor units and that of scanned indoor units are different.
- Page 55 HR Unit PCB Flow chart of auto-addressing for indoor units Turn HR unit , indoor unit and outdoor unit on in the order named. Wait for 3 minutes Press SW02V of the outdoor unit main PCB for 5 seconds '88' is displayed on outdoor unit main PCB and HRunit PCB The number of the indoor units connected is displayed at 7-SEG of the outdoor unit main PCB...
- Page 56 HR Unit PCB Flow chart of auto addressing for pipe detection Confirmation of indoor unit address setting Outdoor unit is operated for 5~30 minues. Turn No.1 of SW02M of HR unit PCB off. Is the pipe setting condition Confirm that the setting of No.2, 3 of satisfied during the operation of SW02M corresponds with the number of indoor unit?
- Page 57 HR Unit PCB Flow chart of manual addressing for pipe detection Execute in case of Auto pipe detection Wait for about 5 minutes. failure The number of the indoor units installed is Turn No.1 of SW02M of HR unit PCB on. displayed.
- Page 58 HR Unit PCB Example of manual valve addressing (In case that an indoor unit of central control address "11" is connected to a valve #1 of an HR unit) • Prerequisite for manual valve addressing: central control address of each indoor unit must be preset differ- ently at its wired remote control Display and setup Setup and Contents...
- Page 59 HR Unit PCB Example of checking valve address (In case that an indoor unit of central control address "11" is connected to a valve #1 of an HR unit) Display and Setup Setup and Contents • Operation: Turn dip S/W No.1 on. •...
-
Page 60: Main Pcb
Main PCB Main PCB SW01B SW02B (DIP S/W) (DIP S/W) 7 - Segment SW02V Auto addressing Outdoor Unit Outdoor Unit... -
Page 61: Dip Switch Setting
Main PCB DIP switch setting I Checking according to dip switch setting 1. You can check the setting values of the main outdoor unit from the 7 segment LED. The dip switch setting should be changed when the power is OFF. 2. -
Page 62: Main Pcb
Main PCB I Setting the DIP switch (SW03M) • Set the dip switch with the power turned off. If you change the setting when the power is on, the changed setting is not applied immediately. The changed setting is applied at the moment that the power is on. •... - Page 63 Main PCB Function Function SW01B Setting SW01B Setting SW02B Setting SW02B Setting Remarks Remarks Snow Snow 9 10 11 12 13 14 9 10 11 12 13 14 Forced Forced Defrosting Defrosting 9 10 11 12 13 14 9 10 11 12 13 14 Snow + Forced Snow + Forced Defrosting...
- Page 64 Main PCB 2. Settings of slave outdoor unit Function Function SW01B Setting SW01B Setting SW02B Setting SW02B Setting Remarks Remarks Slave 9 10 11 12 13 14 3. Settings of corresponding outdoor unit Function Function SW01B Setting SW01B Setting SW02B Setting SW02B Setting Remarks Remarks...
- Page 65 Main PCB Group Number setting Group Number setting for Indoor Units Confirm the power of whole system(Indoor Unit, Outdoor Unit) is OFF, otherwise turn off. The transmission lines connected to INTERNET terminal should be connected to central control of Outdoor unti with care for their polarity( A ¡...
- Page 66 Main PCB WARNING • Valve address and central control address of its corresponding indoor unit should be set identical in manual addressing. Valve (04) Indoor unit (04) Valve (03) Indoor unit (03) HR unit Valve (02) Indoor unit (02) Valve (01) Indoor unit (01) Central control address Outdoor Unit...
-
Page 67: Test Run
Test Run Test Run Checks Before Test Run Check to see whether there is any refrigerant leakage, and slack of power or transmission cable. Confirm that 500 V megger shows 2.0 MΩ or more between power supply terminal block and ground. Do not operate in the case of 2.0 MΩ... -
Page 68: How To Cope With Test Run Abnormality
Test Run How to Cope with Test Run Abnormality The phenomena from main component failure Component Phenomenon Cause Check method and Trouble shooting Not operating Motor insulation broken Check resistance between terminals and chassis Compressor Stop during running Motor insulation failure Check resistance between terminals and chassis High pressure error... - Page 69 Test Run Sensor Checking Function Note 1) Sensor checking function judges whether the current temperature of indoor and outdoor unit sensors is right or not. -3 indoor temperature sensors, 9 outdoor temperature sensors, 2 outdoor pressure sensors. It is used for judging sensor abnormality. Note 2) Note 1.
- Page 70 Test Run Sensor Check Error Code Display In case error occurs during sensor checking process, error display is as shown below. Following contents are displayed one after the other on the main PCB of master outdoor unit. Indoor sensor error : Outdoor sensor error : * 5 number of errors is displayed Displaying error content...
-
Page 71: Refrigerant Checking Function
Test Run Refrigerant Checking Function 1. This function charges appropriate amount of refrigerant automatically through cycle operation. 2. This function judges refrigerant leakage and overcharging. 3. It can be used with refrigerant auto charging function. Start Note 1. In case air temperature is out of guaranteed Main temperature, refrigerant checking function may end Wait for 3 min. - Page 72 Test Run CAUTION 1. Guaranteed Temperature range(Error occurs out of guaranteed temperature range) IDU : 20~32°C(68~90˚F) (buffer 1°C(33.8˚F)) ODU : 10~38°C(10~38˚F) (buffer 1°C(33.8˚F)) 2. Set IDU wired remote controller temperature sensor setting as 'IDU'. 3. Make certain that IDU doesn't run with thermo off mode during operation. [ Error contents about auto refrigerant charging function ] : Temperature Range Error (In case that IDU or ODU is out of range) : System Unstable Error (In case, After 45 min operating the system, it does not be stable)
- Page 73 Test Run Night silent operation Function In cooling mode, this function makes the ODU fan operate at low RPM to reduce the fan noise of ODU at night which has low cooling load. Max. RPM setting method Master ODU Dip S/W No.12+14 ON SW01B Master ODU Main PCB Power Reset...
-
Page 74: Vacuum Mode
Test Run Vacuum Mode This function is used for creating vacuum in the system after compressor replacement, ODU parts replace- ment or IDU addition/replacement. Vacuum mode setting method Vacuum mode cancellation method Main PCB ODU power reset Master main PCB DIP switch OFF( No.11,14) SW01S Main PCB Power reset... - Page 75 Test Run Self-Diagnosis Function Error Indicator • This function indicates types of failure in self-diagnosis and occurrence of failure for air condition. • Error mark is displayed on display window of indoor units and wired remote controller, and 7-segment LED of outdoor unit control board as shown in the table.
- Page 76 Test Run Display Title Cause of Error Master Outdoor Unit Input Voltage Master Outdoor Unit input voltage is over 487V or High/ Low Voltage below 270V slave Outdoor Unit Input Voltage slave Outdoor Unit input voltage is over 487V or below High/ Low Voltage 270V Master Outdoor Unit Inverter...
- Page 77 Test Run Display Title Cause of Error Master Outdoor Unit High Master Outdoor Unit High Pressure Sensor open or Pressure Sensor Fault short slave Outdoor Unit High Pressure slave Outdoor Unit High Pressure Sensor open or Sensor Fault short Master Outdoor Unit Air Master Outdoor Unit Air Temperature Sensor open or Temperature Sensor Fault short...
- Page 78 Test Run Display Title Cause of Error Inverter PCB EEPROM Error of Access Error of Inverter PCB of Master Outdoor Unit Master Outdoor Unit Inverter PCB EEPROM Error of Access Error of Inverter PCB of slave Outdoor Unit slave Unit Master Outdoor Unit Fan Lock Restriction of Master Outdoor Unit slave Outdoor Unit Fan Lock...
- Page 79 Test Run Display Title Cause of Error Failing to receive Slave Unit signal at main PCB of Communication Error Between Master outdoor unit Master Outdoor Unit and Other Outdoor Unit 1 0 4 Failing to receive master and other Slave Unit signal at Communication Error Between main PCB of slave outdoor unit slave Outdoor Unit and Other...
-
Page 80: Caution For Refrigerant Leak
Caution For Refrigerant Leak Caution For Refrigerant Leak The installer and system specialist shall secure safety against leakage according to local regulations or standards. The following standards may be applicable if local regulations are not available. Introduction Though the R410A refrigerant is harmless and incombustible itself , the room to equip the air conditioner should be large to such an extent that the refrigerant gas will not exceed the limiting concentration even if the refrigerant gas leaks in the room. - Page 81 Caution For Refrigerant Leak (3) With partition and without opening which serve as passage of air to adjoining room Outdoor unit Indoor unit Smallest room I Calculate refrigerant concentration Total amount of replenished In case the result of calculation exceeds refrigerant in refrigerant facility (lb) Refrigerant concentration the limiting concentration, perform the...
-
Page 82: Installation Guide At The Seaside
3) Select a well-drained place. 1. If you can’t meet above guide line in the seaside installation, please contact LG Electronics for the additional anticorrosion treatment. 2. Periodic ( more than once/year ) cleaning of the dust or salt particles stuck on the heat exchanger by using water... - Page 83 P/No.: MFL46912304 Printed in Korea After reading this manual, keep it in a place easily accessible to the user for future reference.
Need help?
Do you have a question about the ARUB076BT2 and is the answer not in the manual?
Questions and answers