Table of Contents
Advertisement
Quick Links
Advertisement
Table of Contents

Subscribe to Our Youtube Channel
Related Manuals for Visioneer OneTouch 5300 Series


Summary of Contents for Visioneer OneTouch 5300 Series
- Page 1 Visioneer ® OneTouch 5300 Series ® for USB and Parallel Installation Guide...
- Page 2 Visioneer’s Limited Product Warranty If you find physical defects in the materials or the workmanship used in making the product described in this document, Visioneer will repair, or at its option, replace, the product at no charge to you, provided you return it (postage prepaid, with proof of your purchase from the original reseller) during the 12-month period after the date of your original purchase of the product.
-
Page 3: Table Of Contents
ABLE OF ONTENTS T A B L E O F C O N T E N T S Welcome ..........1 Please Use the Proper Section of this Manual . - Page 4 ....... 35 Visioneer OneTouch 5300 Scanner Specifications ....36...
-
Page 5: Welcome
ELCOME Congratulations on purchasing your Visioneer OneTouch 5300 flatbed scanner. With your scanner, you can quickly scan paper documents and color photos to place their electronic images on your computer. LEASE SE THE ROPER ECTION OF THIS ANUAL This manual contains installation instructions for both models of the OneTouch 5300 scanner—the 5300 USB scanner and the 5300 Parallel... -
Page 6: Part 1: Installation
The CD also includes your PaperPort User’s Guide. This guide provides more detailed information about the PaperPort software’s features. Please see the CD to view or print the guide. The guide is also available at Visioneer’s web site at www.visioneer.com. -
Page 7: The Onetouch 5300 Usb Scanner
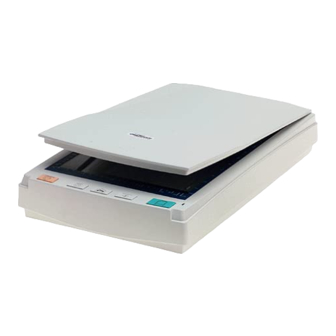
5300 USB S OUCH CANNER 5300 USB S OUCH CANNER Document cover Document pad Glass Reference frame Five-Button panel USB port Power jack Document cover. Close the document cover after placing items on the scanner glass. Document pad. Helps to secure the document in place on the scanner glass. Glass. -
Page 8: Getting Help
APER OFTWARE Note: You must install the PaperPort software before you connect the Visioneer OneTouch 5300 USB scanner to the computer. Otherwise the correct program to run your scanner will not be installed and it may not scan properly. The PaperPort CD includes all the PaperPort software files. - Page 9 STEP 1: I NSTALLING THE APER OFTWARE Note: If the PaperPort CD does not automatically start, make sure the CD drive’s door is completely shut. If the CD still doesn’t start, the autorun option on your computer is turned off. Click the Windows 98 icon that shows the drives on your computer.
-
Page 10: Step 2: Connecting The Scanner To The Computer
ONNECTING THE CANNER TO THE OMPUTER The Visioneer OneTouch 5300 USB scanner connects to any available USB port. Check your computer’s manual for its USB port locations. Note: You do not have to shut off the power to your computer when connecting the Visioneer 5300 USB scanner. - Page 11 6. Please turn to “Checking It Out” on page 14 to continue setting up your Visioneer OneTouch 5300 USB scanner. Note: The scanning lamp under the scanner’s glass remains lit so you don’t have to wait for it to warm up each time you want to scan.
-
Page 12: Installing The 5300 Parallel Scanner
UIDE 5300 P NSTALLING THE ARALLEL CANNER This section of the manual contains instructions for the Visioneer OneTouch 5300 Parallel scanner. To use the 5300 Parallel scanner and software, you need the following: • IBM PC (or 100-percent compatible) Pentium or higher •... -
Page 13: The Onetouch 5300 Parallel Scanner
5300 P OUCH ARALLEL CANNER 5300 P OUCH ARALLEL CANNER Document cover Document pad Glass Reference frame Five-Button panel To Printer To Host PC parallel Power jack Document cover. Close the document cover after placing items on the scanner glass. Document pad. -
Page 14: Getting Help
ONNECTING THE CANNER TO THE OMPUTER The Visioneer OneTouch 5300 Parallel scanner connects to any available parallel (LPT) port on the back of your computer. Note: Please follow the sequence of steps in this section. Do not connect the power cable until all other connections are complete. - Page 15 STEP 1: C ONNECTING THE CANNER TO THE OMPUTER 4. Plug one end of the scanner cable into the port on the back of the scanner marked “Host.” 5. Plug the other end of the scanner cable into the parallel port on the back of your computer.
- Page 16 5300 S ISIONEER OUCH CANNER NSTALLATION UIDE 7. Plug the power adapter cable into the jack on the scanner. 8. Plug the power adapter into an AC (wall) outlet. The following diagram shows the completed cable connections. When you plug the scanner’s power adapter into a wall outlet an amber light on the front of the scanner comes on indicating that the scanner is receiving power.
-
Page 17: Step 2: Installing The Paperport Software
4. When you’re finished installing the software, remove the CD from the CD drive. 5. That completes the installation of the hardware and software. Please see “Checking It Out” on page 14 to continue setting up your Visioneer OneTouch 5300 Parallel scanner. -
Page 18: Checking It Out
CANNER NSTALLATION UIDE HECKING This section of the manual applies to both models of the Visioneer OneTouch scanner—the 5300 USB scanner and the 5300 Parallel scanner. The OneTouch scanner software adds the scanner icon to the Windows taskbar (at the bottom right corner of the computer screen). If the scanner icon looks like the one shown in the figure, the scanner is... -
Page 19: If The Scanner Is Not Properly Connected
• If you are using the Visioneer OneTouch 5300 Parallel scanner, are other devices “daisy-chained” to the parallel port? If so, the scanner must be the first one connected to the computer (with the exception of a Zip... - Page 20 5300 S ISIONEER OUCH CANNER NSTALLATION UIDE computer and the scanner then connected to the drive). Plug the scanner into the computer’s parallel port first, then plug the next device into the scanner. • Did you restart the computer after installing the software? If you didn’t restart the computer, it may not have loaded all of the software files.
-
Page 21: Part 2: Scanning
Twain icon on the PaperPort Command Bar. To scan from other Twain software, choose Acquire from the software’s File menu. The Visioneer Scan Manager appears so you can Preview the scanned image, make any adjustments, and then scan the final image. See... -
Page 22: Scanning By Pressing The Onetouch Buttons
5300 S ISIONEER OUCH CANNER NSTALLATION UIDE CANNING RESSING THE OUCH UTTONS Pressing a scanner button scans the item and then sends the image either to the printer to print, or to a software application on your computer. To scan with a button: •... -
Page 23: Scanning From The Screen
CANNING FROM THE CREEN CANNING FROM THE CREEN Scanning from the screen is just like pressing a scanner button, except you click the button on the screen. The scanner scans the item and then sends the image either to the printer to print, or to a software application on your computer. -
Page 24: About The Onetouch Buttons
5300 S ISIONEER OUCH CANNER NSTALLATION UIDE BOUT THE OUCH UTTONS The OneTouch buttons are pre-configured to scan items at various settings, and then send the scanned image to a pre-selected software application. You can change the settings for each button except the Stop/Cancel button. -
Page 25: Changing The Button Settings
HANGING THE UTTON ETTINGS HANGING THE UTTON ETTINGS Each button setting can be changed to optimize the scanner for the type of scanning you want to do. To change a button’s settings: 1. Press and hold down the button that you want to change (except the Stop/Cancel button). - Page 26 5300 S ISIONEER OUCH CANNER NSTALLATION UIDE Select a software application to send the scanned image to that application. Select a setting for scanning the item. Select options for the button. 2. Click the tab of the button you want to change, if it isn’t already selected.
-
Page 27: Selecting Properties
Clicking the Properties tab on the Preferences dialog box displays a list of options and settings for customizing the scanner, and provides a direct link to Visioneer’s web site. Please see the Help information for a complete description of the Properties. -
Page 28: Adjusting Scan Settings And
5300 S ISIONEER OUCH CANNER NSTALLATION UIDE DJUSTING ETTINGS AND ETTINGS If you’re scanning using a scan configuration that you define yourself, you can adjust that configuration’s scan settings and page settings. For example, if the scanned image is too dark, you can adjust the brightness of the scan setting. - Page 29 HANGING THE UTTON ETTINGS Note: You cannot edit or change the pre-defined configurations. To make a change, you need to create a new configuration or copy an existing one and give it a new name. 3. If you haven’t defined a configuration yet, click the New button to create a new configuration.
- Page 30 5300 S ISIONEER OUCH CANNER NSTALLATION UIDE Resolution—Drag the slider to the right or left to adjust the dots per inch (dpi) of the resolution. The maximum resolution is 600 dpi, the minimum is 50 dpi. The higher the dpi setting, the sharper and clearer the scanned image.
- Page 31 HANGING THE UTTON ETTINGS DeScreen—Select this option when scanning a picture from a newspaper or magazine article, or other item that contains images with patterns or dots. Scans of patterns or dots sometimes have a distorted or wavy appearance. The scanner scans the item to compensate for the patterns and dots, and produces a clearer image.
-
Page 32: Scanning From The Paperport Software
Desktop appears. 2. From the File menu, choose Select Source. The Select Source dialog box appears, listing your Visioneer OneTouch 5300 scanner (as well as all other Twain devices installed on your computer). 3. Choose the Visioneer OneTouch 5300 scanner option, then click Select. -
Page 33: Scanning An Item With The Twain Button
Twain button in the PaperPort software. You can scan many types of items, from small business cards to A4-sized pages. Note: Your Visioneer OneTouch scanner is initially set to scan from the PaperPort software with the setting Color Document—Faster. To scan a black-and-white image, select one of the other settings. - Page 34 5300 S ISIONEER OUCH CANNER NSTALLATION UIDE The Visioneer Scan Manager dialog box appears. Select one of these pre-set options if it’s appropriate for how you want to use the scanned item. If you don’t want to use a pre-set option, select new settings here to manually configure the scan.
- Page 35 CANNING FROM THE APER OFTWARE Mode—From left to right the three modes are color, grayscale, and black-and-white. The same symbols next to the pre-set options indicate their mode setting. Click a mode to select it for the scan. Res—This is the resolution setting for the scan in dots-per-inch (dpi).
- Page 36 5300 S ISIONEER OUCH CANNER NSTALLATION UIDE 7. (optional) To see a preview again before scanning the final image, click the Preview button. 8. When you’re satisfied with the image settings, click the Scan button. The scanner now re-scans the item and displays the final image as a thumbnail on the PaperPort Desktop.
-
Page 37: The Predefined Scan Settings
CANNING FROM THE APER OFTWARE REDEFINED ETTINGS Selecting the proper scan setting before final scanning provides the best results for a scanned item. The scan setting determines the sharpness of the item and the number of possible shades of gray or color. These selections also affect the speed of the scan and the file size. -
Page 38: Adjusting The Brightness And Contrast
To adjust brightness and contrast: 1. Click the Twain icon on the Command Bar, or choose Acquire from the File menu. The Visioneer Scan Manager dialog box appears. 2. Click the Adv. Settings button on the Scan Manager. The Advanced Settings dialog box appears. -
Page 39: Cleaning The Scanner Glass
LEANING THE CANNER LASS 4. Drag the Contrast slider to the left to decrease the contrast or to the right to increase the contrast. See the Help information for more details about the Advanced Settings dialog box. LEANING THE CANNER LASS Scanning items that have excessive amounts of dirt or dust may dirty the glass. -
Page 40: Visioneer Onetouch 5300 Scanner Specifications
5300 S ISIONEER OUCH CANNER NSTALLATION UIDE 5300 S ISIONEER OUCH CANNER PECIFICATIONS Bit Depth 36-Bit color (internal), 12-Bit gray (internal), 1-Bit line art/text Scanning resolution Optical resolution: 300 x 600 dpi Maximum resolution (interpolated): 2400 x 2400 dpi Maximum Item sizes 8.5 x 11.69 inches (21.6 x 29.7 cm) Scanner dimensions Height...
Need help?
Do you have a question about the OneTouch 5300 Series and is the answer not in the manual?
Questions and answers