Advertisement
Quick Links
F
®
P
ISHMAN
REFIX
P
REAMP
W
ARNING
INSTALLATION BY A QUALIFIED PROFESSIONAL REPAIRMAN IS STRONGLY RECOMMENDED.
FISHMAN TRANSDUCERS WILL NOT BE RESPONSIBLE FOR INSTRUMENTS DAMAGED DUE TO
IMPROPER INSTALLATION.
P
ARTS
•
•
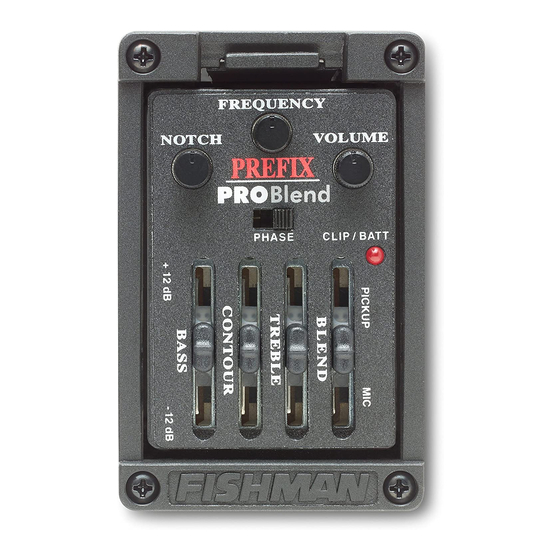
Prefix Professional preamp
•
•
Endpin jack with hardware
•
•
Adhesive backed wire guides
T
OOLS
•
Flex shaft tool with 1" (25.4 mm) diameter cutting wheel or router with 3/16" (6.30 mm) cutter
•
#45 (.082") drill (for screws)
•
Soldering Iron (30 watt max)
•
Rosin core solder
•
Wire Strippers
•
#1 Phillips screwdriver
•
Variable speed drill
•
Center punch
•
1/8" twist drill
•
15/32" Spade bit drill
•
1/2" open end wrench
•
3/32" Allen wrench or rod
P
I
REPARE THE
NSTRUMENT
Prepare the Endblock for the Jack
The objective of this method is to safely drill a hole in the endblock, with the end-
pin in place. You may remove a loose endpin and refasten it in the endblock with
cyanoacrylate glue before starting the procedure.
1 Apply masking tape around the endblock area to protect the instrument.
2 Locate an X-Acto saw 1/16" away from the body and saw off the endpin.
3 Centerpunch a guide hole in the trimmed endpin.
4 Drill a 1/8" pilot hole through the endpin and endblock.
NOTE: To protect guitars with ornamental veneers around the endblock
(ex: D-45), we recommend enlarging the veneer to size with a hand
reamer after completing this step.
5 Line up 15/32" Spade bit in the pilot hole and begin drilling. Maintain a perpen-
dicular plunge in relation to the instrument. Use steady (but not heavy) pressure,
especially as the drill exits inside the guitar.
6 To avoid damage to the instrument, let the drill come to a complete stop before
removing it from the hole.
Cut Out the Preamp Cavity
The Prefix Professional preamp can mount without structural alteration to the
instrument, provided that there is at least a clearance of 1-11/16" between the top
and bottom braces in the path of travel of the preamp. This path is defined as a 1-
5/8" radius, with the hinge point on the bezel being the center of the circle. The arc
implied by the travel of the overhanging side of the preamp defines the outside of
the circle.
GUITAR BODY
P
/ P
B
RO
RO
LEND
I
NSTALLATION
(4) 7/16" self-tapping screws
Preamp cut out template
(2) Mounting brackets
PREAMP
5
1
/
NOTE: For solid wood instruments, we strongly recommend gluing ply-
wood reinforcement patches to the screw mounting areas inside the gui-
tar before drilling the screw holes. This will prevent cracking and splin-
tering during installation, as well as provide extra support for the sides
of the instrument.
1 Choose a flat location for the preamp on the side of the instrument. The Flattest
and most comfortable location is often just above the instrument's waist and well
below the shoulder. Note that the bezel can conform to limited curves on the
sides of Auditorium, Dreadnought and Jumbo instruments.
CAUTION! When mounting the PREFIX PRO on guitars with highly
curved sides (such as small bodied acoustic- electrics), use extreme
caution when choosing the preamp location. A highly curved mounting
surface may cause the preamp to bind on the mounting bezel or in worst
cases, crack the wood around the preamp mounting holes.
2 Locate the enclosed cutout template at the desired location. and cut out the cav-
ity for the preamp .
3 If you are mounting the preamp with wood screws, drill the mounting holes to
.082" (#45") diameter. If you are mounting the preamp with machine screws and
a metal backing bracket, drill the mounting holes to 7/64" (.109") diameter.
I
NSTALL THE
Connect the Wires
Precaution:
a. Before cutting the wire lengths, be sure to leave enough slack to allow
full travel of the pivoting preamp.
b. A delicate silver foil enclosure on the back of preamp shields the
pickup terminal connections from hum and noise. When you connect
the pickup wire to the preamp, handle this foil enclosure carefully; do not
to bend or distort its shape.
"
8
S
YSTEM
FOIL SHIELD
TERMINAL BLOCK SCREWS
GROUND WIRE
SIGNAL WIRE
PICKUP WIRE ENTRY
Advertisement

Summary of Contents for Fishman Prefix Pro
- Page 1 INSTALLATION BY A QUALIFIED PROFESSIONAL REPAIRMAN IS STRONGLY RECOMMENDED. NOTE: For solid wood instruments, we strongly recommend gluing ply- FISHMAN TRANSDUCERS WILL NOT BE RESPONSIBLE FOR INSTRUMENTS DAMAGED DUE TO wood reinforcement patches to the screw mounting areas inside the gui- tar before drilling the screw holes.
- Page 2 • The ground wire goes to the terminal closest to the FISHMAN logo. to Ring • The signal (hot) wire goes to the terminal further from the FISHMAN logo. 3 Tighten the terminal block screws with a small slotted screwdriver.


Need help?
Do you have a question about the Prefix Pro and is the answer not in the manual?
Questions and answers