Alcatel-Lucent OMNISWITCH 6800 Hardware User's Manual
Alcatel-lucent switch user manual
Hide thumbs
Also See for OMNISWITCH 6800:
- Network configuration manual (926 pages) ,
- Management manual (292 pages) ,
- User manual (32 pages)

Subscribe to Our Youtube Channel
Related Manuals for Alcatel-Lucent OMNISWITCH 6800


Summary of Contents for Alcatel-Lucent OMNISWITCH 6800
- Page 1 Part No. 060196-10, Rev. G June 2007 OmniSwitch 6800 Series Hardware Users Guide www.alcatel-lucent.com...
- Page 2 This user guide documents OmniSwitch 6800 Series hardware, including The specifications described in this guide are subject to change without notice. Copyright © 2007 by Alcatel-Lucent. All rights reserved. This document may not be reproduced in whole or in part without the express written permission of Alcatel-Lucent.
-
Page 3: Table Of Contents
OmniSwitch 6800 Series Application Examples ...1-8 Gigabit-to-the-Desktop Migration ...1-8 Server Aggregation ...1-9 Layer 3 Aggregation/Distribution ...1-10 Small Enterprise Core ...1-11 Chapter 2 OmniSwitch 6800 Series Chassis and Hardware Components OmniSwitch 6800-24 ...2-3 OmniSwitch 6800-48 ...2-5 OmniSwitch 6800-U24 ...2-7 OmniSwitch 6800-24L ...2-9 OmniSwitch 6800-48L ...2-11 OmniSwitch 6800 Series Hardware Users Guide ... - Page 4 Setting Up a Stacked Configuration ...2-22 Rack Mounting Stacked Configurations ...2-22 Cabling Stacked Configurations ...2-22 Redundant Stacking Cable Connections ...2-22 Supported Cabling Patterns ...2-22 Booting OmniSwitch 6800 Series Switches ...2-25 Booting a Stand-alone Switch ...2-25 Booting Stacked Configurations ...2-26 Power Cords ...2-27 Console Port ...2-28 Serial Connection Default Settings ...2-28...
- Page 5 No Slot Number is Specified ...2-54 Chapter 3 Managing OmniSwitch 6800 Series Stacks In This Chapter ...3-1 OmniSwitch 6800 Series Stack Overview ...3-2 Roles Within the Stack ...3-2 Primary and Secondary Management Modules ...3-2 Primary Management Module Selection ...3-5 Secondary Management Module Selection ...3-8 Idle Module Role ...3-10...
- Page 6 Power Disconnection Warning ... A-10 Proper Earthing Requirement Warning ... A-10 Read Important Safety Information Warning ... A-11 Restricted Access Location Warning ... A-11 Wrist Strap Warning ... A-12 ... A-1 OmniSwitch 6800 Series Hardware Users Guide Contents June 2007...
- Page 7 Advertencia sobre una apropiada conexión a tierra ... A-14 Leer “información importante de seguridad” ... A-14 Advertencia de acceso restringido ... A-14 Advertencia de pulsera antiestática ... A-14 Clase de seguridad ... A-14 Index ... Index-1 OmniSwitch 6800 Series Hardware Users Guide June 2007...
- Page 8 Contents viii OmniSwitch 6800 Series Hardware Users Guide June 2007...
-
Page 9: About This Guide
This OmniSwitch 6800 Series Hardware Users Guide describes your switch hardware components and basic switch hardware procedures. Supported Platforms The information in this guide applies to the following products: OmniSwitch 6800-24 • OmniSwitch 6800-48 • OmniSwitch 6800-U24 • OmniSwitch 6800-24L •... -
Page 10: Who Should Read This Manual
CLI commands that pertain directly to hardware configuration, but it is not intended as a software users guide. There are several OmniSwitch 6800 Series users guides that focus on switch software configuration. Consult those guides for detailed information and examples for configuring your switch software to operate in a live network environment. -
Page 11: How Is The Information Organized
About This Guide How is the Information Organized? This users guide provides an overview of OmniSwitch 6800 Series switches in the first chapter, an overview and procedures for setting up and managing OmniSwitch 6800 Series switches in the second chapter, and an overview and procedures for managing stacks in the third chapter. - Page 12 802.1Q, VLANs, and Spanning Tree. The OmniSwitch 6800/6850/9000 Network Configuration Guide contains overview information, procedures and examples on how standard networking technologies are configured in the OmniSwitch 6800 Series. The OmniSwitch 6800/6850/9000 Advanced Routing Configuration Guide includes configuration informa- tion for networks using Open Shortest Path First (OSPF).
-
Page 13: Related Documentation
About This Guide Related Documentation The following are the titles and descriptions of all the OmniSwitch 6800 Series user manuals: OmniSwitch 6800 Series Getting Started Guide • Describes the hardware and software procedures for getting an OmniSwitch 6800 Series switch up and running. -
Page 14: User Manual Cd
User Manual CD User Manual CD All user guides for the OmniSwitch 6800 Series are included on the User Manual CD. This CD also includes user guides for other Alcatel-Lucent data enterprise products. In addition, it contains a stand-alone version of the on-line help system that is embedded in the OmniVista network management application. -
Page 15: Chapter 1 Omniswitch 6800 Series
1 OmniSwitch 6800 Series The OmniSwitch 6800 Series is an advanced fixed configuration family of Ethernet switches. These switches provide wire rate layer-2 forwarding and layer-3 routing with advanced services. OmniSwitch 6800 Series Hardware Users Guide Co ns Sp eed... - Page 16 • unshared 10/100 ports, which can be upgraded to 10/100/1000 ports. Whether operating as a single switch or as a stack, the OmniSwitch 6800 Series offers effective availability, resiliency, and security features and are ideal for the following network applications: Enterprise workgroups/LAN wiring closets •...
-
Page 17: Chapter 3 Managing Omniswitch 6800 Series Stacks
10/100/1000 ports are added for each OS6800-48. Up to eight switches can be stacked. OmniSwitch 6800 Series switches can be mixed and matched in any combination within the stack. This provides a virtual chassis with a 10/100/1000 capacity of up to 384 ports. -
Page 18: Availability Features
• Management Module Redundancy In stacked configurations, one OmniSwitch 6800 Series switch is designated as the primary “management module” for the stack. Because the stack can be thought of as a virtual chassis, the role of this primary management switch is to monitor and manage the functions of the stack. -
Page 19: Software Rollback
OmniSwitch 6800 Series Software Rollback Software rollback (also referred to as image rollback) essentially allows the OmniSwitch 6800 Series switches (in both standalone and stacked configurations) to return to a prior “last known good” version of software in the event of a system software problem. The switch controls software rollback through its resilient directory structure design (i.e., /flash/working and /flash/certified). -
Page 20: Hardware Monitoring
Show commands for all features are described in detail in the OmniSwitch CLI Reference Guide. page 1-6 Chapter 2, “OmniSwitch 6800 Series Chassis and Hardware Chapter 2, “OmniSwitch 6800 Series Chassis OmniSwitch 6800 Series Hardware Users Guide OmniSwitch 6800 Series... -
Page 21: Port And Fabric Capacities
OmniSwitch 6800 Series Port and Fabric Capacities OmniSwitch 6800 Series switches offer 20 non combo 10/100/1000 Ethernet ports, 44 non combo 10/100/1000 Ethernet ports, 20 non combo 1000 Mbps SFP connectors, 20 non combo 10/100 Ethernet ports, or 44 non combo 10/100 Ethernet ports. The switches also offer combo ports, which consist of four paired Gigabit Ethernet SFP connectors and four 10/100/100 Ethernet ports. -
Page 22: Omniswitch 6800 Series Application Examples
Layer 3 Aggregation/Distribution • Small Enterprise core • Gigabit-to-the-Desktop Migration OmniSwitch 6800 Series switches provide a migration path to Gigabit on the edge of the LAN. For example: 10/100/1000 Layer 2+ Switching OmniSwitch 6800 Layer 2+ 10/100 Switching Application Example: Gigabit-to-the-Desktop Migration... -
Page 23: Server Aggregation
OmniSwitch 6800 Series Server Aggregation The OmniSwitch 6800 Series switch is a well-suited server aggregation switch, especially for space- constrained data centers, where the switch can be installed in the same rack as the servers. For example: 10/100/1000 Switching 10/100/1000 Switching... -
Page 24: Layer 3 Aggregation/Distribution
OmniSwitch 6800 Series Application Examples Layer 3 Aggregation/Distribution OmniSwitch 6800 Series switches placed in the distribution layer of three-tier networks provide high- capacity, wire speed Layer 2 switching, Layer 3 routing, and intelligent services near the edge of the network. For example:... -
Page 25: Small Enterprise Core
Small Enterprise Core With its high-speed switching capacity, supported Layer 3 routing protocols, advanced network services, and wire speed 10 Gigabit capability, the OmniSwitch 6800 Series provides effective core switching for smaller Enterprise networks (200-500 ports). For example: 10/100 layer 2 Switching... - Page 26 OmniSwitch 6800 Series Application Examples OmniSwitch 6800 Series page 1-12 OmniSwitch 6800 Series Hardware Users Guide June 2007...
-
Page 27: Chapter 2 Omniswitch 6800 Series Chassis And Hardware Components
2 OmniSwitch 6800 Series Chassis and Hardware OmniSwitch 6800 Series switches are available in five stackable chassis configurations—the 24-port OmniSwitch 6800-24 (OS6800-24), OmniSwitch 6800-U24 (OS6800-U24), OmniSwitch 6800-24L (OS6800-24L), the 48-port OmniSwitch 6800-48 (OS6800-48), and OmniSwitch 6800-48L (OS6800- 48L). This chapter includes detailed information on these chassis types. Topics include: OmniSwitch 6800 Series chassis descriptions •... - Page 28 2-2 OmniSwitch 6800 Series Chassis and Hardware Components OmniSwitch 6800-24 K/ AC ol e Co ns K/ AC Sp ee Sp ee -2 4 it ch ni Sw PR I BP S K/ AC FA N K/ AC -4 8...
- Page 29 OmniSwitch 6800 Series Chassis and Hardware Components OmniSwitch 6800-24 The OmniSwitch 6800-24 is a stackable edge/workgroup switch offering 24 10/100/1000Base-T ports, as well as four combo SFP connectors for high speed connections. The front panel of the OS6800-24 chassis contains the following major components: System status and slot indicator LEDs •...
- Page 30 Weight Humidity Operating Temperature Storage Temperature Altitude page 2-4 OmniSwitch 6800 Series Chassis and Hardware Components 192 (stack of eight switches) 32 (stack of eight switches) 160 Gbps 150W AC/DC power supply, providing +12V @ 12.5A; 90-264VAC50-60 Hz universal input...
-
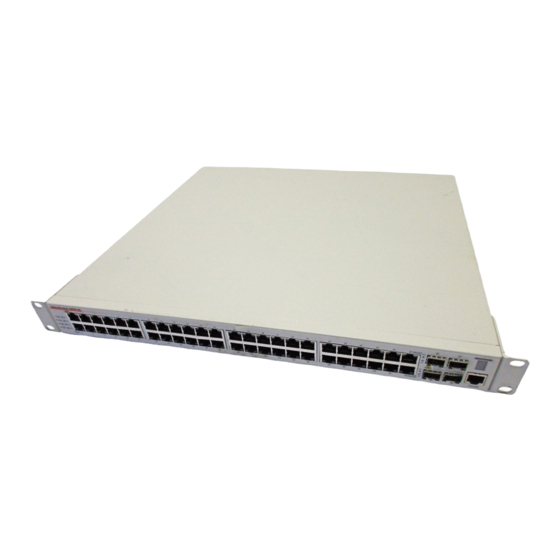
Page 31: Omniswitch 6800-48
OmniSwitch 6800 Series Chassis and Hardware Components OmniSwitch 6800-48 The OmniSwitch 6800-48 is a stackable edge/workgroup switch offering 48 10/100/1000Base-T ports, as well as four combo SFP connectors for high speed connections. The front panel of the OS6800-48 chassis contains the following major components: System status and slot indicator LEDs •... - Page 32 Weight Humidity Operating Temperature Storage Temperature Altitude page 2-6 OmniSwitch 6800 Series Chassis and Hardware Components 384 (stack of eight switches) 32 (stack of eight switches) 160 Gbps 150W AC/DC power supply, providing +12V @ 12.5A; 90-264VAC50-60 Hz universal input...
-
Page 33: Omniswitch 6800-U24
OmniSwitch 6800 Series Chassis and Hardware Components OmniSwitch 6800-U24 The OmniSwitch 6800-U24 is an edge/workgroup switch offering 24 1000Base-X SFP connectors, as well as four combo 10/100/1000Base-T ports. The front panel of the OS6800-U24 chassis contains the following major components: System status and slot indicator LEDs •... - Page 34 Humidity Operating Temperature Storage Temperature Altitude page 2-8 OmniSwitch 6800 Series Chassis and Hardware Components 80 Gbps 150W AC/DC power supply, providing +12V @ 12.5A; 90-264VAC50-60 Hz universal input 2 (one factory-installed power supply and one optional backup power supply)
-
Page 35: Omniswitch 6800-24L
Console port (RJ-45) • Note. The 20 (non combo ports) 10/100Base-T ports on the OmniSwitch 6800-24L can be upgraded to 10/100/1000Base-T ports. Please contact your Alcatel-Lucent representative for more information. Refer to the illustration below for more front panel information. For detailed LED descriptions, refer to page 2-13. - Page 36 Weight Humidity Operating Temperature Storage Temperature Altitude page 2-10 OmniSwitch 6800 Series Chassis and Hardware Components 160 (stack of eight switches) 32 (stack of eight switches) 160 Gbps 150W AC/DC power supply, providing +12V @ 12.5A; 90-264VAC50-60 Hz universal input...
-
Page 37: Omniswitch 6800-48L
• An Optional 10 Gigabit module is also supported (see Note. The 44 (non combo ports) 10/100Base-T ports on the OmniSwitch 6800-48L can be upgraded to 10/100/1000Base-T ports. Please contact your Alcatel-Lucent representative for more information. Refer to the illustration below for more front panel information. For detailed LED descriptions, refer to page 2-13. - Page 38 Weight Humidity Operating Temperature Storage Temperature Altitude page 2-12 OmniSwitch 6800 Series Chassis and Hardware Components 352 (stack of eight switches) 32 (stack of eight switches) 160 Gbps 150W AC/DC power supply, providing +12V @ 12.5A; 90-264VAC50-60 Hz universal input...
-
Page 39: Status Leds
OmniSwitch 6800 Series Chassis and Hardware Components Status LEDs LEDs provide visual status information. These “status lights” are used to indicate conditions such as hardware and software status, primary role status (stacked configurations), power supply status, fan and temperature errors, 10 Gigabit uplink status (when applicable), slot number information, data speed, link integrity, and activity. -
Page 40: 10/100/1000 Leds
LED. Displays solid green when a link state exists; blinks green to show activity (transmitting or receiving traffic); off when no activity is present. page 2-14 OmniSwitch 6800 Series Chassis and Hardware Components OmniSwitch 6800 Series Hardware Users Guide June 2007... -
Page 41: Rear Panel
• switches) Stacking ports (all OmniSwitch 6800 Series switches except for the OmniSwitch 6800-U24) • 10 Gigabit XFP module connector (all OmniSwitch 6800 Series switches except for the OmniSwitch • 6800-24 and OmniSwitch 6800-24L) Power Connector Socket Type IEC-320-C13. Supports one 10 amp power cord. -
Page 42: Mounting The Switch
Clearance is not required at the top and bottom of the chassis. For detailed chassis airflow diagrams, refer to “Chassis Airflow” on page page 2-16 OmniSwitch 6800 Series Chassis and Hardware Components Rear Recommended 5 inches minimum at rear of chassis for access to backup power supply connectors and power cord(s). -
Page 43: Chassis Airflow
OmniSwitch 6800 Series Chassis and Hardware Components Chassis Airflow The fans pull air from the air intake vent located at the left-hand side of the chassis. The air is directed horizontally through the chassis and past the circuit board. Airflow is then exhausted through the fan vents at the right-hand side of the chassis. -
Page 44: Blank Cover Panels
Blank cover panels are provided with your switch and are used to cover empty backup power supply bays and 10 Gigabit uplink bays (all OmniSwitch 6800 Series switches except for the OmniSwitch 6800-24 and OmniSwitch 6800-24L). These cover panels play an important role in chassis airflow and temperature management. -
Page 45: Installation Options
OmniSwitch 6800 Series switches can be installed freestanding as tabletop units. Place your switch on a stable, flat, static-free surface. Note. OmniSwitch 6800 Series switches must be placed “right side up.” Never attempt to operate a switch positioned on its side. -
Page 46: Rack-Mounting The Switch
Mounting the Switch Rack-Mounting the Switch Refer to the important guidelines below before installing the OmniSwitch 6800 Series chassis in a rack. It is recommended that two people install the switch in the rack—one person to hold the chassis and •... -
Page 47: Installing And Removing Combo Port Sfps
Note. If you are installing multiple switches in a rack to form a stacked configuration, refer to a Stacked Configuration” on page Installing and Removing Combo Port SFPs OmniSwitch 6800 Series switches offer four Gigabit Ethernet combo ports, located on the front panel (see page 2-3 page 2-5). -
Page 48: Setting Up A Stacked Configuration
This will ensure that all required stacking cables will have adequate length for the installation. Important Note. OmniSwitch 6800-U24 switches do not support stacking. Cabling Stacked Configurations In order to connect stacked switches into a virtual chassis, all modules in the stack must be connected via stacking cables (provided). - Page 49 OmniSwitch 6800 Series Chassis and Hardware Components Starting from the top of the stack, insert one end of the stacking cable into either stacking port A or stacking port B. The stacking port (A or B) depends on your preferred cabling pattern. Refer to “Managing OmniSwitch 6800 Series Stacks”...
- Page 50 Tightening Stacking Connector Captive Screws Now that all switches in the stack are connected, continue to Switches” on page 2-25. page 2-24 OmniSwitch 6800 Series Chassis and Hardware Components “Booting OmniSwitch 6800 Series OmniSwitch 6800 Series Hardware Users Guide June 2007...
-
Page 51: Booting Omniswitch 6800 Series Switches
Booting a Stand-alone Switch The OmniSwitch 6800 Series switch does not use an on/off switch. The power cord is the switch’s only connect/disconnect device. The power connector socket is located on the switch’s rear panel. For more information, refer to “Rear Panel”... -
Page 52: Booting Stacked Configurations
Once the switches have been connected into a virtual chassis, the next step is to manually power on the stack. The OmniSwitch 6800 Series switch does not use an on/off switch. The power cord is the switch’s only connect/disconnect device. The power connector socket is located on the switch’s rear panel. For more information, refer to “Rear Panel”... -
Page 53: Power Cords
OmniSwitch 6800 Series Chassis and Hardware Components Note. Chapter 3, “Managing OmniSwitch 6800 Series Stacks,” chassis behavior during and after a boot. Consulting this chapter is strongly recommended for users oper- ating switches in a stacked configuration. Power Cords Because the power cord is the switch’s only disconnect device, it should be plugged into an easily accessible outlet. -
Page 54: Console Port
To change the data bits (i.e., word size) value, enter boot serialwordsize, followed by the number of data bits. Options include 7 and 8 (default). For example: Boot > boot serialwordsize 7 page 2-28 OmniSwitch 6800 Series Chassis and Hardware Components 9600 none none... - Page 55 OmniSwitch 6800 Series Chassis and Hardware Components To change the stop bits value, enter boot serialstopbits, followed by the number of stop bits. Options include 1 (default) and 2. For example: Boot > boot serialstopbits 2 Verify your current changes by entering show at the boot prompt: Boot >...
-
Page 56: Console Port Pinouts
Console Port Console Port Pinouts RJ-45 Console Port – Connector Pinout Pin Number Signals as DTE Console Port Ground Ground page 2-30 OmniSwitch 6800 Series Chassis and Hardware Components OmniSwitch 6800 Series Hardware Users Guide June 2007... -
Page 57: Monitoring The Chassis
OmniSwitch 6800 Series Chassis and Hardware Components Monitoring the Chassis OmniSwitch 6800 Series switches can be monitored and managed via the console port using Command Line Interface (CLI) commands. The switches can also be monitored and managed via the Ethernet ports using CLI commands, WebView, SNMP, and OmniVista. -
Page 58: Checking Fan Status
For a complete list of output definitions for this command, refer to the OmniSwitch CLI Reference Guide. Checking Power Supply Status For information on checking power supplies for stand-alone and stacked OmniSwitch 6800 Series switches, refer to “Viewing Primary and Backup Power Supply Status” on page... -
Page 59: Using Leds To Visually Monitor The Chassis
• Combo Port Status LEDs • For tables showing LED states for switches and stacks operating normally, refer to pages For detailed information on all OmniSwitch 6800 Series LEDs, refer to OmniSwitch 6800 Series Hardware Users Guide page 2-13. June 2007... -
Page 60: Os6800-Xni-U2 10 Gigabit Expansion Module
OS6800-XNI-U2 10 Gigabit Expansion Module OS6800-XNI-U2 10 Gigabit Expansion Module OmniSwitch 6800-48, 6800-U24, and 6800-48L switches support a 10 Gigabit expansion module (OS6800-XNI-U2). The slot for the expansion module is located at the rear panel of the switch chassis. The 10 Gigabit Ethernet expansion module supports up to two 10 Gbps Small Form Factor Pluggable (XFP) optical transceivers. -
Page 61: 10 Gigabit Slot And Port Numbering
Expansion Module Slot/Port Numbering Example 10 Gigabit Expansion Modules and Token Usage As with OmniSwitch 6800 and OmniSwitch 6800L switches, 10 Gigabit expansion modules also use tokens for budgeting stack ASIC resources. Each expansion module operating within a stack uses two tokens. -
Page 62: 10 Gige Interoperability Between Os6800 And Os8800 Switches
1/22 1/23 1/24 1/25 1/26 page 2-36 OmniSwitch 6800 Series Chassis and Hardware Components command on the OS6800 switch. The command must be issued sepa- OS8800 Cost 10G Opt. OmniSwitch 6800 Series Hardware Users Guide “10 Gigabit Slot and Port... -
Page 63: Installing 10 Gigabit Expansion Modules
OmniSwitch 6800 Series Chassis and Hardware Components Installing 10 Gigabit Expansion Modules ESD Caution. Before handling the expansion module, you must discharge all static electricity on your person to avoid Electrostatic Discharge (ESD) damage. If using a wrist strap, ensure that the wrist strap touches your skin. -
Page 64: Removing 10 Gigabit Modules
Once the screws are inserted, fasten the panel to the chassis by tightening the screws. Be sure not to overtighten the screws. page 2-38 OmniSwitch 6800 Series Chassis and Hardware Components Expansion Module OmniSwitch 6800 Series Hardware Users Guide June 2007... -
Page 65: Installing Sfp And Xfp Transceivers
Because the OmniSwitch 6800 Series backup power supply system is chassis-based—with each chassis supporting up to eight backup power supplies—this provides 1:1 redundancy for stacks of up to eight switches. -
Page 66: Os6800-Bps-Shlf Backup Power Supply Shelf
The OS6800-BPS-SHLF backup power supply shelf is a separate, rack-mountable chassis offering power supply bays for up to eight 225 watt power supply modules. Each module can be connected to a single OmniSwitch 6800 Series switch—either stand-alone or in a stacked configuration. Refer to the sections below for more information. -
Page 67: Os6800-Bps-Shlf Backup Power Shelf Specifications
Humidity Important Note. The OS6800-BPS-SHLF power shelf is an accessory product and can be used only with the OmniSwitch 6800 Series product. Do not attempt to operate the OS6800-BPS-SHLF power shelf with any other product or chassis type. OmniSwitch 6800 Series Hardware Users Guide 17.32 inches, approx. -
Page 68: Os6800-Bps-225 225W Backup Power Supply
For information on installing a backup power supply module, refer to removing a backup power supply, refer to page 2-42 OmniSwitch 6800 Series Chassis and Hardware Components OS6800-BPS-225 Backup Power Supply page 2-48. OmniSwitch 6800 Series Hardware Users Guide Air Intake Vent. -
Page 69: Os6800-Bps-225 225W Backup Power Supply Specifications
Humidity Important Note. The OS6800-BPS backup power supply is an accessory product and can be used only with the OmniSwitch 6800 Series product. Do not attempt to operate the OS6800-BPS backup power supply with any other product or chassis type. -
Page 70: Rack-Mounting The Os6800-Bps-Shlf Power Shelf
19-inch rack mount installations. These flanges must be attached to the chas- sis before the power shelf can be rack mounted. Note. If you are installing the power shelf in a 23-inch wide rack, Alcatel-Lucent offers optional 23-inch rack-mounting hardware. For more information, contact your Alcatel-Lucent representative. - Page 71 OmniSwitch 6800 Series Chassis and Hardware Components After the rack-mount flanges are secured to the power shelf, mark the holes on the rack where the power shelf is to be installed. Lift and position the power shelf until the rack-mount flanges are flush with the rack post.
-
Page 72: Installing A Backup Power Supply In The Power Shelf
For more information, refer to the diagram below. page 2-46 OmniSwitch 6800 Series Chassis and Hardware Components When orienting the backup power supply, be sure that the handle is at the top, as shown. Otherwise, the module will not fit properly in the power shelf’s... - Page 73 OmniSwitch 6800 Series Chassis and Hardware Components With one hand, grasp the handle at the front of the power supply. Place your other hand under the power supply casing to support its weight. Carefully insert the rear of the casing into the power supply bay and slide the power supply back along the chassis alignment guide until its connector meets the chassis backplane connector.
-
Page 74: Installing The Backup Power Supply Daughtercard
Powering on the Backup Power Supplies OmniSwitch 6800 Series backup power supplies do not use on/off switches. The power cord is the supply’s only connect/disconnect device. The power connector socket is located on the supply’s front panel. For more information, refer to To power on the backup power supply, plug the power cord (provided) into the supply’s power connector... -
Page 75: Removing A Backup Power Supply
OmniSwitch 6800 Series Chassis and Hardware Components Removing a Backup Power Supply Note. You can remove a backup power supply from the power shelf at any time without disturbing the switch’s network functions. You are not required to power down the switch. - Page 76 Store the power supply in a secure, static-free location. Refer to the important blank cover panel requirement on page 2-50 OmniSwitch 6800 Series Chassis and Hardware Components Removing the Backup Power Supply page 2-51.
-
Page 77: Removing The Backup Power Supply Daughtercard
OmniSwitch 6800 Series Chassis and Hardware Components Removing the Backup Power Supply Daughtercard Note. You can remove a daughtercard from the chassis at any time without disturbing the switch’s network functions. You are not required to power down the switch. -
Page 78: Backup Power Supply Pinouts
Ground -50 VDC RPS_ABNORMAL Ground Enable RPS_ABNORMAL -50 VDC Ground Enable RPS_ABNORMAL page 2-52 OmniSwitch 6800 Series Chassis and Hardware Components Pin Number Switch Side -48 RTN Enable -48 RTN SYSPWRFAIL_L -48 DC RPS_ABNORMAL -48 DC -48 RTN -48 RTN... -
Page 79: Viewing Primary And Backup Power Supply Status
OmniSwitch 6800 Series Chassis and Hardware Components Viewing Primary and Backup Power Supply Status The switch constantly monitors primary and backup power supply operation. If either the primary or backup power source unexpectedly shuts down, the switch sends out a notification to the user. In addition, the power LED on the chassis front panel and the LED on the backup power supply front panel (if installed) display solid amber. -
Page 80: No Slot Number Is Specified
1 and 3; no backup power supply is installed in the switch operating in slot 2—or the unit is powered off. More Information on Stacked Configurations. For detailed information on stacked OmniSwitch 6800 Series switches, refer to “Managing OmniSwitch 6800 Series Stacks”... -
Page 81: Managing Omniswitch 6800 Series Stacks
3 Managing OmniSwitch In addition to working as individual stand-alone switches, OmniSwitch 6800 Series switches can also be linked together to work as a single virtual chassis known as a stack. With stacks, users can easily expand their switching capacity simply by adding additional switches to the stack. In addition, stacks provide enhanced resiliency and redundancy features. -
Page 82: Omniswitch 6800 Series Stack Overview
Network Interfaces (NIs). Roles Within the Stack In order to operate as a virtual chassis, switches within an OmniSwitch 6800 Series stack are assigned specific roles. These roles include primary and secondary management roles, idle status, and pass-through. - Page 83 Redundant Management Module Failover (Three or More Switches) OmniSwitch 6800 Series Hardware Users Guide “Synchronizing Switches in a Stack” on A stack of four OmniSwitch 6800 Series switches is operating normally. The stack consists of a primary module, secondary module, and two elements operating in idle status.
- Page 84 Redundant Management Module Failover (Two Switches) page 3-4 Managing OmniSwitch 6800 Series Stacks A stack of two OmniSwitch 6800 Series switches is operating normally. The stack consists of a primary module and a secondary module. (The software on both elements in the stack is synchronized.) The primary management module fails or is taken offline (e.g., powered off or rebooted by the user).
-
Page 85: Primary Management Module Selection
Managing OmniSwitch 6800 Series Stacks Primary Management Module Selection In order for a stack of OmniSwitch 6800 Series switches to operate as a virtual chassis, there must be mechanism for dynamically selecting which switch within the stack will assume the primary management role. - Page 86 3-6 Managing OmniSwitch 6800 Series Stacks “Manual Slot Number Assign- Four OmniSwitch 6800 Series switches are stacked; all switches are connected via stacking cables. The user configures each switch to have a unique saved slot number. When each saved slot number is configured, the information is automatically written to the boot.slot.cfg file located in the /flash directory of...
- Page 87 Primary Management Module Selection Using Switch Uptime OmniSwitch 6800 Series Hardware Users Guide Four OmniSwitch 6800 Series switches are stacked and connected via stacking cables. All switches are currently powered off. The user powers on a single switch in the stack. In this case, the bottom-most switch is powered on.
-
Page 88: Secondary Management Module Selection
In order to provide effective management module redundancy, all OmniSwitch 6800 Series stacked configurations dynamically assign a backup—or secondary—management module during the boot process. OmniSwitch 6800 Series stacks use two different methods for selecting the secondary switch. These methods are: Stacking connection to the primary switch •... - Page 89 For more information on pass-through mode, refer to OmniSwitch 6800 Series Hardware Users Guide Four OmniSwitch 6800 Series switches are stacked; all switches are connected via stacking cables. The user configures each switch to have a unique saved slot number, as shown. When the saved slot number is configured, the information is automatically written to the boot.slot.cfg file located in the /flash directory of...
-
Page 90: Idle Module Role
Secondary Management Module Selection Using Saved Slot Information page 3-10 Managing OmniSwitch 6800 Series Stacks Four OmniSwitch 6800 Series switches are stacked; all switches are connected via stacking cables. The stack is booted. The primary and secondary management modules are dynamically... -
Page 91: Pass-Through Mode
MAC address will be given the secondary manage- ment role. The slot with the higher MAC address will be forced into pass-through mode. OmniSwitch 6800 Series Hardware Users Guide show stack topology... -
Page 92: Recovering From Pass-Through Mode (Duplicate Slot Numbers)
Link A Saved Link A Remote Remote Slot State Port 1001 StackA StackB StackA OmniSwitch 6800 Series Hardware Users Guide Managing OmniSwitch 6800 Series Stacks Link B Link B Link B Remote Remote State Port StackA StackB StackB Link B... - Page 93 1 and 2, respectively). There are now no duplicate numbers in the stack and all elements are operating normally: -> show stack topology Role State ----+-----------+--------+------+-------+-------+-------+-------+-------+------- 1 PRIMARY RUNNING 2 SECONDARY RUNNING 3 IDLE RUNNING OmniSwitch 6800 Series Hardware Users Guide Link A Link A Saved Link A Remote Remote Slot State Port StackA StackB...
- Page 94 Saved Link A Remote Remote Slot State Port StackB StackB StackB StackB StackB StackB StackB StackB OmniSwitch 6800 Series Hardware Users Guide Link B Link B Link B Remote Remote State Port StackA StackA StackA 1001 StackA StackA 1003 StackA...
-
Page 95: Stack Cabling
Stacking cables for OmniSwitch 6800 Series switches can be connected in any pattern. In other words, the cable connected to stacking port A of one switch can be connected to either stacking port A or stacking port B of the adjacent switch. -
Page 96: Redundant Stacking Cable Connection
Stack Cabling Redundant Stacking Cable Connection OmniSwitch 6800 Series switches allow redundant stacking cable connections between the top-most and bottom-most switches in a stack. Important. For a stacked configuration to have effective redundancy, a redundant stacking cable must be installed between the upper-most and bottom-most switch in the chassis at all times. -
Page 97: Checking Redundant Stacking Cable Status
Tokens available In this example, a redundant stacking cable connection is present between the top-most and bottom-most switches in the stack. OmniSwitch 6800 Series Hardware Users Guide Chassis Front Data enters slot 1 through a 10/100/1000 Ethernet port. The data traverses slot 2 via the stacking cables and exits slot 3 through one of its 10/100/1000 Ethernet ports. -
Page 98: Slot Numbering
Slot Numbering Slot Numbering For a stack of OmniSwitch 6800 Series switches to operate as a virtual chassis, each module in the stack must be assigned a unique slot number. To view the current slot assignments for a stack, use the show module commands. - Page 99 Slot 3 - Idle Slot 2 - Secondary Slot 1 - Primary OmniSwitch 6800 Series Hardware Users Guide In this example, the bottom switch is elected the primary management module for the stack. (It can be assumed that this switch has the low- est MAC address in the stack.) This switch is...
-
Page 100: Manual Slot Number Assignment
(see page 3-20 3-18, shows a stack in which the primary and secondary switches are phys- page OmniSwitch 6800 Series Hardware Users Guide Managing OmniSwitch 6800 Series Stacks stack set slot command. This 3-11). -
Page 101: Reverting To The Dynamic Slot Numbering Model
Because the system software no longer has preassigned slot infor- mation to read during the boot process, the stack uses the dynamic slot number assignment method described on page 3-18. OmniSwitch 6800 Series Hardware Users Guide 3-11 through 3-13 for detailed information. -
Page 102: Hot-Swapping Modules In A Stack
Make sure all switches are running the same software version • Note. Other stackable Alcatel-Lucent products, such as the OmniSwitch 6600 Series switch, cannot be added to an OmniSwitch 6800 Series virtual chassis. To avoid duplicate slot numbers, simply make sure that any modules being added to an existing stack have been cleared of preassigned slot information. -
Page 103: Merging Stacks
32 tokens for all hardware operating within the stack. If a module is inserted into an existing stack and not enough tokens are available, an error will result. Refer to on page 3-24 for more information. OmniSwitch 6800 Series Hardware Users Guide Hot-Swapping Modules In a Stack June 2007 page 3-15. -
Page 104: Understanding Tokens
Understanding Tokens Understanding Tokens OmniSwitch 6800 and OmniSwitch 6800L switches use global module identifiers—referred to as tokens— for budgeting stack ASIC resources. Each stack offers 32 tokens, with each module added to the stack using a specific number of these tokens. For a list showing the number of tokens used by each module type, refer to the table below. -
Page 105: Reloading Switches
The optional syntax primary can In this stack of four OmniSwitch 6800 Series switches, the slot 1 switch is the primary management module. The slot 2 switch is the secondary. Slots 3 and 4 are operating in idle roles. - Page 106 Reloading the Primary Management Module In a Stack of Two page 3-26 Managing OmniSwitch 6800 Series Stacks In this stack of two OmniSwitch 6800 Series switches, the slot 1 switch is the primary management module. The slot 2 switch is the secondary.
-
Page 107: Reloading The Secondary Management Module
Be sure to include the syntax In this stack of four OmniSwitch 6800 Series switches, the slot 1 switch is the primary management module. The slot 2 switch is the secondary. Slots 3 and 4 are operating in idle roles. - Page 108 Reloading the Secondary Management Module In a Stack of Two page 3-28 Managing OmniSwitch 6800 Series Stacks In this stack of two OmniSwitch 6800 Series switches, the slot 1 switch is the primary management module. The slot 2 switch is the secondary.
-
Page 109: Reloading Switches With Idle Roles
Otherwise, the switch is likely to come up again in pass-through mode. For detailed information, including steps used to recover from pass-through, refer to OmniSwitch 6800 Series Hardware Users Guide reload ni reload all command. -
Page 110: Reloading All Switches In A Stack
An illustrated example of this method for assigning slot numbers and management roles is provided on pages 3-20 and 3-21. page 3-30 Managing OmniSwitch 6800 Series Stacks reload all command. For example: OmniSwitch 6800 Series Hardware Users Guide June 2007... - Page 111 To check the current saved slot information across the stack, use the show stack topology “Pass-Through Mode” on page OmniSwitch 6800 Series Hardware Users Guide command. For detailed information on pass-through mode, refer to 3-11. June 2007...
-
Page 112: Avoiding Split Stacks
For more information on the redundant stacking cable connection, refer to page 3-32 Managing OmniSwitch 6800 Series Stacks page 3-16. OmniSwitch 6800 Series Hardware Users Guide June 2007... -
Page 113: Changing The Secondary Module To Primary
Changing the Secondary Module to Primary OmniSwitch 6800 Series stacks allow users to manually force the secondary switch to assume the primary management role. This is referred to as “takeover.” The behavior of a takeover is similar to that of reload-... - Page 114 Secondary - Slot 1 Primary - Slot 2 page 3-34 In this stack of two OmniSwitch 6800 Series switches, the slot 1 switch is the primary management module. The slot 2 switch is the secondary. A takeover is initiated by the user; the primary management module is automatically reloaded.
-
Page 115: Synchronizing Switches In A Stack
Note. For more information on management module synchronization and managing the /flash/working and /flash/certified directories, refer to the “Managing CMM Directory Content” chapter in the Switch Management Guide. OmniSwitch 6800 Series Hardware Users Guide : PRIMARY, : DUAL CMMs, : 1,... -
Page 116: Monitoring The Stack
Displays the current operating chassis ambient temperature, as well as current temperature threshold settings for each of the modules in the stack. for detailed information on LEDs and stack status. OmniSwitch 6800 Series Hardware Users Guide June 2007... -
Page 117: Cli Commands Supported On Both Primary And Secondary Management Modules
Switch Logging and Monitoring Commands swlog swlog appid level swlog output show log swlog show swlog Memory Monitoring Commands show log pmd OmniSwitch 6800 Series Hardware Users Guide debug chassis auto-reboot show microcode show running-directory show reload show module show cmm show module long... - Page 118 Monitoring the Stack Managing OmniSwitch 6800 Series Stacks page 3-38 OmniSwitch 6800 Series Hardware Users Guide June 2007...
-
Page 119: Appendix A Regulatory Compliance And Safety Information
A Regulatory Compliance and Safety Information This appendix provides information on regulatory agency compliance and safety for the OmniSwitch 6800 Series. Declaration of Conformity: CE Mark This equipment is in compliance with the essential requirements and other provisions of Directive 73/23/EEC and 89/336/EEC as amended by Directive 93/68/EEC. -
Page 120: China Rohs: Hazardous Substance Table
对销售之日的所售产品,本表显示, 阿尔卡特朗讯公司供应链的电子信息产品可能包含这些物质。注意:在所售产 品中可能会也可能不会含有所有所列的部件。 This table shows where these substances may be found in the supply chain of Alcatel-Lucent electronic information products, as of the date of sale of the enclosed product. Note that some of the component types listed above may or may not be a part of the enclosed product. - Page 121 Regulatory Compliance and Safety Information China RoHS: Hazardous Substance Table Products are packaged using one or more of the following packaging materials: Corrugated Cardboard Corrugated Fiberboard Low-Density Polyethylene OmniSwitch 6800 Series Hardware Users Guide June 2007 page A-3...
-
Page 122: Standards Compliance
ETS 300 019 Stationary Use Class 3.1 • stand-alone OmniSwitch 6800 Series switches comply with Class A and Class B standards for digital devices per the FCC Part 15, ICES-003, EN 55022, CISPR 22, AS/NZS 3548, and VCCI standards. Modules with copper connectors meet Class A requirements using unshielded (UTP) cables, but meet Class B requirements using shielded (STP) cables. -
Page 123: Fcc Class A, Part 15
Regulatory Compliance and Safety Information Stacks consisting of two to eight OmniSwitch 6800 Series switches comply with Class A requirements. FCC Class A, Part 15 This equipment has been tested and found to comply with the limits for Class A digital device pursuant to Part 15 of the FCC Rules.These limits are designed to provide reasonable protection against harmful inter-... -
Page 124: Vcci
This is a Class A Information Product. When used in a residential environment, it may cause radio frequency interference. Under such circumstances, the user may be requested to take appropriate counter- measure. page A-6 Regulatory Compliance and Safety Information OmniSwitch 6800 Series Hardware Users Guide June 2007... -
Page 125: Translated Safety Warnings
Español: Para evitar peligro de descargas, no conecte o desconecte ningun cable, ni realice ninguna insta- lación, maintenimiento o reconfiguración de este producto durante una tormenta eléctrica. OmniSwitch 6800 Series Hardware Users Guide June 2007 Translated Safety Warnings... -
Page 126: Installation Warning
Español: Debido a que la apertura del puerto puede emitir radiación invisible cuando no hay un cable de fibra conectado, procurar no mirar directamente a las aperturas para no exponerse a la radiación. page A-8 Regulatory Compliance and Safety Information OmniSwitch 6800 Series Hardware Users Guide June 2007... -
Page 127: Lithium Battery Warning
Español: Si substituye las pilas de litio en su chasis, siempre utilice el mismo modelo o el tipo equiva- lente de pila recomendada por el fabricante. Deshágase de las pilas usadas según las instrucciones del fabricante. Devuelva el módulo con la pila de litio a Alcatel-Lucent. La pila de litio será substituida en la fábrica de Alcatel-Lucent. -
Page 128: Power Disconnection Warning
Cualquier otro equipo a cual se conecte este producto también debe estar conectado a tomas de • alimentación adecuadamente cableadas. page A-10 Regulatory Compliance and Safety Information OmniSwitch 6800 Series Hardware Users Guide June 2007... -
Page 129: Read Important Safety Information Warning
Español: Este equipo se debe instalar en un sitio con acceso restrinjido. Un sitio con el acceso restrinjido es uno seguro y con acceso limitado al personal de servicio que tiene una clave especial u otros medios de seguridad. OmniSwitch 6800 Series Hardware Users Guide June 2007 Translated Safety Warnings... -
Page 130: Wrist Strap Warning
Français: L'électricité statique (ESD) peut endommager les composants du commutateur. Pour cette raison Alcatel-Lucent joint à l'envoi du châssis un bracelet antistatique à brancher sur la prise mise à la terre située en bas à droite du commutateur. Vous devrez mettre ce bracelet avant toute intervention hard- ware. -
Page 131: Advertencia Sobre El Levantamiento Del Chasis
Deseche las baterías usadas según las instrucciones del fabricante. Las instrucciones del fabricante son como sigue: Devuelva el módulo con la batería del litio a Alcatel-Lucent. La batería del litio será substitu- ida en la fábrica de Alcatel-Lucent. -
Page 132: Advertencia Sobre Una Apropiada Conexión A Tierra
Para este propósito, Alcatel-Lucent proporciona una pulsera antiestática y un terminal que pone a tierra situados cerca de la parte superior derecha del chasis. Para que la pulsera antiestática sea eficaz en la eliminación de ESD, las fuentes de alimentación se deben instalar en el chasis y enchufar en las salidas de CA con descarga a... -
Page 133: Index
2-15 tabletop 2-19 chassis types OS6800-24 OS6800-24L OS6800-48 OS6800-48L 2-11 OS6800-U24 OmniSwitch 6800 Series Hardware Users Guide CLI commands supported on secondary switch console port default settings modifying default settings fabric capacities hardware monitoring automatic LEDs 1-6, 2-13, 2-26, 2-33... - Page 134 10 Gigabit expansion module backup power shelf 2-41 backup power supply 2-43 console port 2-28, 2-30 OmniSwitch 6800-24 OmniSwitch 6800-24L 2-10 OmniSwitch 6800-48 OmniSwitch 6800-48L 2-12 OmniSwitch 6800-U24 pinouts 2-30, 2-52 OmniSwitch 6800 Series Hardware Users Guide Index 2-34 June 2007...
Need help?
Do you have a question about the OMNISWITCH 6800 and is the answer not in the manual?
Questions and answers