
Related Manuals for RCA J13SE821


Summary of Contents for RCA J13SE821
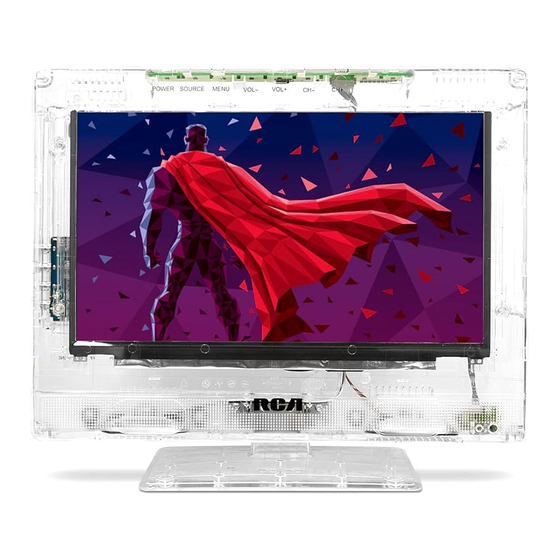
- Page 1 User Manual J13SE820 J13SE821 J15SE820 J15SE821 Before operating this product, please read user manual completely...
-
Page 2: Table Of Contents
Contents Caution Safety Information Product Introduction Front View Rear View Connections Remote Control (Not Included) Basic Operation OSD Menu 7-13 1. Picture menu 2. Audio menu 3. Time menu 4. Setup menu 5. Lock menu 6. Channel menu 12-13 Simple Troubleshooting Limited Warranty... -
Page 3: Caution
Caution The lightning flash with arrowhead symbol, within an equilateral triangle is intended to alert the user to the presence of un-insulated “dangerous voltage” within the products enclosure that may be of sufficient magnitude to constitute a risk of electric shock to the persons. The exclamation point within an equilateral triangle is intended to alert the user to the presence of important operating and maintenance (servicing) instructions in the literature accompanying the appliance. -
Page 4: Safety Information
Safety Information To ensure reliable and safe operation of this equipment, please read all of the instructions carefully in this user guide, especially the safety information below. Electrical safety • To prevent overload, don't share the same main supply socket with too many other appliances. -
Page 5: Product Introduction
Product Introduction Front View POWER SOURCE MENU VOL- VOL+ POWER:Turn on/standby the TV set. SOURCE: Display the input source menu; At Setup Wizard, press SOURCE(OK) to confirm selection/setting. MENU: Display/exit the OSD menu. VOL+/-: Adjust volume; At Setup Wizard, press VOL- to move LEFT, press VOL+ to move RIGHT. -
Page 6: Connections
Connections AC POWER IN SERVICE JACK PC AUDIO HDMI HEADPHONE AC POWER IN: Connect to an grounded 100-240V~ 50/60Hz outlet with the Power Cable. SERVICE JACK: This interface is only used as a software upgrade. Connecting of HDMI equipment. HDMI: VGA: For a PC display. -
Page 7: Remote Control (Not Included)
Remote Control (Not Included) control may not work correctly if it is operated out of range or out of angle. POWER(red button): Turn the TV on/standby. EJECT Number Buttons: Choose channel directly. For example: To select channel 5, Press button "5" To select channel 62, Press button "6", then press button "2"... -
Page 8: Basic Operation
Basic Operation Power on/off 1. Connect to the power supply with the power cord. 2. -To turn on the TV Press STANDBY/ button on the TV or remote control. -To turn off the TV Press STANDBY/ button on the TV or remote control. Input source selection If you have a remote control, then press the SOURCE button to display the input source menu. -
Page 9: Osd Menu
OSD Menu 1. Picture menu Medium Blue Screen Description Picture mode: Select between Standard, Dynamic, Mild and User. You may select the picture mode directly by pressing the PICTURE button on the remote control (Not Included). Contrast: Control the difference between the bright and dark regions of the picture. Brightness: Adjust the brightness of the picture. -
Page 10: Audio Menu
OSD Menu 2. Audio menu Auto Volume Audio Languages English Description Sound Mode: Select your desired sound mode as follows: Standard, Music, Movie, User. You may select the sound mode directly by pressing the SOUND button on the remote control. Bass: Low frequency intensity. -
Page 11: Time Menu
OSD Menu 3. Time menu Clock 2005/10/01 11:13 PM Description Sleep timer: You may set the automatic shutdown timer choosing from 5 to 240 minutes, or deactivate this function. Time zone: Select between Pacific, Alaska, Hawaii, Eastern, Central and Mountain. Daylight Saving Time: Select between On and Off. -
Page 12: Setup Menu
OSD Menu 4. Setup menu Restore Default Middle Source Label Setup Wizard Move Next Return Description Menu Language: Select OSD menu language. Transparency: Turn on or off the transparency menu function. Zoom Mode: Select the zoom mode between Wide, Zoom, Cinema, Normal. Noise reduction: Select the noise reduction mode between Strong, Off, Weak and Middle. -
Page 13: Lock Menu
OSD Menu 5. Lock menu (Remote Control Required) You must enter the password to gain access to the Lock menu. The default password is 0000. You may modify the following options: Set Password Next Return Move Description Change password: Change the password, you must enter the new password twice to confirm it. Note: Do not forget the password. -
Page 14: Channel Menu
OSD Menu 6. Channel menu Channel Number Good Move Select Return Description Air/Cable: Allows you to select antenna between Air and Cable. If you select “Cable”, the following items (Favorite, Show/Hide, Channel NO, Channel Label and DTV Signal) are unable to be used. Auto Scan: Enter the Auto Scan menu to start auto scan. - Page 15 OSD Menu Show/Hide: Allows you to show or hide the channels. button to highlight the desired item, then press Audio Time Setup Parental Picture Channel Channel Channel Name Add/Delete OK button to show or hide the highlighted channel. √ √ Move Press ‘OK’...
-
Page 16: Simple Troubleshooting
Simple Troubleshooting If the display fails or performance dramatically deteriorates check the display in accordance with the following instructions.Remember to check the peripherals to pinpiont the source of the failure. If the display still fails to perform as expected,connect your helpline for assistance. No power - Check all connections to the TV. -
Page 17: Limited Warranty
How you get service: Contact your dealer, or visit http://www.rcacommercialtv.com, or call 1-800-RCA-2161 (800-722-2161). Proof of purchase in the form of a bill of sale or receipted invoice which is evidence that the product is within the warranty period must be presented to obtain warranty service. - Page 18 RCA is a trademark of RCA Trademark Management used under license to DTI. DTI Services, LLC 5935 W 84th Street STE A Indianapolis IN 46278...
Need help?
Do you have a question about the J13SE821 and is the answer not in the manual?
Questions and answers