
Related Manuals for Acconeer Entry+ XM123


Summary of Contents for Acconeer Entry+ XM123
- Page 1 PROPRIETARY AND CONFIDENTIAL Explore the next sense Getting Started Guide Acconeer XE123/124 Entry+ Module Evaluation Kit Jan 2023...
- Page 2 PROPRIETARY AND CONFIDENTIAL Installation guide The XE124 is delivered non-flashed. This installation quick guide will show you how to get the Acconeer XE124 Module Server up and running. For a hands-on instruction video, please visit Acconeer channel. Getting started with Acconeer A111 EVKs – YouTube In this guide we will refer to XE124 but everything is also applicable for XE123.
- Page 3 EVK in that it comes already soldered onto the breakout board. All you need is the USB-C cable. XE124 EVK Additionally*: • USB-C Cable for connection to PC * Not provided by Acconeer. © 2019 by Acconeer – All rights reserved...
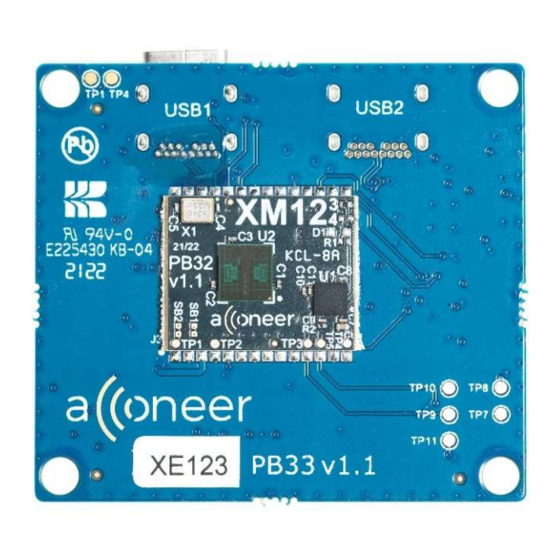
- Page 4 PROPRIETARY AND CONFIDENTIAL HW Overview XE124 EVK Front and Back Side USB1 USB2 is NoMount USB1 XM124 STM32L4 Power 64 kb RAM Switch 128 kb Flash A111 Reset Serial Debug GPIO:s © 2019 by Acconeer – All rights reserved...
- Page 5 The following applications will be required to complete an installation. Also, they will be very useful when working with the Radar Sensor Module Server. Please download and install: • Acconeer Module SW Image for XM124: Available from https://developer.acconeer.com/ • Acconeer Exploration tool: https://github.com/acconeer/acconeer-python-exploration...
-
Page 6: Installing Python
Make sure the Add Python to PATH option is selected. (Pic 1) Click Install Now. No need for a customized • Installation. (Pic 2) • Close once the installation is completed. (Pic 3) © 2019 by Acconeer – All rights reserved... - Page 7 You can always find it by searching for “cmd”. • In the command prompt, change the directory to where you unzipped the exploration tool by typing the command cd followed by the path to the folder. (Pic 2) © 2019 by Acconeer – All rights reserved...
- Page 8 -m pip install -U --user setuptools wheel • Then the command: pip install --user –r requirements.txt (Pic 1) • Wait until the installation has finished and run the next command: python setup.py install --user (Pic 2) © 2019 by Acconeer – All rights reserved...
- Page 9 Start Boot Mode (DFU Mode) Press the DFU-button and hold it. Press the RESET-button and hold it. RESET Release the RESET-button. Release the DFU-button Now the module is in DFU mode and ready to be flashed. © 2019 by Acconeer – All rights reserved...
- Page 10 –w –v acc_module_server_xm124.bin Make sure COM5 above is replaced with your COM port. Now the XE124 is flashed and ready to use. Make sure to restat the module by pressing the RESET button. © 2019 by Acconeer – All rights reserved...
- Page 11 Choose a service or a detector and click • Start. (We used Envelope as an example) • The result should be a graph showing the envelope data output from the sensor. Shown in next page. © 2019 by Acconeer – All rights reserved...
- Page 12 PROPRIETARY AND CONFIDENTIAL Exploration Tool GUI, Envelope graph Connect/Disconnect Select Service/Detector Start © 2019 by Acconeer – All rights reserved...
- Page 13 PROPRIETARY AND CONFIDENTIAL...
Need help?
Do you have a question about the Entry+ XM123 and is the answer not in the manual?
Questions and answers