Table of Contents
Advertisement
Quick Links
PROGRAMMA MISCELAZIONE BAGNO
PROGRAMME DU MITIGEUR POUR LA SALLE DE BAIN
ПРОГРАММА СМЕСИТЕЛЕЙ ДЛЯ ВАННОЙ
ΛΟΥΤΡΟ ΠΟΥ ΑΝΑΜΙΓΝΥΕΙ ΤΟ ΠΡΟΓΡΑΜΜΑ
VIA MANZONI
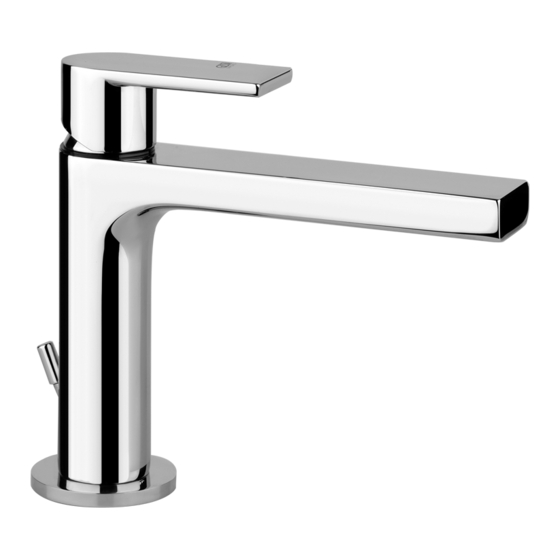
Art. 38601
Art. 38603
Art. 38607
13037 Serravalle Sesia (Vercelli) - Italy
Phone +39 0163 454111 - Facsimile +39 0163 459273
www.gessi.com - gessi@gessi.it
BATH MIXING PROGRAM
BAD-MISCHUNGSPROGRAMM
PROGRAMA MEZCLADORES BAÑO
浴室混水产品
Gessi SpA - Parco Gessi
Advertisement
Table of Contents

Related Manuals for Gessi VIA MANZONI 38603


Summarization of Contents
Before Installation and Setting to Work
Technical Data
Details minimum, maximum, and recommended working pressures for the mixer.
Installation Guidelines
Hose Connection Checks
Check crimping integrity on both sides of the flexible hoses before installation.
Tool Usage Restrictions
Avoid tightening connections with tools; hand-tighten first.
Fitting Tightening Procedure
Hand-tighten O-ring seal connectors, then apply a quarter turn with a wrench.
Wall Installation Caution
Do not embed or recess the conduit/pipe within the wall.
Hose Strain Prevention
Do not install the hose with torsion or tension to prevent damage.
Material Compatibility and Hose Handling
Substance Interaction Warning
Prolonged contact with aggressive substances can damage the hose and cause bursting.
Hose Bending Radius
Maintain a minimum straight section of two external diameters before bending the hose.
Fitting Connection Procedure
Hand-tighten fittings with gasket seal, then add a quarter turn with a wrench.
Preventing Lateral Stress
After installation, avoid even minimal lateral stress on components.
Final Sink Installation
Pre-insertion Checks
Check base gasket position and ensure supply hoses/drain rod are tightened to the tap body.
Product Maintenance
Qualified Personnel
Product maintenance should only be performed by qualified staff.
Contacting Retailer
For component replacement, contact an authorized retailer or visit the website.
Cartridge Replacement
Water Supply Check
Ensure the water supply is turned off before starting cartridge replacement.
Handle Removal
Remove the finish plug and unscrew the fixing screw to extract the handle.
Cartridge Extraction
Remove indicator ring, unscrew fixing nut, and take out the cartridge from the mixer body.
New Cartridge Installation
Insert new cartridge, ensuring centering pins align and gaskets are correctly positioned.
Aerator Cleaning and Replacement
Water Supply Shut-off
Ensure the water supply is closed before performing aerator operations.
Aerator Cleaning
Rinse clogged aerator with running water, do not use detergents.
Aerator Replacement
If damaged, replace the aerator and reassemble in reverse sequence.
Need help?
Do you have a question about the VIA MANZONI 38603 and is the answer not in the manual?
Questions and answers