Harman Kardon AVR 700 Owner's Manual
Owners manual
Hide thumbs
Also See for AVR 700:
- Quick start manual (113 pages) ,
- Service manual (60 pages) ,
- Quick start manual (8 pages)
Table of Contents
Advertisement
Advertisement
Table of Contents
Troubleshooting

Related Manuals for Harman Kardon AVR 700


Summary of Contents for Harman Kardon AVR 700
- Page 1 AVR 700/AVR 70/AVR 70C Audio/video receiver Owner’s Manual...
-
Page 2: Table Of Contents
AVR 700/AVR 70/AVR 70C Table of Contents IntroductIon operAtIng your AVr SupplIed AcceSSorIeS controllIng the Volume ImportAnt SAfety InformAtIon mutIng the Sound plAce the AVr lIStenIng through heAdphoneS front-pAnel controlS SelectIng A Source reAr-pAnel connectorS VIdeo troubleShootIng tIpS SyStem remote control functIonS... -
Page 3: Introduction
Thank you for choosing this Harman Kardon product! Verify Line Voltage Before Use for more than fifty years, the harman kardon mission has been to share a passion for music the AVr 700 has been designed for use with 120-volt alternating current (Ac). the and entertainment, using leading-edge technology to achieve premium performance. -
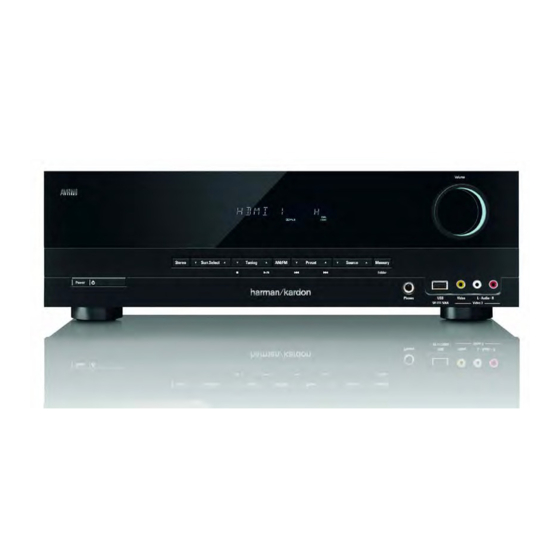
Page 4: Front-Panel Controls
If a short circuit is not found, bring the unit to an authorized harman kardon service center for inspection and repair before using Power On/Standby button: press this button to turn the AVr on and put it into the it again. -
Page 5: Rear-Panel Connectors
AVR 700/AVR 70/AVR 70C Rear-Panel Connectors Rear-Panel Connectors digital Audio hdmI composite Video Ac Input ® connectors connectors connectors connector radio Antenna Analog Audio Subwoofer Speaker connectors connectors connector connectors Radio Antenna connectors: connect the included Am and fm antennas to their Subwoofer connector: connect this jack to a powered subwoofer that has a line-level respective terminals for radio reception. -
Page 6: System Remote Control Functions
AVR 700/AVR 70/AVR 70C System Remote Control Functions Remote Control Functions Ir transmitter lens mute button power on button power off button AVr button Source Selector buttons Stereo mode button tone controls button Surround mode Select buttons Volume up/down buttons... - Page 7 1, optical digital 2, coaxial digital, In addition to controlling the AVr, the AVr remote can also control a harman kardon blu- hdmI (for hdmI 1 – hdmI 3 only) and Analog. this button does not function for the Am/ ray disc ®...
-
Page 8: Introduction To Home Theater
Introduction to Home Theater AVR 700/AVR 70/AVR 70C and Place Your Speakers Introduction to Home Theater Place Your Speakers this introductory section will help you to familiarize yourself with some basic concepts determine the locations for your system’s speakers according to their manufacturer’s unique to multichannel surround-sound AVrs, which will make it easier for you to set up directions and the layout of your listening room. -
Page 9: Types Of Home Theater System Connections
Types of Home Theater AVR 700/AVR 70/AVR 70C System Connections Types of Home Theater System Connections Subwoofer Connections the subwoofer is a speaker dedicated to reproducing only the low (bass) frequencies, there are different types of audio and video connections used to connect the AVr to your which require more power. -
Page 10: Video Connections
Types of Home Theater System AVR 700/AVR 70/AVR 70C Connections, continued Radio Connections Digital Audio Connections – Optical optical digital audio connectors are normally covered by a shutter to protect them from your AVr uses separate terminals for the included fm and Am antennas. the fm antenna dust. -
Page 11: Making Connections
AVR 700/AVR 70/AVR 70C Making Connections Making Connections Connect Your TV or Video Display HDMI Monitor Out connector If your tV has an hdmI connector and you have hdmI or component video source CAUTION: Before making any connections to the AVR, ensure that the AVR’s AC devices, use an hdmI cable (not included) to connect your tV to the AVr’s hdmI monitor... - Page 12 AVR 700/AVR 70/AVR 70C Making Connections, continued HDMI devices Optical digital audio devices If any of your source devices have hdmI connectors, using those connectors will provide If your source devices have optical digital outputs, connect them to the AVr’s optical the best possible video and audio performance quality.
-
Page 13: Connect The Radio Antennas
AVR 700/AVR 70/AVR 70C Making Connections, continued Audio recorders Connect to AC Power connect an analog audio recorder’s inputs to the AVr’s analog audio tape out connectors. connect the Ac power cord to the AVr’s Ac Input connector and then to a working Ac you can record any analog audio input signal except for the tape 1 input. -
Page 14: Set Up The Avr
AVR and unplug it. Check all speaker wires for a short circuit (“+” and “–” wires touching). If none is found, bring the unit to an authorized Harman Kardon service center for inspection and repair before using it again. -
Page 15: Configure The Avr For Your Speakers
AVR 700/AVR 70/AVR 70C Set Up the AVR, continued Notes on Setting Subwoofer Volume: consult the technical specifications for your system’s main left and right speakers and locate the frequency response, usually given as a range, e.g., 80hz – 20khz (±3db). -
Page 16: Operating Your Avr
AVR 700/AVR 70/AVR 70C Operating Your AVR Operating Your AVR In the fm Stereo mode, the radio uses automatic tuning, meaning each press of the tuning up/down buttons scans until a station with acceptable signal strength is found. In the fm mono mode, the radio uses manual tuning, in which each press of a tuning button now that you have installed your components and completed a basic configuration, you steps through a single frequency increment. -
Page 17: Selecting A Surround Mode
Operating Your AVR, continued, AVR 700/AVR 70/AVR 70C and Advanced Functions Selecting a Surround Mode Surround Mode Selection Surround-mode selection depends upon the format of the incoming audio signal as well Selecting a surround mode can be as simple or sophisticated as your individual system as your personal taste. -
Page 18: Sleep Timer
If the AVr does not function correctly after a processor reset, contact an authorized harman kardon service center for assistance. to locate an authorized service center, If you press the Sleep button after the timer has been set, the remaining play time will be visit our web site at www.harmankardon.com. -
Page 19: Troubleshooting
• Amplifier is in protection mode due to internal problems • Contact your local Harman Kardon service center no sound from center or surround speakers • Incorrect surround mode • Select a surround mode other than stereo •... -
Page 20: Specifications
AVR 700/AVR 70/AVR 70C Specifications Specifications Audio Section Video Section multichannel power: 75w per channel, two television format: ntSc (AVr 700); channels driven @ 6 pAl (AVr 70/AVr 70c) ohms, 20hz – 20khz, Input level/impedance: 1Vp-p/75 ohms <0.1% thd; 100w per channel, two... -
Page 21: Appendix
AVR 700/AVR 70/AVR 70C Appendix Appendix – Default settings, worksheets, remote product codes Table A1 – Recommended Source Component Connections Device Type AVR Source Audio Connections Video Connections Vcr, dVr, pVr, or other audio/video recorder Video 1 • Video 1 Analog (inputs and outputs) •... - Page 22 AVR 700/AVR 70/AVR 70C Appendix Table A4 – Surround Modes Surround Mode Description Incoming Bitstream or Signal • Dolby Digital 1/0/.0 or .1, 2/0/.0 or .1, 3/0/.0 or .1, dolby digital provides up to five separate main audio channels and a dedicated low-frequency 2/1/.0 or .1, 2/2/.0 or .1, 3/2/.0 or .1...
- Page 23 AVR 700/AVR 70/AVR 70C Appendix Table A4 – Surround Modes (cont.) Surround Mode Description Incoming Bitstream or Signal • DTS 1/0/.0 or .1, 2/0/.0 or .1, 3/0/.0 or .1, 3/1/.0 or .1, 2/2/.0 or dtS Stereo delivers a 2-channel downmix of dtS digital materials or presents a matrix- .1, 3/2/.0 or .1...
- Page 24 AVR 700/AVR 70/AVR 70C Appendix refer to the numbered buttons when using the remote control function list...
- Page 25 AVR 700/AVR 70/AVR 70C Appendix Table A5 – Remote Control Function List Button Name AVR Function Blu-ray/DVD Button Name AVR Function Blu-ray/DVD power on power on power on power off power off power off mute mute mute AVr Select AVr Select...
- Page 26 8500 balboa boulevard, northridge, cA 91329 uSA © 2012 hArmAn International Industries, Incorporated. All rights reserved. harman kardon is a trademark of hArmAn International Industries, Incorporated, registered in the united States and/or other countries. blu-ray disc is a trademark of the blu-ray disc Association.