Advertisement
Quick Links
H4020 | H4021
GoSmart videophone 7" set IP-750A / 750B
Table of Contents
Safety instructions and warnings ........................................................................................... 2
Contents of the package ........................................................................................................ 3
Technical Specifications ......................................................................................................... 4
Description of the device ....................................................................................................... 5
Description of the monitor main menu ............................................................................... 22
Connection options.............................................................................................................. 36
Troubleshooting FAQ ........................................................................................................... 45
1
zdroj: 3010040200_31-H4020_00_01_WEB_CSY.indd
Advertisement

Related Manuals for Emos GoSmart H4021


Summary of Contents for Emos GoSmart H4021
-
Page 1: Table Of Contents
H4020 | H4021 GoSmart videophone 7" set IP-750A / 750B Table of Contents Safety instructions and warnings ................... 2 Contents of the package ......................3 Technical Specifications ......................4 Description of the device ....................... 5 Description of the monitor main menu ................22 Connection options...................... -
Page 2: Safety Instructions And Warnings
Do not disassemble, repair or modify the equipment yourself. Doing so may result in fire, electric shock or permanent damage. EMOS Ltd. hereby declares that the radio equipment type H4020 and H4021 are in compliance with Directive 2014/53/EU. The full text of the EU Declaration of Conformity is available on this website http://www.emos.eu/download. -
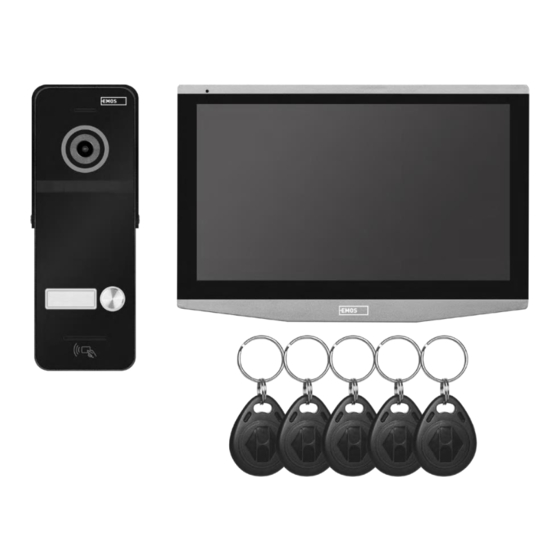
Page 3: Contents Of The Package
Package Contents Indoor Monitor Monitor Holder Camera unit (H4020 only) Power supply Installation material - screws Manual... -
Page 4: Technical Specifications
Storage: SD card (max. 128 Gb, min. Class 10, FAT32), expandable to Cloud storage directly in EMOS GoSmart Degree of protection: IP55 Maximum number of users: 10 APP: EMOS GoSmart for Android and iOS 21 mm Connectivity: 2.4 GHz WIFI (IEEE802.11b/g/n) Notice 2.4 GHz 5 GHz The device only supports 2.4GHz Wi-Fi (does not support 5GHz). -
Page 5: Description Of The Device
Description of the device Description of the connectors of the indoor unit 1 - Microphone 2- IPS display 3 - SLOT for SD card 4 - Speaker 5 - Anchor points PCB Description: 6 - Video output 7 - Gate travel control 8 - Power supply 9 - Door unit - door 1 10 - External CCTV camera 1... - Page 6 power audio video × 12 V DC EXIT 1 - RED - 12V 2 - WHITE - Audio 3 - BLACK - GND 4 - YELLOW - Video 5 - LIGHT BLUE - NC 6 - BLUE - COM 7 - BLUE/BLACK - NO 8 - BROWN - EXIT Button Description of cabling Door camera unit...
- Page 7 Push the monitor down slightly to secure it. Recommended: It is advisable to mount the installation box A9457 (general product number on the EMOS website) behind the monitor for easier cable handling.
- Page 8 Outdoor unit installation 1. Select a suitable mounting location and attach the mounting frame here. 2. Pull the supply cable through the mounting hole and plug it into the terminal block on the back of the door camera unit. 3. Screw the connected door camera unit to the mounting frame using the screws provided. 4.
- Page 9 Setting the volume and length of time the lock is unlocked • If you are uncomfortable with the amount of time the door lock is open and would like to extend or shorten it, you can do so by using the potentiometer hidden in the rear of the outdoor unit under the rubber insert.
- Page 10 Connecting the cabling When using CAT5 or CAT6 network cable, the effective distance from the outdoor camera to the farthest indoor monitor will be limited. In the case of an unshielded network cable, the distance will be a maximum of 20 m. For shielded network cable, the distance will be a maximum of 40 m.
- Page 11 Pairing a monitor with an application The monitor must first be connected to the wifi network that your phone is connected to. Go to settings. Select network settings...
- Page 13 Select a suitable WiFi network and enter your password.
- Page 14 • The app is available for Android and iOS via Google play and the App Store. • Please scan the QR code to download the app. Open the EMOS GoSmart app and confirm the privacy policy and click I agree. Select the registration option.
- Page 15 An automatic search is performed The device should pair and you can start using it.
- Page 16 Description of the main screen controls 1 - Motion detection on individual channels Red means that detection is enabled, if the icon is grey, it means that the camera does not have motion detection enabled. 2 - Mode switching: "At home" - Normal operation. Notifications are also sent to the phone. "Away from home"...
- Page 17 Description of controls in the application Advanced settings (described in more detail in the following section) Switching channels Mute Zoom in Full screen mode Take pictures using the app and save them to your mobile album Speak Take a video using the app and save it to your mobile album Expand menu To play a video stored on an SD card...
- Page 18 Advanced device settings in the app • Device information - Basic information about the device and its owner • Tap-to-Run and Automation - View scenes and automations assigned to the device. Creation of scenes is possible directly in the main menu of the application in the section "Scenes".
- Page 19 Description of the controls during a call in the app If you wish to answer the ringtones via your phone, the following is an explanation of each icon. Answer call End call If you want to unlock the gate or door without answering the call, swipe up the menu and you'll see 2 more icons that you can use to unlock.
- Page 20 Main menu styles In the settings you can choose 3 types of main menu according to your preferences. Android menu: Standard menu:...
- Page 21 Windows menu:...
-
Page 22: Description Of The Monitor Main Menu
Description of the monitor main menu... - Page 23 Settings System Language - monitor language selection (English, German, Hungarian, French, Polish, Czech, Slovenian, Czech) Device_ID - Selection of the monitor identifier. Important: The main monitor must have ID 1. If you connect additional monitors (IP-750B) to the main monitor, you must assign them a unique ID (2-6). Two monitors connected together must not have the same ID.
- Page 24 Date & Time Automatic - automatic date and time setting using Wifi network Date format - date format Clock style - Clock style in the main menu. Digital and analogue can be selected Screen saver - After inactivity, the screen will not turn off, but images with the current time will be displayed.
- Page 25 Network settings Connection - enable/disable connection to Wifi network Search WiFi - search for available wifi networks SSID - the name of the wifi to which the monitor is connected *LAN not available for H4020...
- Page 26 To connect to a WiFi network, search for available networks nearby and click on the network you want. If the network is secured with a password, enter it in the Password field.
- Page 27 Photo frame Ability to play photos from the SD card as a photo frame when the monitor is idle. The monitor supports photos in JPG format with a resolution of 1024x600.
- Page 28 Setting up connected devices Outdoor unit settings Enable - switching on/off the outdoor unit connected to the DOOR 1 connector + possibility of renaming the unit Video Signal - Setting the type of signal from the outdoor unit. No need to change if you are using units dedicated to a monitor.
- Page 29 Sensitivity - motion detection sensitivity setting Motion Alarm - Sounds when motion is detected Screen Popup - when enabled, each time motion is detected, the current video transmission is also displayed Alarm Push Notification - Sends a notification of motion detection to the phone...
- Page 30 CCTV camera settings Enable - enable / disable the camera connected to the CAM 1 connector + rename option Video Signal - Setting the type of signal from the camera. Alarm input - Alarm device input Alarm Record - recording during an alarm. Video recording or snapshot. Alarm buzzer - alarm siren from the monitor Motion detection - enable/disable motion detection.
- Page 31 Ringtone settings Setting - Select the source of ringtones (from the device itself or SD card) Selection - Select from 10 preset ringtones Volume - volume setting Duration - ringing duration Door Ringtone - Turn on/off the outdoor unit ringtone...
- Page 32 View records Channel - outdoor unit / camera selection Event - event type filtering (calls, absent messages, motion detection, alarms, everything) In the calendar, the days when the monitor has recorded an entry are marked in pale blue. When you click on a day, a list of events within that day is displayed on the right.
- Page 33 View live feed from outdoor units / cameras Adjust brightness, contrast, colour and volume Taking pictures Acquisition of video footage Switching between outdoor units / cameras Answer the call Unlocking the lock connected to the outdoor unit Opening a gateway connected to a monitor Leave a call...
- Page 34 Information View basic monitor and network information.
- Page 35 Intercom Thanks to the intercom function, you can communicate between interconnected indoor units. In the menu, just click on the intercom icon and then select which indoor unit you wish to communicate with. Also for the intercom you need to set the monitor ID correctly. Gate travel control After connecting the gate travel to the H/L connector, this icon allows you to control the opening/closing of the gate directly from the monitor.
-
Page 36: Connection Options
Connection options power audio MENU -> ID: 2 video MENU -> ID: 1 2x Outdoor units + Main monitor (DOOR1+DOOR2) + Slave monitor... - Page 37 power audio video EXIT EXIT 2x Main monitor (2 residential units) + 2 outdoor units (DOOR1 and DOOR 2).
- Page 38 power audio video 4x Main monitor + 2 outdoor units H3018 (DOOR1 and DOOR 2) (e.g. for 4 residential units with front and rear entrance)
- Page 39 power audio video H8011 12 V DC Pink Connection of one housing unit with one separate input in combination with the H8011 keypad and G.U-SECURY.
- Page 40 ID: 1 (master) ID: 2 (slave) PIR detect. Signal: AHD - analog HD CVBS - analog TVI, CVI PIR detect. H8011 Signal: AHD - analog HD CVBS - analog TVI, CVI 12 V DC power audio video Connection of 2 separate inputs with H8011 keypad and CCTV cameras for one housing unit with intercom.
- Page 41 Flash FLASH ELECTRONIC LOCK/OGI Photo 24V Test +24 V DC Common PHOTO Photo PHOTO1 Photo1 L2 L1 Open AERIAL H8011 12 V DC power audio video Connection of one separate input in combination with the H8011 keypad and WINGO NICE 2024 KCE for one separate housing unit.
- Page 42 power audio video Relay 12 V EXIT ELEKTROBOCK CZ ZV2 Econom ZV2-1 Gong ZV2-3 Gong ZV2 Melody Connection of one separate entrance with exit button and additional indoor bell ELEKTROBOCK ZV2 for one separate housing unit.
- Page 43 power audio video shielding EXIT Connection of one separate entrance with exit button for one separate dwelling unit. Connection via FTP cable. Double-sided shielding connected to GND.
- Page 44 power audio video DC ON In Adj. Connection of one separate entrance with exit button for 2 separate housing units. The power supply is implemented by a power supply to the switchboard on DIN rail H7009. WARNING: Do not connect the master monitors to each other. If you have an outdoor unit for two or more subscribers and you connect the master monitors to each other, all connected monitors will ring when you press any bell.
-
Page 45: Troubleshooting Faq
Troubleshooting FAQ I can't get the devices to pair. What can I do? • If you can't pair the device, try resetting the monitor to factory settings 2-3 times first (Settings -> factory settings -> OK ). • Make sure you are using a 2.4 GHz wifi network •... - Page 46 The sound is hoarse/noisy and the video is of poor quality or has streaks. What's wrong? • Properly shielded cables were not used during installation, or cables run parallel to the power lines. • The solution is to use a quality shielded cable and connect the shield to terminal 2 (GND) How many languages does the monitor support? •...
Need help?
Do you have a question about the GoSmart H4021 and is the answer not in the manual?
Questions and answers