Table of Contents
Advertisement
Safety Instructions
The lightning flash with arrow head within an equilateral triangle is intended to alert the user to
the presence of uninsulated "dangerous voltage" within the product's enclosure that may be of
sufficient magnitude to constitute a risk of electric shock to persons.
The exclamation point within an equilateral triangle is intended to alert the user to the presence
of important operating and maintenance (servicing) instructions in the literature accompanying
the appliance.
WARNING: TO REDUCE THE RISK OF FIRE OR ELECTRIC SHOCK, DO NOT EXPOSE THIS APPLIANCE
TO RAIN OR MOISTURE. DANGEROUS HIGH VOLTAGES ARE PRESENT INSIDE THE ENCLOSURE. DO
NOT OPEN THE CABINET. REFER SERVICING TO QUALIFIED PERSONNEL ONLY.
Important Safety Instruction
1. Do not block any ventilation openings. To ensure reliable operation of the projector and to protect from over
heating, it is recommended to install the projector in a location that does not block ventilation. As an example,
do not place the projector on a crowded coffee table, sofa, bed, etc. Do not put the projector in an enclosure
such as a book case or a cabinet that restricts air flow.
2. Do not use the projector near water or moisture. To reduce the risk of fire and/or electric shock, do not expose
the projector to rain or moisture.
3. Do not install near heat sources such as radiators, heaters, stoves or any other apparatus such as amplifiers
that emit heat.
4. Clean only with dry cloth.
5. Only use attachments/accessories specified by the manufacturer.
6. Do not use the unit if it has been physically damaged or abused.
Physical damage/abuse would be (but not limited to):
Unit has been dropped.
Power supply cord or plug has been damaged.
Liquid has been spilled on to the projector.
Projector has been exposed to rain or moisture.
Something has fallen in the projector or something is loose inside.
Do not attempt to service the unit yourself. Opening or removing covers may expose you to dangerous voltages
or other hazards. Please call InFocus before you send the unit for repair.
7. Do not let objects or liquids enter the projector. They may touch dangerous voltage points and short out parts
that could result in fire or electric shock.
8. See projector enclosure for safety related markings.
9. The unit should only be repaired by appropriate service personnel.
Intended Use Statement
y Operation Temperature:
-
For 0 - 2500 ft, 5°C ~ 40°C
-
For 2500 - 5000 ft, 5°C ~ 35°C
-
For 5000 - 10000 ft, 5°C ~ 30°C
y Maximum Humidity:
-
Operating: 10%~80% RH (Max.), Non-condensing
-
Storage: 5%~95% RH, Non-condensing
The ambient operating environment should be free of airborne smoke, grease, oil and other contaminants that can
affect the operation or performance of the projector.
Use of this product in adverse conditions will void the product warranty.
1
English
Advertisement
Table of Contents

Related Manuals for InFocus INL4128


Summarization of Contents
Safety Instructions
Electrical and Voltage Warnings
Highlights risks associated with dangerous voltage and electric shock.
Operating Environment Precautions
Guidelines on ventilation, moisture, heat sources, and cleaning.
Unit Condition and Servicing
Instructions on handling damaged units and seeking qualified service.
INTRODUCTION
Package Overview
Details the items included in the projector package.
Standard accessories
Lists the standard components that come with the projector.
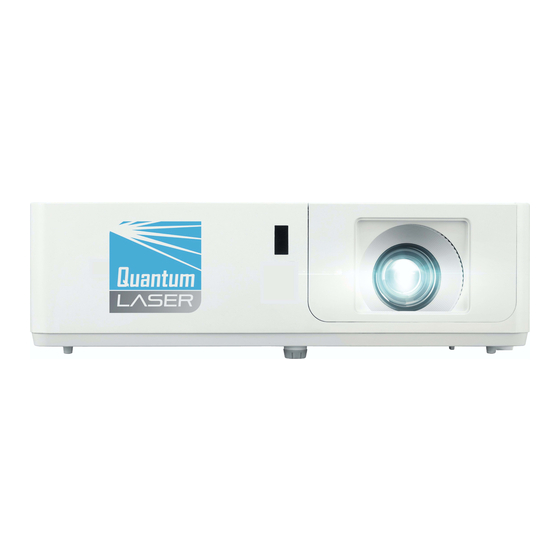
Product Overview
Illustrates and labels the projector's external features and components.
Connections
Details the various input and output ports on the projector.
Keypad
Identifies the buttons on the projector's control panel.
Remote control
Explains the functions of each button on the remote control.
SETUP AND INSTALLATION
Installing the projector
Describes the four possible mounting positions for the projector.
Projector installation notice
Provides guidelines on projector placement, tilt angles, and clearance.
Connecting to a computer
Illustrates how to connect the projector to a computer using various cables.
Connecting to a DVD player
Shows the process of connecting the projector to a DVD player.
Connecting to HDBaseT and Network
Details the connection procedure for HDBaseT and network interfaces.
Adjusting the projector image
Explains how to adjust image height, zoom, lens shift, and focus.
Remote setup
Instructions for installing and replacing batteries in the remote control.
USING THE PROJECTOR
Powering on / off the projector
Step-by-step guide on how to turn the projector on and off.
Selecting an input source
Describes how to choose the active input signal for the projector.
Menu navigation and features
Explains how to navigate the projector's on-screen display (OSD) menus.
OSD Menu tree
Provides a hierarchical view of the projector's OSD menu structure.
Display menu
Covers settings related to image display and adjustment.
Display 3D menu
Configuration options for the projector's 3D capabilities.
Display aspect ratio menu
Options for adjusting the image's aspect ratio for different content.
Display edge mask menu
Removes video encoding noise from the edges of the video source.
Display zoom menu
Allows magnification or reduction of the projected image.
Display image shift menu
Adjusts the horizontal or vertical position of the projected image.
Display keystone menu
Corrects trapezoidal distortion to make image sides parallel.
Audio menu
Settings for controlling audio output and input.
Audio mute menu
Option to temporarily turn off the sound output.
Audio volume menu
Adjusts the speaker or microphone volume level.
Audio input menu
Selects the audio input port for video sources.
Audio audio/mic input function menu
Configures audio input source settings for line or mic.
Setup menu
Contains various configuration options for the projector.
Setup projection menu
Selects the projector's mounting orientation (e.g., front, rear).
Setup screen type menu
Chooses screen type for WUXGA models (16:9 or 16:10).
Setup power settings menu
Configures power management features like direct/signal power on.
Setup security menu
Enables password protection for projector access.
Setup HDMI CEC menu
Enables HDMI Link control for connected CEC-compatible devices.
Setup HDBaseT control settings menu
Configures HDBaseT and RS232 port connections and modes.
Setup options menu
Includes language, closed caption, menu location, timer, and auto source settings.
Network menu
Manages network settings and connection status.
Network LAN menu
Displays network status, MAC address, DHCP, IP, Subnet, Gateway, DNS.
Network control menu
Enables internal interface control via HTTP for network functions.
Setup network control settings menu
Details LAN RJ45 function for remote management and control.
Info menu
Displays projector information such as serial number, firmware version, and IP address.
ADDITIONAL INFORMATION
Compatible resolutions
Lists supported digital resolutions for HDMI 1.4 and HDMI 2.0.
Image size and projection distance
Provides tables for image size, projection distance, and offset for 1080p series.
Projector dimensions and ceiling mount installation
Details projector dimensions and requirements for ceiling mount installation.
RS232 Commands and Protocol Function List
Lists RS232 pin assignments and command protocols for control.
Troubleshooting
Provides solutions for common image-related problems.
Other problems
Solutions for projector unresponsiveness and remote control issues.
Remote control problems
Troubleshooting steps when the remote control does not function.
Warning indicators
Explains LED indicators for errors like lamp, temperature, and fan failure.
Specifications
Lists technical specifications including optical, electrical, mechanical, and environmental data.
Need help?
Do you have a question about the INL4128 and is the answer not in the manual?
Questions and answers