
Related Manuals for ALP CL- 40M


Summary of Contents for ALP CL- 40M
- Page 1 QC-200-S-005-1706E AUTOCLAVE (Steam Sterilizer) CL- 32S / 32L 40S / 40M / 40L Instruction Manual ● Make sure to read this manual to use this product safely. ● Place this manual in a convenient location for easy reference.
-
Page 2: Table Of Contents
Contents 1. Preliminary notes 2. For the safety use P.3 to 6 3. Part names P.7 to 8 4. Installation P.9 to 15 5. Operation method P.16 to 38 6. Safety device P.39 7. Trouble shooting P.40 to 43 8. Maintenance P.44 to 51 9. -
Page 3: Preliminary Notes
1.Preliminary notes ● Thank you for choosing ALP products. Keep this manual at your hand for your quick reference whenever operating this autoclave. ● Do not use this autoclave for improper purpose. Strict observance of this manual is required. ● Please do understand and observe safety instructions written in this manual. -
Page 4: Installation
● How to use autoclave WARNING This autoclave sterilizes objects with high temperature and high pressure. Do not operate putting following materials and / or dangerous substances (Refer to 11.3 Dangerous substances list) in chamber. ・Explosive materials ・Flammable materials ・Acid or Alkaline materials ・Corrosive materials ・Non heat-resistance materials In case of sterilization of saline objects such as seawater, discharge saline water after... - Page 5 Do not touch stainless lid directly when opening or closing lid. It may cause burn injury. Do not touch it until cooling down enough. Genuine accessories and spare parts made by ALP Co., Ltd. must be used. Using other company’s products may cause accident and /or breakage of autoclave.
- Page 6 ● Notes on power failure In case of power failure during operation, autoclave works as follows. (Refer to 3. Part names Operation panel about LAMP, KEY, and DISPLAY) 1. Power is cut and stop working. 2. When power is supplied again, PROCESS INDICATION BAR lights up to show the status when power failure happened.
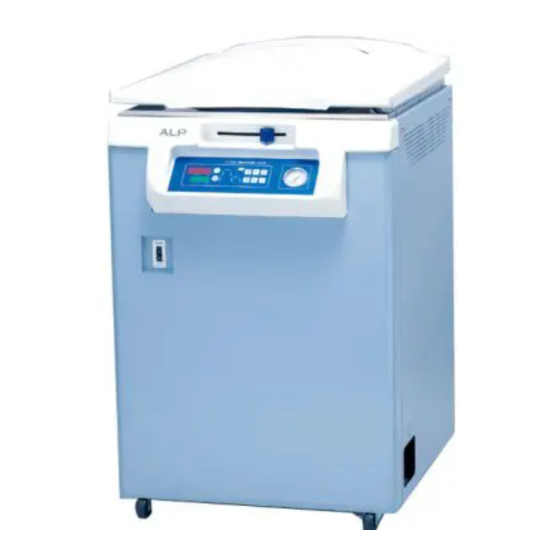
- Page 7 3.Part names Main body Lid cover Lid lock lever Operation panel Pressure gauge Lid hold (both side) Power switch (Breaker) Drain outlet Exhaust bottle Front caster with stopper Exhaust cooling tank (inside of the exterior) Power cable...
- Page 8 Operation panel Option STERILIZE O.T. TEMP STOP EXHAUST EXHAUST TIME ℃ HEAT START PATTERN START WARM TIMER ENTER READY COMPLETE 14. STERILIZE LAMP Pressure gauge It indicates chamber pressure. The character lights up during sterilizing process. The TEMPERATURE DISPLAY character blinks at sterilizing setting change It displays temperature in the chamber or setting condition.
- Page 9 4.Installation 4.1 Transportation This autoclave has casters. So it can move horizontally. WARNING Do not pinch hands / feet when moving autoclave. There is a risk of a fracture or bruise. CAUTION The autoclave must be moved by two or more persons. Do not hit and /or get shock to autoclave nor hold lid cover.
- Page 10 4.2 Installation location Autoclave must be installed as follows. Refer to 4.3~4.5. U p t o c e l l i n g o r d u c t W a l l s u r f a c e W a l l P a y a t t e n t i o n t o e l e c t r i c s u r f a c e...
- Page 11 WARNING Do not install autoclave in the place where chemicals such as flammable materials, explosive materials, and /or corrosive gas are kept. Installing autoclave in above mentioned place may cause serious accident and/or trouble of autoclave. This autoclave must be installed to a place where operator can read pressure gauge, or it may cause serious trouble.
- Page 12 (Refer to 9. Specifications) ・Be sure to connect the power cable to the breaker which meets below specifications. CL-32S : AC220-240V, single phase, more than 15A CL-32L : AC220-240V, single phase, more than 15A CL-40S : AC220-240V, single phase, more than 20A...
- Page 13 Exhaust bottle(3L), 1pc. Base plate hook, 1pc. Chamber drain tray, 1pc. Stainless wire basket (CL-40L only) CL-32S : φ30×20cm 2pcs. CL-32L : φ30×30cm 2pcs. CL-40S : φ38×20cm 2pcs. CL-40M : φ38×30cm 2pcs. CL-40L : φ38×40cm 2pcs. ●Base plate・・・Set it on the bottom of chamber.
- Page 14 ●Base plate hook(for CL-40L only)・・・Keep it with this instruction manual. Purpose of use:Tool for unloading base plate from bottom of chamber at the time of maintenance. ○Pouring water into exhaust cooling tank Mixture of steam and air in chamber is evacuated during operation. They get cold through exhaust cooling tank, then they are evacuated to exhaust bottle.
- Page 15 Keep the silicon hose straight. Detail Ideal water supply quantity: About 10L or 90% of tank capacity Figure 2 WARNING Be sure to set base plate during operation. Operation without base plate may cause burning of object which leads to fire. Do not bend exhaust hose when setting exhaust bottle, or it may cause serious accident and / or breakage.
-
Page 16: Operation Method
5.Operation method WARNING Be sure to read this chapter carefully and understand well before operation and use autoclave properly, or it may cause fatal accident at worst as well as mechanical trouble. ● Flow chart of basic operation 1. Turn on power switch(breaker) 2. - Page 17 Before operation WARNING In case of sterilization of objects such as electrolyte-containing saline (EX. sea water), be sure to discharge water in chamber and clean it after sterilization complete. Then put fresh water and operate several times. Failure to maintain after sterilization may cause corrosion of bottom of chamber by electrolytic corrosion which leads to rot.
- Page 18 5.3 Water supply 5.3.1 Water supply ① Check if pressure gauge indicates “0MPa”. ② Open lid then pour water to the same level as base plate. (CL-32S/32L : about 4L, CL-40S/40M/40L : about 6L) Base plate Chamber Proper level Heater WARNING Do not open lid until chamber pressure goes down to “0MPa”.
- Page 19 5.3.2 Drain water from exhaust bottle ① Unload exhaust bottle from housing hole and draw out exhaust hose from the bottle. ② Pour water up to LOW level. If the water level is over HIGH level, pour off the water down to LOW level. ③...
- Page 20 ※Do not put too much objects in the chamber. Too much objects in the chamber may cause sterilization incomplete. (Quantity of objects to be put inside the chamber shall be less than 60% of the capacity of chamber) WARNING Be sure to use the stainless wire basket, the stainless wire basket with pan or the stainless bucket.
- Page 21 ●About a disposable plastic bag When using a disposable plastic bag or other kind of bags, please be strictly observe following warnings/cautions. WARNING Be sure to put the bag into Stainless bucket or Stainless wire basket. (Fig. 1) If the bag is put into chamber directly, autoclave may cause serious explosion. When exhaust holes located in the wall of chamber are chocked by the bag, safety devices may not activate.
- Page 22 Be sure to put the bag into genuine stainless bucket or stainless wire basket with pan made by ALP Co., Ltd. when you put objects with sharp edge such as broken petri dishes, test tubes, needles into the bag directly.
- Page 23 ●How to use stainless bucket (optional parts) When using a stainless bucket, please strictly observe following warnings/cautions. WARNING Load stainless bucket in the center of chamber. If the space between the bucket and the chamber’s wall is not enough, exhaust holes located in the wall of chamber may choke.
- Page 24 5.5 Close and lock the lid ① Grip lid hold then close lid slowly. ② Slide the lid lock lever slowly to close position (left end) with pressing front part of the lid cover. ① ② CLOSE OPEN WARNING Be sure lid gasket has no dusts and crack. Wipe off dusts on gasket with a soft cloth.
- Page 25 5.7 Set operation pattern, value of temperature and time 5.7.1 Operation pattern setting When press shift to Initial condition When press shift to Sterilization Press PATTERN/ENTER KEY. 1 2 1 pattern O . T . STERILIZE EXHAUST STOP TEMP 0 2 0 TIME ℃...
- Page 26 Warming time:0minute to 48hours CL-40S/40M/40L : Sterilization temp.:101℃ to 137℃ Sterilization time:0minute to 48hours Warming temp.:40℃ to 60℃ Warming time:0minute to 48hours Dissolving/Warming pattern(for CL-32S/32L/40S/40M/40L) Dissolving temp.:40℃ to 100℃ Dissolving time:0minute to 48hours Warming temp.:40℃ to 60℃ Warming time:0minute to 48hours ●Continuous run setting...
- Page 27 When press shift to Initial condition (In case of Sterilization / Warming pattern) When press shift to In case of other patterns,operate in the same way. O . T . STERILIZE EXHAUST STOP TEMP 0 2 0 TIME ℃ START HEAT WARM PATTERN...
- Page 28 5.7.3 Exhaust setting ① Set automatic exhaust / referring to following statements. ② In case of , set automatic exhaust starting temperature. ●Automatic exhaust Automatic exhaust enables to exhaust steam to outside automatically after sterilization to cool down quickly. It’s necessary to set in each operation depending on objects as follows. For appliance(except glassware) ・・・...
- Page 29 O . T . STERILIZE EXHAUST STOP TEMP 0 2 0 TIME ℃ START HEAT PATTERN START TIMER ENTER To the mode of exhaust setting 1 2 1 O . T . STERILIZE EXHAUST STOP TEMP EXHAUST 0 F F TIME ℃...
- Page 30 5.8 Press START KEY Press START KEY to start operation. ① The heater is on with “the output lamp of heater” on TEMPERATURE DISPLAY lighting up, and HEATING-1 PROCESS LAMP blinking. ②Mixture of steam and air in chamber is evacuated to exhaust bottle with rise of temperature. This is the process of filling chamber with saturated steam, not abnormal condition.
- Page 31 5.9 Operation complete During exhaust 1 0 7 ④ O . T . STERILIZE EXHAUST STOP TEMP EXHAUST 0 0 0 TIME ℃ START HEAT PATTERN START TIMER ENTER ⑤ O . T . STERILIZE EXHAUST STOP TEMP EXHAUST pi,pi,pi,pi,pi, 0 0 0 TIME ℃...
- Page 32 WARNING Be sure to set automatic exhaust OFF when sterilizing liquid object or glass container. (Do not press EXHAUST KEY.) Quick reduction of chamber pressure may cause breakage of glass container or blow-out of hot liquid. In case of breakage or spill of objects, be sure to clean inside of chamber to use autoclave safely, or it may decrease life of heating element and/or chamber, then causes corrosion of chamber and serious accident.
- Page 33 ●Checking operation pattern, value of temperature and time during operation O . T . EXHAUST STOP TEMP 0 2 0 TIME ℃ HEAT START PATTERN START TIMER ENTER Sterilization 1 2 1 temperature O . T . STERILIZE EXHAUST STOP TEMP 0 2 0 TIME...
- Page 34 5.10 Unload object (below 80℃ in chamber) ① Check if pressure gauge indicates 0MPa and TEMPERATURE DISPLAY indicates below 80℃. ② Slide the lid lock lever slowly to open position (right end) with pressing front part of the lid cover then open lid. ③...
- Page 35 ● Stop operation Follow below steps to stop operation. ① Press STOP KEY to cool down the chamber. (Press EXHAUST KEY to shorten cooling time if needed.) ② When TEMPERATURE DISPLAY indicates 80℃, complete alarm sounds and COMPLETE LAMP blinks. ③...
- Page 36 5.13 Other functions Autoclave has calendaring function. It’s necessary to set date and time as follows according to the location. 5.13.1 Date and time setting Local time has already been set. But this time data will be lost about one month of no electrical power supply to autoclave.
- Page 37 5.13.2 Reservation operation Autoclave has function of reservation operation which can be set starting time of operation with calendar timer. If you set reservation operation for next day, you will be able to unload objects from chamber next morning. This function save time especially busy morning. You can use it as following procedure accordingly.
- Page 38 5.14 For the reliable sterilization In case of sterilizing following containers which hinder the circulation and penetration of steam, the temperature rises slower than temperature in chamber. Because residual air in following containers is difficult to be evacuated. Also it may cause Er1(over pressure error). ●Containers which hinder the circulation and penetration of steam are;...
- Page 39 6.Safety device WARNING Do not disassemble or adjust safety valve since it has been adjusted before shipment. It may cause fatal accident because of abnormal performance. Do not touch power switch(breaker) by wet hand. It may cause electric shock. CAUTION Do not pour water into chamber until heater cools down enough after water lack, or it may cause heater trouble.
-
Page 40: Trouble Shooting
7.Trouble shooting WARNING If the situation of autoclave correspond to following item(①or②) when you ask for repair autoclave, make autoclave and accessories to be non-polluting condition. ① Part of autoclave is exposed to infectious substance or radioactive substance. ② Blood or other hazardous components for human body adhere to part of autoclave. Do not touch power switch(breaker) by wet hand. - Page 41 7.2 Trouble shooting TROUBLE CONDITION CAUSES COUNTERMEASURES A. Power is not on. 1. Power cable is disconnected. 1. Be sure to connect cable. 2. Misconnection of power cable. 2. Be sure to connect cable properly. 3. Burning of connecting part in power 3.
- Page 42 TROUBLE CONDITION CAUSES COUNTERMEASURES L. Safety valve activates. 1. Residual air is not evacuated enough and 1-1. Quantity of objects to be put inside of (Steam blowing from bottom plate.) pressure in chamber rises abnormally due chamber shall be less than 60% of to additional pressure by residual air.
- Page 43 TROUBLE CONDITION CAUSES COUNTERMEASURES R. Er21or Er22 is shown on the display 1. Breakage of control sensor or object 1. Contact local distributor. with alarm. temperature sensor. S. Er3 is shown on the display with 1. In a sterilization process, temperature 1-1.
- Page 44 8.Maintenance ●Regular Maintenance Daily maintenance ① Replacement of water ② Check of lid clamping unit Monthly maintenance ③ Cleaning of chamber and lid gasket ④ Check of power supply and its peripherals Yearly maintenance ⑤ Check of water level of exhaust cooling tank ⑥...
- Page 45 CAUTION When replacing water in chamber, check the chamber temperature if it is cold enough, or it may cause burn injury. Empty chamber, drain whole water in chamber, then close lid when autoclave is not used for over a week. Be sure to check water level in the chamber.
- Page 46 Fig.2 CL-32S/32L (Four clamps) 8.2 Monthly maintenance ③ Cleaning of chamber and lid gasket ● How to clean 1. Open lid, and empty chamber. (also base plate, use base plate hook for CL-40L) 2. Turn off power switch(breaker). 3. Unload exhaust bottle from housing hole and draw out exhaust hose from the bottle.
- Page 47 CAUTION Do not scratch heater in bottom of chamber when cleaning. The water which infiltrates into heater may cause breakdown. When cleaning, check the chamber temperature if it is cold enough, or it may cause burn injury. Do not pull out the lid gasket forcibly. It may cause steam leakage.
- Page 48 8.3 Yearly maintenance ⑤ Check of water level of exhaust cooling tank ● How to check 1. Detach the right side panel using phillips-head screw driver. 2. Check if the water level of exhaust cooling tank has a range of below figure. In case of water lack, pour water into the tank referring to 4.5...
- Page 49 8.4 Spare parts and replacement Refer to the following list and replacement manual of main parts. 8.4.1 Spare parts list for CL series 8.4.2 Replacement of the lid gasket 8.4.3 Replacement of pipe heater If you will order these spare parts, please contact local distributor. 8.4.1 Spare parts list for CL series Model No.
- Page 50 8.4.2 Replacement of the lid gasket...
- Page 51 8.4.3 Replacement of pipe heater Chamber Gasket Washer Insulator Assembly nut Wiring 1.Dismantlement 1) Pull off the 3pcs. of metal fittings"E" with pliers. 2) Open the both sides of the body and fall down sideways for easy work. 3) Disconnect wiring of the heater. 4) Open assembly nuts of the heater with spanners.(Opposite side 21) 5) Dismount the heater from bottom of the chamber.
-
Page 52: Specifications
9.Specifications... -
Page 53: Disposal And Dismantlement
10.Disposal and dismantlement Make the autoclave and accessories to be non-polluting condition before disposal and dismantlement. If the power cable is connected to distribution board directly, beware of electric shock. WARNING If the situation of autoclave correspond to following item(①or②) when you dismantle and/or dispose of the autoclave, make the autoclave and accessories to be non-polluting condition. -
Page 54: Appendix
11.Appendix 11.1 Setting flow chart... - Page 55 11.2 Block diagram ① ①EGO② ④ ③ SSR1 ② ① ⑧ ④ ⑥ ② DC24V AC100VAC240V...
- Page 56 11.3 Dangerous substances list EXPLOSIVE Nitro glycol, Nitroglycerine, Nitrocellulose, and other nitrate esters Trinitrobenzene, Trinitroluene, Picric acid, and other explosive nitro compounds EXPLOSIVE: Peracetic acid, Methyl ethyl ketone peroxide, Benzyl peroxide, and other organic peroxides Sodium azide and other metal azide compounds FLAMMABLE Metallic lithium, Metallic potassium, Metallic sodium, Yellow phosphorus Phosphorus sulfide, Red phosphorus, Celluloid compounds, Calcium carbide...
- Page 57 Memo...
- Page 58 ● The contents of this manual may be changed without notice. ● This manual with missing pages may be replaced. Instruction Manual for AUTOCLAVE Laboratory use CL-32S/32L/40S/40M/40L Second Edition 28 Jul., 2016 ALP Co., Ltd. 3-3-10, Midorigaoka, Hamura-shi, Tokyo, Japan Zip code : 205-0003 TEL: +81 (0)42-579-0531 FAX: +81 (0)42-579-0533 http://www.alpco.co.jp...
Need help?
Do you have a question about the CL- 40M and is the answer not in the manual?
Questions and answers