Table of Contents
Advertisement
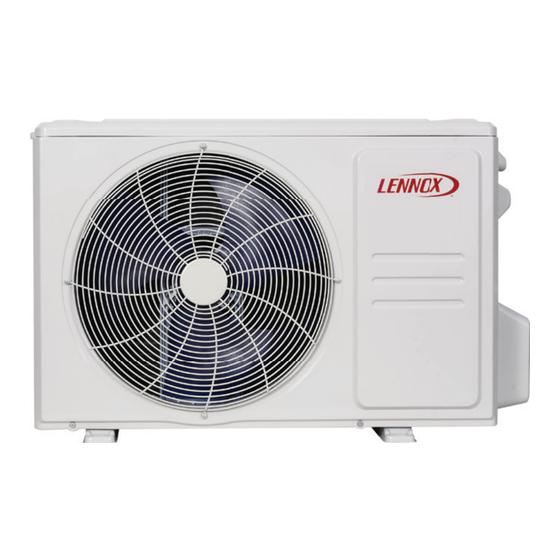
2021 Lennox Industries Inc.
©
Dallas, Texas, USA
General ..........................................................................1
Use of Mini-Split System During Construction ..........1
Included Parts ...............................................................2
Model Number Identification .......................................3
Typical System Components .......................................4
System Dimensions .....................................................4
Outdoor Units ..............................................................4
Indoor Units .................................................................5
Indoor Unit Wall Mounts ..............................................5
System Clearances.......................................................5
Outdoor Unit ................................................................5
Indoor Unit ...................................................................5
Multiple Outdoor Units .................................................6
Torque Requirements for Caps and Fasteners ..........6
Indoor Unit Installation ................................................6
Unit Placement Considerations ...................................6
Determining Wall Mounting Plate Location ..................7
Installation of Wall Mounting Plate...............................7
Installation of Wall Sleeve............................................7
Indoor Unit Condensate Piping Connections ...............8
Outdoor Unit Installation .............................................8
Placement Considerations ...........................................8
Direct Sunlight and Rain Protection .............................9
Buried Refrigerant Pipe Protection ..............................9
Securing the Outdoor Unit ...........................................9
Refrigerant Piping Connections ................................10
Adding Refrigerant for Longer Line Set ...................12
Leak Test and Evacuation ..........................................12
Leak Test ...................................................................12
Triple Evacuation Procedure......................................12
Wiring Connections ....................................................12
Outdoor Unit .............................................................13
Indoor Unit .................................................................13
Unit Start-Up ...............................................................14
Service Information ....................................................14
Indoor Unit Alert Codes and Outdoor Unit LED .........14
Test Run ....................................................................15
Double-Check Line Set Connections .........................15
Ambient Temperature is Below 60ºF (16ºC) ..............15
Indoor Unit Wiring Diagrams .....................................16
Outdoor Unit Wiring Diagrams ...................................17
INSTALLATION INSTRUCTION &
SERVICE INFORMATION
MCB and MWCB Series Units
SINGLE-ZONE MINI-SPLIT SYSTEM
(115V and 208/230V)
50824101 12/2021
THIS MANUAL MUST BE LEFT WITH THE OWNER
FOR FUTURE REFERENCE
WARNING
Improper installation, adjustment, alteration, ser vice
or maintenance can cause property damage, personal
injury or loss of life.
Installation and service must be performed by a li
censed professional HVAC installer (or equivalent) or a
service agency.
CAUTION
In order to avoid injury, take proper precaution when
lifting heavy objects.
General
Refer to the Product Specifications bulletin (EHB) for
additional product information. These instructions are
intended as a general guide and do not supersede local or
national codes in any way. Authorities having jurisdiction
should be consulted before installation.
This wallmounted indoor unit is matched with an outdoor
air conditioner unit to create a minisplit system that uses
HFC410A refrigerant.
Use of Mini-Split System During
Construction
Lennox does not recommend the use of its minisplit
systems during any phase of construction. Very low return
air temperatures, harmful vapors and operation of the unit
with clogged or misplaced filters will damage the system.
However, minisplit systems may be used for cooling of
buildings under construction, if the following conditions
are met:
•
Air filter must be installed in the system and must be
maintained during construction.
•
Air filter must be replaced upon construction comple
tion.
•
The indoor wall unit assembly must be thoroughly
cleaned following final construction clean-up.
•
All mini-split operating conditions must be verified ac
cording to these installation instructions.
Advertisement
Table of Contents

Related Manuals for Lennox MCB012S4S-1L


Summary of Contents for Lennox MCB012S4S-1L
-
Page 1: Table Of Contents
Construction Outdoor Unit .............13 Indoor Unit ..............13 Unit Start-Up ...............14 Lennox does not recommend the use of its minisplit Service Information ............14 systems during any phase of construction. Very low return Indoor Unit Alert Codes and Outdoor Unit LED ..14 air temperatures, harmful vapors and operation of the unit Test Run ..............15... -
Page 2: Included Parts
Included Parts Package 1 of 1 contains the following: Assembled Indoor Unit includes the following items: Parts Figure Quantity Parts Figure Quantity Installation instruction, Wireless controller 1 ea. user guide and warranty Wireless control Mounting plate holder with 2 mounting (shipped attached to the screws back of the indoor unit) -
Page 3: Model Number Identification
Model Number Identification OUTDOOR SINGLE ZONE AIR CONDITIONER UNITS M C B 009 S 4 S 1 P Series Type Voltage M = Mini-Split L = 115V-1 phase-60Hz P = 208/230V-1 phase-60Hz Minor Design Sequence Unit Type 1 = 1st Revision C = Air Conditioner Refrigerant Circuits S = Single Circuit... -
Page 4: Typical System Components
Typical System Components 2-1/2 (63) 3/8 (10) DRAIN HOLE (bottom of unit) 12-3/8 (314) 11-1/4 (286) TOP VIEW 30-7/8 (784) 21-7/8 (556) 2-3/8 (60) 3-5/8 (92) 17-3/4 (451) 30-1/8 (765) 11-7/8 (302) 2-3/4 (70) FRONT VIEW SIDE VIEW Figure 3. 18K Outdoor Unit Dimensions - Inches (mm) 1 (25) DRAIN HOLE (bottom of unit) -
Page 5: Indoor Units
Indoor Units System Clearances Outdoor Unit 24 (610) Air Inlet (305) (305) (610) (2007) SIDE VIEW FRONT VIEW Air Outlet Minimum rear clearance can be 6 inches (152 mm) when mounted on brackets and with no obstructions on the other three sides. Figure 8. -
Page 6: Multiple Outdoor Units
Do not install the unit in the following locations: the valve stem recess. • Areas exposed to petrochemicals or petrochemical See the Lennox Service and Application Notes C081 products. for further details and information. • Areas exposed to salt or other corrosive materials or caustic gases. -
Page 7: Determining Wall Mounting Plate Location
• Areas exposed to strong electromagnetic forces. plate to better secure wall plate. Field-provided anchors/fixings may be required depending on • Areas exposed to acids or alkaline detergents. wall construction. Use the appropriate type of anchors for the application. • Place the unit so that it is not exposed to direct sun... -
Page 8: Installation Of Indoor Unit On Wall Mounting Plate
Installation of Indoor Unit on Wall Mounting Plate pump has been installed, it must be checked to ensure proper operation. This check is part of the 1. A length of field-provided flexible condensate piping startup process which must be done by the installing should be connected to the drain prior to securing the contractor. -
Page 9: Direct Sunlight And Rain Protection
• Avoid installing the outdoor unit near a bedroom or other places where noise may cause a problem. • There must be sufficient space to carry the unit into and out of the site. • There must be unobstructed air flow around the air 24 in 610 mm 12 in... -
Page 10: Refrigerant Piping Connections
4. Cut the selected pipes with a pipe cutter. Make the cuts flat and smooth as illustrated in “Figure 23. Cutting Piping”. Lean Crude Burr Four Field-provided Anchor Bolts Figure 20. Securing Outdoor Unit to Slab Figure 23. Cutting Piping 5. - Page 11 15. Align threaded connections with IMPORTANT flared refrigerant lines. Tighten the flare nuts lightly at first to obtain a smooth match as Always use two wrenches when tightening flare nuts to illustrated in “Figure 24. Making Connections avoid twisting refrigerant piping. DO NOT over-tighten (Male to Female Connection)”.
-
Page 12: Adding Refrigerant For Longer Line Set
Adding Refrigerant for Longer Line Set For adding additional refrigerant for longer line sets, see “Table 5. Line Set Guide”. Be sure to add the proper amount of additional refrigerant. Failure to do so may result in reduced performance. Table 5. Line Set Guide Each system size has a line set length and vertical elevation parameters. -
Page 13: Outdoor Unit
Indoor Unit CAUTION • Indoor unit is powered by the outdoor unit. All terminal connections must be made as illustrated • Communication, power and ground wiring - Use one stranded 3conductor with ground wire. in the following diagrams. Improperly connected wiring could damage unit or cause communication errors •... -
Page 14: Unit Start-Up
Service Information Table 7. Single Zone Installation Electrical Voltage/Phase, Outdoor Unit Model Max Fuse Indoor Unit Alert Codes and Outdoor Unit LED The following codes are display on the indoor unit LED on MCB012S4S-1L 115 / 1 / 60 the outdoor unit. MCB009S4S-1P Table 8. -
Page 15: Test Run
Test Run the COOL function. See “Figure 29. Manual Control Button”. Pre-Checks 3. Perform Test Run as normal. Only perform test run after you have completed the following steps: Indoor Unit Control Box • Electrical Safety Checks – Confirm that the unit’s Area (under front panel) electrical system is safe and operating properly. -
Page 16: Indoor Unit Wiring Diagrams
Indoor Unit Wiring Diagrams Figure 30. MWCB 09K,12K and 18K Indoor Unit Wiring Diagram (115 and 208/230VAC) 16022000C27182 Figure 31. MWCB 24K - 208/230VAC Indoor Unit Wiring Diagram... -
Page 17: Outdoor Unit Wiring Diagrams
Outdoor Unit Wiring Diagrams Figure 32. MCB 09, 12K and 18K - 208/230VAC Outdoor Unit Wiring Diagram Figure 33. MCB 12K - 115VAC Outdoor Unit Wiring Diagram... - Page 18 Figure 34. MCB 24K 208/230VAC Outdoor Unit Wiring Diagram...
Need help?
Do you have a question about the MCB012S4S-1L and is the answer not in the manual?
Questions and answers