
Related Manuals for ADS Technologies DVD XPRESS DX2 USBAV-714


Summary of Contents for ADS Technologies DVD XPRESS DX2 USBAV-714
- Page 1 XpressDX2 Xpress Xpress Xpress Xpress Xpress Xpress Xpress Xpress DVDXpress Hardware Hardware Software Software Manual Manual English German French Edition...
-
Page 3: Table Of Contents
Table of Contents Quick Setup Steps Ways to Capture and Edit Video Installation Guide Capture Wizard Creating Video for your Video iPod™, Sony PSP™ or Creative Zen Vision Direct to Disc German Manual French Manual Service & Warranty Service & Warranty Service &... -
Page 5: Table Of Contents
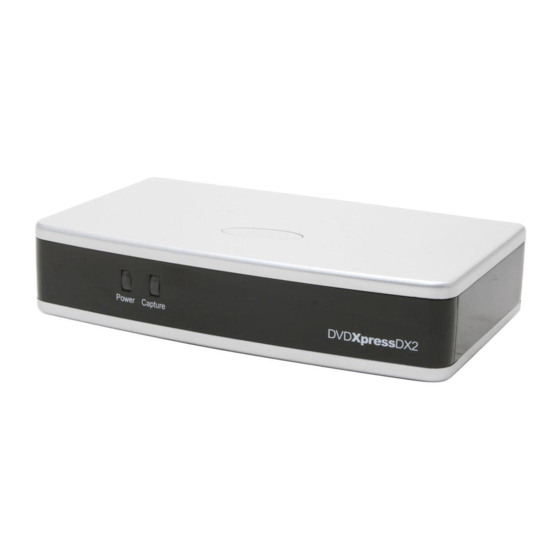
Quick Setup Steps This is a One Page Quick Setup Guide to help you get up and running fast 1 Connect the Audio/Video cables from your video source to DVD Xpress DX2 device. 2 Load the DVD Xpress DX2 CD. 3 Connect DVD Xpress DX2 to your PC via the USB Port. - Page 6 DVD Xpress DX2 Overview DVD Xpress DX2 supports today’s most popular video formats including MPEG4 and DivX video. All of the video formats are supported by an advanced video encoding chipset inside the DVD Xpress DX2 which means that DVD Xpress DX2 does all the work instead of your PC.
-
Page 7: Ways To Capture And Edit Video
Ways to Capture and Edit Video Capture Wizard (CapWiz): Easy Video Capture & Playback This is the fastest and easiest way to capture MPEG-1 (VCD), MPEG-2 (SVCD, DVD), MPEG-4 and DivX video on your PC. Create video for playback in your Video iPod® or your Sony PSP device. -
Page 8: Installation Guide
Installation Guide Minimum System Requirements • Intel® Pentium® III 1GHz or higher or AMD Athlon/Duron CPU • Microsoft ® Windows® 2000 or XP (Home or Professional) • 256MB of RAM • 1.2GB of available hard drive space for program installation •... -
Page 9: Getting Started
USB 1.1 We recommend using the USB 1.1 port on your motherboard or from a USB 1.1 add-in card. All USB 1.1 cards use the Microsoft USB drivers. Do not use a USB Hub to connect the DVD Xpress DX2 to your PC. Getting Started Check DVD Xpress DX2 Contents Hardware:... - Page 10 Wire It Up In this section you will connect audio and video cables to capture audio and video. Connect your video source (VHS, DVD Player, Laser Disc Player, Camcorders, TV, etc.) to the DVD Xpress DX2. Connect the 6 ft. A/V In cable to the 3 RCA jacks to your analog audio/video source RCA Line Out.
- Page 11 Install Device Drivers Now, plug your USB cable into DVD Xpress DX2 and your PC. Windows will recognize the device and ask you for the device drivers. Windows XP or Windows 2000 Let Windows conduct an automatic search for the drivers. The drivers are located in the root directory of your DVD Xpress DX2 CD, usually your “D”...
- Page 12 Windows XP or Windows 2000: 1 Click Start, Settings, Control Panel. 2 In Control Panel, click System. 3 Click on the Hardware Tab. 4 Click Device Manager Button. 5 Double click the Sound, Video and Game Controllers Device. 6 ADS DVD Xpress DX2 should be listed. If ADS DVD Xpress DX2 is listed under the Sound, Video and Game Control lers heading, then the device was properly installed.
-
Page 13: Installation Summary
Defragment your Hard Drive for best performance Disk Defragmentation consolidates files and folders on your Hard Disk and allows for better system access of files and folders. It will also help when you are capturing and writing new files into your Hard Disk. Please keep in mind that this process requires some amount of time which depends on several factors, including the size of the Hard Disk, number and size of files and how fragmented your local disk is. -
Page 14: Capture Wizard
Capture Wizard DVD Xpress DX2 Capture Wizard Click “Next” to advance to the next step. 1 Open CapWiz Click the CapWiz icon on your Desktop or Click “Start” > “All Programs” > “ADSTech DVD Xpress DX2” and click on “Capwiz” Choose worldwide video standard based on country –... - Page 15 3 Create file name and select file location We will automatically select “My Documents\My Videos\” as the location to store your video files, we also set the file name to “Movies. You can select a different location or file name if you desire. 4 Choose video format In this step you will select between MPEG-1 and MPEG-2 video compression formats.
- Page 16 5 Ready Now you are ready to start viewing and capturing video. You will need to start your Camcorder or VCR playing. Press Play on your video source (VCR, DVD player, etc.). Click Finish and the Wizard screen will disappear and you will see the full Capture Wizard interface.
- Page 17 Preview and Record Video 1 Be sure your video device is playing a video 2 Click “Preview” and you will see video playing in the preview window. You will notice the status indicator displaying “Preview”. 3 Click the “Stop” ( ■ ) button or press the “Esc” key on your keyboard to stop video preview. 4 If you Click the Red “Record”...
-
Page 18: Deleting A File
Capture Wizard Features and Functions Recording File Name Before Recording check the Recording Filename box in the upper left hand corner of the application. The file name you selected in the Wizard Screen is listed here. 1 Keep this file name if you wish or run the Wizard to use a new file name. 2 Check the “Auto Naming”... -
Page 19: Menu Options
Application Links The icons at the side of the CapWiz screen allow you to easily jump from CapWiz to the bundled application that came with your DVD Xpress DX2. You can quickly jump to ArcSoft ShowBiz® DVD 2 application. When you click on the application button, CapWiz will auto- matically close. -
Page 20: Video Resolution
Video Encoding Format • MPEG-1 (VCD only) • MPEG-2 (DVD or SVCD) • DivX (MPEG-4) Audio Encoding Format • MPEG-1 Layer-2 • WAV (LPCM) Compression Tuning This section allows you to customize the Video Encoding Format you have selected. You will be able to set the Video Resolution, Video Quality, Audio Frequency or Audio Bit Rate. - Page 21 Audio Frequency You can select between the following: • 48.0 KHz (MPEG-1 L2) • 44.1 KHz (MPEG-1 L2) Note: Select 48.0 KHz (MPEG-1 L2) if you want to capture MPEG-2 for DVD disc. Audio Bit Rates The audio format is always compressed in MPEG-1 Layer 2 audio. CapWiz also automatically sets the audio sampling rate to 44.1 kHz for VCD and SVCD settings and 48 kHz for DVD video.
- Page 22 Control The Control menu gives you another way to control video recording and playback. The selections are: Preview, Record, Stop, Pause and Play. Applications The Applications menu gives you another way to jump to bundled application and you can also change the path of the application if you happened to install it on a different drive. 1 Click the Applications menu button 2 Click on ShowBiz to jump to the selected application.
- Page 23 Skins… This will bring up the Skin Chooser. Currently CapWiz includes 2 skins. In the future there may be other skins available for download from ADS Tech website. Checkspace… You can set up to be warned if you don’t have enough disk space available when you begin recording.
-
Page 24: Creating Video For Your Video Ipod™, Sony Psp™ Or Creative Zen Vision
Creating Video for your Video iPod™, Sony PSP™ or Creative Zen Vision We made it easy and simple for you to capture video for playback in your favorite Portable Media Player device. To assist you in this step, we added the options for iPod™ (MPEG-4) and Sony PSP™ (MPEG-4) in the Audio / Video Format window. - Page 25 Creative Zen Vision The Creative Zen Vision device supports different video formats which you can select before you start your video capture. The supported video formats are: MPEG-1, MPEG-2 and DivX (MPEG-4). Follow the instructions below to capture the video format that you would like to use in your device. 1 Click on the Audio / Video Format button.
-
Page 26: Direct To Disc
Direct to Disc Direct to Disc Wizard Overview Capture Direct to Optical Disc CapWiz includes the ability to capture directly to VCD, SVCD or DVD disc. This is only for MPEG-1 and MPEG-2 video format. To make sure you get the best results, insert a blank media to your CD-R or DVD recordable device before you start this step. - Page 27 Single Session only In speaking with Customers we found that most people just want a fast and simple way to archive video tape to DVD. We have excluded features such as leaving a disc open for multi-session recording (adding more video files at a later time), editing the DVD, and other features found on full featured DVD Authoring packages.
- Page 28 Quick Guide - CapWiz Direct to Disc Wizard We have tried to make the Direct to Disc Wizard simple to use. You can begin recording video directly to a disc in as few as 4 Clicks. Here are the quick step by step instructions to start recording to disc in real time.
-
Page 29: Splash Screen
Splash Screen The splash screen introduces the user to the DTD capabilities. This splash screen can be disabled so it will not appear again. Click NEXT to Continue. DTD Wizard Step 1 In Step One you select if you want to capture and burn or load a file to burn, select your drive and video format you want to capture and burn and verify the drive capabilities and your optical media. - Page 30 You must have a blank CD or DVD disk in the disc drive before starting the DTD Wizard. When you select the drive the DTD Wizard not only examines the capability of your drive, but also detect the type of media in the drive. The Media Type will be displayed and the type of contents on the disc (if any) will also be displayed.
- Page 31 DTD Wizard Step 2 In Step 2, you customize your video disc with Movie and video clip titles, set video capture duration times, auto chapter timing points and back ground template. Background Template You can select from several background templates. CapWiz includes a few templates to choose from.
- Page 32 You can also click the Stop button on CapWiz or press the Escape key (ESC) on your keyboard to stop recording at any time. Please BE AWARE that if or when you stop recording, the disc will be finalized and you will have a CD or DVD with a background menu and a video file recorded on the disc even if you stop capture after a few seconds.
- Page 33 Ready to Record Once the disc has been initialized you will see the record confirmation dialog box. Recording will not start until you click the “YES” button. This provides you the opportunity to cue up your video to the exact start position. Once you click “YES”, the recording will start in approx.
-
Page 34: German Manual
Schnell-Setup Das ist eine Kurzanleitung zur Installation, mit der Sie schnell betriebsbereit sind 1 Schließen Sie die Audio-/Videokabel von Ihrer Videoquelle an das DVD Xpress DX2-Gerät an. 2 Legen Sie die mit dem DVD Xpress DX2-Gerät mitgelieferte CD in Ihr CD-Laufwerk ein. 3 Verbinden Sie dann den DVD Xpress DX2 über den USB Port mit Ihrem PC. - Page 35 DVD Xpress DX2 - Überblick DVD Xpress DX2 unterstützt die meisten gängigen Videoformate einschließlich MPEG4 und DivX Video. Die Unterstützung aller Videoformate erfolgt durch einen technisch ausgereiften Chipsatz zur Videokodierung, der sich im Inneren des DVD-Xpress- DX2-Geräts befindet. Dies bedeutet, dass die gesamte Kodierungsarbeit von Ihrem DVD-Xpress-DX2-Gerät geleistet wird, nicht von Ihrem PC.
- Page 36 Video Aufzeichnung und Bearbeitung Capture Wizard (CapWiz): Video Mühelos Aufzeichnen und Abspielen Dies ist der schnellste und einfachste Weg, um MPEG-1 Video (VCD), MPEG-2 Video (SVCD, DVD), MPEG-4 oder DivX auf Ihren PC zu übertragen. Erstellen Sie Video zum Abspielen auf Ihrem Video iPod® oder Ihrem Sony PSP. Mit dem Assistenten können Sie Ihre Videoanschlüsse, das Kompressionsformat sowie das Speicherverzeichnis für Ihre Dateien auswählen und einsehen.
- Page 37 Installationsanleitung Mindest-Systemkonfi guration • Intel® Pentium® III 1GHz oder höher oder AMD Athlon/Duron CPU • Microsoft ® Windows® 2000 oder XP (Home oder Professional) • 256MB RAM • 1,2GB freier Platz auf der Festplatte für die Programminstallation • 4 GB freier Platz auf der Festplatte für Videoaufnahme und Editieren •...
- Page 38 USB 1.1 Wir empfehlen, die USB 1.1-Schnittstelle zu Ihrer Hauptplatine oder zu einer USB 1.1-Add- in-Karte zu verwenden. Alle USB 1.1-Karten verwenden USB-Treiber von Microsoft. Erste Schritte Packungsinhalt des DVD-Xpress-DX2-Geräts auf Vollständigkeit überprüfen Hardware: • DVD Xpress DX2-Gerät • 2 Meter USB-Kabel •...
- Page 39 Video- und Audiokabel Anschliessen In diesem Abschnitt schließen wir die Audio- und Videokabel an, die benötigt werden, um Audio und Video auf den Computer zu übertragen und anschließend zur Ansicht bzw. zur Aufnahme an ein Fernseh- oder Videogerät zurückzuschicken. Schließen Sie Ihre Videoquelle (VHS, DVD, Laser Disc Player, TV usw.) an Ihr DVD Xpress DX2-Gerät an.
- Page 40 Gerätetreiber und Software installieren Schließen Sie als Nächstes das USB-Kabel an das DVD Xpress DX2-Gerät und an Ihren PC an. Windows erkennt das Gerät und Sie erhalten eine Aufforderung zur Installation der Gerätetreiber. Windows XP und Win2000 Lassen Sie Windows eine automatische Suche nach den Treibern durchführen.
- Page 41 Windows XP, Windows 2000: 1 Klicken Sie auf “Start”, “Einstellungen”, “Systemsteuerung”. 2 Im Fenster mit der Systemsteuerung klicken Sie auf “System”. 3 Klicken Sie auf die Registerkarte “Hardware”. 4 Klicken Sie auf die Schaltfläche “Gerätemanager”. 5 Klicken Sie zweimal rasch hintereinander auf “Sound, Video und Game Controller” 6 “ADS DVD Xpress DX2”...
- Page 42 Festplatte defragmentieren, um die Leistung zu optimieren Die Plattendefragmentierung konsolidiert Dateien und Verzeichnisse auf Ihrer Festplatte und ermöglicht einen besseren Systemzugriff auf Dateien und Verzeichnisse. Sie hilft auch bei der Aufnahme und Speicherung von neuen Dateien auf Ihrer Festplatte. Bitte beachten Sie, dass dieser Vorgang eine gewisse Zeit in Anspruch nimmt, die von verschiedenen Faktoren abhängt, einschließlich der Größe der Festplatte, der Anzahl und Größe der Dateien und dem Grad der Fragmentierung.
- Page 43 Capture Wizard DVD Xpress DX2 Capture Wizard Klicken Sie auf “Next” (Weiter), um mit dem nächsten Schritt fortzufahren. 1 CapWiz öffnen Klicken Sie auf das Cap-Wiz-Symbol auf Ihrem Desktop. Alternativ können Sie auch auf “Start”, “Programme”, “ADSTech DVD Xpress DX2” und “Capwiz” klicken. Wählen Sie den in Ihrem Land verwendeten Videostandard aus.
- Page 44 3 Einen Dateinamen eingeben und ein Zielverzeichnis für die Datei auswählen Als Speicherverzeichnis ist “Eigene Dateien\Eigene Videos\” vorgegeben, außerdem ist als Dateiname “Movies” vorgegeben. Sie können den Zielordner und den Dateinamen nach Belieben ändern. 4 Videoformat auswählen In diesem Schritt wählen Sie zwischen den Kompressionsformaten MPEG-1 und MPEG-2 aus.
- Page 45 5 Fertig Jetzt sind Sie so weit, dass Sie mit dem Ansehen und Aufzeichnen von Video beginnen können. Dazu müssen Sie Ihren Camcorder bzw. Ihr Videogerät starten. Drücken Sie einfach die Play-Taste auf Ihrer Videoquelle (VCR, DVD-Player usw.). Klicken Sie auf “Finish” (Beenden). Das Setup-Fenster verschwindet und Sie sehen den Capture-Wizard- Programmbildschim.
- Page 46 Video in der Vorschau anzeigen und aufnehmen 1 Vergewissern Sie sich, dass Ihr Videogerät ein Video abspielt. 2 Anklicken von “Preview” (Vorschau) zeigt das aktuelle Video im Vorschaufenster an. Die Statusanzeigen sind blau und zeigen an, dass Sie sich im Vorschaumodus befinden. 3 Durch Anklicken von “Stop”...
- Page 47 Capture Wizard - Merkmale und Funktionen Dateiname des aufgezeichneten Videoclips Werfen Sie einen Blick in das Kästchen “Recording Filename” (Dateiname für die Aufzeichnung), ehe Sie mit der Videoaufnahme beginnen. Hier sehen Sie den Dateinamen, den Sie zu Anfang mit dem Assistenten für die aufzunehmende Datei eingegeben haben.
- Page 48 Software-Links Mit den Icons seitlich im CapWiz Fenster können Sie auf einfache Weise aus CapWiz die gebündelten Anwendungen aufrufen, die mit Ihrem DVD Xpress DX2 mitgeliefert wurden. Sie können schnell ArcSoft ShowBiz® DVD 2 aufrufen. Wenn Sie ein Icon für eine Anwendung anklicken, wird die entsprechende Anwendung gestartet und CapWiz wird automatisch geschlossen.
- Page 49 Videokodierformat • MPEG-1 (nur VCD) • MPEG-2 (DVD oder SVCD) • DivX (MPEG-4) Audiokodierformat • MPEG-1 Layer-2 • WAV (LPCM) Compression Tuning (Kompressionseinstellung) Hier können Sie das gewählte Format für die Videokodierungsformat individuell anpassen. Sie können die Video Resolution (Videoauflösung), Video Quality (Videoqualität), Audio Frequency (Audiofrequenz) und Audio Bit Rate (Audio-Bitrate) einstellen.
- Page 50 Audio Frequency (Audiofrequenz) Folgende Optionen stehen zur Auswahl: • 48.0 KHz (MPEG-1 L2) • 44.1 KHz (MPEG-1 L2) Hinweis: Wählen Sie 48,0 KHz (MPEG-1 L2) aus, wenn Sie MPEG-2 für DVD-Disk auswählen wollen. Audio Bit Rates (Audiobitraten) Das Audioformat ist immer komprimiert auf MPEG-1 Layer 2. Außerdem stellt CapWiz die Audio-Samplingrate bei VCD und SVCD automatisch auf 44,1 KHz, bei DVD-Video auf 48 KHz.
- Page 51 Control (Steuerung) Das Control-Menü ist eine alternative Möglichkeit, um Videoaufnahme und -playback zu steuern. Folgende Optionen stehen zur Auswahl: Preview (Vorschau), Record (Aufnahme), Stop, Pause und Play. Applications (Anwendungsprogramme) Das Applications-Menü ist eine alternative Möglichkeit, die gebündelte Software aufzurufen. Außerdem haben Sie die Möglichkeit, den Pfad zu den Programmen zu ändern, sollten Sie diese auf einem anderen Laufwerk installiert haben.
- Page 52 Skins… (Layout Benutzeroberfläche) Diese Option ruft den “Skin Chooser” aus. Zurzeit enthält CapWiz 2 Skin, d. h. In Zukunft werden eventuell auf der ADS Tech Website andere Skins zum Download zur Verfügung gestellt. Check space... (Festplattenspeicher) Sie können zu Beginn des Aufnahmevorgangs eine Warnung anzeigen lassen, wenn nicht genügend freier Festplattenspeicher vorhanden ist.
- Page 53 Video für Ihren Video iPod™, Sony PSP™ oder Creative Zen Vision erstellen Wir haben es einfach für Sie gemacht, Video zur Wiedergabe auf einem tragbaren Mediaplayer zu capturen. Um Ihnen bei diesem Schritt zu helfen, haben wir im Fenster “Audio / Video Format” Optionen für iPod™...
- Page 54 Creative Zen Vision Das Creative-Zen-Vision-Gerät unterstützt unterschiedliche Videoformate, von denen Sie eines auswählen können, ehe Sie mit dem Capturen von Video beginnen. Die folgenden Videoformate werden unterstützt: MPEG-1, MPEG-2 und DivX (MPEG-4). Folgen Sie den unten stehenden Anweisungen und capturen Sie das Video in dem Format, das Sie in Ihrem Gerät verwenden möchten. 1 Klicken Sie auf die Schaltfläche “Audio / Video Format”...
- Page 55 Direkt auf Disk “Direct to Disc” - Assistent - Überblick Direkt auf optischen Plattenspeicher capturen CapWiz bietet die Möglichkeit, Video direkt auf VCD-, SVCD- oder DVD-Disk zu capturen. Diese Funktion steht nur bei den Videoformaten MPEG-1 und MPEG-2 zur Verfügung. Für optimale Ergebnisse sollten Sie vor Beginn dieses Schritts immer eine leere CD-R- oder DVD-Disk in Ihr CD- oder DVD-Laufwerk einlegen.
- Page 56 Nur “Single Session” (eine Aufnahme pro Disk) Im Gespräch mit unseren Kunden haben wir herausgefunden, dass die meisten Leute nichts weiter möchten, als ihre Videobänder auf rasche und einfache Weise auf DVD zu archivieren. Funktionen wie das spätere Hinzufügen zusätzlicher Dateien (Multi-session Recording), das Bearbeiten der DVD und andere Funktionen, die man in kompletten DVD-Authoring-Paketen findet, wurden daher weggelassen.
- Page 57 CapWiz “Direct-to-Disc”-Assistent - Kurzanleitung Wir haben versucht, den “Direct to Disc”-Assistenten möglichst einfach in der Anwendung zu machen. Mit nur 4 Mausklicks können Sie beginnen, Video direkt auf Disk zu brennen. In der Folge die Kurzanleitung, wie Sie Ihre Videos in Echtzeit auf Disk brennen können. 1 Eine leere CD- oder DVD-Disk in das Diskettenlaufwerk einlegen.
- Page 58 Begrüßungsbildschirm Der Begrüßungsbildschirm gibt eine Einführung in die Funktionen von DTD. Der Begrüßungsbildschirm lässt sich abschalten, so dass er beim nächsten Aufrufen des Programms nicht wieder erscheint. Zum Fortfahren auf “NEXT” (Weiter) klicken. DTD-Assistent Schritt 1 In Schritt 1 wählen Sie aus, ob Sie Video capturen und direkt auf Disk brennen möchten, oder ob Sie eine bereits auf dem Computer gespeicherte Datei laden und brennen möchten.
- Page 59 Vor dem Aufrufen des DTD-Assistenten müssen Sie eine leere CD- oder DVD-Disk in das Laufwerk einlegen. Wenn Sie das Laufwerk auswählen, prüft der DTD-Assistent nicht nur die Laufwerkskapazität, sondern stellt außerdem fest, welcher Typ von Speichermedium sich im Laufwerk befindet. Es wird der Medientyp sowie der auf der Disk befindliche Inhalt (sofern zutreffend) angezeigt.
- Page 60 DTD-Assistent Schritt 2 In Schritt 2 können Sie Ihre Video-Disk mit dem Filmnamen und dem Namen des Videoclips kennzeichnen. Außerdem haben Sie die Möglichkeit, die Aufzeichnungsdauer vorzugeben, die Zeitintervalle für automatische Kapitelpunkte und ein Hintergrundmenü auszuwählen. Hintergrundvorlage Es stehen mehrere Hintergrundvorlagen zur Auswahl. CapWiz beinhaltet einige Hintergründe, von denen Sie einen auswählen können.
- Page 61 Sie können den Aufnahmevorgang jederzeit stoppen, indem Sie in CapWiz auf die Schaltfläche “Stop” klicken, oder indem Sie die Escape-Taste (ESC) auf Ihrer Tastatur drücken. BITTE BEACHTEN: Sobald Sie den Aufnahmevorgang stoppen, wird die Disk fertiggestellt und Sie erhalten eine CD oder DVD mit einem Hintergrundmenü und einer aufgezeichneten Datei, selbst wenn Sie den Aufzeichnungsvorgang nach nur wenigen Sekunden gestoppt haben.
- Page 62 Aufnahmebereit Sobald die Initialisierung abgeschlossen ist, erscheint die Dialogbox zur Bestätigung des Aufnahmebeginns. Die Aufnahme startet erst, wenn Sie auf “YES” (Ja) klicken. Dadurch haben Sie die Möglichkeit, die genaue Startposition Ihres Videos einzustellen. Wenn Sie auf “YES” (Ja) klicken, beginnt ca. 1 Sekunde später der Aufnahmevorgang. Wenn Sie noch nicht bereit sind oder die Aufnahmeeinstellungen ändern möchten, klicken Sie auf “NO”...
-
Page 63: French Manual
Etapes d’installation rapide Ce guide d’installation rapide d’une page est destiné à vous aider à prendre en main votre périphérique sans délai. 1 Branchez les câbles audio/vidéo de votre source vidéo au périphérique DVD Xpress DX2. 2 Chargez le CD d’DVD Xpress DX2. 3 Branchez l’DVD Xpress DX2 à... - Page 64 Presentation D’DVD Xpress DX2 DVD Xpress DX2 prend en charge tous les formats vidéo les plus utilisés aujourd’hui, y compris MPEG-4 et DivX Video. Tous les formats vidéo sont supportés par un chipset d’encodage vidéo sophistiqué, situé dans le DVD Xpress DX2 ; c’est donc ce dernier qui fait tout le travail, et non pas votre ordinateur PC.
- Page 65 Ways to Capture and Edit Video Capture Wizard (CapWiz) : Capture& Lecture Video En Toute Facilite La solution la plus facile et la plus rapide pour capturer une vidéo en MPEG-1 (VCD), MPEG-2 (SVCD, DVD), MPEG-4 ou DivX sur votre PC. Créez une vidéo pour la visionner sur votre iPod®...
- Page 66 Installation Guide Confi guration système minimale • Processeur Intel® Pentium® III 1GHz ou supérieur, ou AMD Athlon/Duron • Microsoft ® Windows® 2000 ou XP(version familiale ou professionnelle) • Mémoire vive de 256 Mo • 1,2 Go d’espace disque disponible pour l’installation des logiciels •...
- Page 67 USB 1.1 Nous vous conseillons d’utiliser le port USB 1.1 de votre carte mère ou d’une carte additionnelle USB 1.1. Toutes les cartes USB 1.1 utilisent des pilotes USB Microsoft. Prise en main Vérification du contenu de la boîte DVD Xpress DX2 Matériel: •...
- Page 68 Câblage Dans cette section, nous connecterons tous les câbles audio et vidéo dont vous aurez besoin pour la capture audiovisuelle et pour la retransmission de la séquence audiovisuelle sur une télévision pour la regarder ou sur un magnétoscope pour l’enregistrer. Branchez votre source vidéo (VHS, DVD, lecteur de disque laser, TV, etc.) à...
- Page 69 Installation des pilotes de périphérique et des logiciels Branchez maintenant le câble USB à l’Instant DVD et au PC. Windows reconnaîtra le périphérique et en demandera les pilotes. Windows XP ou Win2000 Laissez Windows faire une recherche automatique des pilotes. Ils se trouvent dans le répertoire de base du CD de l’DVD Xpress DX2.
- Page 70 Windows XP, Windows 2000: 1 Cliquez sur Démarrer, Paramètres, Panneau de configuration. 2 Dans Panneau de configuration, cliquez sur Système. 3 Cliquez sur l’onglet Matériel. 4 Cliquez sur le bouton Gestionnaire de périphériques. 5 Double-cliquez sur Contrôleur son, vidéo et jeux 6 «...
- Page 71 Défragmentation du disque dur pour améliorer les performances La défragmentation de disque consolide les fichiers et dossiers du disque dur et accélère l’accès aux fichiers et dossiers stockés sur le disque. Elle s’avèrera également utile pour la capture et l’écriture de nouveaux fichiers sur le disque dur. Sachez que ce processus demande plus ou moins de temps selon plusieurs facteurs, y compris la taille du disque dur, le nombre et la taille des fichiers et l’état de fragmentation du disque local.
- Page 72 Capture Wizard CapWiz pour DVD Xpress DX2 Cliquez sur « Next » pour passer à l’étape suivante. 1 Ouvrir CapWiz Cliquez sur l’icône CapWiz de votre bureau électronique ou cliquez sur Démarrer -> Programmes -> ADSTech DVD Xpress DX2 et cliquez sur CapWiz. Choisissez le standard vidéo universel en fonction de votre pays.
- Page 73 3 Attribution d’un nom de fichier et sélection d’une adresse de fichier Nous sélectionnerons automatiquement « My Documents\My Videos\ » comme répertoire dans lequel stocker vos fichiers vidéo et attribuerons au fichier le nom « Movies ». Vous pouvez choisir un autre répertoire ou nom de fichier de votre choix. 4 Choisir un format vidéo Dans cette étape, vous devez choisir entre les formats de com¬pression vidéo MPEG-1 et MPEG-2.
- Page 74 5 Prêt à l’emploi Vous pouvez maintenant commencer à visionner et à capturer des vidéos. Vous devrez démarrer la lecture de votre caméscope ou magnétoscope en appuyant sur le bouton de lecture de votre source vidéo (magnétoscope, lecteur DVD, etc.). Cliquez sur “Finish”...
- Page 75 Prévisualisation et enregistrement d’une séquence vidéo 1 Vérifiez que votre périphérique vidéo visionne une séquence vidéo. 2 Cliquez sur le bouton “Preview” (prévisualisation) pour faire défiler la vidéo dans la fenêtre de prévisualisation. L’indicateur d’état est bleu et affiche le mot “Preview”. 3 Cliquez sur le bouton “Stop”...
- Page 76 Caractéristiques et fonctions de CapWiz Enregistrement du nom de fichier (Recording File Name) Avant l’enregistrement, cochez la boîte de dialogue “Recording Filename” (Enregistrement du nom de fichier) située dans l’angle supérieur gauche de l’application. Le nom du fichier que vous avez sélectionné dans l’écran de l’assistant CapWiz s’y trouve. 1 Gardez ce nom de fichier si vous le souhaitez, ou lancez l’assistant pour utiliser un nouveau nom.
- Page 77 Liens d’application Les icônes situées sur le côté de l’écran CapWiz vous permettent de passer facilement de CapWiz aux applications fournies avec l’DVD Xpress DX2. Vous pouvez, par conséquent, passer rapidement à ArcSoft ShowBiz® DVD 2 application. Il vous suffit de cliquer sur l’icône d’une application pour lancer celle-ci et fermer automatiquement CapWiz.
- Page 78 Format d’encodage vidéo (Video Encoding Format) • MPEG-1 (VCD) • MPEG-2 (DVD ou SVCD) • DivX (MPEG-4) Format d’encodage audio (Audio Encoding Format) • MPEG-1 Layer-2 • WAV (LPCM) - Disponible si l’option « Audio Only » est sélectionnée Réglage de la compression (Compression Tuning) Cette section vous permet de personnaliser le format d’encodage vidéo que vous avez sélectionné.
- Page 79 Fréquences d’échantillonnage (Audio Frequency) Vous avez le choix entre les fréquences suivantes : • 48.0 KHz (MPEG-1 L2) • 44.1 KHz (MPEG-1 L2) Remarque : Sélectionnez 48,0 KHz (MPEG-1 L2) si vous souhaitez capturer un fichier MPEG- 2 pour disque DVD. Débits binaires audio Le format audio est toujours compressé...
- Page 80 Contrôle (Control) Le menu “Control” vous fournit une autre méthode de contrôle de l’enregistrement et de la lecture de votre vidéo.Les sélections sont : Preview (Prévisualisation), Record (enregistrement), Stop (arrêt), Pause (pause), Play (lecture). Applications Le menu “Applications” est une autre méthode vous permettant de passer aux applications intégrées.
- Page 81 Peaux… (Skins…) Cette option appelle le sélecteur de “peau”. Actuellement CapWiz inclut 1 peaux. Il est possible qu’à l’avenir d’autres peaux puissent être téléchargées depuis le site Web d’ADS Tech. Espace disque (Checkspace…) Vous pouvez régler cette option pour que CapWiz vous avertisse, au commencement de l’enregistrement, que vous n’avez pas suffisamment d’espace libre sur le disque.
- Page 82 Création de vidéo pour votre iPod™ vidéo, Sony PSP™ ou Creative Zen Vision Nous avons fait le nécessaire pour rendre simple et facile la capture vidéo dans votre baladeur média préféré. Pour vous aider dans cette étape, nous avons ajouté les options iPod™ (MPEG-4) et Sony PSP™...
- Page 83 Creative Zen Vision Le baladeur Creative Zen Vision prend en charge plusieurs formats vidéo : MPEG-1, MPEG-2 et DivX (MPEG-4). Sélectionnez-en un avant de lancer la capture vidéo. Suivez les instructions ci-dessous pour capturer le format vidéo que vous souhaitez utiliser dans votre baladeur. 1 Cliquez sur le bouton «...
- Page 84 Direct to Disc Sommaire de l’assistant Direct to Disc Capture sur disque optique en temps réel CapWiz offre la fonction de capturer et graver en temps réel une vidéo sur un disque VCD, SVCD ou DVD. Pour optimiser le résultat, insérez un support vierge dans votre lecteur enregistreur CD-R ou DVD avant de commencer cette étape.
- Page 85 En une seule séance Après avoir écouté les clients, nous avons découvert que la plupart des utilisateurs souhaitaient avoir à portée de main une méthode simple et rapide d’archiver une cassette vidéo sur DVD. Nous avons décidé d’exclure certaines fonctions, comme celles qui permettent de laisser un disque ouvert pour un enregistrement multiséances (ajout de nouveaux fichiers vidéo à...
- Page 86 Prise en main rapide – Assistant CapWiz Direct to Disc Nous avons essayé d’assurer la convivialité de l’assistant Direct to Disc. Vous pouvez lancer l’enregistrement d’une vidéo en temps réel sur disque en 4 clics seulement. Voici les instructions pas à pas à cet effet : 1 Insérez un disque CD ou DVD vierge dans votre graveur de disques.
- Page 87 Ecran splash L’écran splash présente à l’utilisateur les fonctionnalités DTD et peut être désactivé de façon à ne plus réapparaître. Cliquez sur « NEXT » pour continuer. 1ère étape de l’assistant DTD Dans la première étape (Step 1), vous devez préciser si vous souhaitez capturer et graver (Capture and Burn) ou charger un fichier pour le graver (Load a file to burn), sélectionner votre graveur et format vidéo de capture et de gravure, et vérifier les paramètres du graveur et du support optique.
- Page 88 Vous devez mettre un disque CD ou DVD vierge dans le graveur avant de lancer l’assistant DTD. A la sélection du graveur, l’assistant DTD non seulement examine les paramètres du graveur, mais également détecte le type de support introduit dans le graveur.
- Page 89 2e étape de l’assistant DTD A la deuxième étape, vous devez personnaliser votre disque vidéo avec des titres de film et de clip vidéo et sélectionner la durée de capture vidéo, les intervalles automatiques de chapitre et le modèle d’arrière-plan. Modèle d’arrière-plan Vous avez le choix entre plusieurs modèles d’arrière-plan.
- Page 90 Vous pouvez également cliquer sur le bouton Stop de CapWiz ou appuyer sur la touche Echap de votre clavier pour arrêter l’enregistrement à n’importe quel moment. SACHEZ qu’à l’arrêt de l’enregistrement, manuel ou non, le disque sera finalisé et produira un CD ou un DVD avec un menu d’arrière-plan sur lequel sera enregistré...
- Page 91 Prêt à l’enregistrement Après l’initialisation du disque, la boîte de dialogue de confirmation de l’enregistrement s’affichera. L’enregistrement ne sera pas lancé avant que vous cliquiez sur le bouton « YES » (OUI) afin de vous donner la chance de repérer le début exact de votre vidéo. Après avoir cliqué...
-
Page 92: Service & Warranty
Service & Warranty Service If you require assistance with the installation, operation, or application of your ADS Technologies, Inc. product there are several options available to you as described in the technical support section of this manual. Your primary source for information and assistance is always your computer store or computer parts dealer. - Page 93 Service Wenn Sie bei Installation, Betrieb oder Anwendung Ihres Produktes von ADS Technologies, Inc. Hilfe benötigen, stehen Ihnen verschiedene Möglichkeiten zur Verfügung, die im Abschnitt Technischer Support in diesem Handbuch beschrieben sind. Die Mitarbeiter im Technischen Support und im Kundendienst von ADS Technologies können Ihnen bei der Lösung vieler Probleme behilflich sein. Unsere Abteilung Technischer Support steht zur Verfügung, um jedes beliebige Produkt von ADS Technologies zu reparieren.
- Page 95 DVDXpressDX2 North American Offi ce ADS Tech Inc, USA 12627 Hidden Creek Way Cerritos, CA 90703, USA WebSite: www.adstech.com Email: productinfo@adstech.com Tech Support: +1.562.926.4338 Southern Europe | MEA Offi ce ADS Tech SARL France 51/55 Rue Hoche 94200 - Ivry Sur Seine, France WebSite: www.adstech.fr...
Need help?
Do you have a question about the DVD XPRESS DX2 USBAV-714 and is the answer not in the manual?
Questions and answers